DIY Studio Monitor Isolation Pads: Improving Sound Quality on a Budget
Hey there! Looking to up your audio game without spending a fortune? Well, you're in luck because we have just the solution for you: DIY studio monitor isolation pads. These bad boys can work wonders when it comes to improving sound quality, all while being easy on your wallet. So, let's dive in and discover how you can create your own isolation pads using materials that are easily accessible. Get ready to elevate your studio setup and enjoy crystal-clear sound like never before!
We are supported by our audience. When you purchase through links on our site, we may earn an affiliate commission, at no extra cost for you. Learn more.
Now, let's talk about why these DIY isolation pads are a game-changer. By reducing vibrations and isolating your monitors, they work their magic to enhance your audio experience. Think of it like putting your monitors on a cozy, stable cushion that prevents any unwanted vibrations from interfering with the sound. It's like creating a peaceful oasis for your ears amidst a noisy world.
But how do you make these magical pads? Well, fear not, we've got you covered. With just a few simple steps, you can whip up your very own isolation pads. And the best part? You don't need fancy or hard-to-find materials. We're all about keeping things easy and accessible here.
So, imagine this: you're in your studio, surrounded by all your gear, and you've just finished making these DIY isolation pads. You place them under your monitors, and suddenly, it's like the heavens have opened up. The sound is crisp, clear, and oh-so-precise. You can hear every little detail, every subtle nuance in your music or audio production. It's like having a front-row seat to your own private concert.
Now, I know you might be thinking, "But why go through the trouble of making these pads when I could just buy some?" Ah, my friend, that's where the magic lies. When you create something with your own hands, it becomes more than just a simple object. It becomes a part of you, a reflection of your passion and dedication to your craft. Plus, it's a great way to unleash your creativity and show off your DIY skills.
So, what are you waiting for? It's time to roll up your sleeves, gather your materials, and embark on this DIY adventure. Trust me, the rewards will be worth it. Your studio setup will thank you, and your ears will thank you. Get ready to immerse yourself in a whole new world of audio bliss. Let's make some DIY studio monitor isolation pads and take your sound quality to new heights!
Benefits of DIY Studio Monitor Isolation Pads
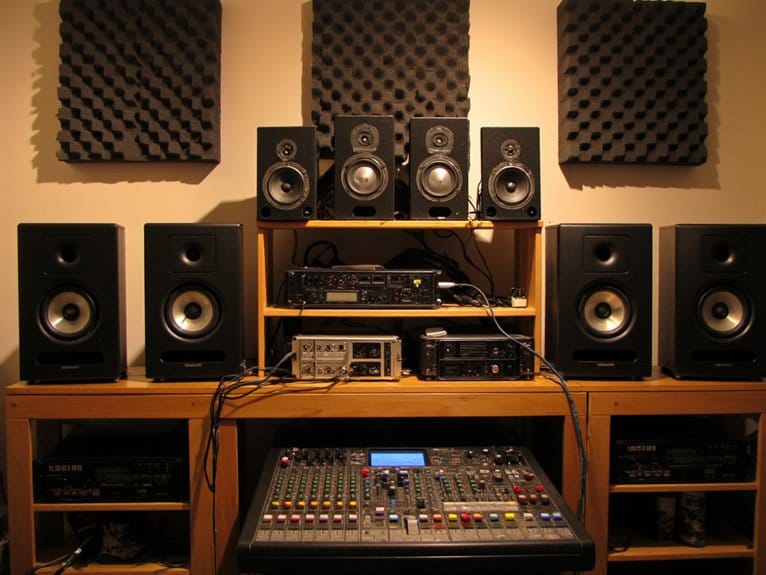
By using DIY studio monitor isolation pads, you can significantly improve the sound quality of your home studio setup on a budget. These pads provide a number of benefits that can enhance your audio production experience. Firstly, they effectively isolate your studio monitors from the surface they are placed on, reducing the transmission of vibrations and preventing them from resonating with the furniture or desk. This isolation minimizes unwanted vibrations and ensures that the sound produced by your monitors remains clear and accurate. Additionally, these pads help to reduce the transfer of sound to neighboring rooms or areas, allowing you to work in a more acoustically controlled environment. The improved sound isolation also enhances the accuracy of your monitoring, enabling you to make more precise adjustments to your mix. Overall, DIY studio monitor isolation pads are a cost-effective solution to optimize your home studio's sound quality.
Materials Needed for Making Isolation Pads
To create DIY studio monitor isolation pads, you will need a few essential materials. These materials are crucial for achieving optimal sound quality and reducing vibrations. First, you will need high-density foam, which is the main component of the isolation pads. This foam absorbs vibrations and prevents them from interfering with the sound produced by your studio monitors. Additionally, you will need a ruler or measuring tape to ensure accurate dimensions for the pads. A sharp utility knife or scissors will be necessary for cutting the foam to the desired size and shape. Lastly, you will need adhesive to secure the foam to the surface where your studio monitors will be placed. By gathering these materials, you can create effective isolation pads to enhance your studio's audio performance.
Step-By-Step Instructions for Constructing the Pads
Now, let's proceed with constructing the pads by carefully following these step-by-step instructions.
- Start by measuring the dimensions of your studio monitor base. Make sure to account for any extra space you want around the monitor.
- Using the measurements obtained, cut a piece of high-density foam to match the size of your monitor base. Foam with a density of 40 to 50 kg/m³ is recommended for optimal isolation.
- Next, cut a second piece of foam with the same dimensions as the first one. This will serve as the top layer of your isolation pad.
- Apply adhesive to one side of the bottom foam layer and carefully place it on a piece of non-slip material, such as rubber sheeting or shelf liner.
- Apply adhesive to the top of the bottom foam layer and carefully place the second foam layer on top, aligning the edges.
- Finally, trim any excess foam and non-slip material, ensuring a neat and uniform appearance.
Placement Tips for Optimal Sound Improvement
To achieve optimal sound improvement, it is important to consider the placement of your DIY studio monitor isolation pads. Proper placement can significantly enhance the performance of your studio monitors and deliver a more accurate and balanced sound. Start by positioning the isolation pads directly under your studio monitors, ensuring that they are centered and aligned with the front edge of the monitor. This placement helps to decouple the monitors from the surface they are placed on, reducing vibrations and minimizing unwanted resonance. Additionally, make sure that the monitors are positioned at ear level and are angled towards your listening position for optimal sound projection. Experiment with different placements and angles to find the position that provides the best sound quality and imaging for your specific studio setup.
Testing and Comparing the Sound Quality Before and After Using the Pads
Begin by comparing the sound quality of your studio monitors before and after using the DIY isolation pads. To accurately assess the impact of the pads on sound quality, it is essential to conduct a thorough comparison. Start by playing a variety of audio tracks through your studio monitors without the isolation pads. Take note of the sound characteristics, such as clarity, detail, and imaging. Next, install the DIY isolation pads and repeat the same audio test. Pay close attention to any noticeable differences in sound quality. Look for improvements in bass response, reduction in resonance, and increased isolation from external vibrations. Compare the two scenarios objectively, noting any enhancements or changes in the sound reproduction. This comparison will help determine the effectiveness of the DIY isolation pads in improving sound quality.
Additional Tips and Tricks for Enhancing Audio Quality on a Budget
As you continue to explore ways to enhance audio quality on a budget, there are additional tips and tricks that can further improve your listening experience. One effective technique is to optimize your speaker placement. Experiment with different positions and angles to find the sweet spot that delivers the best sound. Another cost-effective method is to invest in quality cables. Upgrading your audio cables can significantly reduce signal loss and interference, resulting in cleaner and more accurate sound reproduction. Additionally, consider using acoustic treatment in your listening space. Simple solutions like hanging curtains or placing bookshelves along the walls can help reduce echo and improve overall sound quality. Lastly, regularly clean and maintain your audio equipment to ensure optimal performance. By following these additional tips, you can achieve enhanced audio quality without breaking the bank.
Conclusion
In conclusion, DIY studio monitor isolation pads offer a cost-effective solution for improving sound quality. By following the step-by-step instructions and using the recommended materials, you can easily construct these pads. Proper placement and testing before and after using the pads will ensure optimal sound improvement. Additionally, implementing additional tips and tricks can further enhance audio quality on a budget. With these DIY isolation pads, you can achieve professional sound quality without breaking the bank.