What Is Microphone Self-Noise and Why It Matters
Microphone self-noise is the constant electrical hiss your mic generates internally, measured in dB-A where studio-quality models achieve 11-15 dB-A while consumer mics average 20-24 dB-A. You’ll notice this background noise affects your signal-to-noise ratio, dynamic range, and recording quality, particularly when capturing quiet sources like whispered vocals or acoustic instruments. Higher self-noise limits placement flexibility, requires aggressive noise gating, and creates audible hiss that muddles your recordings, while understanding these specifications helps optimize your entire audio chain.
We are supported by our audience. When you purchase through links on our site, we may earn an affiliate commission, at no extra cost for you. Learn more.
Notable Insights
- Self-noise is the constant background hiss produced by microphone internal components, present in every microphone design.
- Condenser microphones generate more self-noise than dynamic microphones, which produce virtually no self-noise as passive devices.
- Self-noise is measured in dB-A under controlled conditions, with studio-quality microphones achieving 11-15 dB-A ratings.
- Lower self-noise expands usable dynamic range, allowing capture of subtle details and flexible microphone placement options.
- High self-noise creates audible hiss in quiet recordings, making microphone selection critical for vocal and ambient recording applications.
Understanding the Basics of Microphone Self-Noise
The subtle hiss you might notice when plugging in headphones or turning up your audio interface isn’t just your imagination—it’s a fundamental characteristic of every microphone ever made, known as self-noise.
This inherent electrical signature originates from the microphone’s internal components and their interaction with surrounding air molecules, creating a constant low-level background hiss that defines your recording’s noise floor.
Different microphone types exhibit varying self noise impact levels, with condensers typically producing more noticeable noise than dynamics due to their active electronics and higher sensitivity. The specific character of this noise varies significantly depending on the microphone’s internal design, which can produce sounds ranging from smooth white noise to crackling or darker tonal qualities.
Understanding this baseline noise becomes essential when you’re recording quiet sources, since it establishes the absolute limit of your microphone’s ability to capture subtle details without unwanted interference. To quantify this performance, engineers measure self noise in decibels typically within a soundproof container where no external sound can interfere with the measurement.
How Self-Noise Is Measured and Quantified
When engineers need to pin down a microphone’s self-noise with scientific precision, they can’t simply plug it into their home studio and hope for the best—the measurement process demands controlled laboratory conditions that eliminate every possible source of external interference.
Precise microphone self-noise measurement requires controlled laboratory environments—your home studio simply won’t cut it for scientific accuracy.
The microphone calibration process involves placing the unit in a soundproof anechoic chamber where temperature and humidity remain strictly controlled.
Here’s how the actual noise measurement unfolds:
- First, engineers measure the microphone’s sensitivity using reference acoustic signals.
- Next, they record noise levels with zero sound stimulus present.
- High-quality preamplifiers capture signals without adding their own noise contamination.
- Specialized audio analyzers apply A-weighting filters to match human hearing sensitivity.
Results appear in decibels (dB(A)), representing the microphone’s equivalent noise level against the 20-micropascal reference standard. Since microphones function as principal sensors that measure sound pressure waves across various frequencies, accurate calibration ensures reliable performance across the entire frequency spectrum. Manufacturers often specify the microphone’s dynamic range by subtracting the self-noise value from the maximum SPL the unit can handle.
The Role of A-Weighting in Noise Specifications
Behind every microphone’s self-noise specification lies an essential measurement standard called A-weighting, which transforms raw electrical noise into something that actually reflects what you’ll hear during recording.
When manufacturers list self-noise as “14 dB(A)” or similar, they’re applying this frequency curve that mimics human hearing sensitivity, de-emphasizing low and high frequencies where your ears are naturally less responsive.
The A weighting implications mean you’re getting noise measurements that correlate with perceived loudness rather than raw electrical output, making comparisons between microphones more meaningful for practical applications. This standard emerged from the foundational work on equal-loudness contours published in 1933, which first mapped how human hearing sensitivity varies across different frequencies.
This self noise relevance becomes vital when selecting microphones for quiet sources, since A-weighted specifications tell you what background hiss you’ll actually notice in your recordings, not just what electronic instruments detect. A-weighting is the most common frequency weighting method used throughout the audio industry for standardized noise measurements.
Why Self-Noise Specifications Matter for Audio Quality
Understanding A-weighting gives you the foundation for interpreting self-noise specs, but I’ve learned that knowing why these numbers actually matter for your recordings makes all the difference between theoretical knowledge and practical microphone selection.
Despite common self-noise myths suggesting specs don’t translate to real-world performance, your noise perception directly correlates with microphone self-noise ratings. Here’s why these specifications impact your audio quality:
Self-noise specifications directly impact your recording quality, contradicting myths that suggest these technical measurements don’t matter in practical applications.
- Dynamic Range Preservation – Lower self-noise expands your microphone’s usable dynamic range, capturing subtle details without raising the noise floor.
- Placement Flexibility – Ultra-quiet microphones let you position them farther from sources while maintaining clean recordings.
- Post-Processing Reduction – Minimal self-noise eliminates aggressive noise gating needs, preserving natural audio characteristics.
- Professional Standards – Broadcast and studio applications demand specific self-noise thresholds for clean, pristine tracks.
Dynamic microphones excel at handling ambient noise naturally, making self-noise considerations less critical for untreated rooms compared to sensitive condenser microphones. Many low-cost condenser microphones strategically omit self-noise specifications from their product documentation, making it difficult to evaluate their performance before purchase. Even microphones sharing identical self-noise specifications can exhibit different noise characteristics in practical recording scenarios, requiring hands-on testing to determine optimal performance. The RØDE NT1’s exceptional 4dBA self-noise rating exemplifies how premium specifications translate into professional-grade vocal recordings with minimal background interference.
Impact on Signal-to-Noise Ratio Performance
While self-noise specifications provide valuable baseline measurements, I’ve discovered that their most significant impact lies in how they directly determine your microphone’s signal-to-noise ratio performance, which fundamentally shapes every recording you’ll make.
When you’re capturing quiet sources like acoustic guitar fingerpicking or whispered vocals, your microphone’s self noise frequency characteristics establish the noise floor that limits your recording’s dynamic range.
I’ve found that microphones with higher SNR values, typically above 74 dB, deliver noticeably cleaner recordings because the desired signal stands out more prominently against the inherent electronic noise.
This becomes particularly important during post-production, where compression and EQ can inadvertently amplify that underlying noise floor, potentially compromising your final mix quality. For professional applications, microphones requiring at least 80 dB provide the clarity needed to capture expressive dynamics without interference. Choosing microphones with low noise floors results in better SNR and ultimately cleaner recordings with less intrusive background interference.
Microphone Placement Considerations and Flexibility
When you’re dealing with microphones that have higher self-noise levels, I’ve learned that strategic placement becomes your most powerful tool for maintaining professional recording quality, often making the difference between a usable take and one that’s buried in electronic hiss.
Smart placement strategies can effectively mask self-noise by optimizing your signal-to-noise ratio, and I’ve found these recording techniques consistently deliver cleaner results:
- Position your mic 6-12 inches from the source to capture strong direct signal while minimizing room reflections that compete with self-noise
- Use slight off-axis positioning when recording vocals to reduce harsh consonants without sacrificing clarity or signal strength
- Experiment with height alignment to match your microphone’s diaphragm with the sound source for maximum signal capture
- Consider your room’s acoustics since untreated spaces can amplify perceived self-noise through unwanted reflections
Remember that even experienced professionals sometimes struggle with optimal microphone placement, so don’t get discouraged if finding the sweet spot requires multiple test recordings and adjustments. Dynamic microphones with cardioid patterns help minimize interference from surrounding noise sources, making them particularly effective for challenging recording environments. Professional microphones like the Shure SM7B feature superior noise rejection capabilities that make them excellent choices for broadcasting and studio applications where self-noise management is critical.
Capsule Size and Its Effect on Noise Performance
When you’re examining microphone specifications, you’ll notice that capsule size plays an essential role in determining self-noise levels, with larger diaphragms consistently outperforming their smaller counterparts in this critical area.
I’ve observed that while small capsules like typical 8mm electret condensers might seem convenient for compact applications, they’re fundamentally limited by physics, often delivering signal-to-noise ratios around 56 dB that can compromise your recording quality.
The industry hasn’t settled on smaller designs for precision work without good reason, since the random motion of air molecules hits smaller diaphragms with proportionally more disruptive force, creating higher baseline noise that you simply can’t engineer away.
For professional applications, you should target microphones with signal-to-noise ratios of 70 dB or higher, as these specifications typically indicate larger capsule designs that can deliver the clean, broadcast-quality audio necessary for serious recording work.
Larger Diaphragms Reduce Noise
Although it might seem counterintuitive that a larger component could be quieter, microphone diaphragm size operates on fascinating acoustic principles that directly impact self-noise performance.
When air molecules randomly bombard your microphone’s diaphragm through Brownian motion, larger diaphragms demonstrate superior diaphragm compliance, allowing them to move more easily with these subtle pressure changes rather than fighting against them.
This increased flexibility enables better noise absorption compared to smaller, stiffer diaphragms that act like hard surfaces, reflecting more energy back as audible noise.
Here’s how larger diaphragms create quieter recordings:
- Greater surface area captures more sound-wave energy, improving signal strength
- Enhanced compliance reduces energy transfer from air molecule bombardment
- Higher sensitivity produces stronger output signals at low sound pressure levels
- Improved signal-to-noise ratio delivers cleaner audio with less background hiss
Small Capsule Limitations
While larger diaphragms excel at minimizing self-noise, small capsule microphones face inherent physics-based limitations that I’ve observed consistently affect their noise performance across various applications.
Miniature designs can’t escape fundamental thermal noise from air molecule collisions, which creates more energy per unit area on smaller surfaces. You’ll typically see SNR values between 56-62 dB with standard 8mm ECM capsules, compared to 70+ dB from larger designs.
These compact units require higher electronic gain to compensate for reduced sensitivity, which amplifies inherent noise further. Environmental impacts also hit smaller capsules harder, making them more susceptible to temperature variations and stability issues that larger microphones naturally resist through their superior thermal mass.
Dynamic Vs Condenser Microphone Noise Characteristics
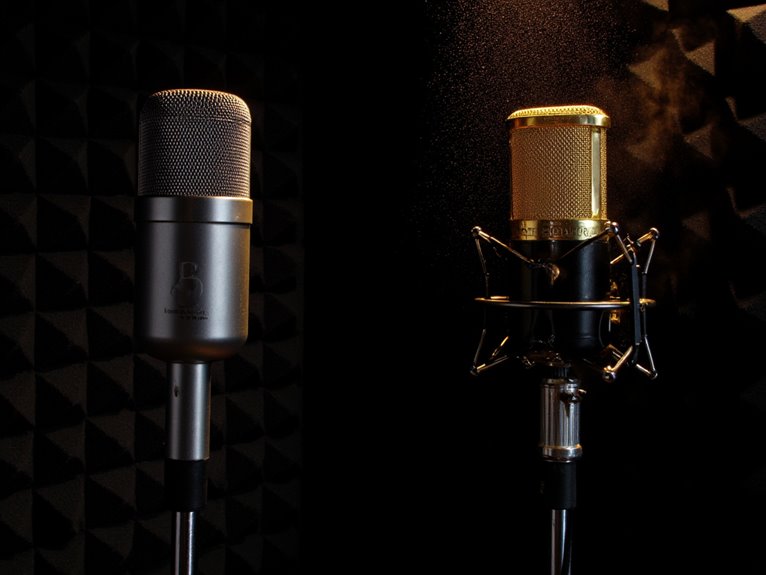
The fundamental difference between dynamic and condenser microphones lies in their underlying construction, which creates dramatically different noise characteristics that I’ve observed through years of testing various microphone types in studio environments.
Dynamic microphones, being passive devices without active circuitry, produce virtually no self-noise since they don’t require power or internal electronics. Conversely, condensers contain active components like FETs and impedance converters that inherently generate electrical noise.
Key noise characteristics include:
• Dynamic microphone advantages: Zero internal self-noise due to passive design
- Condenser microphone drawbacks: Measurable self-noise from active circuitry
- Higher sensitivity in condensers requires less preamp gain, potentially reducing system noise
- Dynamic mics need more amplification, transferring noise responsibility to your preamp
- Condenser microphone drawbacks: Measurable self-noise from active circuitry
Professional condenser microphones achieve self-noise ratings between 4-20 dB, which directly impacts the clarity and quality of your recordings. Condenser microphones typically require phantom power at 48V for operation, which energizes the active electronics that contribute to their inherent self-noise floor.
Practical Effects During Recording Sessions
When you’re recording with a microphone that has high self-noise, you’ll immediately notice an audible hiss that becomes particularly obvious during quiet passages, between words, or when there’s natural silence in your performance.
This persistent background noise forces you to make uncomfortable compromises with your gain structure, since you’ll need to push your preamp levels higher to capture a strong signal, which unfortunately amplifies both your desired audio and that unwanted hiss simultaneously.
I’ve learned through countless sessions that this gain juggling act often leaves you with recordings that sound muddy or distant, especially when you’re trying to capture subtle details like the breath between vocal phrases or the natural decay of acoustic instruments.
Audible Hiss During Recording
The reality of microphone self-noise becomes most apparent during actual recording sessions, where that subtle hiss can transform from a mere specification on paper into a genuine obstacle that affects your creative process.
I’ve witnessed countless sessions where seemingly minor self-noise specifications suddenly matter tremendously when you’re layering multiple vocal tracks or capturing delicate acoustic performances.
During critical recording moments, hiss creates several practical challenges:
- Monitor distractions – The constant background noise can distract performers and complicate your mixing decisions.
- Gain limitations – You’ll find yourself caught between insufficient signal levels and amplified hiss when boosting preamp gain.
- Post-production complications – Noise reduction becomes necessary, potentially introducing unwanted artifacts.
- Creative restrictions – Microphone placement options become limited as you compensate for poor signal-to-noise ratios.
Effective hiss mitigation strategies and thorough recording equipment evaluation become essential.
Gain Requirements Impact
While you’re adjusting preamp knobs during a recording session, the relationship between gain requirements and microphone self-noise creates a frustrating balancing act that I’ve watched derail countless takes. Your microphone choice directly determines how much gain you’ll need, and different microphone types demand varying levels of amplification to achieve usable signal levels.
Budget condensers under $200 often force you into high-gain territory, where their inherent noise becomes painfully obvious through studio monitors. I’ve seen engineers scramble to find the perfect gain balance, only to discover that capturing whispered vocals or distant acoustic instruments requires so much amplification that the microphone’s self-noise overwhelms the recording.
This forces uncomfortable compromises: either accept noisy recordings or reposition microphones closer, fundamentally altering your intended sound character and spatial relationships.
Managing Gain Staging to Minimize Audible Noise
Every audio engineer I’ve worked with understands that proper gain staging forms the foundation of clean recordings, yet I’ve seen countless projects suffer from preventable noise issues because someone rushed through this critical step.
Your gain staging strategies directly impact how much microphone self-noise becomes audible in your final mix. I’ve found that implementing proper noise reduction techniques from the start saves countless hours of cleanup later.
Here’s what works consistently:
- Position your input levels around -18 dBFS to maximize headroom while keeping signals well above the noise floor.
- Engage high-pass filters early in your chain to eliminate low-frequency rumble that masks quieter signals.
- Adjust preamp gain first, then use faders for mixing rather than fixing levels post-recording.
- Monitor each stage carefully to prevent noise buildup between devices.
Investing in audio interfaces with low-noise preamps eliminates background hiss at the source, providing cleaner recordings that require less post-processing correction. Professional interfaces often feature ultra-low latency monitoring capabilities that allow you to make real-time adjustments without introducing additional noise artifacts into your signal chain.
Frequently Asked Questions
Can Self-Noise Be Completely Eliminated From Any Microphone Design?
You can’t completely eliminate self-noise from microphone design, despite significant advances in noise reduction technology.
Physical limitations like thermal noise, quantum effects in electronics, and air molecule interactions with the diaphragm create unavoidable noise floors.
While modern ultra-low-noise microphones achieve impressive specifications in the low teens dB(A), absolute zero noise remains physically impossible due to fundamental electronic and acoustic principles governing all microphone components.
How Does Temperature Affect Microphone Self-Noise Measurements?
Temperature impact notably affects your microphone’s self-noise measurements through two primary mechanisms: sensitivity changes and increased thermal noise.
As temperatures rise, you’ll notice sensitivity typically drops by -0.002 to -0.003 dB/°C, while thermal noise from electronic components increases.
These environmental factors can skew your measurements, making self-noise appear higher or lower than actual values, especially affecting frequencies above 6 kHz where temperature sensitivity becomes more pronounced.
On a final note
Understanding microphone self-noise isn’t just technical jargon—it’s essential for achieving professional recordings. When you’re selecting microphones, you’ll want to prioritize low self-noise specs, especially for quiet sources or distant miking situations. By managing your gain staging properly and choosing mics with appropriate noise floors, you’ll guarantee cleaner recordings with better signal-to-noise ratios. Don’t overlook these specifications; they’ll make the difference between amateur and professional-sounding audio.