What Is an Audio Mixer and How Does It Work
An audio mixer functions as your central command hub, combining multiple sound sources like microphones, instruments, and playback devices into a single, polished output. You’ll control individual channel volumes using faders, shape frequencies with EQ knobs, and route signals through various processing stages including preamps, compressors, and effects. Whether analog or digital, mixers let you balance levels, eliminate unwanted noise, and create professional-quality audio for live performances, recordings, or broadcasts. The components and techniques below reveal how to maximize your mixing potential.
We are supported by our audience. When you purchase through links on our site, we may earn an affiliate commission, at no extra cost for you. Learn more.
Notable Insights
- An audio mixer is a central hub that combines multiple sound sources like microphones and instruments into a single polished output.
- Audio signals flow through preamps, equalizers, and compressors before reaching the final output speakers or recording device.
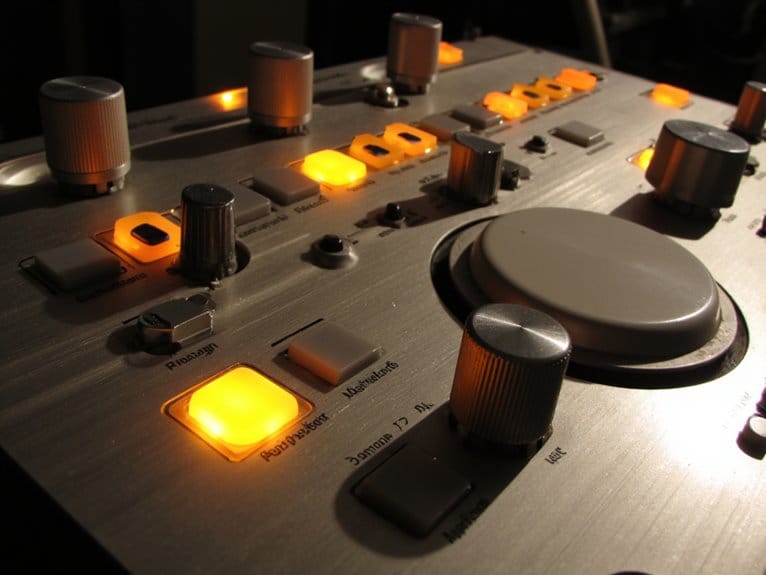
- Mixers feature channel strips with faders for volume control, knobs for EQ adjustments, and auxiliary sends for effects routing.
- Dynamics processors like compressors and gates control volume levels while equalization shapes frequency response for tonal balance.
- Available in analog and digital formats, mixers serve professional applications from live concerts to studio recording and broadcasting.
Understanding Audio Mixers: Definition and Primary Functions
The cornerstone of any professional audio setup, an audio mixer serves as the central hub where multiple sound sources converge into a single, polished output that you’ll send to your speakers or recording equipment.
At its core, you’re looking at a device that combines signals from microphones, instruments, and other audio sources while giving you precise control over each element.
The primary functions revolve around signal blending, volume control, and audio processing that transforms raw inputs into professional-grade output.
Audio mixers excel at transforming multiple raw sound sources into polished, professional-quality output through precise signal blending and processing control.
Through sophisticated mixing techniques, you’ll adjust gain levels, apply effects like reverb or EQ, and route signals to different destinations, ensuring your final mix achieves best balance and clarity for both live performances and studio recordings. Whether you’re working with analog mixers that use traditional technology or digital alternatives, the fundamental mixing principles remain consistent across different platforms. Modern mixers typically feature individual channel strips that contain dedicated controls for each input, allowing you to fine-tune every audio source independently. Professional mixers often include phantom power to support condenser microphones and other equipment that requires additional voltage to operate properly.
Types of Audio Mixers: Analog Vs Digital Systems
Building on these foundational concepts, you’ll find that audio mixers split into two distinct categories that fundamentally differ in how they process and manipulate your audio signals.
Analog mixers work with signals in their original electrical form, delivering that coveted analog warmness through natural saturation and harmonic coloration that many engineers swear by.
Digital mixers, conversely, convert incoming audio to digital data, offering digital precision through mathematical processing that eliminates noise while providing extensive flexibility. These systems often include wireless capabilities that enhance operational convenience and remote control options.
The choice between these systems impacts your workflow notably:
- Control interface: Analog mixers feature hardwired knobs and faders, while digital systems rely on multi-purpose controls and software interfaces
- Sound character: Analog delivers organic warmth versus digital’s clinical accuracy and expandable effects processing
- Operational complexity: Analog offers intuitive, tactile operation compared to digital’s advanced recall capabilities and programmable features
Both analog and digital mixers follow the same fundamental principles when it comes to audio signal control and routing.
Model Identification and Input-Output Configurations
Once you understand the fundamental differences between analog and digital systems, identifying specific mixer models becomes essential for matching your equipment to its intended application, whether you’re setting up a small home studio or managing a complex live sound environment.
Mixer categorization typically revolves around channel count, input configurations, and output capabilities, with models ranging from compact desktop units to expansive mixing consoles. I’ve found that signal flow architecture—whether in-line or split monitor—significantly impacts your workflow efficiency.
Input channels feature microphone preamps, line inputs, and phantom power for condenser mics, while outputs include main stereo feeds, auxiliary sends for effects processing, and subgroup options. Understanding these configurations helps you select mixers that’ll handle your specific routing requirements and processing needs effectively. Modern audio processing systems can extract and blend information from both channel and token perspectives, similar to how advanced neural network architectures handle complex signal routing.
Professional mixers commonly feature track busses ranging from 4 to 16 channels for signal travel, though advanced consoles can offer 24 to 48 busses for complex routing scenarios. For enhanced connectivity, modern 16-channel mixers often include Bluetooth capabilities for wireless streaming and direct device integration.
Budget-conscious users can find quality options like the Yamaha MG06X or Mackie ProFX10v3 that provide phantom power and built-in effects at affordable price points.
Essential Components of a Mixer Board
Having covered the broad framework of mixer models and their input-output configurations, we’ll now examine the individual control elements that make up your mixer’s channel strips and master section, which I’ve learned are the tools you’ll interact with most during any mixing session.
These essential mixer features form the foundation of your audio control, and understanding their channel controls will dramatically improve your mixing capabilities.
The core components you’ll encounter include:
These fundamental mixer elements serve as your primary interface for crafting professional-quality audio during every mixing session.
- EQ sections that shape frequency response, typically offering bass, midrange, and treble adjustments with parametric controls for precise tonal sculpting
- Auxiliary sends that route signals to external effects units or create separate monitor mixes, available in pre-fader or post-fader configurations
- Pan controls and faders that position audio within the stereo field and regulate individual channel levels before combining into your final mix
Each input channel features a dedicated channel strip that serves as the fundamental building block of mixing consoles. Modern mixers also provide convenient USB connectivity for direct interface with your computer, enabling seamless digital recording and playback capabilities.
Channel Strips: The Building Blocks of Audio Control
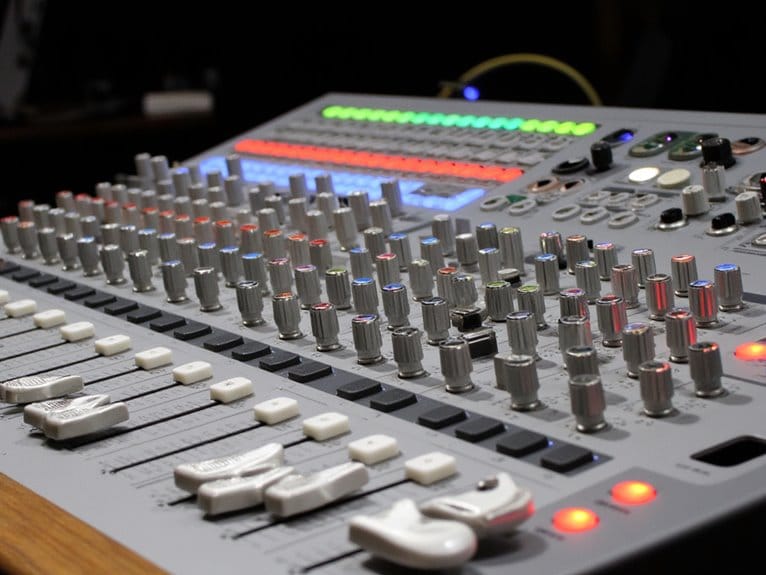
The heart of every mixing console lies within its channel strips, those vertical columns of knobs, buttons, and faders that I’ve found transform raw audio signals into polished, professional sound.
Each strip functions as your dedicated control center for individual audio sources, whether you’re managing a vocalist’s microphone or a guitarist’s amplifier signal.
These standardized configurations guarantee consistency across your mixing workflow, though I’ll admit the sheer number of controls can seem overwhelming initially.
Within each strip, you’ll discover gain controls for input optimization, EQ sections for tonal shaping, dynamics processors for managing dynamic range, and auxiliary sends for external effects routing.
The systematic signal path flows through compression, gating, and limiting functions before reaching the channel fader for final level control. Channel strips are usually numbered for easy identification by audio engineers. Understanding one channel strip completely provides the foundation for operating the entire mixer, since these control sections repeat consistently across all channels.
Signal Flow and Routing Fundamentals
When you’re working with an audio mixer, understanding how signals travel from your microphone to your speakers becomes essential for creating professional-quality sound. This signal path determines how your audio gets processed, shaped, and ultimately delivered to your audience.
The journey your audio takes through each mixer component—from the initial input stage through the channel strip‘s various processing sections to the final output—follows a logical sequence that, once you grasp it, makes operating any mixer feel intuitive rather than overwhelming.
I’ve found that mastering these routing fundamentals transforms mixing from a confusing technical challenge into a creative process where you can focus on crafting your sound rather than fighting with your equipment.
Understanding Signal Path Basics
Every audio signal you hear from a mixer has traveled through a carefully orchestrated journey, and understanding this signal path is like learning the roadmap that transforms your raw microphone input into polished, professional sound.
Signal flow describes how your audio moves through various processing stages, from microphones through preamps, equalizers, and compressors before reaching your final output destination.
Effective routing techniques determine your audio quality and help you avoid common equipment challenges that can compromise your mix.
Understanding these mixing strategies guarantees your signal maintains its integrity throughout each stage.
- Preamplification: Your weak microphone signals get boosted to usable line levels
- Processing Chain: Equalizers and compressors shape your sound’s frequency response and dynamics
- Output Routing: Signals reach speakers, recording devices, or auxiliary sends for effects processing
Input to Output Routing
While signal flow might sound intimidatingly technical at first glance, I’ve found that understanding how audio travels from your microphone to your speakers is surprisingly straightforward once you visualize it as a series of connected pathways.
Your signal begins at the input preamp, where it converts microphone-level signals to line level before passing through each channel strip‘s gain control, EQ, and routing sections.
Effective routing techniques determine how these processed signals move through various buses toward your final outputs, whether that’s main speakers, auxiliary sends for effects, or direct outs for recording.
Mastering signal management means you’ll control exactly where each audio source travels, enabling sophisticated workflows like submixes, parallel processing, and external effect integration.
Channel Strip Signal Journey
Five distinct stages define your signal’s journey through a channel strip, transforming raw microphone input into polished, routable audio that’s ready for your final mix.
Your signal begins at the preamp section, where I’ve found that proper gain staging sets the foundation for everything downstream.
The dynamic processors then smooth out peaks and valleys, though honestly, I’ve learned this step requires patience to master effectively.
- Input amplification boosts microphone signals to usable line levels while maintaining ideal signal-to-noise ratios
- Equalization filtering shapes tonal characteristics through frequency-specific adjustments that enhance or correct audio content
- Insert point integration allows external processors to seamlessly enter your signal chain for specialized processing tasks
Channel Strip Functions continue through aux routing and fader control, while Signal Processing Techniques guarantee each stage maintains signal integrity throughout this carefully orchestrated journey.
Equalization and Frequency Management
When you’re working with an audio mixer, equalization becomes your most powerful tool for sculpting the sonic character of individual channels and your overall mix.
Through precise frequency tuning, you’ll shape audio clarity by targeting specific frequency ranges—sub-bass (20-60 Hz), mids (250 Hz-4 kHz), and highs (4-20 kHz).
Parametric control gives you surgical precision over gain, frequency, and bandwidth adjustments, while graphic EQ visualization helps you see what you’re hearing.
Effective EQ techniques focus on tonal balance rather than dramatic boosts, preventing masking between competing elements.
Genre specific approaches matter too—jazz vocals need different sound shaping than EDM basslines.
Smart mix enhancement comes from understanding that cutting problematic frequencies often works better than boosting desired ones, creating space for each element to breathe naturally.
Dynamics Processing and Volume Control
Four essential dynamics processors transform how your audio mixer handles volume fluctuations and signal consistency, giving you precise control over every nuance of your sound.
When I’m working with dynamic control techniques, I rely on compressors to tame those unpredictable vocal peaks, while limiters act as my safety net against signal overload. Gates eliminate unwanted background noise, and expanders restore natural breathing room to compressed signals.
Your mixer’s dynamics processors work through threshold, attack, release, and ratio controls, allowing sophisticated volume optimization strategies:
Master your mix with precision using threshold, attack, release, and ratio controls for sophisticated volume optimization across all dynamics processors.
- Threshold control sets the precise level where processing begins affecting your signal
- Attack and release parameters determine how quickly processors respond to level changes
- Ratio settings define the intensity of compression applied above threshold
These processors integrate seamlessly with your mixer’s preamps and metering systems for thorough signal management.
Built-in Effects and Signal Enhancement
Modern audio mixers transform raw signals into polished productions through their sophisticated built-in effects processors, eliminating the need for expensive external gear while providing studio-quality enhancement capabilities.
You’ll find these signal enhancement tools fundamentally reshape your audio’s character, with reverb creating spatial depth, delay adding rhythmic echoes, and EQ sculpting frequency response across your entire mix. I’ve noticed that modulation effects like chorus and flanger particularly excel at adding movement, while pitch correction subtly fixes vocal imperfections without obvious artifacts.
| Effect Type | Primary Function |
|---|---|
| Reverb | Simulates acoustic spaces |
| Delay | Creates rhythmic echoes |
| EQ | Shapes frequency response |
| Modulation | Adds texture and movement |
| Compression | Controls dynamic range |
Your mixer’s aux sends route signals to these built-in effects processors, while parallel processing maintains your original signal alongside enhanced versions, giving you precise control over effect intensity.
Master Section and Final Mix Control
The heart of your audio mixer lives in its master section, where every individual channel converges into a unified sonic statement that defines your final output. This central command center houses critical components like the master fader, master EQ, and often a bus compressor that’ll give your mix the cohesion it desperately needs.
Understanding master section advantages transforms your approach to mixing, since you’re controlling the overall volume, tonal balance, and dynamics of everything combined.
The final mix techniques available here include:
- Bus compression for adding punch and gluing disparate elements together seamlessly
- Master equalization to fine-tune frequency balance across your entire mix
- Limiting capabilities that prevent distortion while maintaining peak output levels
These tools guarantee your final product meets professional standards.
Operating Controls: Faders, Knobs, and Metering
When you’re working with an audio mixer, you’ll interact primarily with three essential control types that shape your sound: faders for volume control, knobs for parameter adjustments, and meters for signal monitoring.
These physical interfaces, which I’ve found become second nature after countless mixing sessions, allow you to manage everything from individual channel volumes to complex EQ settings while keeping track of your signal levels.
Understanding how faders provide linear volume control, knobs offer rotary parameter adjustments, and meters display real-time signal information will transform your mixing workflow from guesswork into precise audio engineering.
Fader Volume Control Functions
Volume faders represent the most fundamental control element on any audio mixer, serving as your primary interface for adjusting signal levels with the intuitive motion of dragging a handle up or down along a graduated scale.
Understanding fader placement and different fader types becomes essential when you’re maneuvering through various mixer configurations, as these controls utilize logarithmic scaling rather than linear measurements to provide precise volume adjustments without abrupt loudness jumps.
The unity gain position, marked as 0 dB, maintains your original signal strength without boosting or reducing levels:
- Scale markings range from negative infinity (complete silence) to approximately +10 or +12 dB of gain boost
- Peak level indicators display the highest volume reached during playback, preventing distortion
- Tactile feedback provides superior control compared to digital-only interfaces during live mixing scenarios
Knob Parameter Adjustments
Rotary knobs complement volume faders by providing precise parameter control across multiple signal processing stages, transforming your raw audio inputs into polished, professional-sounding outputs through systematic adjustments of gain, equalization, auxiliary sends, and stereo positioning.
Each channel strip features dedicated input gain knobs for preventing distortion, three-band EQ controls for frequency manipulation, auxiliary send knobs for routing signals to external effects processors, and pan knobs for stereo placement.
Proper knob calibration guarantees accurate parameter mapping, while rotary function design offers tactile feedback through center-detent positioning.
These controls operate independently, allowing simultaneous multi-channel adjustments without affecting neighboring channels, and directly impact your signal chain before reaching output faders, making them essential for real-time sound shaping.
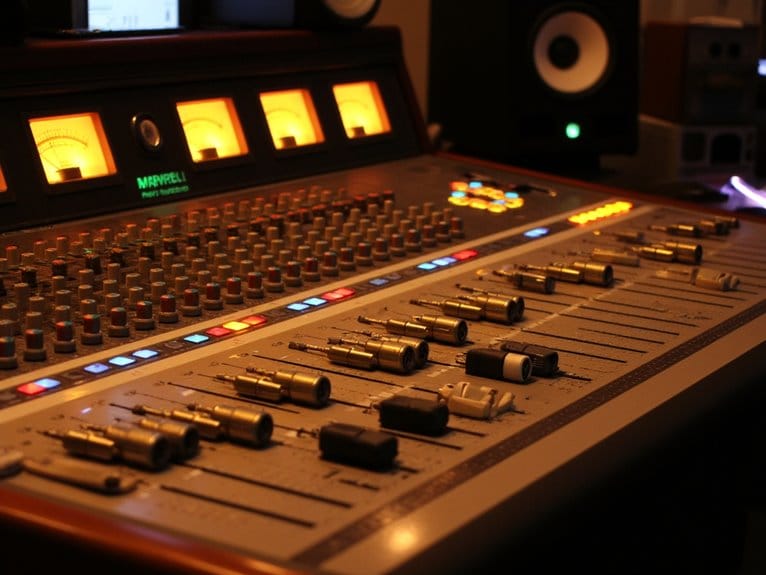
Meter Signal Level Monitoring
Visual feedback becomes your primary defense against signal disasters, as audio meters transform invisible electrical voltages into readable displays that’ll save you from embarrassing distortion incidents and inaudible whispers during critical recording sessions.
Your mixer’s meters, whether they’re traditional VU meters measuring RMS levels or Peak Program Meters monitoring maximum signal strength, provide essential visual cues for maintaining peak audio quality throughout your recording process.
Effective signal level refinement requires understanding these fundamental metering principles:
- Pre-fader listen functionality allows you to monitor channel signals before they reach the main mix, enabling precise level adjustments without affecting your overall output.
- Meter calibration techniques using reference levels like 0 dBu guarantee consistent readings across different equipment and maintain professional audio standards.
- Digital metering flexibility offers adjustable settings for various signal types, switching between RMS and peak monitoring modes as needed.
Choosing the Right Mixer for Your Environment
How do you navigate the overwhelming landscape of audio mixers when every manufacturer promises their device will transform your sound?
I’ve learned that successful mixer selection depends on honestly evaluating your specific environment and requirements, rather than chasing the latest features you’ll never use.
Consider these essential factors when examining mixer features:
- Channel requirements – Count every microphone, instrument, and playback device you’ll connect simultaneously.
- Portability considerations – Weight and size matter notably if you’re transporting equipment between venues regularly.
- Power and connectivity – Match your mixer’s capabilities to your speakers, recording interfaces, and available power sources.
Your budget should reflect long-term value rather than initial cost savings.
Entry-level mixers work perfectly for simple applications, while complex live sound environments justify investing in mid-range or professional-grade equipment with advanced processing capabilities.
Professional mixers typically feature dynamic ranges exceeding 128 dB with ultra-low distortion specifications that ensure pristine audio quality even in demanding performance situations.
For content creators and streamers, prioritize mixers with XLR inputs, USB integration, and phantom power to ensure compatibility with professional microphones and streaming platforms like OBS and Twitch.
Frequently Asked Questions
How Much Does a Professional Audio Mixer Typically Cost?
Professional audio mixer costs vary considerably depending on your needs, with budget options starting around $200 for basic models from reliable mixer brands like Behringer.
You’ll find intermediate models priced between $300-$1,000, while high-end digital consoles range from $1,000-$5,000.
I’ve seen large-scale professional systems exceed $10,000, though most users find excellent performance in the $500-$2,000 range for serious applications.
Can I Connect My Smartphone Directly to an Audio Mixer?
You can connect your smartphone directly to an audio mixer, though smartphone compatibility depends on your phone’s available ports and the mixer features you’re working with.
I’ve found that using a 3.5mm TRS to dual 1/4″ TS cable through your headphone port works well, but phones without headphone jacks require adapters like Lightning or USB-C converters, which can complicate the setup process slightly.
What Cables and Connectors Do I Need for My Mixer Setup?
You’ll need mixer cables that match your specific connector types, and honestly, I’ve learned this the hard way through countless setups.
XLR cables work for microphones, TRS cables handle balanced line signals and headphones, while TS cables connect guitars and unbalanced sources.
Don’t forget RCA cables for consumer devices, plus adapters for mismatched connections, cable ties for organization, and proper power cables.
How Do I Troubleshoot Common Audio Mixer Problems and Issues?
I’ve found that systematically checking power connections, cables, and signal routing solves most mixer problems you’ll encounter.
When dealing with signal interference, I start by testing channels individually, adjusting gain levels, and repositioning microphones to eliminate feedback loops.
For digital mixers, I always recommend installing software updates first, since firmware bugs often cause mysterious audio dropouts and routing issues that’ll drive you crazy otherwise.
Do I Need Special Training to Operate a Professional Mixer?
You’ll definitely benefit from specialized training to develop professional audio mixing skills, though it’s not strictly mandatory.
Formal certificate programs provide essential foundation in signal flow, EQ, and dynamics processing, while hands-on experience teaches you to operate under pressure.
I’ve found that combining structured education with real-world practice, whether through internships or assistant roles, accelerates your learning curve considerably and builds the technical competence needed.
On a final note
You’ve explored the fundamentals of audio mixing, from analog circuits to digital processing capabilities, and now you’re equipped with practical knowledge about channel strips, signal routing, and professional applications. Whether you’re managing a small podcast setup or coordinating complex live sound reinforcement, understanding these core principles will guide your equipment decisions. Remember, the best mixer isn’t always the most expensive one—it’s the system that matches your specific workflow requirements.