Understanding Mixer Channels and Signal Routing
You’ll find mixer channels follow a straightforward signal path: your microphone connects via XLR, gets amplified roughly 1000 times through the preamp, passes through EQ controls for frequency shaping, then travels to volume faders and pan controls that position sounds in your stereo field. Auxiliary sends create independent monitor mixes and effects routing, while sub-groups let you control multiple channels simultaneously, and the master fader governs your final output—though there’s considerably more happening behind those familiar knobs.
We are supported by our audience. When you purchase through links on our site, we may earn an affiliate commission, at no extra cost for you. Learn more.
Notable Insights
- Mixer channels follow a top-down signal path from input gain through preamp, EQ, and faders to main output.
- XLR connections handle microphones, while 6.3mm jacks connect guitars and keyboards with different signal levels requiring proper gain staging.
- Auxiliary sends create independent signal routes for effects and monitors, with pre-fader and post-fader options serving different purposes.
- Sub-group buses allow multiple channels to be controlled together while maintaining individual channel settings for efficient mixing workflows.
- Pan controls position sounds across the stereo field, with low-frequency instruments centered and complementary elements spread for depth.
Audio Input Sources and Connection Types
When I first started working with audio mixers, I’ll admit I was overwhelmed by the sheer variety of input sources and connection types I’d encounter in any given session.
The overwhelming variety of input sources and connection types in audio mixing can intimidate newcomers to the field.
However, understanding these fundamentals has become vital for achieving professional results.
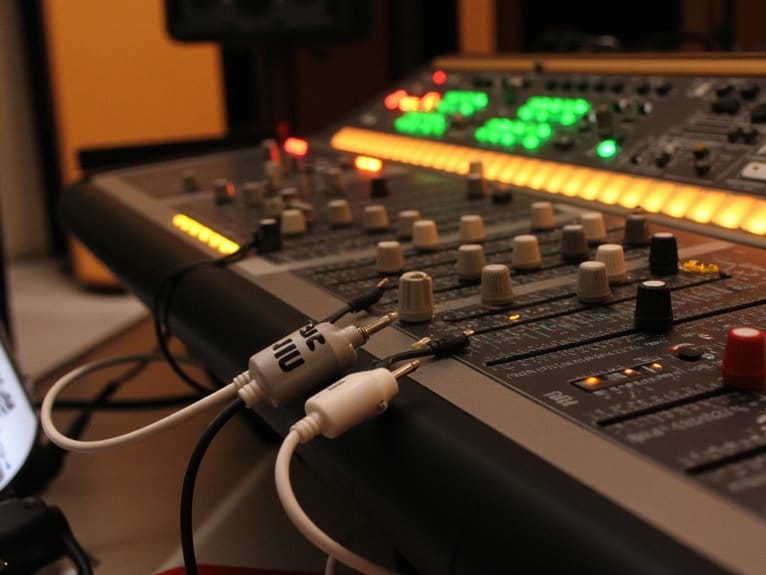
You’ll typically work with microphones requiring XLR connections for balanced signals, while electric guitars and keyboard instruments use 6.3mm jacks for line level differences.
Recording equipment integration becomes straightforward once you grasp that RCA connections handle consumer electronics, TRS jacks manage stereo signals, and digital inputs like USB guarantee audio interface compatibility.
Sound source diversity means your studio setup layouts must accommodate everything from condenser mics needing phantom power to auxiliary returns for signal processing tools. Most professional mixers include a pad button that instantly reduces excessive input signals by 20dB when sources are running too hot. Creating flashcard sets for each connection type and their specific applications helps memorize these essential routing concepts quickly.
This diversity makes mixer operation basics essential for maintaining ideal audio quality factors through proper device connection methods.
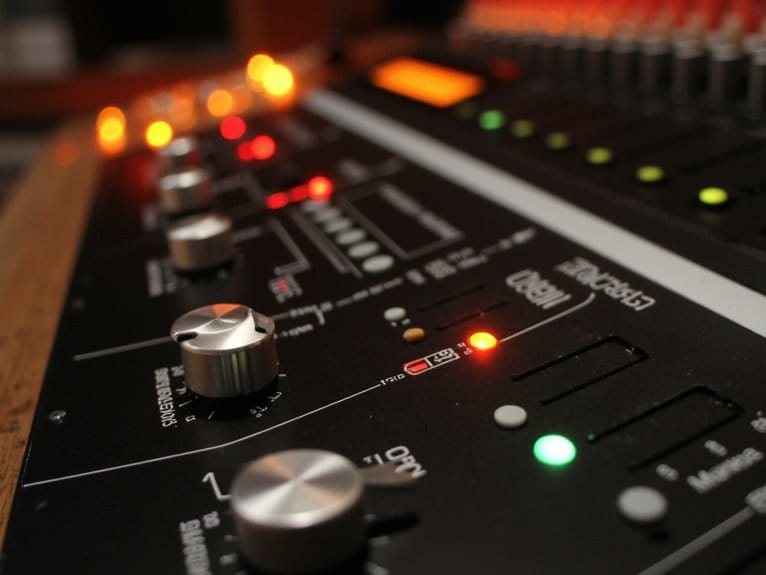
Channel Strip Architecture and Core Components κι
Once you’ve got your cables properly connected and understand how different sources feed into your mixer, the real magic happens within each channel strip itself, where every single audio signal gets shaped, controlled, and prepared for the final mix.
Understanding channel strip functionality starts with recognizing its core architecture: the preamp provides initial signal amplification, input gain controls incoming levels, and equalization adjusts frequency balance across your audio spectrum.
The channel strip layout typically follows a logical top-down signal path, featuring rotary potentiometers for precise adjustments, auxiliary sends for external routing, and the channel fader that regulates final output levels. Channel strips are usually numbered for easy identification, allowing audio engineers to quickly locate and adjust specific inputs during live performances or recording sessions.
Additional components like mute switches, pan controls, and high-pass filters give you extensive control over each individual channel’s contribution to your overall mix. Each input channel has its own dedicated channel strip, ensuring that every source receives individual processing and control capabilities.
Preamp Functions and Signal Amplification
Sitting at the heart of every mixer channel strip, the preamp serves as your signal’s first essential processing stage, transforming weak microphone-level signals into robust line-level signals that can travel through your entire audio chain without degradation. This amplification process, whether using operational amplifiers or vacuum tubes among different preamplifier types, boosts your signal approximately 1000 times while maintaining signal fidelity through proper impedance matching. Modern mixer preamps often feature multiple input jacks for various audio sources including XLR, TRS, and RCA connections to accommodate different equipment types. Proper data documentation of signal routing configurations ensures continuity and prevents setup errors during recording sessions.
| Preamp Feature | Function |
|---|---|
| Gain Control | Adjusts signal amplification levels |
| Impedance Matching | Guarantees ideal signal transfer |
| Noise Reduction | Minimizes interference and hum |
| Signal Protection | Prevents distortion and clipping |
| Quality Enhancement | Maintains audio clarity |
Effective gain staging becomes vital here, as you’ll need to balance sufficient amplification with noise reduction to preserve audio quality throughout your signal chain.
EQ Section Controls and Frequency Shaping
After your signal receives proper amplification through the preamp stage, the EQ section becomes your primary tool for sculpting and refining the tonal character of each channel, offering frequency-specific control that can make the difference between a muddy mix and crystal-clear audio.
Most mixers provide three-band EQ controls positioned beneath the gain knob, giving you low, mid, and high frequency adjustments that cover the essential frequency spectrum. These equalizers for adjusting frequencies typically follow the standard high, middle, low configuration found across most mixing consoles. The gain knobs for each EQ band have a default of 0 dB, providing a neutral starting point before making frequency adjustments.
While basic EQ sections offer simple boost and cut functions, parametric EQ units like those found on SoundCraft MH series mixers provide precise frequency selection, adjustable Q factors, and sophisticated equalization techniques that allow you to target specific problematic frequencies, enhance instrument clarity, and balance your overall mix with surgical precision.
Volume Faders and Pan Controls
You’ll find that mastering volume faders and pan controls represents the foundation of effective mixing, where precise level adjustments and strategic stereo placement transform individual tracks into cohesive musical experiences.
I’ve observed countless engineers struggle with these seemingly simple controls, particularly when it comes to understanding how fader movements affect signal flow, how pan positioning creates spatial depth within your stereo field, and how automation systems can enhance these adjustments over time.
Let’s examine the fundamental techniques for fader level control, explore pan positioning strategies that create professional-sounding mixes, and discuss how automation and grouping features can streamline your workflow while maintaining creative control. The peak level display provides essential feedback during these adjustments, helping you monitor the highest levels reached by each track to prevent clipping and maintain proper mix balance. Most professional engineers recommend maintaining fader levels around unity as your starting point, which creates better system balance and allows for more headroom in your overall mix.
Fader Level Control Basics
When you’re working with any mixing console, whether it’s a compact home studio board or a massive live sound desk, the channel faders represent your most fundamental tool for shaping the overall mix balance. These volume sliders use logarithmic fader scaling techniques that provide fine volume adjustments without jarring shifts, with unity gain importance centered at the 0 dB mark where your signal passes through unaltered.
Understanding aux send configurations becomes essential since pre fader benefits include consistent monitor levels, while post fader applications follow your main fader movements for effects processing.
Effective subgroup fader management allows collective control over related instruments, maintaining audio signal integrity throughout your signal chain while preserving the professional quality your mix demands.
Pan Positioning Techniques
While fader levels control how loud each element sits in your mix, pan positioning determines exactly where those sounds live within the stereo landscape, and I’ve found that mastering this aspect can make the difference between a cluttered mess and a professionally spacious recording.
Effective panning strategies involve keeping low-frequency instruments like kick drums and bass guitars centered for stability, while spreading complementary elements across the stereo field. I typically use the LCR approach for maximum separation, though subtle positioning often works better than hard panning everything.
| Center Position | Left/Right Positioning |
|---|---|
| Kick, bass, lead vocals | Guitars, keyboards |
| Snare drum | Background vocals |
| Primary melodic elements | Percussion, effects |
| Foundation instruments | Stereo enhancement |
Your stereo imaging improves dramatically when you monitor adjustments in mono, ensuring compatibility while preventing frequency masking that destroys clarity.
Automation and Grouping
Although static fader positions and pan settings form your mix’s foundation, automation transforms these basic controls into dynamic storytelling tools that breathe life into your recordings. I’ve discovered that mastering both volume and pan automation can elevate even mediocre performances into compelling musical experiences.
Your automation strategies should focus on enhancing group dynamics through collective control, where VCA groups and bus automation provide routing efficiency for managing multiple tracks simultaneously.
I’ve found that drawing automation curves creates superior volume dynamics compared to static adjustments, allowing you to maintain performance consistency while expanding dynamic range.
Effective fader techniques involve balancing gradual changes with nuanced adjustments, ensuring proper signal balance across all mix elements without compromising the overall musical flow.
Auxiliary Sends and Parallel Signal Routing
You’ll encounter auxiliary sends on virtually every mixer worth owning, and understanding their pre-fader versus post-fader configurations will transform how you approach effects processing and monitor creation.
When you’re setting up effects sends, you’ll typically want post-fader operation so your reverb and delay levels track naturally with your channel faders, while monitor mixes demand pre-fader sends that remain consistent regardless of your front-of-house adjustments.
I’ve watched countless engineers struggle with muddy mixes simply because they didn’t grasp this fundamental distinction, so let’s explore how proper aux send configuration reveals the parallel processing techniques that separate amateur recordings from professional productions.
Pre Vs Post Fader
When I first encountered the concept of pre- and post-fader auxiliary sends, I’ll admit the terminology made my head spin a bit.
However, understanding this fundamental routing concept becomes essential once you realize it’s fundamentally about where your mixer taps into the audio signal path.
Pre-fader sends grab the signal before it reaches your channel fader, making them perfect for creating independent monitor mix feeds that won’t fluctuate when you adjust front-of-house levels.
Post-fader sends, conversely, tap the signal after the fader, which means they’ll track your volume changes—ideal for effects processing where you want reverb and delay levels to follow your instrument’s output naturally, maintaining consistent wet-to-dry ratios throughout your performance.
Effects Send Configuration
Since we’ve covered how pre- and post-fader sends determine where your signal gets tapped, let’s explore the practical magic of effects send configuration, which transforms your mixer from a simple routing device into a sophisticated parallel processing powerhouse.
Through send effects and parallel routing, you’re fundamentally creating auxiliary channels that enable efficient mixing across multiple tracks simultaneously.
Here’s what makes effects sends invaluable for creative effects:
- Reverb applications allow cohesive soundscapes by placing instruments in shared acoustic spaces
- Dynamic control through parallel compression blends processed and unprocessed signals seamlessly
- Audio blending capabilities let you dial in precise effect amounts using return faders
- Monitoring techniques guarantee peak signal processing balance throughout your mix
This configuration delivers resource-efficient workflows while maintaining complete creative control over your sound design choices.
Monitor Mix Creation
While effects sends open up creative possibilities for your mix, auxiliary sends become absolutely essential when you’re creating monitor mixes that keep performers comfortable, confident, and musically connected during live performances.
Your aux send configurations determine whether musicians can hear themselves clearly for pitch accuracy, maintain rhythmic cohesion, and blend harmonies effectively. I’ve found that proper monitor mix balancing requires understanding pre-fader versus post-fader routing, where pre-fader sends maintain consistent levels regardless of main mix changes, while post-fader sends mirror your front-of-house adjustments.
| Send Type | Main Mix Dependency | Best Use Case |
|---|---|---|
| Pre-fader | Independent levels | Musician-specific mixes |
| Post-fader | Follows main fader | Streamlined control |
| Parallel routing | Isolated processing | Custom EQ per mix |
| Balanced cables | Noise reduction | Professional connections |
Each auxiliary send creates discrete monitor mixes through parallel signal routing.
Main Mix Routing and Direct Outputs
Although many people think of a mixer as simply making everything louder, I’ve found that understanding where your audio actually goes makes the difference between amateur hour and professional results.
Main mix importance centers on combining all channels into your primary stereo output, while direct output flexibility gives you independent control benefits for recording or monitor feeds.
Your mixer channel routing determines audio distribution strategies through different paths:
- Main mix travels through the master fader for collective control
- Direct outputs bypass master processing for isolated channel feeds
- XLR and 1/4″ connections provide versatile output connections options
- Digital mixers offer programmable routing beyond physical limitations
Signal flow management becomes essential when you’re running both live sound and recording simultaneously, since master fader significance affects only your main outputs while direct feeds remain independent.
Pre-Fader Vs Post-Fader Send Configuration
When you’re setting up aux sends on your mixer, the pre-fader versus post-fader decision fundamentally changes how your signal behaves in relation to the channel fader’s position.
Pre-fader sends bypass your fader operation entirely, maintaining fixed levels regardless of volume adjustments, which makes them perfect for monitor mixes and headphone feeds where routing flexibility demands consistency.
Post-fader sends follow your fader movements, ensuring signal coherence between your main mix and effects returns, which maintains proper mix integrity when you’re adjusting levels.
For send applications involving reverbs and delays, post-fader routing provides superior effects management since your time-based processors respond proportionally to source changes, creating natural-sounding results that track your mixing decisions seamlessly.
Bus Systems and Signal Grouping
When you’re working with multiple channels that need similar processing or control, sub-group buses become your best friend for streamlining the mixing process, allowing you to adjust levels, EQ, and compression across several related channels with just one fader movement.
I’ve found that grouping drum mics into a drum sub-group, or vocals into a vocal sub-group, makes it markedly easier to balance these elements within your overall mix while maintaining the individual character of each channel.
Effects buses work similarly but serve a different purpose, letting you send multiple channels to shared reverb, delay, or other time-based effects, which not only saves processing power but also creates cohesive spatial relationships between instruments.
Sub-Group Control Benefits
Most audio engineers discover that subgroups become indispensable tools once they understand how these bus systems transform chaotic mixing sessions into organized, manageable workflows.
Through strategic signal consolidation, you’ll maintain precise volume balancing across entire instrument families while preserving your carefully crafted individual channel settings, which honestly saves my sanity during complex sessions.
Your creative workflow improves dramatically because subgroup strategies enable sophisticated tonal shaping and dynamic processing at the group level, freeing up individual channels for fine-tuning.
Here’s what makes subgroups particularly powerful:
- Group dynamics processing affects all grouped inputs simultaneously for cohesive sound
- Aux sends remain consistent regardless of subgroup fader position through output preservation
- Feedback management becomes simpler when addressed at the group level
- Complex effect routing gets streamlined across similar sound sources
Effects Bus Routing
While subgroups excel at organizing instrument families, effects buses take signal routing into entirely different territory by creating dedicated pathways for processing that don’t interfere with your original tracks.
You’ll use parallel processing to send duplicate signals to effects buses, maintaining your dry signal while adding wet processing through global effects like reverb or delay.
Serial processing chains multiple effects sequentially for complex effects application, while nested buses allow sophisticated routing where one bus feeds another.
Dynamic control becomes more precise through layered compression techniques across grouped channels.
Whether you’re managing live performance situations or handling post production management tasks, effects buses prevent bus overload by distributing processing loads efficiently, giving you professional-level control over your mix’s sonic landscape.
Frequently Asked Questions
What’s the Difference Between Balanced and Unbalanced Cable Connections for Mixers?
You’ll find balanced advantages include superior noise rejection through differential signaling, making them ideal for professional mixer setups where signal integrity matters most over longer cable runs.
Unbalanced disadvantages become apparent when you’re dealing with interference susceptibility, especially in complex audio environments where electromagnetic noise can compromise your mix quality.
I’ve seen countless setups where choosing balanced XLR connections over unbalanced alternatives dramatically improved overall audio performance and reliability.
Can I Record Multiple Channels Simultaneously While Mixing Live Sound?
Yes, you can achieve live recording with proper equipment, though basic USB mixers typically limit you to stereo outputs.
For true channel isolation, you’ll need mixers with dedicated direct outputs or multi-track USB capabilities, plus audio interfaces matching your channel count.
I’ve found panning channels hard left/right works for two-channel separation, but advanced digital mixers offer the best simultaneous recording flexibility.
Why Does My Mixer Sound Distorted Even at Low Volume Levels?
Distortion causes at low volumes usually stem from improper gain staging, where you’ve got input levels set too high even though your master output seems reasonable.
I’ve seen this countless times – your preamp gain might be cranked up, causing signal clipping before it reaches the main faders, or you’re dealing with impedance mismatches between your sources and mixer inputs that create unwanted harmonic distortion throughout your signal chain.
On a final note
You’ve now grasped the fundamental building blocks that make mixers work, from input connections through your channel strips to complex routing systems. While I’ll admit these concepts can feel overwhelming initially, mastering signal flow becomes second nature with practice. Whether you’re working with analog warmth or digital precision, understanding how your audio travels from source to output gives you complete creative control over every sonic element in your mix.