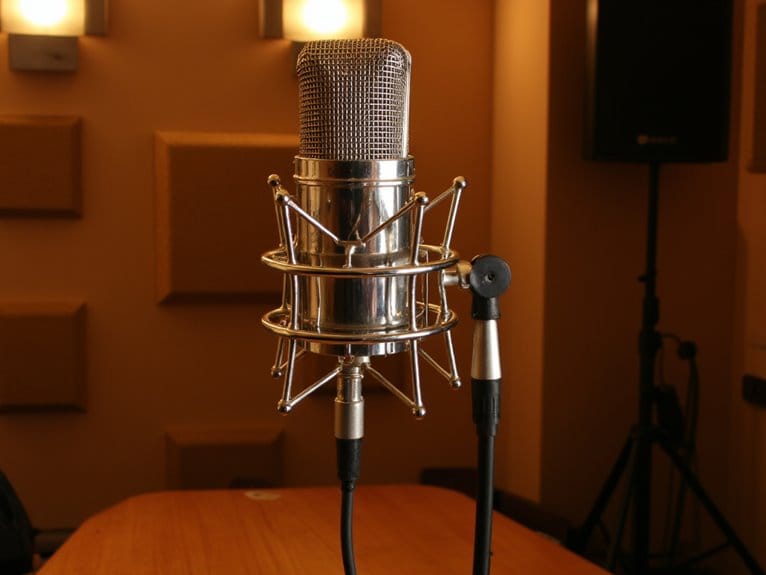
Understanding Impedance in Audio Interfaces and Mixers
Understanding impedance in audio interfaces and mixers involves grasping how electrical resistance affects signal flow between your equipment. You’ll want input impedance that’s 10 times higher than output impedance to prevent signal loss and maintain frequency response. Audio interfaces typically feature 3-15kΩ input impedance for line sources, while microphones output 50-200Ω, requiring proper impedance bridging to avoid thin sound, bass roll-off, and noise that compromises your recordings’ professional quality and clarity throughout your signal chain.
We are supported by our audience. When you purchase through links on our site, we may earn an affiliate commission, at no extra cost for you. Learn more.
Notable Insights
- Impedance represents frequency-dependent opposition to alternating current, affecting signal strength and quality in audio equipment connections.
- Audio interfaces use impedance bridging with low output impedances connecting to higher input impedances for optimal performance.
- XLR mic inputs typically have 5kΩ impedance while TRS line inputs exceed 10kΩ to prevent signal loss and distortion.
- Mismatched impedance causes thin sound, frequency roll-off, and signal degradation; ideal ratio is 10:1 input-to-output impedance.
- Proper impedance matching prevents equipment damage, maintains signal integrity, and ensures accurate frequency response throughout the audio chain.
What Is Impedance and Why Does It Matter?
The invisible force that governs every audio signal flowing through your interface, impedance represents the opposition a circuit presents to alternating current, measured in ohms and distinguished from simple resistance by its frequency-dependent nature.
Understanding impedance basics becomes essential when you’re connecting microphones, instruments, and monitors to your audio interface, since mismatched values can drain your signal’s strength, introduce unwanted noise, or even damage your equipment.
Mastering impedance matching prevents signal loss, eliminates unwanted noise, and protects your valuable recording equipment from potential damage.
The importance explained lies in how impedance affects your entire recording chain—from capturing pristine vocal takes to monitoring playback accurately. Following Ohm’s Law, impedance directly influences the relationship between voltage, current, and resistance in your audio circuits.
Modern audio systems typically employ impedance bridging techniques that use low output impedances paired with higher input impedances to minimize signal loss over extended cable runs. When you grasp these principles, you’ll avoid the frustrating scenarios where your expensive microphone sounds lifeless or your headphones lack sufficient volume, ensuring efficient signal transfer and maintaining the sonic integrity your music deserves.
Measuring Impedance in Audio Equipment
When you’re ready to measure impedance in your audio equipment, you’ll need to understand that different test equipment serves different purposes, from basic multimeters that handle DC resistance checks to specialized impedance meters that provide thorough frequency-dependent analysis.
The measurement techniques you choose will depend on your specific requirements, whether you’re running quality control on a production line where single-channel methods offer speed and simplicity, or conducting detailed R&D work where dual-channel approaches deliver the accuracy needed for calculating Thiele-Small parameters.
I’ve found that selecting the right combination of equipment and technique often makes the difference between getting usable data and spending hours troubleshooting unreliable measurements that don’t reflect your system’s actual performance. Your choice of reference resistor should follow the guideline of using a value that’s 1/10 to 1/100 of your device’s nominal impedance to maintain optimal signal-to-noise ratio. Additionally, impedance mismatches during measurement can cause significant signal degradation and affect the accuracy of your readings.
Test Equipment Requirements
Precision in impedance measurement demands specific tools that’ll transform your audio testing from guesswork into genuine science, and I’ve found that building a proper measurement setup doesn’t require breaking the bank or earning an electrical engineering degree. Understanding test equipment types guarantees measurement accuracy across your entire audio chain, from microphone preamps to speaker outputs.
| Essential Equipment | Purpose & Function |
|---|---|
| Volt/Ohm Meter | Measures voltage and resistance for impedance calculations |
| Audio Signal Generator | Provides precise test tones at specific frequencies |
| Known-Value Resistor | Creates voltage divider circuit for reference measurements |
| Measurement Microphone | Captures acoustic response with analog output precision |
You’ll need software like ARTA or REW for frequency-dependent analysis, since impedance varies dramatically across the audio spectrum, particularly in complex loads like speakers. When setting up your measurement chain, always verify the signal generator output remains consistent across frequencies to maintain reliable impedance calculations throughout your testing process. Professional audio environments often utilize the historical 600Ω standard as a reference point when calibrating measurement equipment and validating impedance readings across different audio interfaces.
Measurement Techniques Overview
Armed with proper test equipment, you’ll discover that impedance measurement techniques fall into several distinct categories, each offering specific advantages depending on your accuracy requirements, available channels, and measurement environment.
Single channel methods excel in production settings where you need simultaneous acoustic and impedance measurements, though they require precise calibration and don’t account for amplifier effects.
Dual channel approaches provide superior measurement precision by monitoring both voltage and current simultaneously, making them ideal for R&D applications where accuracy trumps convenience. Remember that multimeter measurements will only capture the DC resistance component, which typically runs 60-90% of the nominal impedance value you’re targeting.
You’ll also encounter constant voltage versus constant current methods, which handle impedance types differently—constant voltage delivers better signal-to-noise ratios, while constant current maintains consistent flow but shows higher environmental sensitivity. When selecting your drive levels, keep voltage outputs below 300mV to maintain linear response and ensure measurement accuracy across different impedance measurement methods.
Input Vs Output Impedance Fundamentals
While I’ve spent countless hours explaining audio gear to confused musicians, I’ll admit that impedance remains one of those concepts that makes even seasoned engineers scratch their heads sometimes.
Understanding input impedance characteristics versus output impedance effects becomes essential when you’re connecting microphones, instruments, and mixers in your signal chain.
Getting your impedance matching wrong between microphones, instruments, and mixers will absolutely destroy your signal quality and leave you troubleshooting for hours.
Think of input impedance as your device’s resistance to accepting power from a source, while output impedance measures how easily power flows out to your load. Modern audio engineering prioritizes voltage transfer over power matching, which means your input impedance should be at least ten times higher than your source’s output impedance.
When you violate this rule, you’ll notice signal degradation, frequency response changes, and reduced sound quality that’ll have you questioning your entire setup. Unlike DC circuits that deal with simple resistance, audio circuits include reactance from capacitors and inductors that cause impedance to vary with frequency.
A classic example involves connecting an electric bass guitar with its high output impedance directly to a low-impedance microphone input, which produces thin sound due to the resulting low-frequency roll-off. Audio interfaces with dedicated instrument inputs solve this common impedance mismatch by providing high-headroom connections specifically designed for guitars and bass instruments.
Professional interfaces often feature high-impedance inputs that prevent distortion and signal loss when recording guitars directly.
How Impedance Affects Signal Flow
Once you start routing signals through your audio chain, impedance becomes the invisible force that determines whether your carefully crafted sound reaches its destination intact or gets mangled along the way. When you’re splitting signals to multiple destinations, impedance variation affects how current distributes across your connections, directly impacting signal strength and circuit efficiency.
| Impedance Type | Voltage Level | Signal Integrity |
|---|---|---|
| High Source | Higher voltage | Better SNR |
| Low Input | Lower voltage | Preserved over distance |
| Mismatched | Variable | Signal degradation |
I’ve learned that cable capacitance interacts with your source and load impedances, creating frequency-dependent filtering that can seriously compromise audio fidelity. Higher frequencies get attenuated on long runs, while mismatched impedances cause unwanted tonal coloration that’ll have you questioning your mixing decisions.
Troubleshooting Impedance Issues in Your Setup
When your audio setup starts delivering less-than-stellar results, impedance mismatches often lurk behind the scenes as silent culprits, creating a cascade of problems that can frustrate even experienced engineers. I’ve found that implementing common troubleshooting tips begins with systematic observation—listen carefully for distorted audio, crackling sounds, or unusually low output levels that signal potential issues.
| Symptom | Likely Cause |
|---|---|
| Muffled/distorted audio | Interface impedance mismatch |
| Crackling/buzzing sounds | Faulty connections/termination |
| Low output levels | Input/output impedance conflict |
| Amplifier overheating | Sustained impedance overload |
Identifying impedance symptoms requires methodical testing using multimeters to measure actual values against manufacturer specifications, comparing readings between channels to isolate problems, and swapping components while monitoring performance changes through careful listening tests. Professional audio interfaces often include Auto Gain features and Clip Safe modes that help prevent impedance-related distortion and maintain signal integrity during recording sessions. Modern interfaces with ESS Sabre32 technology can provide exceptional dynamic range and clean signal processing that minimizes impedance-related artifacts during recording and monitoring.
Best Practices for Impedance Management
After troubleshooting countless audio setups over the years, I’ve learned that effective impedance management isn’t just about fixing problems—it’s about preventing them through deliberate, systematic practices that you can implement from day one.
Understanding typical impedance levels becomes your foundation, where microphones typically operate at 150-600 ohms, line-level equipment at 10K ohms, and instrument inputs around 1 megohm. I always recommend creating a reference sheet with your gear’s specifications, because knowing these numbers saves time during setup.
- Document all equipment impedance ratings in a centralized reference guide for quick access
- Use impedance matching transformers when connecting mismatched equipment to prevent signal degradation
- Choose appropriate cable lengths based on your impedance levels to minimize signal loss
- Monitor signal quality regularly using meters to catch impedance-related issues before they affect recordings.
When selecting audio interfaces, prioritize models with ultra-low-noise preamps and comprehensive phantom power support, as these features directly impact impedance matching effectiveness and overall signal integrity in your recording chain. Dynamic microphones like the SM7B require 60dB gain from your interface’s preamp section to achieve optimal signal levels without introducing unwanted noise or distortion.
Frequently Asked Questions
Can I Use Guitar Cables for Microphones Without Impedance Problems?
Using guitar cables for microphones creates impedance mismatches that’ll cause weak signals, increased noise, and potential tonal issues.
While you can physically connect them with adapters, microphone cables use balanced XLR connections designed for low-impedance signals, whereas guitar signals operate at high impedance through unbalanced 1/4″ connections.
You’ll get better results using proper microphone cables or impedance matching transformers.
Do Expensive Cables Have Better Impedance Characteristics Than Cheap Ones?
Expensive cables typically offer better impedance characteristics than cheap ones, though you’ll find the differences aren’t always dramatic.
Higher-end cables use superior cable materials like oxygen-free copper and advanced insulation that maintains consistent impedance values, while premium shielding reduces signal interference that can affect impedance stability.
However, I’ve noticed that many mid-priced cables perform nearly as well for most applications.
Will Using Multiple Splitters Create Impedance Issues in My Setup?
Yes, you’ll likely encounter impedance problems when chaining multiple splitters in your audio chain, as each connection point introduces signal degradation and potential mismatching.
Different splitter configurations create cumulative attenuation that becomes noticeable after two or three units, particularly with passive Y-cables that don’t maintain proper 75-ohm or 600-ohm standards.
Can Impedance Mismatching Permanently Damage My Audio Interface or Mixer?
Generally, you won’t permanently damage your audio interface or mixer through impedance mismatching, though understanding impedance definitions helps explain why.
Modern equipment features high input impedance designs that tolerate mismatched connections well. The audio equipment implications typically involve tonal changes, signal attenuation, or frequency roll-off rather than hardware damage.
While mismatching affects sound quality and can introduce unwanted artifacts, today’s interfaces are built to handle various impedance scenarios safely.
On a final note
You’ve now got the foundational knowledge to tackle impedance challenges confidently, whether you’re connecting microphones, instruments, or routing signals through complex audio chains. Remember, impedance matching isn’t always about exact numbers—it’s about understanding how your gear interacts, recognizing warning signs when things aren’t right, and making informed decisions that preserve signal quality. Trust your ears, reference these principles when troubleshooting, and you’ll maintain clean, professional audio paths consistently.