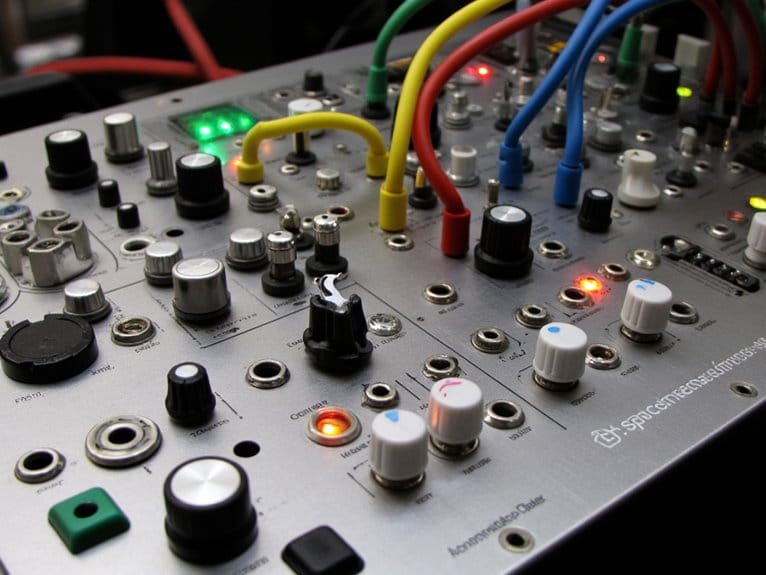
Understanding Guitar Effects Chain Order
Your guitar’s effects chain order dramatically impacts your tone quality, with proper sequencing preventing muddy signals and unwanted noise that plague most setups. Start with fuzz and treble boosters at the front, followed by compressors for dynamic control, then wah and filter effects to shape frequencies before they hit your gain stages. Place overdrive and distortion next, followed by modulation effects like chorus and flanger, finishing with time-based effects and reverb for spatial depth and professional results that’ll transform your sound completely.
We are supported by our audience. When you purchase through links on our site, we may earn an affiliate commission, at no extra cost for you. Learn more.
Notable Insights
- Place dynamic pedals like compressors and volume pedals early in the chain for consistent input levels and gain control.
- Position fuzz, wah, and filter effects at the beginning to capture full dynamic range and maintain tonal integrity.
- Stack overdrive before distortion pedals to act as gain boosters while maintaining clarity and preventing muddy signals.
- Place modulation effects like chorus and flanger after gain stages to add movement without losing core sound character.
- Position time-based effects and reverb last in the chain to add spatial depth and atmospheric enhancement to guitar tone.
Why Pedal Order Matters for Your Guitar Tone
When I first started experimenting with guitar pedals, I made the classic mistake of thinking pedal order didn’t matter much—just plug them in any sequence and let the magic happen.
Boy, was I wrong. Your signal chain dramatically affects tone shaping, and understanding this will transform your sound from muddy mess to polished perfection.
Each pedal you add creates signal coloration that interacts with whatever follows it.
Place a compressor after distortion, and you’ll lose the dynamic responsiveness that makes your playing expressive.
Put reverb before overdrive, and you’ll hear distorted ambience instead of ambient distortion—two completely different beasts. Poor sequencing can also introduce microphonic feedback that creates unwanted noise and ruins your carefully crafted tone.
The order determines whether effects complement or compete with each other, making the difference between professional-sounding tone and amateur hour. Poor gain staging can introduce unwanted noise and distortion that muddy your carefully crafted effects chain. Think of your signal chain like following a recipe where each ingredient must be added at precisely the right moment to achieve the desired flavor. Like audio interfaces that process your signal digitally, each pedal in your chain affects the overall sound quality and character of your guitar tone. Pedals with true bypass switching ensure clean tone integrity when disengaged, preventing signal degradation through your effects chain.
Starting Strong: Fuzz and Treble Boosters at the Front
| Pedal Placement | Tonal Result |
|---|---|
| Fuzz → Treble Booster | Classic rock warmth with controlled boost |
| Treble Booster → Fuzz | Aggressive, over-the-top fuzz saturation |
| Both After Buffers | Thin, less dynamic response |
| Both First in Chain | Pure, rich tonal characteristics preserved |
Placing other pedals before these effects alters input impedance, potentially diminishing their designed response. I’ve learned that buffered pedals, while useful elsewhere, can make fuzz sound disappointingly thin when placed upstream, which explains why many guitarists avoid tuners at the chain’s start. Treble boosters enhance frequency content by adding clarity that helps guitars cut through dense mixes. Modern multi-effects pedals offer various distortion and overdrive options that can simulate these classic effects while providing additional flexibility for tone stacking. Many guitarists prefer true bypass designs to maintain signal clarity and prevent tonal loss when effects are disengaged. For those seeking authentic vintage tones, dedicated fuzz pedals like the JOYO Octave Fuzz deliver 60s British fuzz characteristics that capture the essence of classic rock recordings.
Controlling Dynamics: Compressors and Volume Pedals
After establishing the critical front-end positioning for fuzz and treble boosters, your next major decision involves controlling the dynamic range of your signal, which typically means placing a compressor near the very beginning of your chain.
These compression techniques guarantee loud notes get quieter while quiet notes become louder, creating that coveted even tone that’s essential for funk and country styles.
I’ve found that positioning your volume pedal right after the compressor gives you incredible dynamic control over your entire rig, allowing you to shape input gain before it hits overdrive pedals.
This approach preserves the expressive response of gain-based effects while maintaining consistent output levels, though experimenting with their order can yield surprisingly different tonal characteristics depending on your playing style.
Shaping Frequencies: Wah and Filter Effects
Frequency manipulation through wah and filter effects represents one of the most expressive elements in your signal chain, which is precisely why I position these pedals at the very beginning of my setup to capture the full dynamic range and tonal integrity of your guitar’s raw output.
This placement guarantees your tone modulation remains clean and responsive, allowing subsequent gain stages to react naturally to your frequency emphasis choices. When you sweep that wah pedal, you’re sculpting harmonic content that becomes the foundation for everything downstream, whether that’s compression, overdrive, or modulation effects.
I’ve learned that placing filters early prevents muddying from time-based effects, maintaining clarity while preserving your guitar’s natural character throughout the entire processing chain. The strategic positioning of true bypass circuitry in these effects ensures zero tone loss when the pedals are disengaged, maintaining signal integrity throughout your chain. This foundational approach becomes especially important when stacking with overdrive pedals, as the frequency-shaped signal provides a cleaner foundation for subsequent gain staging. Unlike analog circuits that produce warmer tones, this careful positioning ensures your frequency manipulations maintain their authentic character before reaching any gain or distortion stages.
Adding Grit: Overdrive and Distortion Placement
When you’re ready to add some serious character to your signal chain, understanding where to place your overdrive and distortion pedals becomes essential for achieving the exact grit and saturation you’re after.
I’ve found that your placement strategy directly impacts whether you’ll get smooth, blues-inspired warmth or aggressive, saturated crunch, and honestly, getting this wrong can turn even premium pedals into muddy disappointments.
The signal chain impact goes beyond just tone coloration, affecting everything from your guitar’s dynamic response to how well your distorted signal will play with downstream modulation and time-based effects.
Many guitarists discover that placing a compression pedal before their overdrive helps maintain signal integrity while providing the sustain and clarity needed to keep your distorted tones defined rather than muddy.
Optimal Placement Strategy
Three fundamental principles govern where you’ll want to position your overdrive and distortion pedals in your effects chain, and I’ve learned through countless hours of experimentation that getting this placement right makes the difference between muddy, compressed tone and that perfect gritty sweetness we’re all chasing.
| Before Distortion | During Distortion | After Distortion |
|---|---|---|
| Compressor shapes dynamics | Multiple gain pedals stack | EQ sculpts final tone |
| Tuner maintains accuracy | Frequency responses interact | Modulation adds movement |
| Wah preserves filter sweep | Pedal mixing occurs here | Time effects create space |
First, place dynamics and utility pedals before your gain stages to establish consistent input levels, then stack multiple drive pedals from highest to lowest gain for cleaner saturation, and finally position EQ immediately after distortion for precise tonal sculpting of your saturated signal. High-gain distortion pedals excel at transforming any amplifier into a powerhouse of analog aggression while maintaining clarity across different musical genres. When combining distortion with modulation effects like flangers, placing these after your gain stages allows the flanger to process the already-saturated signal, creating rich and dynamic sound textures that can range from subtle enhancement to dramatic space-like effects. Budget overdrive pedals with aluminum construction provide the durability needed for live performance while offering professional-grade tube warmth that works beautifully in any effects chain position.
Signal Chain Impact
After years of swapping pedals around my pedalboard like puzzle pieces, I’ve discovered that your signal chain’s order doesn’t just affect tone—it fundamentally reshapes how each effect interacts with your guitar’s natural voice, creating either harmonic magic or a muddy mess depending on your placement decisions.
Understanding signal clarity becomes essential when positioning overdrive and distortion pedals. You’ll find that placing overdrive after compressors and wah pedals maintains cleaner articulation, while hard distortion placed later creates aggressive clipping without overwhelming your tone shaping efforts.
When you stack overdrives before distortion, they act as gain boosters, pushing downstream pedals harder for saturated, layered textures. This strategic positioning controls attack characteristics and sustain, transforming your raw pickup signal into refined grit that cuts through any mix. Consider aluminum alloy construction when selecting overdrive and distortion pedals, as this build quality provides the stability and durability needed to withstand frequent adjustments during your signal chain experimentation.
Creating Movement: Modulation Effects Strategy
After establishing your gain foundation with overdrive and distortion, you’ll want to contemplate how modulation effects like chorus, flanger, and phaser can transform your guitar’s static tone into something with genuine movement and character.
While most players default to placing these effects after their gain pedals to capitalize on enhanced harmonic content, I’ve found that experimenting with pre-distortion positioning occasionally yields unexpectedly subtle textures that work well in specific musical contexts.
The key lies in understanding how different modulation types interact with your existing signal chain, since a chorus pedal responds quite differently to a clean signal versus one that’s already been shaped by tube screamer-style overdrive.
Modulation Pedal Types
Movement breathes life into static guitar tones, and I’ve found that modulation pedals serve as the secret weapon for adding that elusive sense of motion and depth that separates amateur recordings from professional productions. Understanding each type’s unique characteristics helps you choose the right tools for your sonic palette.
| Effect Type | Primary Function |
|---|---|
| Tremolo | Volume pulsation with controllable waveforms |
| Chorus | Pitch/delay layering for thickness |
| Flanger | Short delay modulation with feedback |
| Phaser | Phase-shifted frequency sweeping |
| Vibrato | Direct pitch modulation without delay |
Tremolo modulation creates rhythmic pulses, while chorus layering adds shimmer through subtle detuning. Flanger effects produce jet-plane sweeps, phaser dynamics deliver spacey swirls, and vibrato nuances offer pure pitch warbling. UniVibe textures emulate vintage amp tremolo, while ring modulation generates metallic, bell-like tones. Like quality audio equipment that provides a wide frequency range for enhanced sound reproduction, modulation effects expand your tonal spectrum to accommodate different musical genres. For complex layered arrangements, loop pedals work synergistically with modulation effects to capture and build upon these textured sounds during live performance.
Post-Distortion Placement Benefits
While countless guitarists instinctively place their modulation pedals wherever there’s space on their pedalboard, I’ve discovered through years of trial and error that strategic post-distortion placement transforms these effects from subtle colorations into powerful movement generators that breathe life into static distorted tones.
When you position chorus, flanger, or phaser after your distortion pedal, you’re preserving that gritty character while adding sophisticated modulation techniques that create dynamic texture without muddying your core sound.
The distorted signal provides a stable harmonic foundation that these effects can manipulate more predictably, allowing rate and depth parameters to shine through clearly rather than getting compressed by subsequent gain stages, ultimately enabling everything from gentle chorus shimmer to aggressive flanger sweeps.
Similarly, tremolo pedals in this position can create compelling amplitude modulation while maintaining the organic warmth that photoelectric circuits provide, making them particularly effective for adding rhythmic movement to sustained distorted passages. For guitarists exploring broader sonic territories, guitar synth pedals positioned after distortion can create unique combinations that blend traditional distorted tones with synthesizer textures. Proper signal integrity through this effects chain ensures that your modulation effects maintain their clarity and impact without introducing unwanted noise or tonal degradation.
Experimental Pre-Gain Positioning
Breaking from conventional wisdom that treats post-distortion placement as gospel, I’ve found that positioning modulation effects before your gain stages opens up a completely different sonic palette where the clean guitar signal gets modulated first, then pushed through overdrive or fuzz circuits that respond dynamically to those pitch and amplitude variations.
The pre gain advantages become immediately apparent when your UniVibe or chorus receives that higher impedance signal, creating subtle movement that responds to your pick attack intensity rather than simply processing an already-clipped tone.
This modulation clarity allows effects like phasers and flangers to maintain their characteristic sweep without getting buried under harmonic saturation, producing organic textures that evolve naturally with your playing dynamics instead of sounding artificially processed.
Final Touch: Time-Based Effects for Spatial Depth
After you’ve carefully crafted your guitar’s core tone through distortion, modulation, and dynamics, time-based effects serve as the final architectural layer that transforms your sound from a flat, two-dimensional signal into something with genuine spatial presence and depth.
Your delay settings and reverb techniques work together to create atmospheric textures that provide essential spatial awareness, allowing proper tone blending while maintaining pedal compatibility throughout your signal chain. These sonic layering effects establish ambient context that enhances previous effect interactions, ensuring your sound develops authentic sound depth.
I’ve found that placing delays before reverb typically yields the cleanest results, though reversing this order can create interesting reverb artifacts within your delay trails, depending on your preferred aesthetic and the specific atmospheric character you’re pursuing.
Frequently Asked Questions
Can I Use Multiple Distortion Pedals Together in My Effects Chain?
You can definitely use multiple distortion pedals together through distortion pedal combinations. Your multi effects setup can include gain stacking or parallel processing to create richer, more versatile tones than single pedals offer.
How Does Pedal Order Change When Using an Effects Loop?
Effects routing changes your pedal placement considerably. You’ll put gain and dynamic pedals before the amp, while time-based and modulation effects go in the loop for cleaner processing.
Should Noise Gates Go Before or After Distortion Pedals?
You’ll get better noise gate placement before distortion for tone preservation since it reads your clean signal accurately. However, placing it after distortion targets the actual noise source more effectively.
Can I Run Stereo Effects With a Mono Guitar Signal Chain?
You can absolutely run stereo effects with your mono guitar signal. The stereo width gets created during signal processing when pedals split or duplicate your mono input, generating spatial effects downstream from your single guitar source.
On a final note
You’ve got the roadmap now, so trust your ears and experiment with different arrangements until you find what works for your music. Remember, these guidelines aren’t carved in stone—sometimes breaking the rules creates the perfect sound you didn’t know you needed. Start with the basics, build your chain methodically, and don’t be afraid to move things around when inspiration strikes.