Understanding Gain Staging on Mixers
Gain staging on mixers involves managing volume levels throughout your signal path, from microphone preamps to master outputs, ensuring you’ll maintain clean audio without distortion or unwanted noise. You’ll want to set preamp gains so peaks hit around -12dB to -18dB on digital meters, keeping channel faders near unity gain while preserving enough headroom for transients. Proper gain structure prevents clipping, optimizes your signal-to-noise ratio, and creates the foundation for professional-sounding mixes that truly showcase the techniques that separate amateur recordings from studio-quality productions.
We are supported by our audience. When you purchase through links on our site, we may earn an affiliate commission, at no extra cost for you. Learn more.
Notable Insights
- Gain staging manages volume levels throughout the audio signal path to maintain clean signals without distortion or noise.
- Set input preamp gain to keep peaks between -12dB and -18dB while staying above the noise floor.
- Keep channel faders near unity gain (0 dB) to prevent distortion and maintain optimal signal quality.
- Monitor levels constantly using meters to identify imbalances and ensure consistent results across all channels.
- Avoid common mistakes like overdriven preamps and insufficient headroom by maintaining proper signal levels throughout recording.
What Is Gain Staging and Why Does It Matter?
Anyone who’s ever cranked up a microphone only to hear ear-piercing feedback, or struggled with a muddy mix that sounds like it’s buried under a blanket, has encountered the consequences of poor gain staging—though they mightn’t have realized it at the time.
I’ll cut straight to the chase: gain staging is simply managing volume levels at every point in your audio signal path, from your microphone preamp to your final output, ensuring your signal stays clean and strong without distortion.
Now, here’s where the importance emphasis becomes clear—it’s not just about preventing clipping, despite common misconceptions suggesting that’s the only concern.
You’re actually optimizing your signal-to-noise ratio, preserving audio integrity, and maintaining the dynamic range that separates professional-sounding mixes from amateur recordings that lack clarity and punch. While analog gear operates with inherent non-linear characteristics that respond differently at various levels, digital systems maintain linearity throughout the signal chain. Professional systems often require managing total gain that can exceed 100dB, which makes proper staging absolutely critical for maintaining signal quality throughout the entire chain.
The Signal Path: From Microphone to Master Output
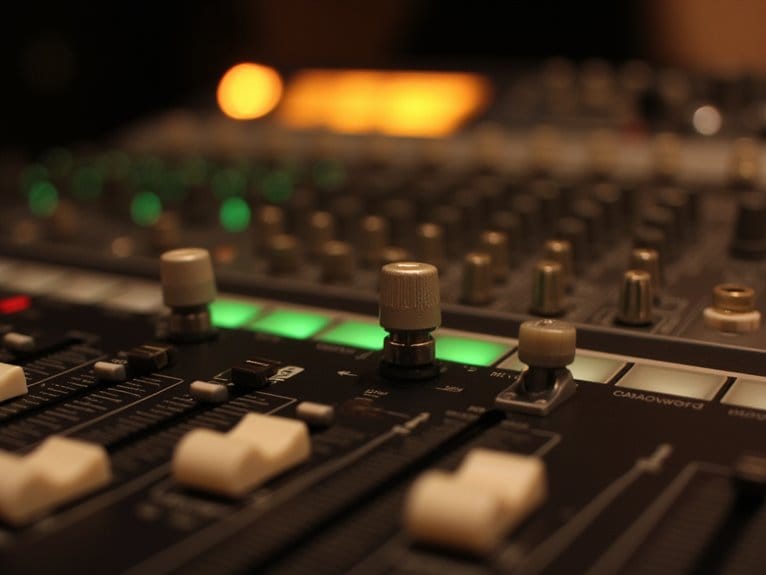
Before I plunge into the technical weave of signal routing, let me paint you a picture of what’s actually happening inside your mixer—because understanding this pathway isn’t just academic knowledge, it’s the difference between fighting your equipment and making it work for you.
Your signal path begins when your microphone captures sound, travels through the preamp with proper gain control, then enters the input section where channel configuration sets your foundation. From there, it flows through EQ adjustments, auxiliary sends for effects processing, and pan controls for stereo positioning, before reaching your main fader and finally the master output stage.
Each step in this signal path directly impacts your audio clarity, making proper mixer settings absolutely critical for professional results. Think of your sound booth like an airport with multiple incoming and outgoing signals that must be efficiently managed to maintain smooth operations.
Understanding the differences between signal levels is crucial since microphones produce much weaker signals than line-level sources, requiring appropriate gain adjustments at each mixer input.
Essential Gain Stages in Your Mixer Setup
When you’re working with any mixer, whether it’s a compact interface or a large console, you’ll encounter two fundamental gain controls that form the backbone of your signal chain: the input preamp section and the channel fader system.
I’ve found that mastering these primary stages, which handle the initial signal capture from your microphones or instruments and the subsequent level management during mixing, determines whether you’ll achieve clean, professional-sounding recordings or struggle with noise and distortion issues. The goal is to maintain peaks a few dB below clipping while keeping your signal above the noise floor. This practice originates from analogue recording where proper level management was critical due to hardware limitations.
These controls work together in a precise workflow where the preamp sets your foundational signal strength, while the channel faders provide the refined balance adjustments that shape your final mix. Modern mixers often include studio-quality preamps that significantly improve signal clarity and reduce unwanted noise in your audio chain. Professional interfaces like the Focusrite Scarlett series feature ultra-low-noise preamps with up to 69 dB gain for optimal signal quality.
Input Preamp Controls
Although many audio engineers focus heavily on EQ and effects, I’ve learned that input preamp controls represent the most critical foundation of your entire mix, determining whether you’ll achieve professional-quality sound or struggle with noise and distortion throughout your signal chain.
Understanding preamp characteristics becomes essential when you’re working with different microphones, since dynamic mics require considerably more gain than condensers, and ribbon mics need even more amplification to reach usable levels.
Setting ideal gain means finding that sweet spot where your signal sits strong enough to avoid noise floor issues, yet conservative enough to prevent clipping during unexpected peaks. Using PFL monitoring during soundcheck allows you to solo individual channels and make precise gain adjustments without affecting the main mix output.
I’ve found that maintaining unity gain with flat tone controls gives you the cleanest possible signal path. Targeting the 0 dB VU sweet spot ensures your analog-modeled plugins perform optimally and respond as intended by their designers.
Channel Fader Management
Channel faders represent the final control point in your gain staging chain, and after years of mixing, I’ve discovered that proper fader management can make the difference between a professional-sounding mix and one that fights you at every turn.
Understanding various fader types, from traditional analog to motorized units, helps you choose equipment that matches your workflow requirements and budget constraints.
I’ve learned that keeping faders near unity gain (0 dB) maintains ideal signal levels while preventing unnecessary gain boosts that introduce distortion.
Modern fader automation systems allow you to record and playback precise level changes, creating dynamic mixes that would be impossible to achieve manually.
Utilizing track groups enables simultaneous control of multiple channel faders, providing efficient level adjustments across related instruments while maintaining their relative balance.
This automation capability, combined with proper metering practices, guarantees consistent results across different mixing sessions. Poor gain staging throughout the audio chain can result in compromised signal quality that even the best fader adjustments cannot fully correct.
Balancing Signal Levels to Avoid Noise and Distortion
Since I’ve spent countless hours watching engineers struggle with muddy, distorted mixes, I can tell you that balancing signal levels isn’t just technical busywork—it’s the foundation that determines whether your audio shines or suffers.
You’ll want to keep your signals high enough to rise above the signal noise floor, typically aiming for peaks around -12dB to -18dB on digital meters, while maintaining sufficient headroom to prevent clipping during unexpected transients.
The key lies in achieving dynamic balance throughout your signal chain—adjusting each channel’s gain so your quietest sounds remain audible without pushing your loudest elements into distortion territory.
Monitor your meters constantly, because that visual feedback helps you catch level imbalances before they compromise your mix’s clarity and punch.
Professional mixing consoles with a dynamic range of at least 102 dB provide the technical foundation necessary for maintaining clean signal paths without introducing unwanted noise artifacts into your recordings.
Effects Processing and Gain Structure Considerations
When you’re incorporating effects processors into your mixer setup, you’ll need to pay careful attention to how these devices interact with your overall gain structure, particularly regarding input level matching and the sequential flow of your processing chain.
I’ve found that even the most expensive reverb or compressor can degrade your audio quality if the signal levels aren’t properly matched at each insertion point, which means you’ll want to verify your effects receive the ideal input level they’re designed to handle.
Your processing chain’s signal flow becomes critical here, as each effect in the sequence can either maintain or alter the gain structure, potentially causing cumulative changes that affect your final output quality.
Effects Input Level Matching
The audio engineer’s holy grail lies in achieving seamless signal flow between your mixer and effects processors, where input level matching becomes the invisible foundation that separates amateur recordings from professional-grade productions.
When you’re working with effects alignment, you’ll need to make certain your mixer’s send levels match your processor’s ideal input range, typically around -18dBFS for digital systems.
Proper plugin calibration prevents that annoying level jump when you engage an effect, maintaining consistent gain structure throughout your mix.
I’ve learned that mismatched levels create a domino effect, where one poorly calibrated processor throws off your entire signal chain.
You’ll want to use reference tracks and A/B comparisons to verify your levels remain consistent before and after processing.
Processing Chain Signal Flow
Signal flow architecture represents the cardiovascular system of your mixing console, where every component either enhances or degrades your audio as it travels from input to output. Understanding this path helps you maintain signal integrity throughout the entire processing chain, from your microphone’s initial capture to the final mix output.
Each stage in your signal flow—preamp, EQ, compressor, and fader—affects gain levels differently, requiring careful attention to prevent cumulative distortion.
I’ve learned that monitoring signal levels at each processing point reveals potential bottlenecks before they compromise your mix quality.
The order matters greatly; placing compression before EQ yields different results than the reverse configuration. Your fader position influences post-fader sends while leaving pre-fader inserts unaffected, giving you flexible control over effect levels and monitoring requirements.
Common Gain Staging Mistakes That Ruin Your Mix
Although I’ve spent countless hours perfecting mixes only to discover fundamental flaws during the mastering stage, I’ve learned that most mixing disasters stem from preventable gain staging errors that occur long before you ever touch an EQ or compressor.
Your biggest enemy isn’t inadequate headroom management or poor preamp selection—it’s inconsistent gain monitoring throughout your signal chain. When you ignore level adjustment protocols, you’ll face distortion prevention nightmares that destroy signal consistency and compromise dynamic control.
I’ve watched engineers struggle with metering accuracy while their mixes suffer from overdriven preamps, insufficient headroom, and failure to monitor levels during critical recording phases, ultimately creating uneven balances that no amount of post-processing can salvage. Professional audio interfaces with low-noise preamps eliminate background hiss and provide the foundation needed for proper gain staging throughout your entire signal chain. Maintaining proper 24-bit/192kHz recording resolution ensures you capture the full dynamic range while preserving signal integrity throughout the mixing process.
Best Practices for Maintaining Clean Audio Throughout Your Signal Chain
Once you’ve got your meters dialed in and understand the difference between your gain and trim controls, the real work begins in maintaining that pristine signal quality from input to output, and I’ll be honest—this is where most mix engineers either shine or completely fall apart.
| Stage | Target Level | Critical Action |
|---|---|---|
| Input | -18 dBFS avg | Use pad switches for hot sources |
| Processing | -12 to -6 dBFS | Monitor green/yellow zones consistently |
| Bus Groups | -6 dBFS peaks | Apply gentle compression, avoid overload |
| Effects Returns | -12 dBFS | Keep reverb/delay signals controlled |
| Master Output | -6 dBFS max | Final limiting, prevent clipping |
Signal degradation happens when you ignore these fundamentals, but ideal calibration of your entire chain—from high-quality cables to proper equipment setup—ensures you’ll maintain that professional sound quality throughout every stage of your mix.
Frequently Asked Questions
Should I Use Different Gain Staging Approaches for Live Versus Studio Mixing?
You’ll definitely need different approaches since live mixing techniques demand real-time flexibility while studio signal flow allows methodical precision.
I’ve found that live situations require more conservative headroom and frequent adjustments due to unpredictable acoustics, whereas studios let you optimize each processing stage systematically.
Your live setup should prioritize preventing feedback and maintaining consistent levels, but studio work benefits from detailed gain structuring throughout your entire signal chain.
Can Digital Mixer Gain Staging Principles Apply to Analog Hardware Setups?
You’ll find that core gain staging principles from digital mixers translate well to analog systems, though I’ve learned the execution requires different approaches.
While you’re still managing signal levels to maximize headroom and minimize noise, analog hardware demands more conservative gains due to cumulative noise buildup.
Plus, you can’t rely on precise digital metering for real-time feedback like modern systems provide.
What’s the Difference Between Unity Gain and Optimal Gain Staging Levels?
Unity gain maintains identical input and output levels across your signal chain, creating consistent reference points that I’ve found useful for standardizing channel levels.
Ideal gain, however, actively adjusts each stage to maximize your signal-to-noise ratio while preventing distortion, requiring more effort but delivering superior audio quality.
You’ll see unity gain keeping faders centered, while ideal gain positions them wherever your signal demands for best performance.
On a final note
You’ve now got the fundamental knowledge to tackle gain staging with confidence, though I’ll admit it takes practice to develop that intuitive feel for ideal levels. Remember, you’re aiming for that sweet spot where your signal stays clean and strong throughout the entire chain, from input to output. Start conservative with your gains, monitor those meters religiously, and don’t be afraid to make small adjustments as you go—your mixes will thank you.

