10 Tips for Better Mixes
You’ll achieve professional-sounding mixes by starting with proper fader balance before adding plugins, cutting problematic frequencies instead of boosting, and rolling off unnecessary low-end around 80-100 Hz to create clarity. Monitor in mono regularly to catch phase issues, take breaks every twenty minutes to combat ear fatigue, and reference professional tracks that match your genre throughout your session. Organize your tracks logically, use strategic ducking to create space between competing elements, and test your mix across multiple playback systems to guarantee translation. These foundational techniques will transform your mixing approach entirely.
We are supported by our audience. When you purchase through links on our site, we may earn an affiliate commission, at no extra cost for you. Learn more.
Notable Insights
- Start with balance using faders and panning before processing, focusing on key elements like vocals and kick drums as anchors.
- Cut frequencies instead of boosting to create more natural, spacious mixes and avoid unwanted artifacts or harshness.
- High-pass filter unnecessary low frequencies on most tracks to enhance clarity and prevent bass frequency competition.
- Take regular listening breaks every twenty minutes and limit focused mixing sessions to four hours to prevent ear fatigue.
- Use professional reference tracks matched to your genre and volume levels to maintain consistent tonal balance throughout mixing.
Start With Balance Before Reaching for Plugins
While most producers instinctively reach for EQ and compression when starting a mix, I’ve found that achieving proper balance through simple fader and pan adjustments alone can deliver roughly 80% of your desired sound quality before you even touch a single plugin.
Your initial balance becomes the foundation that determines whether your mix will succeed or struggle throughout the entire process. I recommend starting with key elements like vocals, kick drums, and main melodies as your anchors, then building everything else around them.
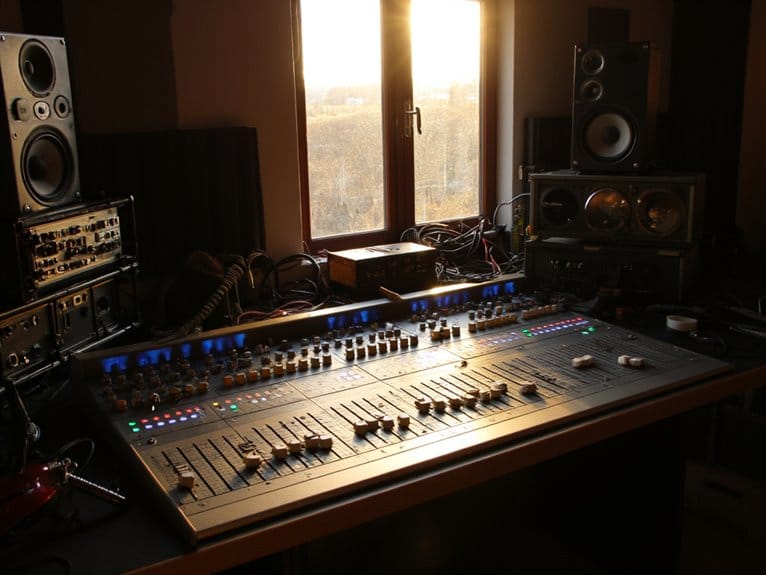
Focus on clarity at low playback volumes first, since this guarantees translation across different listening environments. At lower volumes, it becomes harder to perceive lower frequencies, which can significantly impact how well your bass elements cut through the mix. Strategic panning placement helps prevent frequency build-up by positioning instruments across the stereo field for better separation. Professional mixing boards typically maintain a signal-to-noise ratio exceeding +90 dB to preserve this crucial clarity throughout your signal chain. Quality nearfield monitors with flat frequency response are essential for accurate balance decisions during this critical phase. Save fader automation for the end to maintain dynamic interest without compromising your carefully crafted balance.
Cut Frequencies Instead of Boosting Them
Though it might seem counterintuitive to remove frequencies rather than add them, I’ve discovered that cutting problematic areas creates a more natural, spacious mix than boosting ever could.
Subtractive EQ creates more musical mixes than additive approaches-sometimes less truly becomes more in audio production.
When you cut frequencies instead of boosting, you’re fundamentally creating room for other instruments to breathe, which dramatically improves frequency clarity throughout your entire mix.
I recommend using narrow bandwidth cuts with high Q values to target specific problem frequencies, particularly those resonant tones between 200-800 Hz that cause harshness.
Start with gentle -4 dB cuts and sweep through the midrange to identify boxy or harsh frequencies.
This EQ precision approach maintains your track’s natural tonality while eliminating masking issues, and you’ll find that cutting creates perceived loudness improvements without adding unwanted energy or artifacts. Cutting below 20 Hz tightens the signal and improves compressor performance by removing frequencies that clutter the mix without adding audible benefits. If you’re mixing too quickly by jumping between frequencies rapidly, you may trigger bot detection systems in your DAW’s spectrum analyzer plugins, which could interrupt your workflow.
Create Space With Strategic Ducking Techniques
When I first discovered ducking techniques years ago, I honestly thought they were just trendy electronic music gimmicks, but strategic ducking has become one of my most reliable tools for creating professional-sounding space in dense mixes.
You’ll want to set up sidechain compression on background elements, allowing your kick drum or vocals to automatically lower competing frequencies when they hit. This sidechain creativity prevents that muddy clash where everything fights for the same sonic real estate.
I’ve found that ducking works particularly well with audio layering scenarios, where you’re stacking multiple synths, strings, or ambient textures. The key is subtle threshold settings that create breathing room without obvious pumping effects, unless you’re going for that rhythmic movement intentionally. Different music genre requirements mean you’ll need to adjust your ducking approach depending on whether you’re working with hip-hop, EDM, or acoustic folk tracks. This technique is especially valuable for voiceovers in videos where dialogue clarity takes priority over background music levels.
Roll Off Unnecessary Low Frequencies
Nine out of ten mix engineers I know treat high-pass filtering like it’s optional seasoning, but rolling off unnecessary low frequencies has consistently saved more mixes than any single EQ move in my toolkit.
Strategic rolloff strategy transforms muddy recordings into clear, punchy productions by addressing frequency masking and low end muddiness that plague dense arrangements.
Strategic frequency rolloff eliminates muddy low-end buildup, instantly transforming cluttered arrangements into punchy, professional-sounding productions with enhanced clarity.
Your filter types and slope selection determine how natural versus aggressive your EQ techniques sound in instrument context. Here’s my proven approach:
- Roll vocals around 100 Hz with 18 dB/octave slopes for dynamic control
- High-pass rhythm guitars at 80-100 Hz to clear bass space
- Apply gentle 6 dB/octave filters for subtle proximity effect reduction
- Filter before compression to prevent low-frequency buildup
- Use spectrum analyzers to identify unnecessary sub-bass content
This creates substantial headroom benefits while dramatically improving mix clarity. When working with directional microphones, you can engage the mic’s built-in rolloff and combine it with additional filters for more effective sound management. Properly filtering cymbals, snare drums, and vocals prevents frequency conflicts that can muddy your low end and compromise the overall balance of your mix.
Monitor in Mono to Catch Phase Issues
While most engineers obsess over stereo width and spatial effects, I’ve discovered that regularly collapsing my mix to mono reveals phase problems that can destroy years of careful work in seconds. This mono monitoring approach exposes frequency conflicts and phase cancellation issues that remain invisible during stereo playback, dramatically improving mix clarity and playback compatibility across all systems.
| Monitoring Method | Phase Issue Detection | Mix Transparency |
|---|---|---|
| Stereo Only | Poor signal visibility | Masks tonal problems |
| Mono Check | Excellent detection | Reveals true balance |
| Combined Approach | ideal performance accuracy | Maximum clarity |
I position my speakers centrally at my listening position, then toggle between mono and stereo throughout mixing, ensuring tonal balance translates perfectly whether someone’s using expensive monitors or basic earbuds. In mono, timing differences and tonal variations become the primary way to distinguish simultaneous sounds, making it easier to identify which elements are competing for the same frequency space. Keep low-frequency elements in mono to avoid phase cancellation that can compromise the power and punch of your bass and kick drum.
Use Your Ears, Not Your Eyes
The most expensive monitors, sophisticated analyzers, and colorful frequency displays can’t save you from a fundamentally flawed mix if you’re not actually listening to what’s coming out of your speakers.
Visual tools become dangerous crutches when they override your auditory focus, leading to technically correct but musically lifeless results that sound terrible on real playback systems.
Critical listening skills develop through practice, not staring at meters and graphs that can’t capture the emotional impact of your mix decisions.
- Close your eyes during initial listening sessions to eliminate visual bias
- Practice blind A/B testing when applying processing or effects
- Train your ears to identify problematic frequencies without visual confirmation
- Develop mixing intuition through repeated attentive listening before making adjustments
- Prioritize balance perception and sound priority over impressive-looking plugin settings
Take Regular Breaks to Combat Ear Fatigue
Even with perfectly trained ears that can identify every frequency imbalance and dynamic inconsistency, you’ll inevitably hit a wall where your auditory perception becomes compromised through extended listening sessions.
I’ve learned that implementing strategic listening breaks prevents the Fletcher-Munson curves from flattening your frequency perception, which typically occurs when you’re monitoring at high volumes for extended periods.
The adapted 20-20-20 rule works effectively: every twenty minutes of active listening, pause for twenty seconds of audio rest to reset your auditory system. This approach prevents the common trap of overcompensating frequency adjustments, particularly boosting highs or lows unnecessarily when fatigue sets in.
Limit focused mixing sessions to roughly four hours at 83 dBA, incorporating reflective pauses between playback bursts.
Reference Professional Tracks Throughout Your Session
Once you’ve established a fatigue-resistant listening routine, incorporating professional reference tracks becomes your sonic compass for steering mix decisions with confidence and precision.
Smart reference track selection involves choosing commercially polished songs that match your genre, instrumentation, and vocal style, while avoiding tracks with extreme production quirks that might skew your judgment.
Effective tonal balance evaluation requires systematic comparison between your mix and references:
- Match volumes between your mix and references to eliminate loudness bias affecting decisions
- Switch frequently between tracks to identify inconsistencies in frequency balance and stereo imaging
- Focus on specific frequency regions where your mix deviates from professional standards
- Use spectrum analyzers and tonal balance plugins to visualize differences with scientific precision
- Listen on identical monitoring systems to maintain consistent comparison standards throughout sessions
Organize Your Session Before You Start Mixing
Smart session organization transforms chaotic mixing disasters into streamlined creative workflows, where every track, marker, and file sits exactly where you’d expect to find it during those inevitable late-night deadline crunches.
Proper session organization starts with track naming and grouping instruments logically, using color coding to visually separate sections. I always arrange drums at the top, followed by bass, guitars, and vocals, creating folder tracks for collective processing while maintaining individual control.
| Organization Element | Best Practice | Benefit |
|---|---|---|
| Track Naming | Use descriptive names like “Lead_Vocal_Verse” | Quick identification |
| Marker Setup | Label sections V1, Chorus, Bridge | Fast navigation |
| Gain Staging | Keep peaks around -6 dBFS | Clean headroom |
Your session map should include clear markers for song sections, while maintaining proper file structure and audio alignment. Don’t forget version saving-your future self will thank you when disaster strikes.
Test Your Mix on Multiple Playback Systems
Why does your mix sound incredible on your studio monitors but completely fall apart the moment you play it through your car speakers or earbuds? This frustrating phenomenon highlights why testing across multiple playback environments is absolutely essential for achieving proper mix translation.
Your studio monitors provide an excellent starting point, but they’re just that-a starting point. Real-world listening happens everywhere except your control room, so you need to venture beyond those pristine conditions to truly understand how your mix performs.
Essential playback systems for thorough testing include:
- Consumer earbuds and phone speakers for everyday listening scenarios
- Car audio systems revealing low-end clarity issues
- Small Bluetooth speakers exposing frequency imbalances
- Headphones providing stereo imaging insights
- Club PA systems testing high-volume translation
On a final note
You’ve got the fundamental tools now, but remember that mixing isn’t about perfection-it’s about serving the song’s emotional core while maintaining technical clarity. I’ve learned that these techniques work best when you’re not overthinking every decision, so trust your instincts alongside your meters. Your mixes will improve dramatically once you start treating these principles as starting points rather than rigid rules to follow religiously.


