Synthesizer Sequencing and Pattern Creation Basics
You’ll master synthesizer sequencing by understanding that step-based programming uses a grid system where each step contains precise MIDI data for pitch, velocity, and timing. This approach lets you program complex polyrhythms and melodic patterns that’d be nearly impossible to play manually, while piano roll editors facilitate intricate melodic arrangements with real-time recording capabilities. Modern sequencers integrate seamlessly with MIDI systems, enabling pattern layering and tempo automation that keeps all elements synchronized during live performances, and continuing will reveal advanced polyphonic techniques.
We are supported by our audience. When you purchase through links on our site, we may earn an affiliate commission, at no extra cost for you. Learn more.
Notable Insights
- Step-based programming uses grid systems for precise beat control, with each step containing pitch, velocity, and duration data.
- Piano roll editors facilitate complex melodic arrangements while step sequencers excel at programming intricate drum patterns.
- BPM settings determine playback speed and rhythmic flexibility, with tempo automation enhancing live performance capabilities.
- Layer patterns progressively while automating parameter changes to create dynamic textures and evolving timbres during production.
- External clock synchronization is essential for multi-device setups, with master devices controlling tempo for accurate timing.
Understanding Step-Based Music Programming
When you’re first diving into synthesizer sequencing, step-based programming offers the most intuitive approach to creating electronic music patterns, breaking down complex rhythms and melodies into manageable, bite-sized chunks that you can control with precision.
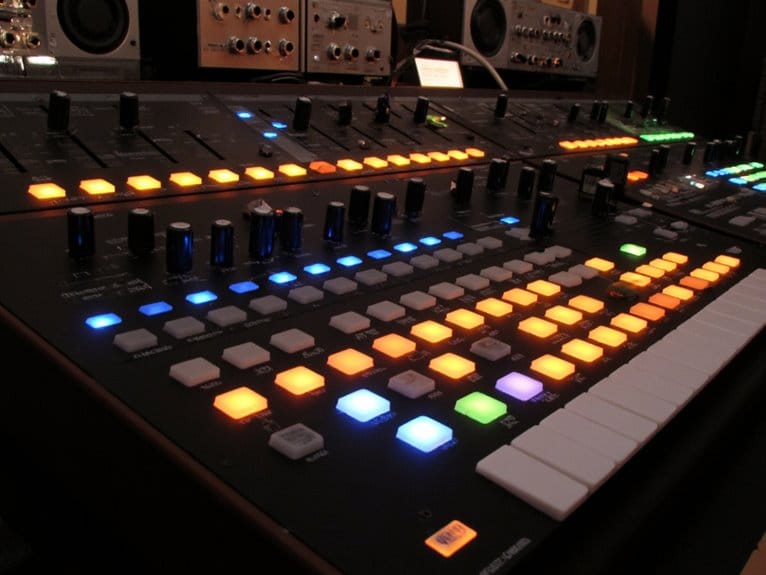
These step sequencing principles operate through a grid system where each square represents a specific point in time, allowing you to activate or deactivate individual beats with simple clicks or button presses.
I’ve found that mastering these programming techniques starts with understanding how steps contain essential musical data like pitch, velocity, and duration, while step counters manage playback and looping functions.
You’ll discover that this methodical approach transforms complex musical ideas into clear, visual representations that make editing and experimentation remarkably straightforward. Experimenting with odd step rates creates unique sound placement and allows for more complex polyrhythmic structures in your patterns. Modern sequencers can integrate with MIDI input systems to enable real-time recording and editing of your patterns as you perform.
Building Melodic and Harmonic Sequences
Once you’ve grasped the fundamentals of step programming, building melodic and harmonic sequences becomes an exercise in layering musical elements that work together to create compelling patterns, though I’ll admit the shift from single-note patterns to full harmonic structures can feel overwhelming at first.
Start with sequence layering using auxiliary outputs from your sequencer to control filters or additional oscillators, keeping your main 1V/oct pitch unchanged while creating harmonic complexity.
Use auxiliary sequencer outputs to drive filters and oscillators while maintaining your primary pitch CV for effortless harmonic layering.
Focus on harmonic progression by organizing bass lines around the circle of fifths, alternating between fourth and fifth intervals for natural movement. Modern generative AI models can analyze these bass track patterns to enhance your compositional workflow through machine learning assistance.
Add melodic embellishments systematically over your foundational sequences, and experiment with interval variation through real sequences that preserve exact intervals versus tonal sequences that maintain key consistency. Budget synthesizers under $500 typically offer 4-voice polyphony which provides sufficient harmonic capability for rich chord progressions without overwhelming complexity. Hardware synthesizers with built-in sequencers provide immediate hands-on control for creating complex polyrhythmic patterns without external equipment.
For routing your synthesizer output, affordable audio interfaces under $200 can capture professional-quality recordings while maintaining the full dynamic range of your sequences.
Tempo Control and Clock Synchronization
After you’ve crafted compelling melodic sequences, you’ll need to master tempo control and synchronization to keep everything locked in perfect rhythmic alignment with your other gear.
Your sequencer’s BPM settings determine playback speed, but external clock synchronization becomes essential when you’re connecting multiple synthesizers, drum machines, or DAW software that must march to the same rhythmic drummer.
I’ve found that visual metronomes and tempo displays serve as your timing lifeline, especially during live performances where even slight tempo drift can transform tight arrangements into rhythmic chaos.
BPM and Playback Speed
Although I’ve spent countless hours tweaking synthesizer parameters, I’ll admit that understanding BPM and playback speed control initially felt like learning a foreign language.
But it’s actually one of the most fundamental concepts you’ll need to master for effective sequencing. Your BPM setting directly controls how fast your sequences play, with higher values speeding everything up and lower values slowing things down.
What’s particularly useful is how tempo modulation affects all time-dependent elements simultaneously, keeping your LFOs, arpeggiators, and effects perfectly synchronized.
This rhythmic flexibility becomes essential when you’re layering multiple patterns or performing live, since you can automate tempo changes or sync modulation rates to specific note divisions like eighth or sixteenth notes.
External Clock Synchronization
When you’re working with multiple synthesizers or connecting your synth to a DAW, external clock synchronization becomes the backbone that keeps everything rhythmically locked together.
Though I’ve learned through plenty of frustrating jam sessions that getting it right requires understanding a few key technical details. Your DAW typically sends 24 pulses per quarter note over MIDI, but clock processing algorithms vary between synth models, creating potential sync discrepancies.
Some devices experience brief delays during initial sync as they calculate tempo from pulse intervals, while MIDI latency through USB connections can compound timing issues. Without proper external clock setup, you’ll notice tempo drift that destroys tight synchronization, especially during longer performances where even millisecond differences accumulate into noticeable timing problems.
- Enable MIDI clock output explicitly in your DAW settings, as most software doesn’t transmit clock signals by default
- Configure your synthesizer’s external sync settings to receive clock from the correct input source (USB versus 5-pin DIN)
- Account for different pulse rates between devices to prevent tempo scaling issues that cause rhythmic chaos
- Consider hardware interface quality, as USB MIDI generally provides tighter synchronization than traditional MIDI DIN connections
- Set one master device to control tempo while slave devices follow external clock to eliminate competing timing sources
Metronome and Visual Alignment
Building on external synchronization principles, your metronome becomes the rhythmic foundation that transforms chaotic timing into precise musical coordination. Though I’ll admit that even experienced producers sometimes overlook how visual alignment features can profoundly improve sequencing accuracy.
Effective metronome use starts with setting appropriate BPM values, whether you’re tapping tempo manually or typing exact numbers for precision control. Visual indicators like beat counters, flashing displays, and progress bars provide essential feedback that complements audible clicks, especially when working with complex time signatures or compound meters.
I’ve found that combining both audio and visual cues considerably improves timing accuracy during pattern creation. The key is choosing metronome settings that match your musical style while maintaining consistent tempo throughout your sequencing workflow.
Programming Workflow and Real-Time Editing
Since I’ve spent countless hours hunched over synthesizers tweaking parameters until my eyes blur, I can tell you that developing an efficient programming workflow isn’t just about knowing which knobs to turn—it’s about establishing a systematic approach that balances creative exploration with technical precision.
Your workflow optimization should start with initializing patches to basic states before adding complexity through oscillators, filters, and envelopes. Real time modulation becomes intuitive when you’re manipulating hardware controllers with direct parameter access, allowing immediate sonic feedback that software automation can’t match.
- Begin each session by recreating familiar patches to warm up your ear-to-hand coordination
- Use consistent naming conventions for patches and patterns to streamline future recall
- Layer patterns progressively while automating parameter changes for evolving textures
- Record parameter movements into automation lanes during live performance sessions
- Save workflow states frequently to preserve productive programming breakthroughs
For extended studio sessions lasting several hours, ensure your monitoring setup includes speakers with sufficient power output to maintain clarity and prevent ear fatigue during critical sound design phases.
Polyphonic Capabilities and Advanced Controls
Four distinct levels of polyphony have shaped synthesizer evolution, and understanding these differences will transform how you approach complex musical arrangements and layered textures. Monophonic synths handle single notes, while duophonic models manage two simultaneous voices, though they typically share filters or envelopes. Paraphonic synthesizers allow multiple notes but lack independent voice articulation since they share amplifier stages.
| Polyphony Type | Voice Count | Independent Envelopes |
|---|---|---|
| Monophonic | 1 | Single shared |
| Duophonic | 2 | Often shared |
| Paraphonic | Multiple | Shared filter/amp |
| True Polyphonic | Multiple | Per voice |
| Multitimbral | Multiple | Per voice/timbre |
True polyphony provides complete independence through dedicated oscillators, filters, and envelopes per voice. Modern MIDI interfaces enable sophisticated voice allocation algorithms that manage note priority and stealing, while advanced controls facilitate dynamic expression through automated parameter changes per voice during sequencing.
Practical Applications in Music Production
With your understanding of polyphonic capabilities now solid, I’ll show you how these technical foundations translate into real-world music production scenarios where sequencers become your primary creative tools.
Different sequencer types excel in specific production contexts, whether you’re programming intricate drum patterns using step sequencers or crafting complex melodies through piano roll editors.
Sound layering becomes intuitive when you’re looping bassline sequences while simultaneously building additional arrangement elements, freeing your hands to tweak synthesis parameters in real-time.
The automation features inherent in modern sequencers let you create evolving timbres that would be impossible to achieve manually, while integrated effects processing shapes individual drum hits or entire patterns without disrupting your creative flow.
Professional sequencing workflows require high-quality audio interfaces to maintain the integrity of your synthesized patterns during recording and playback sessions.
- Step sequencers accelerate drum pattern experimentation through visual grid interfaces
- Piano roll editors provide precise MIDI editing for complex melodic arrangements
- Built-in synthesizer sequencers enable seamless pattern assignment across musical phrases
- Automated parameter modulation creates dynamic textures synchronized to note sequences
- Real-time sound design integration maintains creative momentum during live performance tweaking
Frequently Asked Questions
Can I Import MIDI Files Into Step Sequencers for Pattern Conversion?
Yes, you can import MIDI files into most modern step sequencers for pattern conversion. MIDI file conversion works through step sequencer compatibility features that automatically translate your imported sequences into editable step patterns.
What’s the Difference Between Sequencers and Drum Machines in Terms of Functionality?
Different sequencer types control external gear without producing sound, while drum machines combine internal sound generation with dedicated percussion sequencing. You’ll find drum machine features focus on rhythm patterns, whereas sequencers offer broader multi-instrument arrangement capabilities.
Can Step Sequencers Trigger External Gear Like Samplers and Effect Pedals?
You can trigger external gear through step sequencers using trigger outputs and MIDI synchronization. Check trigger compatibility between devices, explore routing options for multiple connections, and guarantee proper voltage levels for reliable control.
On a final note
You’ve now got the essential foundation for synthesizer sequencing, from step programming basics to advanced polyphonic techniques. While I can’t promise you’ll become the next electronic music pioneer overnight, mastering these fundamentals will greatly expand your creative possibilities. Start with simple patterns, experiment with timing variations, and don’t hesitate to break conventional rules—that’s where the most interesting musical discoveries happen.

