Studio Acoustics: Treatment, Placement, and Correction
You’ll need to strategically place bass traps in room corners to eliminate low-frequency standing waves, install 2-inch thick acoustic panels at first reflection points for mid-range clarity, and position diffuser panels behind your monitors to maintain room liveliness. Target 25-50% wall coverage while avoiding over-dampening, then use measurement software like Room EQ Wizard with a calibrated microphone to fine-tune your setup through digital correction. Understanding the nuanced interplay between these elements reveals optimization techniques that transform amateur-sounding mixes into professional productions.
We are supported by our audience. When you purchase through links on our site, we may earn an affiliate commission, at no extra cost for you. Learn more.
Notable Insights
- Bass traps in room corners eliminate low-frequency standing waves and modal ringing for controlled, professional sound quality.
- Acoustic panels at first reflection points absorb mid and high frequencies while maintaining natural room liveliness.
- Ceiling clouds above listening positions improve stereo imaging and mix clarity by controlling overhead reflections.
- 25-50% wall coverage with staggered panel placement prevents parallel surface reinforcement and sound energy buildup.
- Room measurement software like REW with calibrated microphones enables precise acoustic analysis and treatment optimization.
Understanding the Goals of Acoustic Treatment
When I first started working in recording studios, I quickly learned that even the most expensive microphones and preamps can’t save a recording made in an acoustically untreated room.
This is because the fundamental goal of acoustic treatment isn’t just about making things quieter-it’s about creating a controlled sonic environment where you can trust what you’re hearing.
Your primary objectives should focus on eliminating standing waves that muddy your frequency response, reducing modal ringing in smaller rooms, and achieving proper reflection control to prevent sound energy from bouncing unpredictably off hard surfaces.
Sound clarity becomes your north star, guiding decisions about absorption placement and diffusion strategies, ultimately ensuring your recordings translate well across different playback systems while maintaining professional-grade quality standards.
Bass Traps for Low-Frequency Control
The thick, wedge-shaped absorbers lurking in studio corners might look like oversized pieces of charcoal, but they’re actually your secret weapon against the boomy, muddy bass that plagues most untreated rooms.
Those unassuming charcoal-colored wedges hiding in your studio corners are silently waging war against the bass frequencies ruining your mixes.
These specialized panels target standing waves that regular acoustic foam simply can’t handle, requiring dense fiberglass or mineral wool construction to absorb those lengthy low-frequency wavelengths effectively.
Bass trap effectiveness depends heavily on strategic placement at room boundaries where two or three surfaces meet, since bass energy naturally accumulates in these intersections.
When properly positioned, they’ll dramatically improve your low frequency dynamics by eliminating those annoying peaks and nulls that make your mixes sound completely different on other systems, ultimately delivering the tight, controlled bass response that separates professional studios from bedroom setups. Professional mixers often incorporate built-in DSP effects to further enhance low-frequency management during the recording and mixing process.
Just as windscreens protect microphones from low-frequency wind interference below 500Hz, bass traps work to eliminate problematic low-frequency accumulation that can muddy your recordings at the source.
Acoustic Panels for Mid and High Frequency Absorption
After tackling those stubborn low frequencies with bass traps, you’ll need to address the mid and high-frequency reflections that can muddy your mix and create flutter echoes throughout your studio space.
The material you choose for these panels, whether it’s open-cell foam, mineral wool, or fiberglass, directly impacts how effectively they’ll absorb frequencies from 125 Hz up to several kHz, with 2-inch thick panels offering the sweet spot between performance and cost-effectiveness.
Your placement strategy becomes essential here, since positioning these panels at first reflection points and ear level will dramatically improve clarity, while understanding their frequency response characteristics helps you avoid over-dampening that can make your room sound lifeless and unnatural.
Panel Material Options
Selection of the right acoustic panel material represents one of the most vital decisions you’ll make in your studio design, as each material type brings distinct absorption characteristics, installation requirements, and performance trade-offs that directly impact your room’s sonic signature.
| Material Type | NRC Rating | Key Advantage |
|---|---|---|
| Fiberglass | 0.85-1.05 | Industry standard reliability |
| Mineral Wool | 0.90-1.15 | Superior absorption performance |
| Recycled Cotton | 0.80-1.00 | Eco-friendly, safe installation |
Understanding material effectiveness becomes significant when comparing panel configurations, as fiberglass offers proven broadband performance while mineral wool often outperforms it in thicker applications. Recycled cotton provides sustainable options with Class A fire ratings, and foam panels deliver affordable solutions despite lower performance metrics. Advanced nanofiber materials maximize absorption in ultra-thin profiles, perfect for space-constrained installations. When selecting materials for quiet recording environments, consider that proper acoustic treatment works hand-in-hand with low self-noise microphones to achieve the cleanest possible recordings. Just as microphone preamps require careful gain staging to achieve optimal -20 dBFS levels for the best signal-to-noise ratios, acoustic panels must be strategically selected and positioned to maintain proper room dynamics without over-dampening the space.
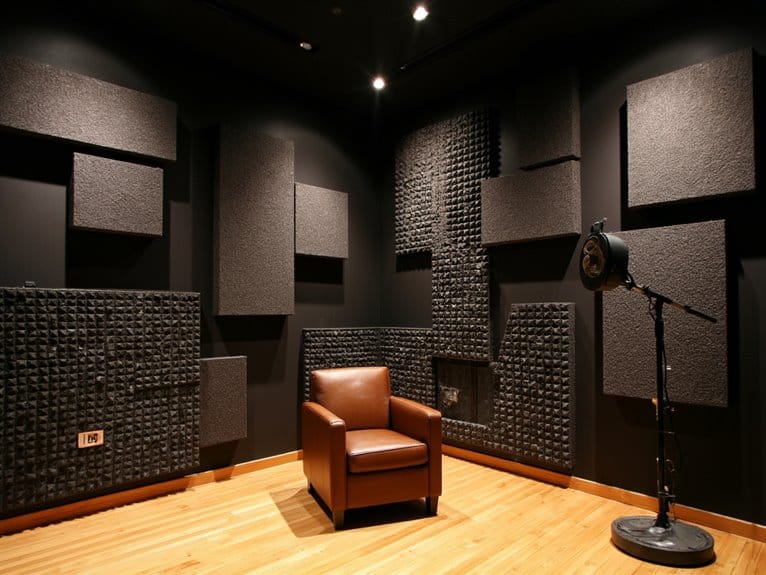
Strategic Placement Techniques
Having selected your panel materials, proper placement becomes the determining factor between a studio that sounds professional and one that leaves you scratching your head wondering why your mixes don’t translate.
I’ve seen too many engineers fall for acoustic myths about covering every surface with panels, ignoring the mirror technique that actually identifies first reflection points where treatment matters most.
Start by placing a mirror on your side walls at ear level-if you see your speakers’ reflection from your listening position, that’s where panels belong.
Don’t sacrifice all your room’s natural character for panel aesthetics; strategic placement at key reflection points on walls and ceiling creates clarity without killing the space’s vibe, ensuring your acoustic treatment enhances rather than overwhelms your studio environment.
Frequency Response Control
When you’re dealing with the frequencies that’ll make or break your mix-roughly 500 Hz to 20 kHz-understanding how acoustic panels absorb sound becomes crucial for achieving professional results.
Your frequency response depends heavily on material choice, with fabric-wrapped panels delivering NRC ratings between 0.7 and 1.0 for superior sound absorption across these critical ranges.
I’ve found that foam panels work excellently for budget-conscious setups, while hybrid materials combining wood and foam achieve the best absorption coefficients.
Thickness matters more than you’d expect-5cm panels typically balance cost with performance, though thicker options extend effectiveness toward lower mid frequencies.
Diffuser Panels for Sound Scattering and Room Liveliness

The magic of diffuser panels lies in their ability to scatter sound waves in multiple directions, creating a sense of spaciousness and liveliness that transforms sterile rooms into acoustically engaging environments. You’ll find that effective diffuser design strategies incorporate mathematically calculated surface patterns with varying depths, producing both spatial and temporal diffusion that enhances your room’s overall sound quality.
| Diffuser Type | Best Application | Frequency Range |
|---|---|---|
| Quadratic Residue | Studio walls | Mid-high frequencies |
| Skyline Diffusers | Ceiling mounting | Broad spectrum |
| Hybrid Panels | Small rooms | Full range |
When evaluating diffusion effectiveness, you’ll want to focus on primary reflection points behind your monitors and sidewalls, where these panels scatter reflections that would otherwise cause problematic comb filtering while maintaining the natural ambience your recordings need.
Ceiling Clouds and Overhead Reflection Management
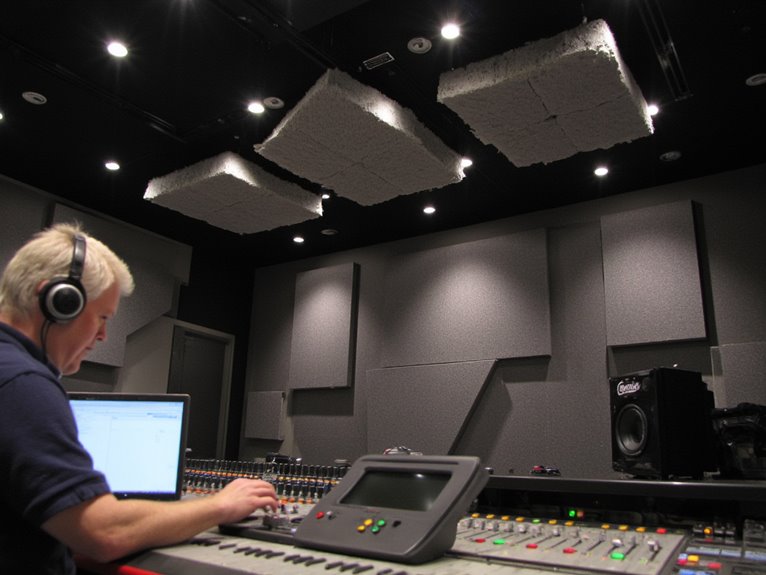
While diffusers scatter sound to create liveliness, ceiling clouds take the opposite approach by absorbing overhead reflections that can muddy your mix and shrink your listening sweet spot.
These suspended panels, typically constructed with glass wool or rock wool cores, target problematic ceiling reflections that cause resonant peaks and flutter echoes between your floor and ceiling surfaces.
The ceiling cloud benefits become apparent when you position them directly above your mixing console, where they’ll absorb frequencies starting around 100 Hz while improving stereo imaging clarity.
Smart reflection management strategies involve suspending these 6-inch-thick panels with an air gap behind them, which enhances low-frequency absorption through resonance effects.
Helmholtz Resonators for Targeted Frequency Control
Unlike broadband absorbers that tackle wide frequency ranges, Helmholtz resonators operate as surgical precision tools, targeting specific problematic frequencies that can turn your carefully crafted mix into a muddy mess.
These clever devices use a cavity-and-neck design where air oscillates at predetermined frequencies, creating targeted absorption that leaves the rest of your frequency spectrum untouched.
When considering Helmholtz applications for your studio, focus on these critical implementation strategies:
- Corner placement – Install resonators where low-frequency buildup is most pronounced, typically room boundaries and corners.
- Multiple units – Deploy several resonators tuned to different frequencies for thorough problematic frequency coverage.
- Custom tuning – Calculate resonant frequency using cavity volume and neck dimensions to match your room’s specific issues.
Resonator design flexibility allows you to address frequencies that foam panels simply can’t handle effectively.
Strategic Placement of Acoustic Treatment Elements
Once you’ve installed your Helmholtz resonators and broadband absorbers, the real magic happens when you place these acoustic treatment elements strategically throughout your studio space, transforming chaotic reflections into controlled sound that serves your mix rather than fighting against it.
| Treatment Location | Coverage Percentage |
|---|---|
| Trihedral corners | 100% priority |
| Wall reflection points | 25-50% coverage |
| Ceiling above listening | Target reflections only |
| Floor at listening position | Small area rugs |
| Dihedral corners | Secondary treatment |
Your reflection symmetry becomes critical here, especially when targeting those primary reflection points using the mirror method. I’ve found that corner solutions require your highest attention-trihedral corners intensify bass buildup considerably, while dihedral corners collect secondary resonances. Maintain symmetrical placement patterns, stagger panels on opposite walls to prevent parallel reinforcement, and always integrate treatment planning with your speaker positioning for ideal phase coherence.
Material Selection and Quality Considerations
When you’re selecting acoustic materials for your studio, the quality gap between professional-grade products and budget alternatives can dramatically affect your sound treatment’s effectiveness, particularly in how well different materials absorb specific frequency ranges.
I’ve learned that material density plays a vital role in performance, with denser fiberglass and mineral wool products like Owens Corning 705 absorbing low frequencies far more effectively than lightweight foam, though the price difference can be substantial.
Your choice between professional materials that cost considerably more versus budget options that might require creative workarounds will ultimately determine whether you achieve truly balanced acoustics or settle for partial frequency control.
Professional Vs Budget Materials
While I’ve spent countless hours testing different acoustic materials in studios ranging from bedroom setups to professional facilities, the choice between professional and budget acoustic treatments remains one of the most critical decisions you’ll make for your recording space.
Understanding acoustic terminology and proper absorption techniques becomes essential when evaluating your options, as the performance gap between professional panels and budget foam is genuinely significant.
Here’s what separates professional materials from budget alternatives:
- Frequency Response – Professional panels absorb broadband frequencies effectively, while budget foam primarily targets mid-to-high frequencies, leaving problematic bass reflections untreated.
- Longevity – Dense professional materials maintain consistent performance for years, whereas cheaper foams degrade quickly and lose effectiveness.
- Installation Efficiency – Professional panels come ready-to-mount with optimized placement strategies, while budget solutions require extensive DIY work and larger coverage areas.
Density and Performance Impact
Professional materials set the foundation, but material density becomes the make-or-break factor that determines whether your acoustic treatment actually performs as intended or simply decorates your walls. I’ve learned that density material selection requires careful balance, as overly dense panels can actually hurt low-frequency absorption while lighter materials may provide inadequate sound blocking.
| Material Type | Density Impact |
|---|---|
| High-density fabrics | Block mid-high frequencies effectively |
| Low-density particle board | Superior sound absorption |
| Dense construction materials | Reflect rather than absorb |
| Layered assemblies | Optimize broad frequency range |
Performance optimization demands understanding that more mass doesn’t always equal better acoustics. You’ll achieve the best results by combining high-density barriers with porous absorbers, creating assemblies that handle both sound transmission and absorption across your studio’s frequency spectrum.
DIY Solutions Vs Professional Acoustic Products
How do you decide between rolling up your sleeves for a DIY acoustic treatment project or investing in professional-grade products that promise studio-quality results?
I’ve found that DIY paneling options using rockwool and wood frames can match store-bought absorption, particularly for mid and high frequencies, while costing considerably less.
However, professional products offer consistent density and eliminate the trial-and-error headaches that come with homemade soundproofing techniques.
Consider these key factors when choosing your approach:
- Budget constraints – DIY solutions cost a fraction of professional panels while delivering substantial improvements.
- Skill level – Professional rockwool panels require greater DIY expertise than simple acoustic foam installations.
- Time investment – Ready-made products install immediately, while DIY projects demand construction time but allow incremental adjustments.
Proper equipment placement also requires stable positioning, which is why quality mic stands with weighted bases and steel reinforcement become essential for maintaining consistent recording conditions during acoustic testing.
Room Correction Software and Measurement Tools
When you’ve exhausted physical acoustic treatments or can’t modify your space further, room correction software becomes your digital equalizer, using sophisticated algorithms to compensate for frequency imbalances, phase issues, and temporal distortions that plague even well-treated rooms.
You’ll need to understand three critical components: proper measurement microphone placement and setup procedures, which software options best suit your budget and correction needs, and the calibration techniques that transform raw acoustic data into usable correction profiles.
I’ve found that mastering these fundamentals separates effective room correction from expensive digital band-aids that create more problems than they solve.
Measurement Microphone Setup Basics
Before diving into the sophisticated world of room correction software and digital signal processing, I’ve learned that establishing proper measurement microphone setup forms the foundation of any meaningful acoustic analysis.
Understanding measurement microphone types and implementing proper calibration techniques will dramatically improve your results, though I’ll admit my first attempts were laughably inaccurate due to poor positioning.
Your setup requires three critical components:
- Calibrated omnidirectional measurement microphone positioned vertically at ear height, not pointed toward speakers
- Audio interface with proper gain staging maintaining around -18 dBFS for ideal dynamic range
- Stable tripod placement at your primary listening position to eliminate handling noise
Multiple measurement runs at strategic locations, combined with consistent room conditions and single-speaker test signals, guarantee repeatable data that actually reflects your acoustic environment.
Room Analysis Software Options
Once you’ve mastered microphone positioning and calibration, selecting the right room analysis software becomes your next critical decision, and I’ll be honest-the sheer number of options can feel overwhelming at first. When evaluating software reviews, you’ll find packages ranging from free solutions like Room EQ Wizard (REW) to thorough systems that include hardware bundles.
| Software | Cost | Best For |
|---|---|---|
| REW | Free | Advanced users wanting detailed analysis |
| XTZ Room Analyzer | Paid | Beginners needing simplicity |
| Sound iD | Subscription | User-friendly room simulation |
| KRK Ergo | One-time | Complete correction systems |
REW offers extensive features including frequency response analysis, spectral decay plots, and automatic parametric EQ adjustments, though it requires separate hardware purchases and has a steeper learning curve than simpler alternatives.
Calibration and Fine-Tuning Methods
While selecting capable room analysis software sets the foundation, the real transformation happens during calibration and fine-tuning-and I’ll admit, this process requires more patience than I initially expected when starting my own studio journey.
Effective calibration techniques begin with capturing accurate measurements using flat-response microphones, which cost several hundred dollars but deliver essential data about frequency response, room modes, and decay times. Your software then processes impulse response measurements, applying correction algorithms to flatten frequency response and reduce problematic resonances throughout your listening area.
Essential fine tuning methods include:
- Physical optimization first – Address acoustic treatment before relying on DSP correction
- Multiple position measurements – Capture extensive room characteristics from various listening positions
- Validation testing – Confirm improvements using reference audio after implementing corrections
During this calibration process, monitor in mono to identify phase conflicts that can emerge between your corrected speakers and any reflective surfaces that weren’t fully addressed by acoustic treatment.
Acoustic Impact on Studio Workflow and Productivity
How greatly can acoustic conditions transform your studio’s productivity and creative output? Poor acoustics force your brain to work harder, filtering unwanted noise while reducing mental resources for detailed tasks, which I’ve witnessed firsthand in countless untreated rooms.
When noise elevates cortisol levels, your memory retention and problem-solving abilities suffer, creating a productivity nightmare that affects everything from mixing accuracy to creative decision-making.
Implementing sound masking techniques and proper acoustic treatment delivers immediate cognitive benefits, reducing perceived stress by approximately 27% while boosting concentration up to 48%.
Strategic placement of absorptive materials prevents sound bleed between workspace zones, ensuring accurate monitoring environments that minimize costly rework and maintain workflow continuity throughout extended sessions.
Frequently Asked Questions
How Much Should I Budget for Professional Acoustic Treatment in a Home Studio?
You’ll want to budget between $1,000 and $10,000 for professional acoustic treatment, depending on your room’s size and complexity.
Your budget breakdown should prioritize essential treatment materials like acoustic panels for mid-high frequencies, bass traps for corners, and ceiling treatments.
I’ve found that smaller rooms need less investment, while larger spaces with irregular shapes require more extensive solutions and professional installation to achieve peak sound quality.
Can Acoustic Treatment Help With Noise Isolation From Neighbors or Outside Sounds?
Acoustic panels won’t greatly help with neighbor noise since they’re designed to absorb sound inside your room, not block transmission through walls.
You’ll need proper soundproof techniques like adding mass to walls, decoupling assemblies, or installing dedicated noise barriers for external isolation.
I’ve found that combining both approaches works best-soundproofing blocks outside noise while acoustic treatment handles internal reflections.
How Do I Measure My Room’s Acoustics Before Installing Any Treatment?
I’d start your room analysis with a calibrated sound level meter and free Room EQ Wizard software for extensive sound measurement.
Position your microphone at ear height in your primary listening spot, then measure at least three different locations about one meter from walls.
Generate impulse responses using sharp sounds like handclaps, analyze frequency response curves, and identify problematic bass buildup or reflection points before selecting treatments.
What’s the Minimum Room Size Needed for Effective Acoustic Treatment to Work?
You’ll need minimum dimensions of approximately 17 feet wide, 10 feet high, and 23 feet long for effective treatment to focus primarily on reflection management rather than excessive bass absorption.
Smaller rooms require considerably more low-frequency trapping due to modal issues and reinforced bass buildup, demanding proportionally higher treatment coverage and budget to compensate acoustically.
How Often Should Acoustic Panels Be Cleaned or Replaced for Optimal Performance?
You’ll want to dust your acoustic panels monthly and perform deep cleaning every 3-4 months to maintain ideal performance, though I’ve found that cleaning frequency really depends on your room’s traffic and dust exposure.
Most quality panels have impressive panel lifespan potential lasting years with proper care, but you should replace them when you notice irreparable staining, structural damage, or significant acoustic absorption loss.
On a final note
You’ve now got the roadmap for transforming your space into a professionally treated studio environment. Whether you’re installing bass traps in corners, positioning absorption panels at reflection points, or calibrating room correction software, remember that acoustic treatment isn’t just about gear-it’s about creating an environment where you can trust your ears. Start with measurement, treat systematically, and don’t let perfectionism paralyze your progress toward better sound.