Recording Electric Bass: Capturing the Low End
You’ll capture professional electric bass low end by starting with fresh strings and proper intonation, then positioning a dynamic microphone one inch from your amp’s speaker grill to handle high SPLs while maintaining that punchy mid-range character. Apply surgical EQ cuts around 250-500 Hz to eliminate muddiness, boost gently at 80-100 Hz for fundamental warmth, and use 3:1 compression ratios with slow attack times to preserve transient punch while controlling dynamics-though mastering the delicate balance with your kick drum requires additional strategic considerations.
We are supported by our audience. When you purchase through links on our site, we may earn an affiliate commission, at no extra cost for you. Learn more.
Notable Insights
- Use proper bass setup with fresh strings, correct intonation, and optimal pickup height to prevent fret buzz and ensure clean signal capture.
- Position microphones one inch from speaker grill and experiment with dynamic mics for punch or condensers for extended frequency response.
- Apply high-pass filtering around 30 Hz to remove subsonic rumble while gently boosting 80-100 Hz for fundamental warmth.
- Use compression ratios of 3:1 to 5:1 with slow attack times to control dynamics while preserving transient punch and clarity.
- Separate bass (80-250 Hz) from kick drum (60-80 Hz) frequencies and consider sidechain compression to prevent low-end masking.
Essential Setup and Preparation Techniques
Anyone who’s spent time recording bass knows that getting a solid foundation starts long before you hit the record button, and I’ve learned through countless sessions that proper preparation can make the difference between a professional-sounding track and something that’ll have you pulling your hair out during mixing.
Your instrument setup becomes critical here-fresh strings, proper intonation, and clean electronics prevent headaches later. I always check my bass’s action and pickup height, since fret buzz becomes magnified during recording.
A properly set up bass with fresh strings and correct intonation prevents costly studio time wasted on fixing avoidable technical issues.
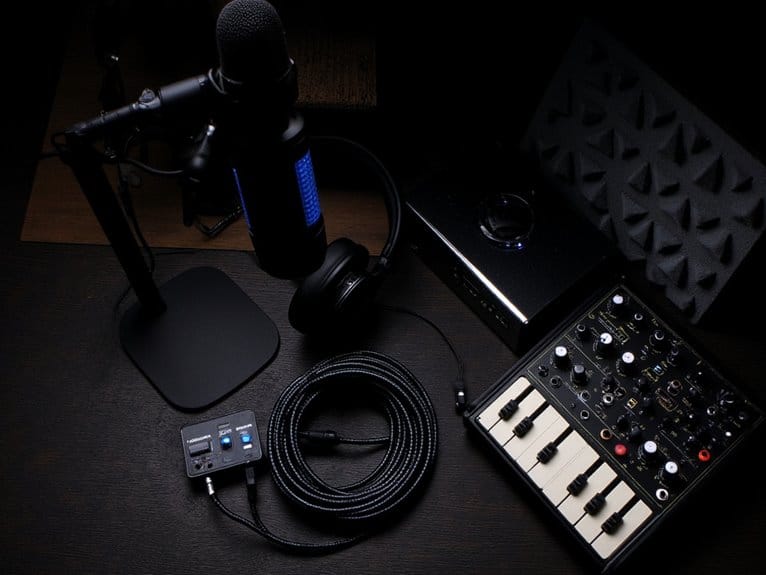
For signal path, you’ll want quality DI box alternatives like interface preamps with sufficient gain, paired with shielded cables to minimize electromagnetic interference. Quality cables with oxygen-free copper conductors and dual shielding deliver clean signal transmission while eliminating hum and interference during your recording sessions. Consider incorporating a bass preamp pedal with built-in DI capabilities to enhance your tonal flexibility and maintain signal quality when connecting directly to recording interfaces or live sound systems.
Don’t overlook monitor acoustics either; accurate low-frequency response helps you judge your bass tone correctly during tracking. Having both headphones or speakers ensures you can properly monitor your sound and catch any issues before they become problems in your mix.
Microphone Selection and Positioning Strategies
Three fundamental microphone choices will shape your electric bass recording more than any other single decision, and I’ve found that understanding each type’s strengths saves you from chasing your tail during sessions.
Dynamic microphones excel at handling high SPL while delivering that punchy mid-range character you’re after, though condenser microphones capture extended frequency response when you need those extreme highs and lows.
I’ve discovered that dual element mics offer the best compromise, combining both technologies in one package.
Your mic distance dramatically affects tone-I typically start one inch from the speaker grill, then experiment with polar patterns for room control.
Frequency Shaping and Compression Methods
While microphone placement gets you in the ballpark, frequency shaping and compression will make or break your bass recording’s impact in the final mix. Your EQ techniques should start with surgical cuts around 250-500 Hz to eliminate muddiness, followed by gentle boosts near 80-100 Hz for fundamental warmth.
I’ve found that high-passing around 30 Hz cleans up subsonic rumble without sacrificing weight, while boosting 700 Hz-1.5 kHz adds vital articulation.
For compression ratios, stick with 3:1 to 5:1 using slow attack times to preserve transient punch. Parallel compression works wonders here, blending heavily compressed signal with your dry bass to maintain dynamics while adding fullness that cuts through dense arrangements. Consider using a bass compressor pedal as part of your signal chain for consistent and controlled dynamics. This pedal can enhance your low-end presence and ensure that every note rings true, even in complex mixes. Experimenting with different settings will allow you to find the perfect balance between compression and clarity.
Balancing Bass With Kick Drum in the Mix
Once you’ve dialed in your bass tone through EQ and compression, the real challenge becomes creating space for both your bass and kick drum to coexist without stepping on each other’s sonic territory.
The secret to professional mixes lies in orchestrating bass and kick drum frequencies so they complement rather than compete.
This relationship determines whether your low end sounds tight and punchy or muddy and undefined.
- Note tuning your kick to match your bass line’s key creates harmonic cohesion
- Frequency separation gives each element distinct space, typically kick at 60-80 Hz, bass at 80-250 Hz
- Dynamic management through sidechain compression prevents masking when the kick hits
- Visual waveform editing reveals overlap points for strategic cutting or crossfading
- Target kick peaks around -3 dB before adding bass to reach combined 0 dB
Smart arrangement techniques like timing offsets and decay adjustments guarantee both elements remain individually audible while working together.
On a final note
You’ve now got the foundation for capturing professional-quality bass recordings that’ll sit perfectly in your mix. Remember, there’s no single “right” way to record bass-each instrument, player, and song demands its own approach. Trust your ears, experiment with different techniques, and don’t be afraid to break conventional rules. With practice and patience, you’ll develop the instincts to nail that perfect low-end sound every time.