Programming Drum Machines and Beat Production
You’ll master drum machine programming by starting with step sequencer basics—those 16-button grids that represent timing positions in musical phrases. Focus on genre-specific techniques like funk’s syncopated ghost notes, trap’s intricate hi-hat rolls, or hip-hop’s “drunk snare” placement for natural swing. Control groove through velocity dynamics and micro-timing adjustments that shift hits slightly off-grid, while layering percussion elements with proper frequency separation around 300-400Hz prevents muddiness. The complete framework awaits below.
We are supported by our audience. When you purchase through links on our site, we may earn an affiliate commission, at no extra cost for you. Learn more.
Notable Insights
- Use step sequencer grids with 16 buttons to create musical phrases and layer up to six percussion tracks for complex rhythms.
- Apply genre-specific techniques like syncopated ghost notes for funk, 32nd-note hi-hat rolls for trap, and swung patterns for jazz.
- Create organic grooves by adjusting velocity dynamics and micro-timing variations to avoid robotic-sounding drum patterns.
- Position drums strategically across the stereo field and apply selective reverb to add dimensional depth without cluttering the mix.
- Choose hardware for tactile control and live performance or software for extensive sound libraries and advanced DAW integration features.
Understanding Step Sequencer Interfaces and Basic Operations
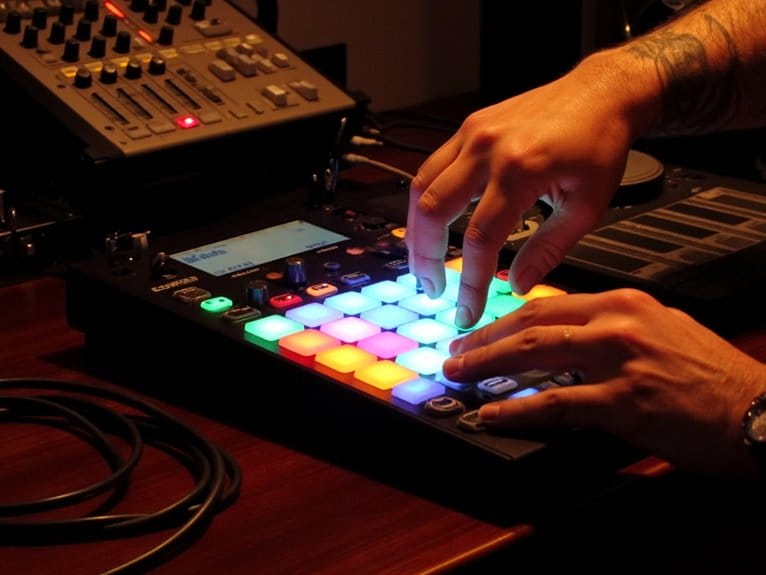
When you first encounter a step sequencer, whether it’s a hardware drum machine or software plugin, you’ll notice the interface design revolves around a grid of buttons or pads that represent individual steps in a musical phrase.
Typically, you’ll see 16 buttons laid out in a row, with each corresponding to a specific timing position within a bar of music. Above these buttons, LEDs or visual indicators show which steps are active and track the current playback position as it moves through your pattern.
The beauty of step sequencing lies in its simplicity—you press buttons to toggle sounds on or off, creating rhythmic patterns that loop continuously, allowing you to hear your beats develop in real-time as you program them. Modern step sequencers often support up to six tracks simultaneously, enabling you to layer different percussion elements like kicks, snares, and hi-hats for more complex rhythm programming.
Most sequencers provide pattern lengths that can be adjusted to accommodate different musical phrases, giving you flexibility in creating everything from standard 16-step loops to more elaborate arrangements.
Essential Pattern Programming Techniques for Different Genres
Once you’ve mastered the mechanics of step sequencing, your next challenge involves understanding how different musical genres demand distinct programming approaches.
I’ll be honest—this is where many producers either find their groove or get stuck in repetitive patterns that lack character.
Genre characteristics fundamentally shape your programming decisions, from funk’s syncopated ghost notes and delayed hits that create pocket feel, to trap’s intricate 32nd-note hi-hat rolls paired with booming 808 kicks.
Each genre’s rhythmic DNA demands specific programming techniques—from funk’s ghost notes to trap’s rapid-fire hi-hats and thunderous 808s.
Rock demands straightforward kick-snare patterns emphasizing backbeats, while hip-hop thrives on “drunk snare” placement behind the beat for swing.
Jazz requires swung ride patterns with dynamic variations, avoiding rigid quantization.
Understanding these style variations guarantees your beats authentically represent each genre’s DNA rather than generic four-on-the-floor monotony.
Just as drummers adjust their spring tension and beater angles for different playing intensities across genres, drum machine programming requires similar precision in velocity mapping and timing adjustments to achieve authentic genre-specific feels.
Mastering Groove Through Timing and Velocity Control
You’ll discover that creating engaging grooves isn’t just about placing beats on the grid, but rather about strategically manipulating velocity dynamics to breathe life into your patterns. Since varying the intensity of each hit simulates the natural inconsistencies that make human drummers so enchanting.
When you start offsetting your drum hits slightly from strict grid positions, using micro-timing adjustments and subtle delays on elements like hi-hats and percussion, you’re fundamentally teaching your drum machine to feel less robotic and more organic.
The secret lies in understanding how accent placement strategies work in conjunction with these timing variations, because knowing where to emphasize certain beats while softening others creates the rhythmic tension and release that separates amateur programming from professional-sounding grooves.
Velocity Dynamics Create Feel
While timing gets most of the attention in discussions about groove, I’ve found that velocity dynamics often make the difference between a beat that feels mechanical and one that breathes with life. When you’re programming drums, velocity expression becomes your primary tool for creating dynamic performance that mimics human playing nuances.
| Element | Low Velocity (1-40) | Medium Velocity (41-90) | High Velocity (91-127) |
|---|---|---|---|
| Kick Drum | Subtle thump | Punchy hit | Aggressive slam |
| Snare | Ghost note | Backbeat | Accent hit |
| Hi-Hat | Whisper tap | Standard groove | Sharp attack |
| Crash | Gentle wash | Musical accent | Power crash |
| Tom | Roll fill | Shift hit | Spotlight moment |
I’ve discovered that varying velocity across individual hits prevents that robotic feel, while strategic accent placement through higher velocities creates natural emphasis points that make listeners unconsciously nod their heads to your programmed beats.
Timing Offset Humanization Techniques
Velocity creates the dynamic foundation, but timing offsets are what truly transform your programmed drums from digital perfection into something that feels authentically human.
I’ve found that nudging MIDI hits 10-30 milliseconds ahead or behind the grid creates that essential “push and pull” dynamic that keeps listeners engaged. You’ll notice how shifting hi-hats by just a 96th note dramatically affects groove perception, making your rhythm feel either laid-back or driving forward.
The key lies in applying these human-like variation techniques consistently—randomize within controlled ranges to simulate natural drummer inconsistency, but avoid over-randomization that disrupts rhythmic dynamics.
Your DAW’s groove templates can automate this process, embedding authentic timing variations that elevate mechanical patterns into compelling, organic-feeling beats.
Accent Placement Strategies
Building upon timing variations, accent placement transforms ordinary drum patterns into compelling grooves that grab listeners and refuse to let go. Your accent strategies determine whether patterns sound mechanical or musical, with velocity values ranging from 0 to 127 providing precise dynamic control over each hit’s intensity.
| Step Position | Accent Strategy |
|---|---|
| Steps 1, 9 | Primary kick accents |
| Steps 5, 13 | Snare emphasis points |
| Steps 3, 7, 11, 15 | Hi-hat velocity boosts |
| Off-beat positions | Syncopation highlights |
| Ghost note steps | Subtle texture adds |
Dynamic accents work best when you layer different intensities across drum voices, creating conversational interplay between kick, snare, and percussion elements. I’ve found that combining velocity adjustments with timbral changes, like switching to rim shots on accented snare hits, adds authentic drummer-like dynamics that elevate programmed beats considerably.
Building Rhythmic Complexity With Layered Percussion Elements
When you’re programming drum machines, layering percussion elements becomes one of the most effective techniques for transforming a basic beat into something with genuine depth and complexity.
You’ll discover that combining synthetic kicks with organic snare samples, while maintaining proper transient alignment importance, creates fuller, more engaging rhythms than single-layer approaches.
Layer blending techniques involve strategic frequency separation, typically high-passing supporting elements around 300-400Hz to prevent muddiness, while preserving the punch of your primary drum hits.
Strategic frequency separation around 300-400Hz prevents muddy percussion layers while maintaining the essential punch of your primary drum elements.
I’ve found that panning different percussion layers across the stereo field, combined with selective reverb application, adds dimensional richness without cluttering your mix.
Hardware Vs Software Options for Beat Creation
After years of producing beats across countless studio sessions, I’ve learned that choosing between hardware and software drum machines isn’t just about sound quality—it’s about finding the tool that matches your creative workflow and production goals.
Hardware benefits include immediate tactile control through physical pads and knobs, allowing you to craft beats with hands-on precision that feels natural during live performances. These units typically deliver that distinctive analog character and punchiness that makes drums cut through a mix.
Software flexibility offers deeper advantages for studio work:
- Extensive sound libraries with custom sample loading capabilities
- Advanced sequencing and automation features for complex arrangements
- Seamless DAW integration with total project recall
- Cost-effective scalability with virtual instruments
- Non-linear editing for detailed sound design
Your choice ultimately depends on whether you prioritize immediate performance capability or all-encompassing production features.
Humanization Methods to Avoid Mechanical-Sounding Drums
Despite all the technological advances in drum programming, nothing screams “amateur production” quite like drums that sound like they were played by a metronome with zero personality.
The key to breathing life into your beats lies in deliberate imperfection, starting with micro-timing variations that push and pull individual hits away from the rigid grid. I’ve found that MIDI groove customization works best when you vary velocity levels across each hit, creating natural dynamics that mirror human playing intensity.
Effective drum accentuation techniques include layering samples with subtle timbral differences, strategically placing ghost notes, and employing partial quantization to maintain organic timing while correcting major errors. Just as guitar pickups require balanced frequency response for optimal sound quality, drum programming benefits from careful attention to tonal balance across all elements of your kit. Modern drum machines with dynamic articulation technology can help achieve these realistic variations by automatically adjusting sample playback based on velocity input, making it easier to create convincing human-like performances.
Advanced Sound Design and Effects Processing for Dynamic Beats
When you’ve mastered the fundamentals of drum programming, you’ll want to push beyond static patterns by incorporating real-time effect automation that breathes life into your beats, transforming ordinary sequences into dynamic compositions that evolve throughout your track.
I’ve found that layered percussion sound design, which combines multiple sonic elements across different frequency ranges and envelope stages, creates the kind of depth and impact that separates professional productions from bedroom beats.
These advanced techniques require patience and experimentation, but they’ll give you the tools to craft beats that sound anything but machine-generated, even when they’re born entirely from digital sources. Professional drum machines often feature dynamic articulation technology that automatically varies the tonal characteristics and intensity of repeated hits, simulating the natural variations found in acoustic drumming.
Modern MIDI controllers with velocity-sensitive keys and aftertouch capabilities allow you to inject human-like expression into your drum programming, making it possible to achieve natural dynamics that respond to your playing intensity and pressure variations.
Real-Time Effect Automation
Real-time effect automation transforms drum programming from a static exercise into a dynamic, evolving art form that breathes life into even the most mechanical patterns.
I’ve found that dynamic modulation creates movement where none existed before, turning rigid kick-snare combinations into fluid, breathing compositions. Modern drum machines offer extensive automation controls that I regularly utilize for professional-sounding productions.
Essential automation parameters include:
- Filter cutoff and resonance for sweeping frequency changes
- Pan automation for spatial movement across the stereo field
- Velocity modulation creating natural dynamics
- Gate timing for rhythmic stuttering effects
- Send levels controlling reverb and delay depths
Effect movements between patterns become seamless when you synchronize automation data with your DAW, enabling complex builds and breakdowns.
Whether you’re drawing curves manually or recording live tweaks, automation prevents those mechanical-sounding beats that scream “programmed.”
Layered Percussion Sound Design
Beyond traditional single-hit programming, layered percussion sound design reveals the depth and complexity that separates amateur beats from professional productions, creating composite sounds that breathe with organic richness while maintaining the precision of digital control.
You’ll master transient variation by combining fast-attacking layers with smooth envelopes, while frequency splitting assigns specific roles—sub-bass foundations, midrange punch, high-frequency snap.
Smart stereo management spreads elements across the soundfield without cluttering, and parallel processing adds warmth through duplicate compressed layers.
Velocity triggering creates dynamic interaction where harder hits reveal additional texture layering, transforming static beats into responsive instruments. Professional producers often monitor their layered percussion through compact amplifiers with precise frequency response to accurately assess how their complex drum arrangements translate across different playback systems.
I’ve found that careful layer roles, where each element serves a distinct sonic purpose, transforms simple drum programming into sophisticated sound architecture that responds naturally to your musical intentions.
When practicing these layering techniques, consider using practice pads with realistic rebound characteristics to develop the nuanced velocity control essential for triggering complex layered samples effectively.
Frequently Asked Questions
How Can I Sync Multiple Drum Machines or Hardware Sequencers Together Effectively?
You’ll need proper sync techniques to connect multiple units effectively. Use MIDI clock as your master timing source, designate one device as the master, and configure others as slaves for tight synchronization.
On a final note
You’ve now got the foundation to transform basic beats into compelling rhythmic landscapes that capture listeners’ attention. Whether you’re programming crisp trap hi-hats, swinging jazz grooves, or thunderous rock patterns, remember that the magic happens when technical precision meets creative intuition. Don’t overthink every micro-timing adjustment—sometimes the best grooves emerge from happy accidents and bold experimentation that pushes beyond conventional programming boundaries.