Power Management and Protection in Your Studio
You’ll want to configure Windows power options to High Performance mode, which prevents CPU downclocking and disables USB selective suspend that can cause audio dropouts with your interface. Disable visual effects to free up system resources, then tackle electrical interference by positioning power supplies away from sensitive gear and using quality surge protection with true power conditioning rather than basic strips. Proper grounding techniques and UPS systems protect against failures while balanced power solutions eliminate ground loops that plague many home studios, and there’s considerably more depth to implementing these systems effectively.
We are supported by our audience. When you purchase through links on our site, we may earn an affiliate commission, at no extra cost for you. Learn more.
Notable Insights
- Set Windows to High Performance mode and disable USB selective suspend to prevent audio dropouts and maintain consistent power to interfaces.
- Position power supplies away from audio equipment and route cables perpendicular to power lines to minimize electromagnetic interference.
- Use Kill-A-Watt meters and monitoring tools to track power consumption patterns and identify peak loads for capacity planning.
- Implement star grounding systems connecting all equipment to a central point to eliminate voltage differences and reduce noise coupling.
- Install true power conditioning with Series Mode technology rather than basic surge strips for reliable equipment protection.
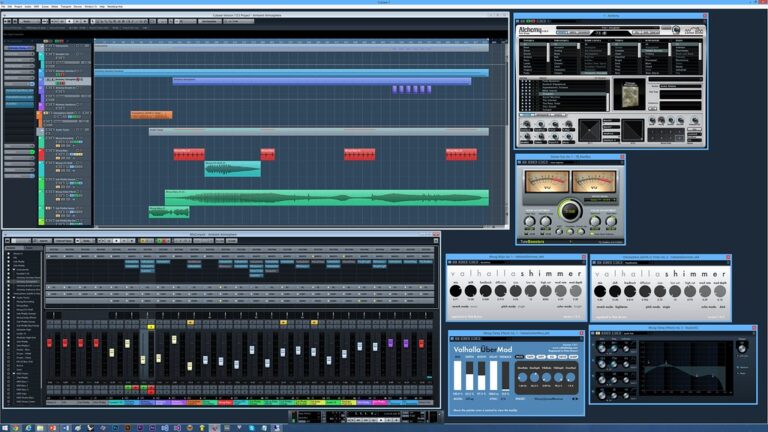
Configuring High Performance Power Plans for Audio Production
When you’re setting up your studio for serious audio work, one fundamental step that’ll save you countless headaches involves configuring Windows’ power management settings to prioritize performance over energy efficiency.
Navigate to Control Panel > Power Options and select the High Performance plan, which prevents CPU downclocking and keeps USB controllers from entering sleep mode-critical for maintaining continuous communication with your audio interface. These power plan configurations guarantee all CPU cores run at maximum frequency, eliminating the throttling that causes those dreaded pops, clicks, and dropouts during recording sessions.
While you’ll sacrifice some energy savings, the trade-off dramatically improves audio production efficiency by maintaining steady power to external drives and sample libraries, preventing the processing stalls that can derail your creative workflow.
Optimizing Laptop Power Settings for Studio Work
When you’re running a laptop-based studio setup, you’ll need to approach power management differently than desktop configurations, since laptops prioritize battery life over consistent performance by default.
Your primary focus should be enabling High Performance mode while simultaneously disabling USB selective suspend for audio interfaces, and reducing visual effects that compete for system resources during critical recording sessions.
I’ve found that laptops often revert these settings after updates, so you’ll want to establish a routine check of these configurations, particularly the USB power settings that can cause your audio interface to disconnect unexpectedly mid-session.
High Performance Mode
Although most laptops ship with balanced power settings that prioritize battery life over raw performance, I’ve found that studio work demands every ounce of processing power your machine can deliver.
When you’re running multiple audio tracks with real-time effects, you’ll want to enable high performance mode through Windows’ Power Options menu or by sliding the power mode to “Best Performance.” This setting increases your CPU’s power limits, allowing sustained boost clocks that prevent those frustrating audio dropouts during intensive sessions.
I recommend conducting thorough performance testing with your specific studio software to determine which power profiles work best, since some newer laptops with Modern Standby may require BIOS updates or workarounds to access these critical performance settings.
USB Power Settings
Audio dropouts from USB power interruptions rank among the most maddening studio issues I’ve encountered, and they’re almost always preventable through proper USB power configuration.
Start with USB power optimization in Control Panel’s power settings, disabling USB selective suspend for both battery and plugged-in modes. This simple power plan adjustment prevents Windows from cutting power to your audio interfaces mid-session.
Next, open Device Manager‘s Universal Serial Bus controllers section, unchecking “Allow the computer to turn off this device” for each USB hub-essential power settings troubleshooting that eliminates automatic power-downs.
For USB-C systems, energy consumption monitoring becomes vital since power delivery configurations can affect high-wattage studio gear.
These USB performance enhancement steps guarantee consistent power flow during critical recording moments.
Visual Effects Optimization
Moving beyond USB connectivity, your laptop’s visual processing demands present their own power management challenges that can make or break your studio workflow.
When you’re running intensive visual effects applications, I’ve found that proper power configuration becomes absolutely critical for maintaining consistent performance and preventing those frustrating mid-render crashes that we’ve all experienced.
Your VFX tool integration relies heavily on sustained GPU performance, which means configuring your system for peak power delivery.
Here’s what I recommend for ideal GPU memory optimization:
- Set your power plan to High Performance to prevent CPU throttling during complex rendering tasks
- Disable sleep mode completely to avoid interruptions during long processing sessions
- Keep your laptop plugged in for maximum power availability and GPU performance
- Update graphics drivers regularly to leverage latest power management optimizations
USB Device Power Management and Audio Interface Stability
Your audio interface’s reliability hinges on Windows’ USB power management settings, which can wreak havoc on recording sessions when configured incorrectly.
I’ve watched countless producers pull their hair out over mysterious dropouts and disconnections, only to discover that USB selective suspend was quietly shutting down their interface during brief pauses in audio activity.
The culprit often lies in your USB Root Hub settings, where Windows defaults to power-saving modes that prioritize battery life over the consistent power delivery your audio gear desperately needs.
USB Selective Suspend Issues
When I first started experiencing random audio dropouts during critical recording sessions, I discovered that Windows’ USB Selective Suspend feature was the hidden culprit behind my interface’s frustrating intermittent disconnections.
This power-saving feature automatically suspends USB ports during periods of inactivity, creating havoc with audio interfaces that require consistent communication.
After extensive stability troubleshooting, I learned that disabling this setting resolves most USB power issues affecting interface driver updates and performance optimization.
Here’s how to disable USB Selective Suspend:
- Navigate to Control Panel > Power Options > Change Plan Settings
- Click “Change Advanced Power Settings” to access device power settings
- Expand USB Settings > USB selective suspend setting
- Set both options to “Disabled” to prevent signal degradation
This simple fix eliminates audio dropout causes while maintaining stable USB interface connection.
Root Hub Power Settings
While disabling USB Selective Suspend addresses system-wide power management, I’ve learned that Windows maintains separate power controls for individual USB Root Hubs that can still cause audio interfaces to disconnect unexpectedly during sessions.
For effective power troubleshooting, you’ll need to access Device Manager and locate each USB Root Hub in your system, which typically includes multiple controllers handling different ports.
Navigate to each hub’s Properties dialog, then click the Power Management tab where you’ll find the checkbox labeled “Allow the computer to turn off this device to save power.” Unchecking this option across all hub configurations prevents Windows from automatically shutting down specific USB controllers during inactivity, ensuring your audio interface maintains consistent power delivery throughout extended recording sessions.
These power interruptions can be particularly problematic when using interfaces that require 48V phantom power for condenser microphones, as voltage fluctuations may cause audio dropouts or damage sensitive equipment. Additionally, many modern interfaces feature per-channel phantom power control which allows you to manage power settings for individual XLR inputs independently.
Eliminating Visual Effects to Conserve System Resources
As someone who’s watched countless studios struggle with skyrocketing power bills, I can tell you that visual effects represent one of the largest drains on your system’s resources, consuming massive amounts of GPU and CPU power that translates directly into higher energy costs and increased carbon emissions.
VFX resource reduction becomes essential when you realize that average animation production generates approximately 5.5 tons of CO2 per hour, primarily from intensive computer usage during post-production workflows.
Animation studios burn through 5.5 tons of CO2 hourly, making VFX optimization crucial for sustainable production workflows.
Your energy efficiency improvements can follow these strategic approaches:
- Eliminate complex particle systems that require thousands of GPU cores running simultaneously
- Remove unnecessary lighting passes during real-time rendering sessions
- Simplify polygon counts in 3D models to reduce processing overhead
- Cut redundant effect layers that compound your system’s computational burden
Identifying and Reducing Electrical Interference Sources
You’ll find that electrical interference can transform your pristine recording environment into a nightmare of hums, buzzes, and unwanted artifacts that plague even the most carefully crafted sessions.
From fluorescent lights and dimmer switches to cell phones and wireless routers, these common culprits lurk throughout your studio space, quietly sabotaging your audio quality while you’re focused on capturing that perfect take.
I’ve learned that identifying these interference sources requires a systematic approach, examining everything from your building’s shared electrical infrastructure to the placement of individual components.
Because once you understand what’s causing the problem, you can implement targeted elimination strategies that restore your studio’s sonic integrity.
Common Interference Culprits
When I first started building my home studio, I couldn’t figure out why my recordings sounded like they were competing with a small orchestra of electronic gremlins-until I realized that interference sources were lurking everywhere in my environment, from the obvious culprits like my computer monitor and smartphone to the sneaky ones like my neighbor’s ham radio setup bleeding through my guitar pickups.
Understanding these interference types helped me identify where power quality issues originated, making RFI detection and EMI sources much easier to pinpoint:
- Dimmable lights casting electrical shadows across your signal chain
- Cell phones transmitting invisible radio waves through instrument cables
- HVAC systems injecting power spikes into your electrical circuits
- Computer monitors radiating electromagnetic fields toward magnetic pickups
Professional-grade power conditioners with EMI/RFI filtering capabilities can significantly reduce these noise sources and provide clearer recordings by establishing a barrier between your sensitive audio equipment and these common interference culprits.
Elimination Strategies
Once you’ve identified the interference sources plaguing your studio, the real work begins with systematic elimination strategies that target each problem at its root, rather than trying to mask symptoms with band-aid solutions that’ll inevitably fail when you need clean recordings most.
Start by disconnecting components sequentially to pinpoint exact sources, then prioritize removing or relocating interfering devices before attempting post-signal processing fixes.
Install high-quality power strips with surge protection, incorporate ground loop isolators for hum elimination, and use balanced XLR cables for superior noise cancellation capabilities.
Separate power and audio cables physically, employ isolation transformers for galvanic separation, and maintain signal integrity through regular cable audits.
Lighting Choices That Minimize Audio Equipment Hum
Although most studio engineers focus primarily on acoustic treatment and signal processing when troubleshooting hum issues, I’ve found that lighting choices often represent the most overlooked source of electrical interference in recording environments.
Your dimming effects and LED dimming systems can introduce significant buzz reduction challenges if you’re not careful about circuit grounding and power isolation decisions.
Here’s what I recommend for EMI prevention in your studio layout:
- Non-dimmable LEDs with quality drivers – eliminates the voltage switching that creates audio interference
- Compatible LED dimmers – prevents the abrupt on/off cycles that generate RF noise requiring additional RF shielding
- Fluorescent alternatives – removes poor-quality ballasts that emit radio-frequency interference affecting your microphone circuits
- Proper ground loop isolation – keeps lighting fixtures electrically separated from your audio equipment’s grounding system
Electrical interference from lighting can also create impedance mismatches between your audio equipment components, leading to signal degradation and reduced clarity throughout your recording chain.
Power Monitoring and Consumption Analysis Tools
After addressing lighting-related interference, you’ll need reliable tools to monitor your studio’s actual power consumption, identify potential interference sources, and track energy usage patterns that affect both your equipment performance and monthly utility bills.
Kill-A-Watt power meters, along with more sophisticated energy monitoring devices, provide the precise measurements you need to understand which components draw excessive power, generate electrical noise, or create harmonic distortion that compromises your audio quality.
These monitoring tools transform guesswork into data-driven decisions, allowing you to pinpoint problematic equipment, optimize power distribution, and ultimately create a cleaner, more efficient studio environment.
Kill-A-Watt Power Meters
When it comes to understanding exactly how much power your studio equipment consumes, I’ve found that Kill-A-Watt power meters represent one of the most practical and affordable monitoring solutions available to musicians and audio professionals.
These compact devices plug directly into any standard 120V outlet, instantly displaying real-time measurements of voltage, current, watts, power factor, and cumulative energy consumption on their clear LCD screens.
For thorough energy cost analysis and appliance efficiency assessment, Kill-A-Watt meters excel at revealing four critical power characteristics:
- True RMS voltage and current readings for accurate power quality assessment
- Active power (watts) versus apparent power (VA) measurements for efficiency analysis
- Cumulative kWh tracking over extended periods for cost projection
- Power factor readings that identify inefficient equipment drawing reactive power
Studio Energy Consumption
While Kill-A-Watt meters provide excellent individual device monitoring, I’ve discovered that thorough studio energy management requires a broader toolkit of monitoring solutions that can track consumption patterns across multiple devices, analyze power usage at both hardware and software levels, and help you make informed decisions about electrical infrastructure upgrades.
Professional studio power audits benefit from industrial-grade monitoring products like Allen-Bradley’s PowerMonitor series, which offer detailed load profiling and power quality analysis across your entire electrical system. These tools detect peak loads, consumption patterns, and cost allocation data that inform whether you need capacity upgrades from 6 kVA to 12 kVA service.
Implementing extensive energy efficiency strategies through software-level monitoring tools like Simplicity Studio’s Energy Profiler helps correlate specific equipment behavior with power consumption.
Interference Source Detection
Beyond basic energy monitoring, I’ve found that identifying specific interference sources in your studio requires sophisticated power analysis tools that can pinpoint electrical disturbances at their origin, rather than simply measuring overall consumption patterns.
These interference identification techniques rely on thorough power quality assessment through advanced measurement capabilities.
When hunting down interference sources, I focus on these key measurement approaches:
- Real-time waveform visualization to capture transient spikes and harmonic distortions as they occur
- Component-level current analysis comparing active versus inactive states to isolate problematic equipment
- Phase angle monitoring to detect power factor issues that create electrical noise
- Ground fault detection using pilot lamp indicators to verify proper earth connections
Power analyzers with 5 MS/s sampling rates effectively capture high-frequency interference signatures that standard meters miss completely.
Grounding and Circuit Isolation Techniques
Although power management might seem straightforward on the surface, proper grounding and circuit isolation represent the foundation of any professional studio setup. I’ve learned through years of troubleshooting hum issues that getting this right from the start saves countless hours of frustration later.
Star grounding techniques connect all equipment grounds to a single centralized point, typically at your main electrical panel, which eliminates voltage differences that create audible hum.
Circuit isolation involves running dedicated ground wires for audio gear separately from household circuits, preventing interference from lighting and HVAC systems. I recommend using isolated ground outlets and balanced connections, while avoiding shared ground paths between different equipment types, which commonly cause noise coupling issues.
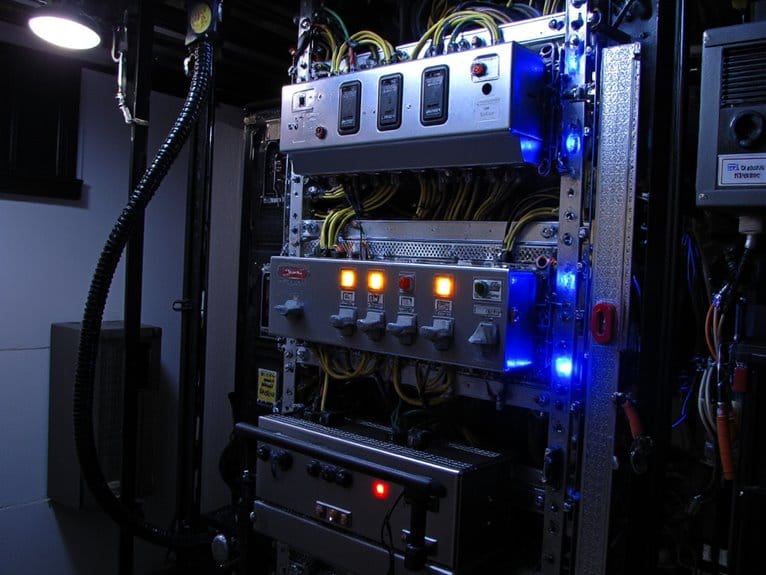
Managing Studio Server Power Consumption
Studio servers present an entirely different power management challenge from your typical audio gear, and I’ve watched countless engineers underestimate the electrical demands of running high-performance computing equipment in their facilities.
Your standard rack server consumes between 500 to 1200 watts during normal operations, with high-performance units exceeding 2000 watts-that’s substantial energy budgeting territory.
Effective server enhancement requires these essential cooling strategies:
- Monitor workload intensity through consumption analysis, as heavy processing spikes power draw considerably.
- Configure power-saving modes during downtime to reduce environmental impact.
- Balance computing performance with energy efficiency through careful server configurations.
- Implement load balancing across multiple units for peak performance tuning.
Power monitoring becomes critical when you’re managing equipment that can consume 1,000 kWh per square meter-ten times your household usage.
Automated Power Management for Off-Hours Energy Savings
Nothing transforms your studio’s energy efficiency quite like implementing automated power management systems that work tirelessly while you’re away. I’ve seen these setups deliver consistent 15-20% reductions in monthly electrical costs without any compromise to your equipment’s readiness.
Smart occupancy sensors detect when you’ve left, automatically adjusting HVAC setpoints by 8-10 degrees, dimming non-essential lighting, and powering down secondary equipment through automated scheduling protocols.
I’ll admit, watching my studio’s energy dashboard drop those first few weeks felt almost magical, but the real magic happens when these systems integrate with your existing workflow, learning your patterns and optimizing power consumption during evenings and weekends.
This energy optimization approach represents the single most cost-effective upgrade you can make to your studio infrastructure.
Enterprise Power Policy Deployment in Studio Environments
Three critical principles define successful enterprise power policy deployment in studio environments, and I’ve learned through extensive implementation that the federated environment strategy consistently outperforms centralized approaches by allowing business teams to maintain development autonomy while adhering to core IT governance frameworks.
Your deployment strategies should prioritize environment policies that balance IT control with operational flexibility, ensuring each business unit manages their Dev/Test/Prod stack under established governance rules.
Effective enterprise deployment balances centralized IT governance with decentralized business unit autonomy across development lifecycle environments.
- Restrict default environments to minimize security vulnerabilities from uncontrolled automation creation
- Enable Managed Environments for enhanced administrative visibility and automated compliance monitoring
- Mandate environment-specific roles aligned with business needs and regulatory obligations
- Implement dedicated environments for targeted solutions with tailored data loss prevention policies
This approach consistently reduces manual governance overhead while maintaining robust security postures across diverse studio operations.
Power Conditioning and Surge Protection for Audio Gear
Every professional audio engineer I’ve worked with has experienced that sinking feeling when expensive gear gets damaged by power surges.
After years of testing various protection solutions, I’ve found that understanding the fundamental differences between basic surge strips and true power conditioning systems can save you thousands in equipment replacement costs.
When making your surge protector selection, prioritize Advanced Series Mode technology over cheaper metal oxide varistors that degrade over time.
Quality units from Furman and SurgeX offer UL 1449 certification, ensuring reliable protection without compromising current capacity.
Beyond surge protection, proper power conditioners eliminate EMI and RFI interference that degrades audio quality.
Regular power conditioner maintenance, including checking diagnostic indicators and cleaning outlets, preserves your investment and maintains peak performance throughout your studio’s operational life.
Uninterruptible Power Supply Implementation Strategies
Anyone who’s suffered through a power outage during a significant recording session understands why I’ve become obsessed with UPS implementation.
After countless hours testing different configurations, I can tell you that proper uninterruptible power supply planning isn’t just about keeping your gear running-it’s about maintaining audio quality, protecting expensive equipment from abrupt shutdowns, and preserving months of work from corruption.
Your UPS Setup requires strategic power routing through this configuration for ideal surge defense:
- Wall outlet connects to surge protector for primary filtering
- Surge protector feeds into online double-conversion UPS for voltage regulation
- UPS outputs pure sine wave power to audio interfaces and monitors
- Load monitoring displays track real-time power consumption and battery status
Battery maintenance becomes essential when you’re targeting four-hour runtime minimums, while system compatibility demands true sine wave output to prevent interference with sensitive studio gear, ensuring power redundancy without compromising energy efficiency.
Balanced Power Solutions for Ground Loop Reduction
While UPS systems protect your gear from power failures, ground loops create an entirely different nightmare that’ll drive you absolutely insane with persistent hum and buzz.
After wrestling with countless studio setups over the years, I’ve found that balanced power solutions offer the most elegant approach to eliminating these voltage differentials that plague audio equipment.
True symmetrically balanced transformer types create two voltage lines 180 degrees out of phase, establishing neutral potential relative to ground while providing exceptional power isolation.
These systems excel at noise filtering, particularly targeting common mode interference that destroys audio clarity.
Combined with proper equipment grounding and voltage stabilization, balanced power transforms your studio’s sonic foundation, though you’ll still need dedicated surge protection since these transformers focus primarily on ground loop elimination rather than electrical spikes.
Physical Layout Design to Minimize Electromagnetic Interference
EMI battlefield-planning becomes absolutely critical when you’re designing your studio’s physical layout, because electromagnetic interference doesn’t respect expensive gear or pristine acoustics.
I’ve watched countless engineers struggle with mysterious hums, clicks, and digital artifacts that could’ve been prevented with proper spatial organization from day one.
Strategic equipment placement creates invisible shields that protect your signal chain:
- Position power supplies and transformers in separate rooms, away from microphones and mixing consoles
- Route sensitive cables perpendicular to power lines, never parallel for extended distances
- Install dedicated enclosures for digital gear that generates switching noise
- Separate lighting dimmers from audio equipment using physical distance and cable shielding
Smart studio acoustics planning incorporates electromagnetic considerations alongside sound treatment, ensuring your investment delivers pristine recordings.
Frequently Asked Questions
How Much Does Running a Home Studio Increase Monthly Electricity Bills?
Your home studio’s energy consumption typically adds $10-$50 monthly to electricity bills, though I’ve seen variations depending on your recording equipment efficiency and usage patterns.
Small setups with basic gear might increase costs by $15-$25, while extensive studios with multiple monitors, computers, and outboard processors can push increases toward $40-$60.
Your actual impact depends on equipment wattage, daily runtime hours, and local electricity rates.
Can Solar Panels Provide Sufficient Backup Power for Professional Recording Sessions?
Solar panels can absolutely provide sufficient backup power for your professional recording sessions, though solar efficiency depends heavily on your specific energy requirements and proper system sizing.
I’ve found that recording reliability hinges on calculating your studio’s peak power demands accurately, then installing battery capacity that exceeds those needs by at least 25-30 percent to handle unexpected equipment loads during critical sessions.
What’s the Recommended Room Temperature Range for Optimal Audio Equipment Performance?
You’ll want to maintain your studio between 65°F and 75°F, with 68°F being the sweet spot for ideal temperature control.
I’ve found this range maximizes equipment longevity while preventing the accelerated aging that occurs above 85°F, where each 10-degree increase can slash your gear’s lifespan by 40%.
Your microprocessor-based equipment, which generates internal heat, particularly benefits from these cooler, consistent conditions.
Do Wireless Charging Pads Near Studio Monitors Cause Audio Signal Interference?
Yes, wireless charging pads can definitely cause audio interference with your studio monitors, and I’ve experienced this firsthand in my own setup.
The wireless technology operates at frequencies around 110-205 kHz, which can induce buzzing, humming, or static in sensitive audio equipment when placed too close.
This is particularly true with cheaper, poorly shielded chargers that lack proper EMI compliance and electromagnetic leakage control.
How Often Should Studio Power Cables and Connections Be Inspected?
You should inspect your studio power cables and connections before each use through visual checks, looking for cable wear like frays or cracks that compromise safety.
I recommend annual professional testing for thorough electrical assessment, though high-usage setups need more frequent evaluations.
Monitor connection stability by checking for loose plugs, overheating signs, or burnt odors that indicate potential failures requiring immediate replacement.
On a final note
You’ve now got the foundation for rock-solid power management that’ll keep your studio running smoothly, even when inspiration strikes at 3 AM during a thunderstorm. I’ve learned through countless late-night sessions that proper power infrastructure isn’t glamorous, but it’s absolutely vital for consistent results. Your future self will thank you when that pivotal vocal take doesn’t vanish due to a power hiccup.