Minimizing Latency in Electronic Drum Setups
You’ll need to optimize your buffer size to 64 samples for that sweet spot between responsiveness and stability, while using ASIO drivers on Windows or Core Audio on Mac to achieve single-digit millisecond latencies. Connect your drum module directly to your audio interface using balanced TRS cables, configure proper trigger sensitivity settings, and close unnecessary background applications to prioritize CPU resources for audio processing. These foundational adjustments reveal the deeper optimization strategies that’ll transform your setup.
We are supported by our audience. When you purchase through links on our site, we may earn an affiliate commission, at no extra cost for you. Learn more.
Notable Insights
- Use small buffer sizes of 32-64 samples and low-latency drivers like ASIO or Core Audio for sub-5 millisecond response times.
- Connect drum modules directly to audio interfaces using analog outputs rather than USB to minimize signal path delays.
- Optimize system performance by closing background applications, using SSDs, and prioritizing audio threads in the operating system.
- Configure trigger sensitivity settings carefully and use manufacturer-certified drivers to ensure proper hardware-software communication without glitches.
- Select audio interfaces with zero-latency monitoring capabilities and enable direct monitoring to bypass unnecessary processing stages.
Buffer Size Optimization for Reduced Response Time
The heart of electronic drum latency lies in a single, critical setting that most drummers overlook: buffer size, which determines how much audio data your computer processes at once before sending it to your speakers or headphones.
When you’re considering buffer size considerations, you’ll discover that smaller values like 32 or 64 samples deliver the sub-5 millisecond response times that make electronic drums feel natural and responsive. However, these latency trade offs come with increased CPU demands, meaning your computer works harder to maintain stability.
I’ve found that starting with 64 samples provides an excellent balance for most setups, though you might need to push it to 96 or 128 samples when running heavy plugins or complex sessions that would otherwise cause audio glitches. The optimal setting varies significantly between different computer systems and session complexity, making experimentation essential for finding your ideal configuration. Additionally, you should disable unnecessary plugins and mute unused tracks during live play to further reduce processing load on your system.
Audio Interface Setup and Connection Methods
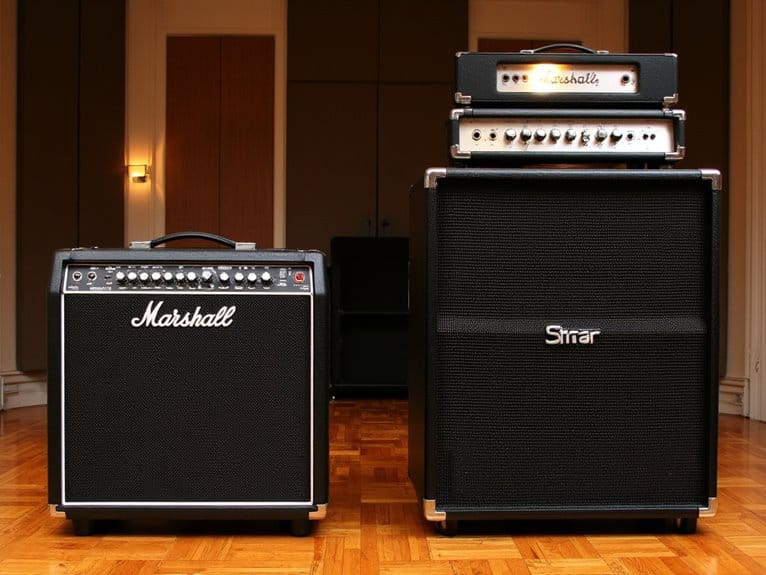
Your audio interface serves as the essential bridge between your electronic drums and computer, and I’ve learned that selecting the right drivers, connection methods, and configuration settings can greatly reduce the latency that kills your playing experience.
You’ll want to focus on installing low-latency drivers like ASIO for Windows or Core Audio for Mac, choosing between MIDI and direct audio connections based on your specific needs, and fine-tuning your interface settings to achieve that responsive feel we’re all chasing. Zero-latency monitoring through dedicated headphone outputs is essential for keeping timing accurate during performance and practice sessions.
The connection method you choose—whether it’s running audio cables directly from your drum module’s outputs or using USB connectivity—will considerably impact your overall latency, so let’s break down each approach and help you make the best choice for your setup. Popular options like the Scarlett 18i2 from Focusrite provide multiple input and output configurations that give you flexibility in how you route your drum signals to your recording software. These interfaces feature ultra-low-noise preamps that ensure clean signal transmission without introducing unwanted noise that could degrade your drum sounds. Professional recordings typically use 24-bit/192kHz conversion rates to capture the full dynamic range of your electronic drum performance while maintaining the highest possible audio quality.
Low-Latency Driver Selection
While ASIO drivers might sound like just another technical acronym to memorize, they’re actually the difference between feeling like you’re playing through mud and experiencing the crisp, immediate response that makes electronic drumming feel natural.
These specialized drivers bypass Windows’ audio mixer entirely, delivering ASIO benefits that include single-digit millisecond latencies compared to standard MME or DirectSound drivers that often struggle with 20-50ms delays.
The key lies in driver compatibility with your specific audio interface, since not all ASIO implementations are created equal. RME interfaces consistently deliver sub-5ms performance, while some budget options barely improve over standard drivers.
You’ll want manufacturer-certified drivers that match your interface model exactly, as generic or outdated drivers can introduce unexpected polling delays that completely negate your hardware’s low-latency capabilities. Some Windows users may need to check specific driver requirements for their audio interface model to ensure optimal compatibility and performance.
For optimal electronic drum performance, consider buffer sizes between 64 to 256 samples, which provide the sweet spot for balancing minimal latency with stable system performance.
Even budget interfaces under $200 now offer professional-grade preamps and low-latency performance that can handle electronic drum setups effectively, making quality audio routing accessible without significant financial investment.
Optimal Connection Methods
Having the right drivers won’t matter much if your connection method creates bottlenecks that sabotage your latency goals from the start.
I’ve learned that direct analog outputs from your drum module to the audio interface create the most straightforward signal path, minimizing conversion stages that add unwanted delay.
Advanced cable routing through multi-channel interfaces lets you assign each pad to dedicated inputs, reducing processing congestion markedly.
The balanced connection benefits become obvious when you’re running longer cables—TRS or XLR connections maintain signal integrity while rejecting interference that could force your interface to work harder.
USB connections work fine for most setups, though Thunderbolt interfaces consistently deliver lower latency if your budget allows the upgrade.
Interface Configuration Settings
Once you’ve established the ideal physical connections, the real magic happens inside your audio interface software, where proper input configuration can make or break your latency goals.
Start by selecting the correct input channels that correspond to your drum module’s outputs, whether you’re using mono or stereo configurations. Set your input gain levels carefully—you want a strong signal without clipping, which I’ve learned the hard way destroys both dynamics and timing.
Enable input monitoring within your DAW to hear yourself play in real-time, but use software monitoring rather than hardware monitoring when possible. Configure your monitor settings to route directly through the interface, bypassing unnecessary processing stages that add milliseconds to your signal chain.
Strategic Sound Sample and VST Selection
How can you select the right VST instruments and sound samples to keep your electronic drum setup running with minimal latency? Your sound preset selection directly impacts CPU load, so I’d recommend choosing lighter, streamlined options over complex multi-layered samples that bog down processing.
Sample library efficiency becomes essential here—preloaded samples with simpler audio retrieval consistently outperform round-robin variations that enhance realism but increase delay.
You’ll want to balance expressiveness with processing complexity, selecting VSTs specifically optimized for low-latency live performance rather than studio perfectionism. Single-sample or fewer-variation instruments typically deliver quicker response times, while efficient sound engines using smart CPU resource allocation maintain consistent timing.
Many modern electronic drum sets feature extensive sound libraries with hundreds of preset options, allowing drummers to find efficient samples that maintain low latency while still providing musical variety.
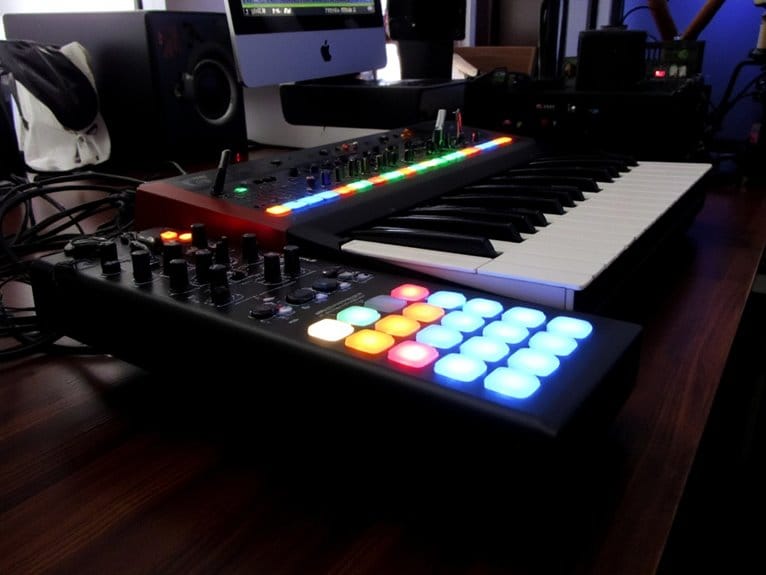
Drum Module Configuration and Software Integration
While selecting ideal VST instruments forms the foundation of low-latency performance, your drum module’s configuration and software integration ultimately determine whether you’ll experience the responsive feel of acoustic drums or the frustrating lag that kills musical momentum.
Your module’s trigger sensitivity settings create the critical first line of defense against latency. I’ve found that balancing threshold levels prevents false triggering while maintaining responsiveness, and proper MIDI mapping guarantees your playing translates instantly to sound output.
| Configuration Area | Latency Impact | Recommended Setting |
|---|---|---|
| Double-trigger window | High | 44-60ms |
| Buffer size | Critical | 32-64 samples |
| USB vs DIN MIDI | Moderate | USB preferred |
| Crosstalk reduction | Medium | Minimal necessary |
| Firmware updates | High | Always current |
Modern drum module features like direct audio output bypass unnecessary processing layers, while dedicated software integration maintains real-time monitoring capabilities.
System Performance and Resource Allocation
Even with perfectly configured drum modules, your computer’s system performance becomes the silent bottleneck that can transform lightning-fast triggers into sluggish, unusable delays.
CPU allocation requires real-time prioritization, where audio threads receive immediate attention from your operating system’s scheduler. Process prioritization means closing unnecessary background applications, disabling non-essential system services, and avoiding power-saving modes that throttle performance unpredictably.
RAM optimization involves using sufficient memory for sample caching while choosing SSDs over traditional drives for faster data retrieval.
Thread management becomes critical when multithreading distributes processing workload evenly across available cores.
Software efficiency demands dedicated audio interfaces with onboard processing, reducing computational burden on your main CPU while maintaining stability during intensive performance sessions.
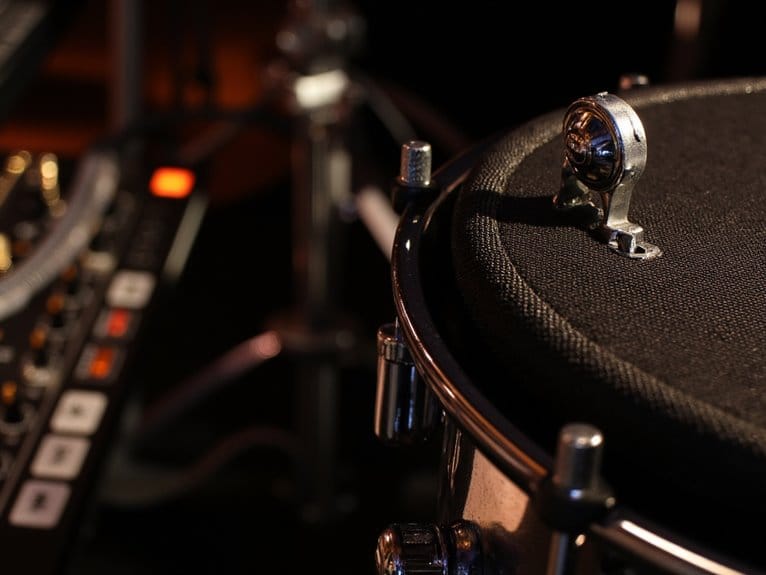
Trigger Hardware and Physical Setup Considerations
Beyond the digital domain of software optimization, your trigger hardware selection and physical mounting decisions create the foundation that determines whether your electronic drums respond with precision or frustrate you with inconsistent performance.
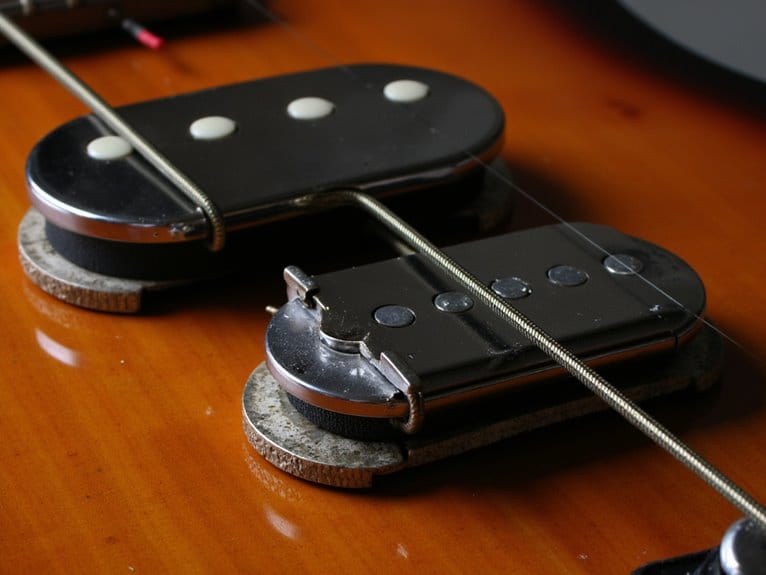
I’ve learned that trigger compatibility starts with choosing TRS inputs and dual-zone trigger types that communicate effectively with your module’s sensitivity settings.
Smart mounting techniques involve securing triggers firmly to drum rims while avoiding interference with natural playing motion, ensuring consistent sensor placement that won’t shift during aggressive performances.
Proper trigger mounting balances firm rim attachment with unrestricted stick movement, preventing sensor drift during intense playing sessions.
Signal integrity depends on high-quality shielded cables kept as short as practical, while regular calibration methods help you maintain accurate response across different velocity ranges.
Don’t overlook power options—USB bus power simplifies your setup considerably.
Professional modules like the Roland TD-27 feature individual channel recording capability that requires precise trigger timing to maximize studio-quality results.
Consider the physical stability of your trigger setup, as anti-slip features prevent wobbling during intense play and maintain consistent sensor positioning throughout your performance.
Frequently Asked Questions
How Much Latency Is Actually Noticeable When Playing Electronic Drums?
You’ll notice latency around 10-15ms during playing, as your perception thresholds make delays above this range feel sluggish. Most drummers can’t detect under 6ms, making trigger responsiveness essential for maintaining natural feel.
On a final note
You’ve now got the essential toolkit for minimizing latency in your electronic drum setup. By optimizing buffer sizes, choosing the right audio interface, selecting efficient samples and VSTs, configuring your drum module properly, managing system resources, and fine-tuning your trigger hardware, you’ll achieve that responsive, natural feel you’re after. Remember, it’s about finding the sweet spot between performance and stability that works for your specific setup.