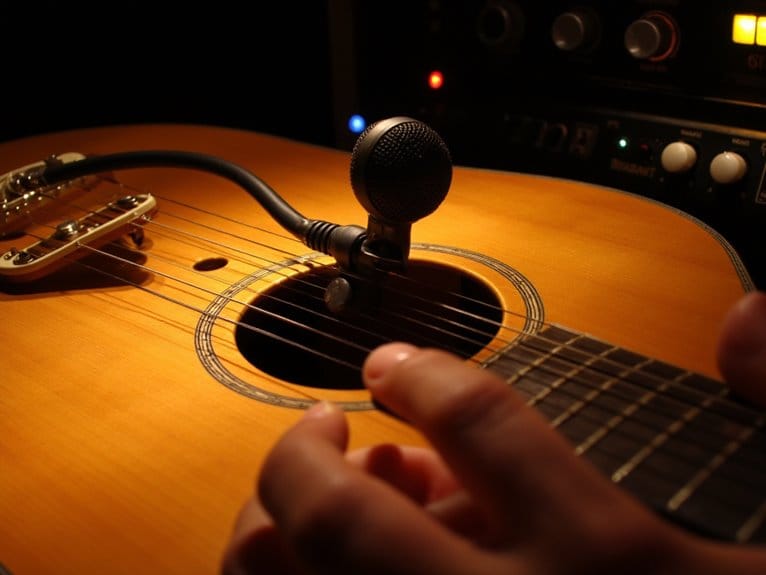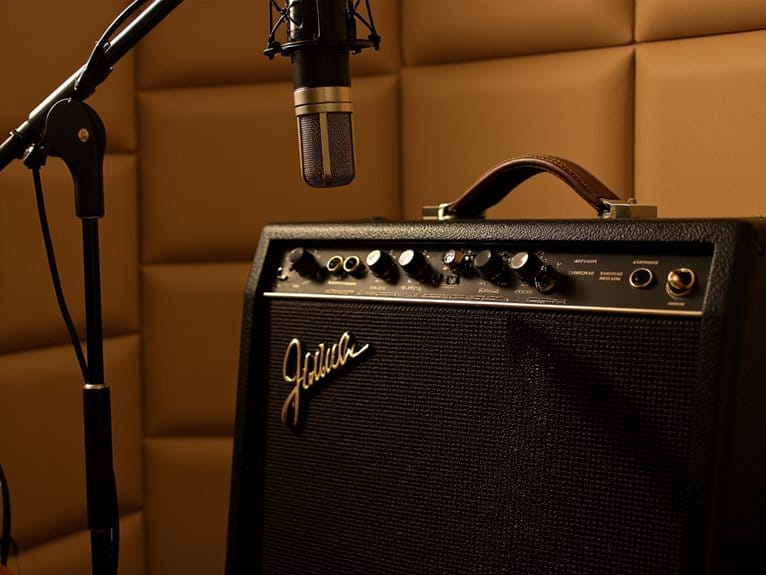
Microphone Placement for Guitar Amplifier Recording
You’ll achieve the best guitar amp recordings by positioning your microphone 3-6 inches from the speaker cone, where balanced tones emerge without proximity effect’s bass heaviness or room reflections. Dynamic mics handle high SPL levels exceeding 130 dB without distortion, while condensers capture harmonic details with superior sensitivity. Center placement yields bright, punchy sounds, whereas off-axis positioning provides warmer tones by softening harsh frequencies. Distance adjustments dramatically alter character, and strategic angling minimizes wall reflections for cleaner results—though mastering multiple microphone techniques reveals even greater sonic possibilities. Experimenting with various mic placements can lead you to discover the cleanest guitar amp tone that perfectly suits your style. Additionally, blending different microphone types can create a richer sound palette, enhancing your recordings. Don’t hesitate to try unconventional methods, such as room mics, to capture the vibe of the space and add depth to your sound.
We are supported by our audience. When you purchase through links on our site, we may earn an affiliate commission, at no extra cost for you. Learn more.
Notable Insights
- Position microphones 3-6 inches from the amplifier speaker for balanced tone without excessive bass buildup.
- Place mics on-axis to the speaker cone center for bright, punchy sound or off-axis for warmer tone.
- Use dynamic microphones for high-volume amps as they handle loud sound levels without distortion or damage.
- Angle amplifiers away from walls to minimize reflections and prevent muddy or harsh frequency buildup.
- Combine multiple microphone types at equal distances to capture both direct sound and room ambiance.
Understanding Speaker Cone Position and Tonal Impact
Three distinct zones on your guitar speaker cone dramatically shape the tone you’ll capture, and I’ve spent countless hours discovering how each area responds differently to microphone placement.
The center dust cap delivers maximum high frequency content with bright, cutting characteristics, while moving outward toward the cone zone yields fuller midrange tones perfect for tonal blending.
The surround edge produces brightness but sacrifices low end, creating thinner textures that work for specific applications. Just like with snare drums, achieving proper cardioid pattern focus helps isolate your guitar signal and minimizes unwanted background noise pickup.
Understanding speaker anatomy allows you to achieve precise sound emphasis through strategic positioning rather than relying on EQ fixes. Elevating your amplifier helps control the bottom end response and reduces problematic floor reflections that can muddy your recorded tone.
Small angular adjustments and mic distance changes reveal diverse tonal textures, giving you mic precision that transforms your recordings through intentional cone zone targeting. Different pickup configurations respond uniquely to various microphone positions, with humbucker-equipped guitars often requiring different placement strategies than single-coil setups. In live sound situations, maintain about an inch distance to minimize leakage from other instruments while preserving your desired tonal characteristics.
Distance Considerations and Room Acoustics
While pinpointing the perfect spot on your speaker cone sets the foundation for great tone, the distance you place your microphone from that cone becomes equally transformative in shaping your final sound.
The distance impact on your recording ranges from bass-heavy proximity effects at 1-2 inches to balanced tones at 3-6 inches,
while distances beyond one foot introduce significant room reflections and sound coloration.
Close miking delivers that dry, direct signal you’ll find easier to process later,
but placing your mic 3-5 feet away captures natural reverb and spatial depth that can’t be replicated artificially.
Your room’s acoustics, size, and materials dramatically influence this ambient capture,
so you’ll need to experiment with various distances to find what complements your specific recording environment.
Choosing the Right Microphone Type
Your microphone choice fundamentally shapes the character of your guitar recording, and I’ve found that understanding the core differences between dynamic, condenser, and ribbon mics will save you countless hours of frustration in post-production.
Dynamic mics like the industry-standard SM57 excel at handling extreme sound pressure levels while naturally filtering out unwanted low-end rumble, making them perfect for high-gain amps that might overload more sensitive condensers.
Each microphone type responds differently across the frequency spectrum, with dynamics offering presence boosts around 2-12kHz for bite, condensers providing full-range transparency that captures every harmonic detail, and ribbons delivering warm vintage tones through their characteristic high-frequency roll-off.
When selecting a microphone for guitar recording, ensure your choice maintains a signal-to-noise ratio above 80 dB to achieve professional audio quality that captures the full dynamics of your amplifier without introducing unwanted noise artifacts.
Dynamic Vs Condenser Mics
When you’re standing in front of your guitar amp with a microphone in hand, the choice between dynamic and condenser mics can make or break your recording. I’ve learned through countless sessions that each type brings distinct advantages that directly impact your final sound.
Dynamic advantages include their ruggedness, high SPL handling, and directional patterns that reject unwanted room noise, making them perfect for capturing punchy electric guitar tones without background interference.
Condenser nuances shine through their superior sensitivity and wider frequency response, delivering detailed high-frequency capture that reveals subtle amp characteristics, though they require phantom power and controlled environments.
I’ve found that dynamics like the SM57 excel for aggressive tones, while condensers capture acoustic subtleties beautifully.
SPL Handling Capabilities
One essential mistake I’ve watched countless engineers make is underestimating their microphone’s SPL handling capabilities when recording cranked guitar amps, leading to unwanted distortion that ruins otherwise perfect takes.
When you’re positioning mics within inches of a screaming Marshall stack, you’ll need microphones with SPL ratings exceeding 130dB to avoid clipping. Dynamic mics like the SM57 naturally handle high SPL environments, while condensers require careful consideration of their maximum thresholds.
I’ve learned that lower sensitivity microphones actually work better in these situations, producing manageable signal levels without overwhelming your preamps.
Don’t overlook self noise specifications either, as they’ll affect clarity during quieter passages between those face-melting guitar solos you’re capturing. The rugged construction of professional dynamic microphones ensures they can withstand the physical demands of close-mic recording sessions with high-volume amplifiers.
Unlike condenser microphones, dynamic microphones excel in high-volume recording scenarios because they don’t require phantom power and naturally reject background noise while handling extreme sound pressure levels.
Frequency Response Characteristics
The frequency response curve of your microphone acts as a sonic fingerprint that’ll dramatically shape how your guitar amp sounds on recording, and I’ve found that matching the right response characteristics to your specific amplifier and musical style makes the difference between amateur and professional results. Your mic selection criteria should prioritize models with natural low-end roll-off below 200 Hz to eliminate cabinet muddiness, while frequency emphasis effects in the 2-12 kHz presence range help guitars cut through dense mixes.
| Microphone Type | Key Response Traits |
|---|---|
| Dynamic | Midrange presence peak, high SPL tolerance |
| Ribbon | Flat response, smooth highs, vintage warmth |
| Condenser | Extended frequency range, detailed transients |
Each microphone type offers distinct tonal coloration that complements different amplifier characteristics and recording scenarios. Professional-grade microphones like Neumann models feature cardioid patterns that provide excellent directional focus for capturing guitar amplifiers while effectively rejecting room noise and unwanted ambient sound. For optimal guitar amp recording, aim for microphones with a signal-to-noise ratio of 78dB or higher to ensure clean captures with minimal background interference. Additionally, selecting the right microphone can significantly enhance the tonal quality of your recordings, making it essential to consider factors like frequency response and transient response. For musicians looking to achieve the best sound, it’s crucial to experiment with different mic placements and angles for optimal results, ensuring a seamless blend of tones. Ultimately, matching amplifiers to your guitar will allow you to harness the full potential of your setup, resulting in recordings that truly showcase your musical style and creativity.
Single Microphone Techniques
Most guitar recording sessions I’ve witnessed start with a single microphone setup, and there’s good reason for this approach—it forces you to nail the fundamentals of mic positioning while keeping your signal chain beautifully simple.
When you’re chasing that perfect guitar tone, your mic’s relationship to the speaker cone becomes everything. Position it dead center for bright, punchy rock characteristics, or move off-axis toward the edge for warmer, bassier results. I’ve found that even subtle height and angle adjustments dramatically alter your sound’s character.
Distance matters too—get close for direct punch, back off slightly for spatial dimension. Dynamic mics like the SM57 remain studio workhorses, though condensers capture stunning detail on clean tones when you’ve got the headroom. Proper microphone placement is crucial for enhancing signal-to-noise ratios and sound quality, which directly impacts your recording’s professional polish. The same frequency response principles that make certain mics excel at capturing snare drums also apply to guitar amplifiers, where the 50Hz to 18kHz range ensures you capture both the amp’s low-end body and high-frequency harmonics.
Multiple Microphone Approaches
Building on that single-mic foundation, multiple microphone setups open up sonic possibilities that simply can’t be achieved with one mic alone, though they demand more careful attention to phase relationships and signal routing.
You’ll want to maintain careful microphone spacing, keeping mics equidistant from speakers and aligned on a linear plane to preserve phase coherence.
I’ve found that tonal blending works best when combining contrasting mic types—perhaps a dynamic close-mic for punch with a ribbon positioned off-axis for warmth.
Your placement experimentation should focus on one mic capturing direct speaker sound while another grabs room ambience. This approach provides incredible recording flexibility during mixing, letting you dial in everything from clinical clarity to atmospheric depth.
Different mic types can capture the same source with unique tonal qualities, requiring proper monitoring to balance levels and avoid comb filtering from phase misalignment.
Angle and Orientation Strategies
When you position your microphone off-axis from the speaker cone, you’ll discover that angling away from the direct sound path naturally softens harsh frequencies while introducing warmer, more musical characteristics that often sit better in a mix.
I’ve found that combining multiple microphones at different angles—perhaps one on-axis for brightness and another at 30-45 degrees off-axis for warmth—gives you incredible flexibility during mixing, allowing you to blend the best qualities of both positions.
This multi-angle approach fundamentally captures multiple tonal perspectives simultaneously, providing you with a palette of sounds that ranges from crisp definition to smooth, rounded warmth. To ensure the highest quality capture, consider using an audio interface with 24-bit/192kHz resolution for detailed audio reproduction that preserves the nuanced tonal differences between your various microphone positions.
The cardioid pickup pattern of many dynamic microphones naturally enhances isolation from unwanted ambient noise when recording guitar amplifiers, making them particularly effective for multi-microphone setups where preventing bleed between sources is crucial.
Off-Axis Positioning Benefits
While on-axis microphone placement might seem like the obvious choice for capturing guitar amplifiers, I’ve found that angling your mic off-axis—typically around 45 degrees—opens up a whole different sonic palette that’s often more musical and mix-friendly. The off axis tonality provides warmer, bassier characteristics while mic smoothing reduces harsh frequency peaks and sibilance that plague direct positioning.
| On-Axis Characteristics | Off-Axis Benefits |
|---|---|
| Bright, punchy tone | Darker, warmer sound |
| Harsh frequency peaks | Smoothed frequency response |
| Position-sensitive | More forgiving placement |
| Direct treble emphasis | Balanced midrange presence |
| Room reflection issues | Natural speaker character |
This technique captures your amp’s natural tonal character as you’d hear it standing nearby, creating recordings that integrate seamlessly into dense mixes without aggressive EQ intervention. Much like budget microphones that utilize cardioid pickup patterns to minimize background noise and focus on the primary sound source, off-axis positioning helps isolate the desired tonal characteristics while reducing unwanted room reflections and harsh frequencies. The nickel-plated steel construction of your guitar strings also influences the tonal characteristics captured through off-axis positioning, as these strings deliver balanced brightness that complements the warmer recording approach.
Multi-Angle Mic Combinations
Three microphones positioned at carefully chosen angles around your guitar speaker can capture a sonic complexity that single-mic recording simply can’t match, though I’ll admit the setup process requires more patience than throwing up one SM57 and hitting record.
Strategic mic placement strategies involve combining center positioning for brightness with edge placement for darker tones, while intermediate positions blend these characteristics. I typically use one mic straight on-axis, another at 45 degrees off-center, and a third angled vertically to capture different harmonic overtones.
This tonal character blending approach leverages complementary frequency responses, creating richer composite tones than any single microphone could achieve alone. Similar to how built-in electronics enhance baritone ukuleles for performance settings, multiple microphones provide the versatility needed for professional recording applications. Combining dynamic mics with condensers in your multi-angle setup captures both the punch of close-miked elements and the ambient character of the room.
- Capture the aggressive bite that cuts through dense mixes with surgical precision
- Release warm, enveloping textures that make listeners lean in closer to their speakers
- Create dimensional soundscapes that transport audiences directly into your studio space
- Achieve professional-grade recordings that rival your favorite album productions
- Transform ordinary amp tones into extraordinary sonic experiences that inspire creativity
Combining Variables for Custom Tones
By understanding how microphone placement variables interact with each other, you’ll discover that achieving your ideal guitar tone becomes a matter of strategic experimentation rather than lucky accidents.
Effective mic blending techniques combine multiple placement approaches—perhaps positioning one dynamic mic near the cone’s edge for warmth while placing a condenser further back on-axis for clarity and detail.
These tonal shaping methods allow you to layer frequency responses strategically, creating depth that single-mic setups can’t match. I’ve found that adjusting distance simultaneously affects proximity effect and room reflection balance, while cone positioning determines your high-frequency emphasis.
When you angle your amp away from parallel walls and experiment with off-axis positioning, you’re controlling reflections and harshness together, giving you precise command over your recorded guitar sound‘s character.
Frequently Asked Questions
Should I Use Phantom Power When Recording Guitar Amps?
You’ll need phantom power when recording guitar amps only if you’re using condenser microphones. Dynamic mics like the SM57 don’t require it, while condensers need phantom power to function properly during amp recording sessions.
How Do I Prevent Feedback When Recording Guitar Amps?
For feedback prevention, you’ll want strategic mic positioning away from speaker cones and monitor wedges. Use directional mics, maintain proper distances, apply high-pass filters, and avoid placing microphones directly in amplifier speaker paths.
On a final note
You’ve now got the essential toolkit for capturing stellar guitar amp recordings, from understanding cone positioning’s tonal impact to mastering distance, microphone selection, and angle strategies. I’ve found that experimenting with these variables—whether you’re using single or multiple mic approaches—will help you develop your unique sonic signature. Don’t be afraid to break conventional rules; sometimes the most compelling tones come from unconventional placement decisions you’ll discover through hands-on experimentation.