Microphone Placement for Different Instruments
For acoustic guitars, you’ll want to position large-diaphragm condensers 12-16 inches from the 12th fret, while string instruments like violins need mics placed a few inches to the side. Brass instruments require careful bell positioning, with trumpets benefiting from 40-degree off-axis placement to avoid harshness. Woodwinds and drums demand close proximity techniques, typically 2-6 inches away for exceptional articulation control. Understanding these fundamental placement principles will reveal the professional techniques that transform your recordings.
We are supported by our audience. When you purchase through links on our site, we may earn an affiliate commission, at no extra cost for you. Learn more.
Notable Insights
- Position microphones 12-16 inches from acoustic guitar’s 12th fret using large-diaphragm condensers for optimal tone capture.
- Place violin mics a few inches to the side while positioning cello mics at f-holes one foot from bridge.
- Position brass instrument mics 40 degrees off-axis to avoid harsh direct sound, with distance varying 1-6 feet depending on environment.
- Use close miking (2-6 inches) for woodwinds to control articulation while avoiding breath noise through careful positioning.
- Place drum overheads 6-12 inches away ensuring equal distances from snare and kick drums to prevent phase cancellation.
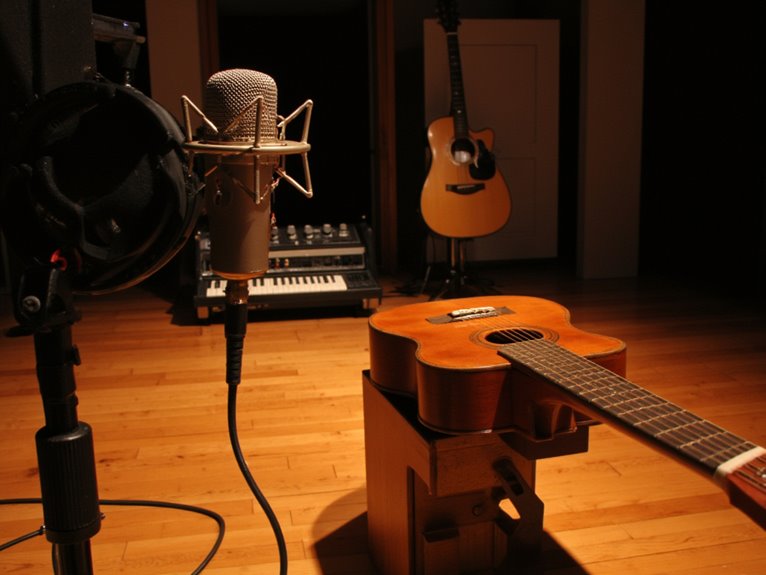
Acoustic Guitar Recording Techniques
When I first started recording acoustic guitars, I made the classic mistake of pointing my microphone directly at the sound hole, thinking it would capture the “fullest” sound—but what I got instead was a boomy, muddy mess that buried all the beautiful string detail and articulation.
Through countless sessions, I’ve learned that positioning your mic 12-16 inches from the 12th fret delivers superior frequency balance and recording clarity. Large-diaphragm condensers excel at capturing guitar resonance and dynamic nuances, while proper mic distance prevents sound hole boom. A frequency response range of 30 Hz to 16 kHz is recommended for capturing both warmth and brilliance in acoustic performances.
For stereo placement, angle two mics 45 degrees apart, maintaining consistent positioning to avoid phasing issues. You’ll achieve better tonal blending by combining high end focus with controlled low frequencies. Don’t overlook experimenting with dynamic mics, as they may suit certain guitar types better than condensers.
For a brighter, more percussive character, try positioning your microphone toward the bridge area instead of the 12th fret. This technique enhances the guitar’s presence and works particularly well for fingerstyle performances where you want to highlight playing nuances. If you’re dealing with unwanted noise or interference during recording, consider using a quality DI box to convert your signal to balanced XLR output and eliminate hum.
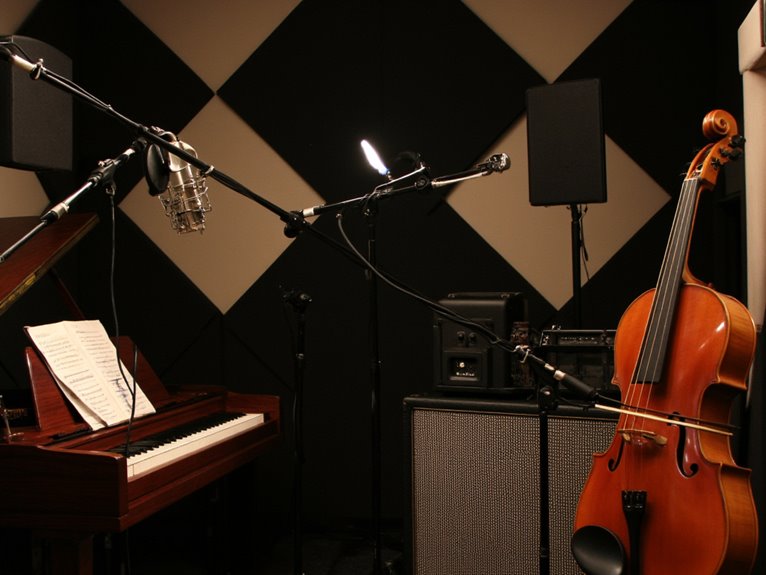
String Instrument Microphone Setup
While acoustic guitars present their own unique recording challenges, string instruments like violins, cellos, and double basses demand an entirely different approach to microphone placement—one that respects their classical heritage and the way they’re naturally heard in performance.
Your mic placement techniques should position violins a few inches to the side, capturing balanced tone without harshness, while cellos benefit from microphones aimed at f-holes approximately one foot from the bridge. For string resonance optimization, you’ll want to maintain moderate distances rather than extreme proximity, allowing lower frequencies space to develop naturally.
I’ve found that gradually moving your microphone while listening through headphones helps locate that sweet spot where direct articulation meets room ambiance perfectly. The recording environment should feature spacious acoustics with wooden surfaces and high ceilings when possible, as strings naturally sound best in these conditions. Consider using condenser microphones for their exceptional sensitivity to capture the subtle nuances and dynamic range that string instruments produce.
Brass Instrument Sound Capture
When you’re setting up microphones for brass instruments, you’ll quickly discover that bell positioning fundamentally determines whether you capture a harsh, piercing sound or achieve that warm, professional tone that separates amateur recordings from studio-quality work.
I’ve learned through countless sessions that controlling distance becomes your primary tool for shaping tonal characteristics, since moving from one foot to six feet away can transform a bright, aggressive trumpet into a naturally blended ensemble voice with proper room ambience. Rather than pointing microphones directly at the bell opening, positioning them at 40 degrees off-axis for trumpet creates a more natural capture that avoids the harsh direct sound while still maintaining clarity and presence.
The techniques you’ll use in controlled studio environments, where precision placement and acoustic treatment reign supreme, differ markedly from live performance scenarios that demand practical compromises between isolation, feedback prevention, and maintaining authentic brass section balance. For solo brass recordings, position your microphones 8-10 feet away and approximately 6 feet high to naturally capture both the instrument’s direct sound and the room’s reverb characteristics.
On-Axis Bell Positioning
I’ve spent countless hours experimenting with microphone placement techniques, and on-axis bell positioning remains one of the most straightforward yet essential approaches for capturing brass instruments with precision and clarity.
When you point your microphone capsule directly at the bell, you’ll capture a brighter, more focused sound that emphasizes high-frequency content and attack characteristics. This technique works exceptionally well for lead moments in dense mixes, though microphone sensitivity becomes vital since brass instruments generate high SPL levels that can cause distortion.
Position your mic one to two feet from the bell, ensuring your cardioid microphone can handle the transient bursts while capturing that bright brass timbre you’re after, though slight angle adjustments can temper potential harshness. Recording in warm, porous wood environments will naturally enhance the overall sound quality of your brass recordings. Ribbon microphones produce a warmer timbre that can be particularly effective for bright brass sources like trumpets, helping to smooth out any harsh frequencies while maintaining clarity.
Distance for Tonal Control
Beyond the directional considerations of mic placement, the distance you choose between your microphone and the brass instrument’s bell fundamentally shapes the tonal character you’ll capture, often making the difference between a thin, harsh recording and one with rich, full-bodied warmth.
I’ve found that maintaining one to two feet from the bell provides ideal frequency response while allowing your signal chain and mic preamps to handle the natural dynamics without overloading.
Closer positioning, around six to eighteen inches, creates aggressive tones perfect for cutting through dense mixes, though you’ll need careful monitoring techniques and proper impedance matching. Moving the microphone to different positions around the instrument will reveal tonal variations as each location captures unique frequency characteristics.
Environmental factors and acoustic treatment become more critical at greater distances, where polar patterns capture more ambient reflections, requiring phase alignment considerations with your audio interfaces. When working with multiple brass instruments, you can achieve excellent results by grouping instruments under a single microphone positioned at the optimal distance for the ensemble.
Studio Versus Live Techniques
Stepping from studio to stage transforms everything about how you’ll approach brass microphone placement, shifting from the luxury of controlled acoustics to the unforgiving reality of feedback loops, stage bleed, and performers who won’t stand perfectly still for your carefully calculated mic positions.
Studio isolation lets you position mics 1-3 feet away, capturing those gorgeous room reflections with ribbon or condenser microphones that’d get absolutely destroyed in live environments.
Performance dynamics demand you get intimate—we’re talking 1-6 inches close—using rugged dynamic mics that can handle the punishment.
While studios offer multiple takes for perfection, live acoustics require immediate decisions about ambient control, often sacrificing tonal nuance for feedback rejection and consistent capture despite constant performer movement.
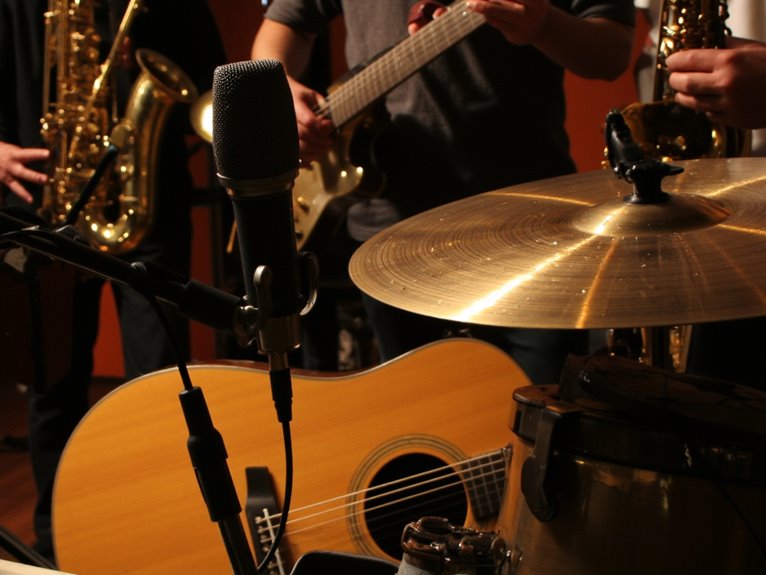
Woodwind and Accordion Recording Methods
When you’re recording woodwinds and accordions, you’ll find that close proximity techniques offer exceptional control over articulation and frequency response, though they require careful positioning to avoid overwhelming your signal with breath noise or mechanical sounds.
I’ve discovered that placing microphones within 2-6 inches of the source captures intimate details that distant micing often misses, particularly with clarinet tone holes and saxophone bell positioning where you can hear every subtle inflection.
Internal microphone options, while less common, provide unique sonic perspectives by capturing the instrument’s resonance from within the body cavity, creating an almost ethereal quality that external mics simply can’t replicate.
Close Proximity Techniques
Moving in closer to instruments opens up a world of sonic detail that you simply can’t capture from a distance, though it brings its own set of technical challenges that I’ve learned to navigate through years of studio work.
Close proximity dramatically increases sound pressure levels, requiring careful gain staging to prevent sound distortion that’ll ruin an otherwise perfect take. You’ll need to master precise mic technique, since even tiny positioning adjustments create significant tonal shifts.
- Monitor harmonic balance carefully, as close miking often alters natural timbre characteristics
- Implement proper room treatment or add artificial reverb to combat the dry, lifeless sound
- Watch for mechanical noise amplification from key clicks, bellows movements, and breathing sounds
The proximity effect boosts low frequencies, demanding constant vigilance to maintain the instrument’s authentic character while capturing intimate detail.
Internal Microphone Options
The heart of woodwind and accordion recording often beats strongest when you venture beyond external placement into the domain of internal microphone systems, where the instrument’s true voice emerges from within its resonant chambers.
Your microphone selection criteria should prioritize dynamic range capabilities, since woodwinds demand mics that capture everything from whispered pianissimo to full-bodied fortissimo passages without distortion.
Internal mounting techniques for accordions involve positioning compact condensers inside the bellows housing, while woodwinds benefit from cardioid mics mounted near sound holes or bells to minimize handling noise.
I’ve found that ribbon microphones like the KU4 excel at capturing the nuanced tonal balance that makes these instruments sing, though you’ll need windscreens to combat breath noise on woodwinds.
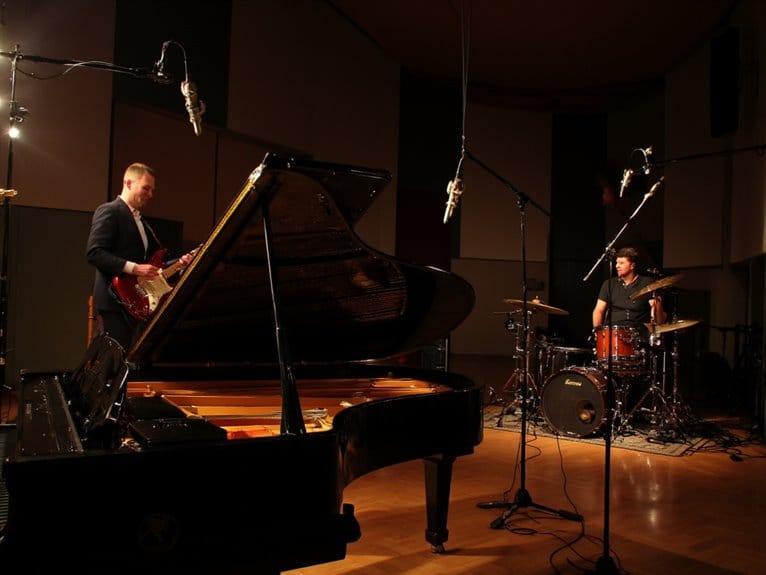
Drum and Percussion Miking Strategies
Few aspects of recording demand as much strategic thinking as drum miking, where you’ll need to balance individual drum clarity with the cohesive sound of the entire kit.
Your approach depends entirely on your sonic goals and available gear.
Consider these fundamental drum mic techniques for different scenarios:
- Close miking: Place snare mics slightly above the rim at an angle to avoid stick hits while capturing attack and body.
- Glyn Johns method: Uses 3-4 mics strategically positioned with one overhead above kit center and another near the floor tom.
- Minimalist setups: Employ just 2-3 microphones focusing on overheads plus kick for natural ambient capture.
Dynamic mics handle high SPL levels perfectly for close work, while condensers excel at ambient capture through overhead placement, giving you detailed cymbal articulation and room reflections.
Position mics 6-12 inches from drum surfaces to capture the ideal balance, where closer distances emphasize attack and punch while farther mic placement captures more room tone. Proper snare positioning typically involves placing the microphone about 2-4 inches from the rim to maintain punch and clarity while minimizing phase issues.
Distance and Positioning Fundamentals
Every microphone placement decision you’ll make ultimately comes down to three critical variables: distance from your source, the angle of approach, and how these choices interact with your recording environment.
Understanding microphone distances becomes intuitive once you grasp that 4-6 inches captures intimate detail for vocals, while 6-12 inches balances presence without plosives or distortion.
Your positioning strategies should adapt to dynamics—pull closer for soft performances, back away when things get loud to prevent clipping.
I’ve found that slightly off-axis placement often tames harsh frequencies without sacrificing quality, especially with bright sources.
For cymbals specifically, close-mic techniques at 6 to 12 inches help manage tone balance, while overhead placements at 2 to 4 feet promote a more natural sound environment with proper decay capture.
Maintaining equal distances from both snare and kick drums prevents phase cancellation issues that can compromise your stereo imaging and overall mix quality.
Microphone Type Selection for Instruments
When you’re selecting microphones for instruments, understanding the fundamental differences between dynamic and condenser microphones becomes vital for achieving professional-quality recordings.
Dynamic mics excel at handling high sound pressure levels and provide exceptional durability, making them your go-to choice for loud sources like drums and guitar amplifiers.
On the other hand, condenser microphones offer superior sensitivity and broader frequency response that captures the nuanced details of acoustic instruments. The diaphragm size further influences your selection.
Large diaphragm condensers deliver warm, rich tones perfect for acoustic guitars and pianos, whereas small diaphragm condensers provide precise detail capture that wind instruments and orchestral sections demand.
Dynamic microphones are particularly valued for their warm clarity in both studio and live performance environments, making them versatile tools for various recording scenarios.
Achieving optimal recording quality also depends on selecting microphones with high signal-to-noise ratios, as professional applications require at least 80 dB for clarity in recordings.
Dynamic Vs Condenser Mics
While most musicians focus on technique and talent, I’ve learned that choosing between dynamic and condenser microphones can make or break your recording or performance, fundamentally shaping how your instrument’s character translates to your audience.
Dynamic microphone advantages include exceptional durability for live performances, high SPL handling that won’t distort your snare hits, and natural background noise rejection that keeps your recordings clean.
However, condenser microphone limitations become apparent in loud environments where their sensitivity picks up unwanted sounds.
Consider these key differences when selecting your microphone:
- Sensitivity levels: Condensers capture subtle acoustic details, while dynamics excel with aggressive, high-volume sources
- Power requirements: Condensers need phantom power, dynamics plug-and-play instantly
- Environmental suitability: Studios favor condensers’ wide frequency response, stages demand dynamics’ rugged construction
Large Vs Small Diaphragm
The diaphragm size in your condenser microphone fundamentally determines how it’ll capture your instrument’s sonic character, and I’ve found that understanding this distinction can dramatically improve your recording decisions.
Large diaphragm mics, typically measuring one inch or more, excel at warming up vocals and instruments that need that rich, full-bodied presence, though they’ll also pick up more ambient noise due to their increased sensitivity.
Small diaphragm mics, usually half-inch or smaller, deliver exceptionally detailed transient response and wider frequency ranges, making them perfect for acoustic guitars, pianos, and string ensembles where you need precise, uncolored reproduction.
I consistently reach for small diaphragms when recording stereo pairs or capturing intricate instrumental details.
Managing Ambient Noise and Leakage
Since even the most carefully chosen microphone can’t escape the reality of unwanted sounds creeping into your recordings, mastering ambient noise and leakage control becomes one of those skills that separates decent recordings from truly professional ones.
Your ambient noise reduction strategy starts with smart positioning, placing mics close to sources while directing them away from noisy elements like air conditioners or amplifiers.
Effective leakage control strategies include:
- Distance management – keeping microphones within 0.5 meters of sources for tighter sound isolation
- Directional mic selection – using cardioid or shotgun patterns to reject off-axis noise
- Physical barriers – positioning foam panels, blankets, or isolation shields between instruments and reflective surfaces
I’ve found that combining these approaches, rather than relying on single solutions, consistently delivers cleaner recordings.
A cardioid polar pattern minimizes background noise by rejecting sound from the sides and rear of the microphone, making it essential for recording in less-than-ideal acoustic environments.
For optimal results, ensure your microphone maintains a signal-to-noise ratio above 70 dB, which significantly contributes to clearer recordings even in challenging acoustic environments.
On-Axis Vs Off-Axis Placement Techniques
When you’re positioning microphones, understanding the fundamental difference between on-axis and off-axis placement will dramatically impact your recording’s tonal character, frequency response, and overall sonic impression.
I’ve found that on-axis placement, where the capsule points directly at your sound source, delivers bright clarity and enhanced high-frequency detail, while off-axis angling produces softer, mellower tones with reduced harshness and sibilance.
The positioning choice you make between these two approaches becomes a powerful creative tool for shaping instrument timbre, managing unwanted frequencies, and achieving the exact sonic character your recording demands.
On-Axis Sound Characteristics
How you position your microphone relative to the sound source fundamentally shapes the character and quality of your recording, and I’ve found that understanding on-axis placement is essential for achieving professional results.
When you place your mic directly facing the sound source, you’re maximizing sound clarity while capturing the brightest, most focused tone possible.
The on axis advantages become immediately apparent through several key characteristics:
- Enhanced proximity effect that adds warmth and bass response, particularly with cardioid microphones
- Superior high-frequency detail that captures every nuance of vocals, strings, and brass instruments
- Reduced phase issues and ambient noise pickup for cleaner, more isolated recordings
This direct alignment produces fuller tonal richness, better mono compatibility, and that professional presence you’re seeking in your recordings.
Off-Axis Tonal Benefits
While on-axis placement delivers that crisp, focused sound we just explored, I’ve discovered that moving your microphone off-axis opens up a completely different palette of tonal possibilities that can transform your recordings in remarkable ways.
You’ll notice enhanced bass response and improved warmth across various instruments, particularly when working in challenging recording environments where isolation becomes critical. Off-axis positioning reduces unwanted bleed between instruments, minimizes feedback during live sessions, and captures a more balanced frequency spectrum that often sounds more natural to our ears.
The key lies in experimenting with different microphone angles—typically between 15 to 45 degrees—to find that sweet spot where your acoustic guitar loses its boominess, your vocals shed harsh plosives, and your overall mix gains dimensional depth.
Positioning Impact Comparison
Understanding the stark differences between on-axis and off-axis placement becomes essential once you’ve grasped the individual benefits of each technique.
I’ll tell you that the contrast in sonic results can be surprisingly dramatic even with minor positional adjustments. Your placement strategy directly influences recording clarity, with on-axis delivering focused brightness while off-axis provides sound diffusion that naturally smooths harsh frequencies.
Consider these key tonal differences:
- Frequency balance shifts: On-axis captures fuller spectrum with enhanced highs, off-axis reduces brightness naturally
- Mic sensitivity variations: Direct positioning increases signal strength but amplifies feedback potential in live settings
- Ambient rejection capabilities: Angled placement minimizes room noise and unwanted reflections effectively
The feedback reduction you’ll achieve with off-axis positioning often outweighs any perceived loss in detail, particularly when working in challenging acoustic environments.
Close Miking Benefits and Applications
Close miking represents one of the most fundamental techniques I’ve relied on throughout my recording career, positioning microphones within inches of the sound source to capture the most direct, unfiltered signal possible from any instrument. The close miking benefits become immediately apparent when you’re dealing with multiple instruments, as you’ll achieve superior isolation and control over each element in your mix.
| Instrument | Primary Benefit |
|---|---|
| Vocals | Intimate clarity with reduced background noise |
| Drums | Attack definition with minimal bleed |
| Strings | Rich body resonance and textural details |
| Acoustic Guitar | Controllable warmth or brightness emphasis |
These application examples demonstrate how proximity effect and strategic positioning transform your recordings, though you’ll sacrifice some natural ambience for precision and separation.
Overhead and Room Microphone Placement
Moving beyond the intimate precision of close miking, overhead and room microphone placement opens up an entirely different sonic landscape that I’ve found transforms recordings from clinical documentation into living, breathing musical experiences.
You’ll discover that overhead techniques like spaced pair configurations capture expansive stereo imaging, though XY placement often proves more reliable for avoiding phase issues that’ll haunt your mono compatibility later.
Room acoustics become your creative partner here, where distance and positioning dramatically shape ambient capture:
- Spaced pair overhead placement creates wide soundstages but requires careful phase management
- Room microphone distance controls ambient blend, with farther placement yielding more natural reverberation
- Stereo techniques like ORTF enhance spatial depth while maintaining mono compatibility
These methods transform sterile recordings into immersive experiences.
Studio Vs Stage Recording Approaches
The fundamental difference between studio and stage recording lies in control versus adaptation, where I’ve learned that studio work lets you craft the perfect sonic environment while live recording forces you to work with whatever acoustical hand you’re dealt.
In studios, you’ll have complete control over feedback management through careful mic placement and soundproofing, while stage work demands quick solutions like repositioning and gain adjustments. Your isolation techniques become essential in both environments, though studios offer superior acoustic treatment that eliminates bleed between instruments.
Key differences you’ll encounter include:
- Equipment flexibility – Studios allow specialized microphone choices, while stages require robust, versatile options
- Sound reinforcement priorities – Live work emphasizes immediate audience experience over perfect capture
- Environmental control – Studios provide consistent acoustics, stages present variable conditions
Understanding these distinctions helps you adapt your microphone placement strategies effectively.
Frequently Asked Questions
How Do I Prevent Microphone Feedback During Live Performances With Acoustic Instruments?
You’ll achieve effective feedback prevention in live sound by positioning directional microphones close to acoustic instruments while maintaining maximum distance from speakers.
I’ve found that using cardioid patterns, reducing open mic counts, and applying strategic EQ cuts in problematic 800Hz-2kHz frequencies works consistently.
Replace floor monitors with in-ears when possible, treat reflective surfaces acoustically, and perform thorough soundchecks to identify feedback frequencies before your performance.
What’s the Best Way to Record Multiple Instruments Simultaneously Without Interference?
I’ve found interference management starts with strategic microphone placement, positioning cardioid mics 6-12 inches from each instrument while angling them away from sound sources you don’t want.
You’ll achieve better mic isolation by using acoustic barriers between instruments, choosing microphones with tight polar patterns, and maintaining proper gain staging.
Consider recording in layers when possible, since simultaneous capture always involves compromises between convenience and audio quality control.
How Do I Adjust Microphone Placement for Different Room Acoustics and Sizes?
You’ll need to adjust mic distance based on your room’s size and acoustic properties.
In smaller spaces, place mics closer to sources to minimize unwanted reflections, while larger rooms allow greater distances to capture natural room ambience.
Follow the 3:1 rule for multiple mics, avoid corners and parallel surfaces, and experiment with heights and angles to find sweet spots that balance direct sound with controlled reflections.
On a final note
You’ve now got the essential microphone placement techniques for capturing professional-quality recordings across every instrument family. Whether you’re tracking delicate acoustic guitars in your home studio, miking a full drum kit for live performance, or positioning condensers for orchestral strings, these fundamentals will serve you well. Remember, there’s no single “perfect” setup—experiment with distances, angles, and polar patterns until you find what works best for your specific room acoustics and artistic vision.