Microphone Guide: Which Type for Every Recording Situation
You’ll want cardioid microphones for podcast vocals and single-source recording since they capture front-facing sound while rejecting background noise, requiring +48V phantom power for condenser types. Choose omnidirectional mics for group discussions and natural ambient capture, though they’re susceptible to room reflections within their 360-degree pickup pattern. Dynamic microphones like the Shure SM57 excel in live settings with their rugged construction and high SPL handling, while ribbon mics offer figure-8 patterns for two-person interviews. Understanding these fundamentals will transform your audio quality decisions.
We are supported by our audience. When you purchase through links on our site, we may earn an affiliate commission, at no extra cost for you. Learn more.
Notable Insights
- Dynamic microphones excel in live performances and noisy environments, handling high sound pressure levels without requiring phantom power.
- Cardioid microphones isolate vocals by capturing sound from the front while rejecting background noise from behind.
- Omnidirectional microphones work best for group recordings, capturing sound from all directions within a 3-6 foot range.
- Condenser microphones provide superior studio vocal quality but require acoustic treatment and +48V phantom power to operate.
- Budget under $300 favors dynamic mics like SM57/58, while $400+ enables quality condensers for controlled studio environments.
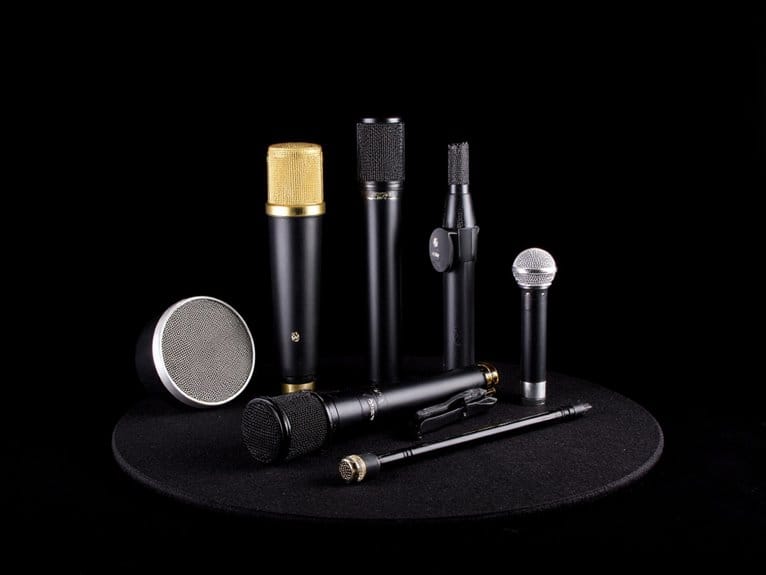
Understanding Microphone Polar Patterns and Their Impact on Sound Quality
Directionality – that invisible force field around every microphone – determines whether you’ll capture crystal-clear vocals or end up with a muddy mess of background noise, room reflections, and unwanted sounds competing for attention in your recording.
Understanding polar patterns becomes essential for matching your mic to specific recording environments, and honestly, I’ve learned this lesson through plenty of trial and error over the years.
Matching microphone polar patterns to your recording space isn’t optional-it’s the difference between professional results and amateur frustration.
An extensive polar pattern comparison reveals five main types: omnidirectional picks up sound from all directions, figure-8 captures front and back while rejecting sides, and cardioid variants focus primarily forward.
Smart microphone placement, combined with pattern selection, directly impacts your signal-to-noise ratio, proximity effect on bass response, and overall audio clarity in any recording situation. Proper positioning is generally optimal 6-12 inches from the source to capture strong direct signals and reduce room reflections while managing self-noise levels effectively.
Professional microphones like the Shure SM58 utilize cardioid patterns to minimize background noise during live performances, demonstrating how pattern choice can make or break your audio quality.
Cardioid Microphones: Front-Focused Recording for Vocal Isolation
The cardioid microphone stands as the workhorse of vocal recording, delivering that heart-shaped pickup pattern that’s become synonymous with professional isolation and clarity in both studio and live environments.
You’ll find this directional design captures sound primarily from the front while rejecting noise from the rear, making it perfect for situations where vocal clarity and feedback resistance are paramount.
- Frequency response typically spans 20 Hz to 20 kHz for studio condensers
- Phantom power requirement of +48V for condenser types
- Proximity effect enhances bass response as you move closer
- Off-axis rejection starts at 3 dB at 66° and 6 dB at 90°
- Self-noise specifications remain low in quality models for clean recordings
This focused pickup pattern isn’t ideal for ambient recording, but excels at isolating your primary source.
Omnidirectional Microphones: Capturing Natural Ambient Sound
Unlike cardioid microphones that focus on what’s directly in front of them, omnidirectional mics pick up sound equally from every direction, which makes them incredibly versatile for capturing the complete acoustic picture of any environment.
You’ll find this 360-degree pickup pattern particularly useful when recording groups of people, since everyone gets equal treatment regardless of where they’re positioned around the microphone.
However, this same characteristic that makes them perfect for natural-sounding recordings also means they’ll capture every bit of background noise, air conditioning hum, and random sounds that might be lurking in your recording space. This is where dynamic microphones excel at rejecting background noise, making them a better choice for untreated rooms and noisy environments.
For optimal results, position omnidirectional microphones within the proper pickup range of your participants, as most models effectively capture clear audio within a 3-meter range for smaller groups.
Equal Sound Pickup
When you’re looking to capture the full acoustic environment around you, omnidirectional microphones excel at picking up sound equally from every direction, creating that natural, immersive quality that makes recordings feel authentically three-dimensional.
Their circular pickup pattern operates on pressure gradient principles, where the diaphragm responds uniformly to sound waves regardless of their origin point, giving you that coveted equal sensitivity for true ambient recording.
Key advantages of omnidirectional microphones include:
- Natural tonal balance without proximity effect bass buildup
- 360-degree pickup pattern captures room acoustics authentically
- Reduced wind noise due to sealed design without rear ports
- Flexible placement since orientation doesn’t affect performance
- Multiple source capture ideal for group conversations or nature sounds
However, they’re more susceptible to background noise and reverberation than directional alternatives. Due to their equal sensitivity to all sound sources, omnidirectional microphones require careful attention to room acoustics and may need additional processing to manage unwanted reflections.
When connecting these microphones to your recording setup, ensure your audio mixer provides 48V phantom power for proper condenser microphone operation and optimal signal quality.
Group Recording Benefits
If you’ve ever tried recording a group discussion with a directional microphone, you’ll quickly discover why omnidirectional mics shine in these scenarios-they effortlessly capture every voice in the room without requiring participants to huddle around a single sweet spot or forcing you to constantly adjust positioning.
These omnidirectional advantages make capturing conversations remarkably straightforward, eliminating the headache of setting up multiple individual microphones or worrying about perfect placement angles.
You’ll find that participants can move naturally throughout the session, whether they’re leaning back in chairs, gesturing enthusiastically, or turning to address different speakers, while the microphone maintains consistent audio quality.
This flexibility proves invaluable for conference calls, focus groups, and interviews where authentic interaction dynamics matter more than studio-perfect isolation. The optimal recording distance for maintaining quality audio typically ranges between 3-6 feet from participants, ensuring clarity while preserving the natural conversational flow.
For shared equipment scenarios like these, implementing daily cleaning with isopropyl alcohol wipes becomes essential to maintain hygiene standards between different user sessions.
Background Noise Considerations
While group recording showcases omnidirectional microphones at their collaborative best, these same 360-degree pickup patterns create a double-edged relationship with background noise that you’ll need to understand before making your recording decisions.
Omnidirectional mics excel at ambient sound capture, delivering warmer, fuller bass through their extended frequency response, but they can’t distinguish between desirable environmental sounds and unwanted noise.
Recording environment dynamics become essential since these microphones inherently lack directional rejection capabilities. Strategic microphone placement becomes crucial for minimizing unwanted handling noise while ensuring optimal audio capture.
- Natural sound preservation: Captures authentic room acoustics and subtle environmental details
- No noise cancellation: Picks up background sounds from all directions without filtering
- Reduced handling artifacts: Less susceptible to wind noise and plosive sounds than directional mics
- Environmental sensitivity: Vulnerable to echoes, footsteps, and ambient hum in uncontrolled spaces
- Best in quiet settings: Requires controlled environments for peak performance
In contrast, cardioid patterns help minimize interference from surrounding noise sources, making them more suitable for environments where background sound control is challenging.
Bidirectional Microphones: Perfect for Two-Person Interviews
When you’re recording a two-person interview, you’ll find that bidirectional microphones offer a surprisingly elegant solution with their distinctive figure-8 pickup pattern, which captures sound equally from the front and back while rejecting audio from the sides.
I’ve found that positioning these mics correctly between two speakers eliminates the complexity of managing multiple microphones, though the setup requires precise centering to maintain balanced audio levels from both participants.
The real advantage becomes apparent when you realize how this configuration allows natural conversation flow and visual communication between speakers, something that’s harder to achieve with traditional unidirectional microphones that would require closer positioning or additional equipment. However, you’ll need to carefully monitor for phase cancellation issues that can occur when multiple sound sources are captured simultaneously in this configuration.
This bidirectional approach also excels at rejecting side noise, making it particularly valuable for maintaining clear dialogue even in acoustically challenging environments where ambient sounds might otherwise interfere with your recording quality.
Figure-8 Pattern Benefits
Because bidirectional microphones capture sound from both the front and back while rejecting noise from the sides, they’ve become my go-to recommendation for two-person interviews, podcast recordings, and face-to-face conversations where you need professional results without the complexity of multiple mic setups.
The figure 8 performance benefits truly shine when you’re dealing with challenging acoustic environments, offering bidirectional sound isolation that eliminates the need for extensive room treatment or multiple cardioid microphones.
- Laser-like directional control creates deep nulls at 90 degrees, rejecting unwanted reflections from ceiling and floor surfaces.
- Natural ambient sound capture mimics human ear perception, producing realistic soundstage with balanced room acoustics.
- Symmetrical frequency response maintains consistent tonal quality for sources positioned on both front and back lobes.
- Reduced setup complexity eliminates multiple microphone configurations while supporting natural eye contact between participants.
- Enhanced noise rejection isolates intended sources from background sounds more effectively than omnidirectional patterns.
For situations requiring mobility without sacrificing professional audio quality, bidirectional microphones can be paired with wireless transmitters to maintain the same directional benefits while providing freedom of movement for interview participants. Like the cardioid patterns used for isolating violin performances, bidirectional microphones excel at rejecting ambient noise while maintaining exceptional clarity for your primary sound sources.
Setup and Positioning
Three fundamental positioning strategies will make or break your bidirectional microphone placement for two-person interviews, and I’ve learned this through countless recording sessions where improper placement turned professional conversations into unusable audio disasters.
First, position the microphone exactly between both speakers at equal distances, typically 12-18 inches from each person’s mouth, ensuring balanced capture from both pickup zones.
Second, angle the microphone perpendicular to the line connecting both speakers, which maximizes audio clarity while minimizing side rejection interference.
Third, maintain consistent height alignment with both speakers’ mouths, even if they’re seated at different levels.
I’ve found that even slight deviations from these positioning fundamentals can create volume imbalances that’ll haunt you during post-production mixing.
To achieve professional results, maintain a signal-to-noise ratio that exceeds 70 dB for crystal-clear interview recordings.
Additionally, consider using microphones with noise cancellation technology to filter out background distractions, which becomes especially important when both speakers are positioned equidistantly from the mic.
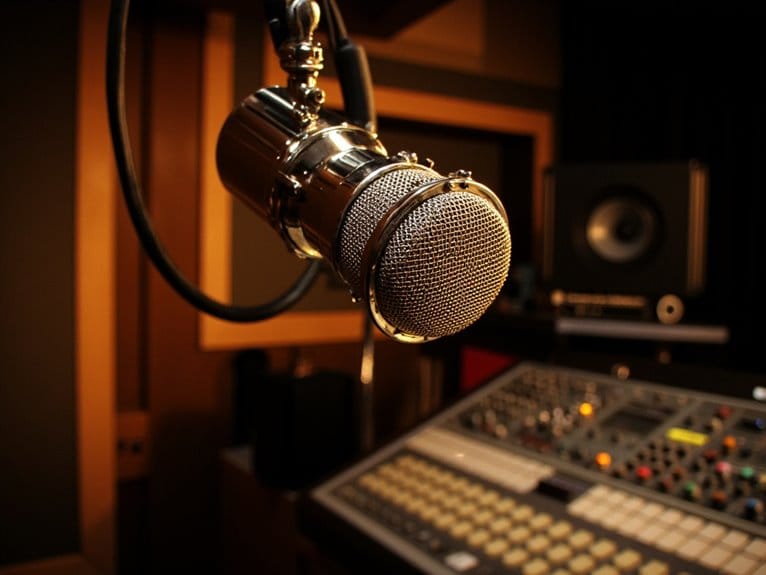
Condenser Microphones: Studio-Quality Sensitivity and Detail
A feather’s touch can trigger a condenser microphone’s diaphragm, and that’s precisely what makes these studio workhorses so remarkable for capturing every sonic detail your ears crave.
Their electrostatic design requires phantom power, typically 48 volts, but delivers unmatched sensitivity across the full frequency spectrum, from whisper-soft vocals to crystalline acoustic guitar harmonics.
You’ll discover these mics excel in controlled environments where sound treatment materials minimize reflections, allowing their wide frequency response to shine without environmental interference:
- Exceptional transient response captures percussive hits and string plucks with stunning accuracy
- Low self-noise guarantees clean recordings even at modest input levels
- Internal preamps provide stronger output signals requiring less external gain
- Greater recording distance flexibility maintains balanced sound without proximity effects
- Superior detail resolution ideal for professional studio applications demanding sonic precision
Professional condenser mics should feature a frequency response range from 20Hz to 20kHz with a signal-to-noise ratio of 70 dB or higher for optimal studio performance. Additionally, it’s essential to consider other features such as polar pattern flexibility and build quality to ensure versatility in various recording scenarios. For those seeking convenience without sacrificing quality, the best usb microphone can deliver superb sound while being easy to set up and use. These mics often come equipped with built-in preamps and digital conversion, making them a popular choice for both professionals and home studio enthusiasts.
Condenser microphones capture subtle vocal nuances that make them optimal for serious content creators and studio recordings where high fidelity matters most.
Dynamic Microphones: Robust Performance for Live Settings
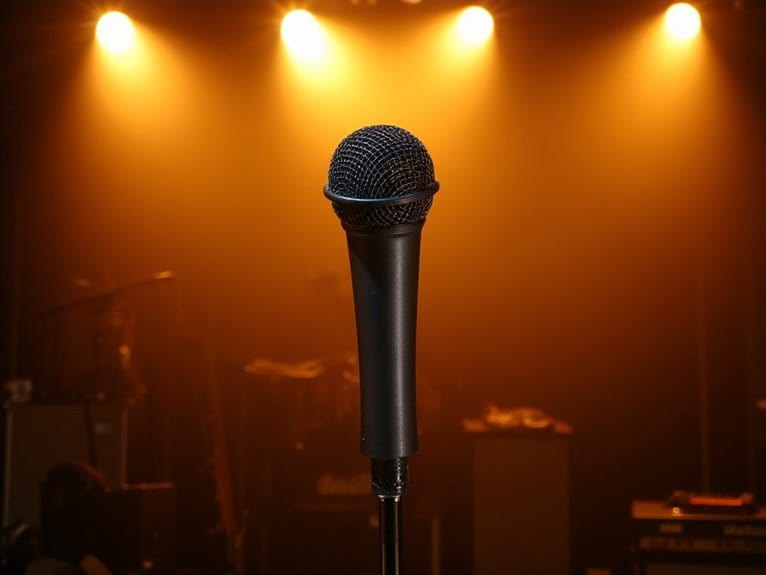
Stage lights blazing, amplifiers cranked to eleven, and crowds cheering at deafening levels-this is where dynamic microphones truly come alive, transforming the chaos of live performance into pristine audio capture.
Dynamic microphones thrive in chaos, capturing pristine audio while stage lights blaze and amplifiers roar at maximum volume.
I’ve witnessed countless microphones fail under pressure, but dynamic microphone durability consistently saves the day when equipment takes a beating. Their robust construction, featuring a simple diaphragm-voice coil-magnet assembly, withstands drops, moisture, and temperature fluctuations that would destroy delicate condensers.
The live performance versatility of dynamics like the legendary SM58 and SM57 stems from their ability to handle extreme sound pressure levels without distortion, while their cardioid patterns reject feedback and ambient noise. With gain before feedback typically rated 15-20 dB higher than condensers, these microphones allow performers to achieve greater volume levels without the piercing squeal that can destroy a performance.
You don’t need phantom power or complex setup procedures-just plug in and perform, making them essential tools for any serious live sound arsenal.
Professional dynamics can handle SPL over 160dB, maintaining crystal-clear audio even during the most aggressive vocal performances or drum hits where lesser microphones would saturate and distort.
Ribbon Microphones: Natural Sound Reproduction for Professional Studios
When you’re seeking that coveted warm, natural sound that makes professional recordings stand out, ribbon microphones offer characteristics that can’t be replicated by dynamic or condenser mics, featuring their signature corrugated metal ribbon suspended within a magnetic field that captures audio with remarkable smoothness and depth.
You’ll find these mics excel in studio applications where their figure-8 pickup pattern, sensitivity to nuanced frequency responses, and ability to tame harsh digital recordings make them invaluable for acoustic instruments, vocals, and ambient room capture.
The benefits you’ll experience include that distinctive mellow tonality, reduced need for EQ adjustments, and the kind of three-dimensional sound reproduction that transforms ordinary tracks into professionally polished recordings.
Ribbon Mic Characteristics
Professional recording engineers often describe ribbon microphones as the “vintage Rolls-Royce” of the microphone world, and after working with these elegant transducers for over a decade, I can tell you they’ve earned that reputation through their remarkably natural sound reproduction and sophisticated engineering.
Understanding ribbon mic characteristics helps you appreciate both their ribbon mic advantages and ribbon mic limitations. These mics feature ultra-thin aluminum ribbons suspended in magnetic fields, creating their signature warm, smooth sound with gentle high-frequency roll-off around 14 kHz.
Key ribbon mic characteristics include:
- Figure-8 polar pattern – captures sound from front and rear while rejecting sides
- High SPL handling – withstands up to 146 dB without damage
- Low output sensitivity – requires quality preamps for peak performance
- Natural frequency response – flat 20 Hz to 15 kHz range
- Proximity bass boost – adds warmth when sources are within one meter
Studio Applications Benefits
After spending countless hours in studios ranging from Nashville’s historic RCA to smaller home setups, I’ve witnessed firsthand how ribbon microphones transform ordinary recordings into something genuinely special through their unmatched ability to capture natural sound reproduction.
The ribbon mic advantages become immediately apparent when you’re tracking acoustic guitars, brass instruments, or drum overheads, delivering that coveted warmth and depth that makes producers nod approvingly.
You’ll find these mics excel at smoothing harsh frequencies while maintaining clarity, making them incredibly EQ-friendly for studio recording techniques.
Their figure-eight polar pattern offers creative placement options, whether you’re capturing the midrange growl of a guitar amp or adding rich character to vocals that need that extra touch of professional polish.
Best Microphone Choices for Studio Vocal Recording
Recording vocals in the studio requires selecting the right microphone that’ll capture your voice with the clarity, warmth, and detail you’re after.
The foundation of any great vocal recording starts with choosing a microphone that complements your unique voice and sonic goals.
I’ve spent countless hours testing different models to understand what really makes the difference between a decent recording and one that truly shines. Through extensive frequency response comparison testing, I’ve found that mic placement techniques greatly impact even the best microphones’ performance.
Here are my top recommendations across different categories:
- Rode NT1 – Clean, detailed sound perfect for both vocals and acoustic instruments
- Shure SM7B – Dynamic workhorse with excellent noise rejection for deep vocals
- Neumann U 87 Ai – Premium choice offering neutral sound for any vocal style
- Audio Technica AT2020 – Budget-friendly condenser delivering impressive quality
- Electro-Voice RE20 – Specialty option ideal for hip-hop and broadcast applications
Live Performance Microphones That Handle Crowds and Stage Noise
When you’re performing live with screaming crowds, blaring stage monitors, and the chaos that comes with every great show, the microphone selection rules change completely. I’ve learned this the hard way after watching perfectly good studio mics become feedback machines in front of energetic audiences.
Dynamic microphones like the Shure SM57 and SM58 become your allies in live sound environments, rejecting background noise while capturing clean vocals and crowd energy. Strategic placement matters tremendously-I position crowd mics high above stages, angled downward to minimize stage bleed while maximizing audience capture.
Modern microphone technology offers shotgun patterns and cardioid designs that isolate sources effectively, though you’ll still need high-pass filters and careful gain staging to combat room reflections and maintain clarity.
Podcasting and Streaming Microphone Recommendations
Anyone who’s spent hours editing out keyboard clicks, air conditioning hum, and neighbor’s barking dogs from their podcast recordings knows that choosing the right microphone can make or break your audio quality.
I’ve discovered through countless recording sessions that the podcasting and streaming world demands a completely different approach than traditional studio setups.
Modern microphone brands have responded with specialized options that cater to content creators’ unique needs, incorporating advanced recording techniques that prioritize voice clarity while rejecting ambient noise through cardioid pickup patterns and built-in pop filters.
- Shure MV7+ offers hybrid USB-C/XLR connectivity with touch controls for versatile setup options
- Samson Q2U provides budget-friendly quality that doesn’t compromise essential podcast recording performance
- Rode PodMic features cardioid pattern with integrated pop filter for clean, affordable XLR recordings
- Blue Yeti delivers plug-and-play convenience for streamers prioritizing straightforward setup processes
- Elgato Wave DX serves as cost-effective alternative to premium models while maintaining professional sound quality
Recording Acoustic Instruments With Precision and Clarity
Three decades of recording everything from fingerpicked ballads to aggressive strumming patterns has taught me that capturing acoustic instruments requires a fundamentally different mindset than recording vocals or electric sources.
I’ve learned that the unforgiving nature of acoustic recording exposes every flaw in your microphone choice, placement technique, and room acoustics.
You’ll find that small-diaphragm condensers like the Shure SM81 excel at capturing transient response and high-frequency clarity, while large-diaphragm options such as the Neumann U87 Ai offer warmth and richness.
The best recording techniques involve positioning your microphone near the 12th fret for balanced string resonance, experimenting with cardioid polar patterns to minimize ambient noise, and considering your budget carefully since quality dramatically impacts your final results.
Essential Technical Specifications: Phantom Power, Frequency Response, and Self-Noise
After forty years behind the mixing board, I’ve watched too many promising recordings fall apart because engineers didn’t understand the technical specifications that determine whether their expensive microphone will actually deliver professional results.
Honestly, I used to gloss over these numbers myself until a disastrous session taught me that phantom power requirements, frequency response curves, and self-noise ratings aren’t just marketing jargon-they’re the foundation of every successful recording.
Understanding these specs becomes essential when you’re dealing with microphone impedance matching and choosing between analog versus digital recording chains. Proper microphone impedance matching ensures optimal signal transfer and minimizes distortion, which can significantly affect the quality of your recordings. Additionally, utilizing balanced microphone cable advantages further reduces unwanted noise and interference, especially in longer cable runs. This combination of thoughtful equipment choices can greatly enhance your overall audio performance.
- Phantom power (+48V) powers condenser mics through XLR cables, eliminating battery dependency
- Frequency response curves reveal how mics capture 20Hz-20kHz range across different applications
- Self-noise ratings (measured in dBA) determine your recording’s noise floor
- Signal-to-noise ratio indicates clarity potential in professional environments
- Dynamic range spans from quietest detectable sound to maximum SPL handling
Choosing the Right Microphone Based on Environment and Budget
When you’re standing in Guitar Center with a $300 budget wondering whether that shiny condenser mic will actually work in your untreated basement studio, you’re facing the same crossroads that’s made or broken thousands of recording projects-and I’ve learned the hard way that matching your microphone choice to both your environment and wallet isn’t just about finding the “best” mic, it’s about finding the right tool for your specific situation.
| Environment Impact | Microphone Budget Reality |
|---|---|
| Untreated room echoes destroy condenser recordings | That $230 RØDE NT1-A needs $200+ acoustic treatment |
| Live venues demand dynamic durability | Entry-level SM57 outperforms expensive condensers here |
| Studio silence releases condenser potential | Your $400 investment becomes worthwhile |
| Background noise kills omnidirectional recordings | Cardioid mics save money on soundproofing |
Dynamic microphones handle harsh environments while condensers excel in controlled spaces.
Frequently Asked Questions
Can I Use a Microphone in Extreme Temperatures or Humid Conditions?
You can use microphones in extreme conditions, but you’ll need proper weather resistance and moisture protection.
Most standard mics operate between -10°C to 50°C, though MEMS microphones handle -40°C to 100°C.
Look for IP67-rated enclosures for humidity up to 90%.
I’ve found that ruggedized models with polycarbonate housing survive temperature shocks better, but always check manufacturer specs before field deployment.
How Do I Properly Clean and Maintain My Microphone for Longevity?
You’ll want to establish proper microphone storage techniques by keeping your mic in protective cases when not in use, while using gentle cleaning solutions like diluted isopropyl alcohol for the body and mild soap for detachable parts.
I’ve found that regular maintenance with soft-bristled brushes, microfiber cloths, and compressed air prevents buildup, though you should avoid cleaning sensitive capsules directly and make sure everything’s completely dry before reassembling.
What Causes Microphone Feedback and How Can I Prevent It During Recordings?
Microphone feedback occurs when you create feedback loops between your mic and speakers, where amplified sound gets picked up and re-amplified continuously.
I’ve learned that proper sound isolation prevents this howling nightmare by keeping mics away from speakers, using directional polar patterns like cardioid, and positioning yourself behind the main speakers.
You’ll also want to mute unused mics, avoid cupping the capsule, and gradually adjust gain levels.
Do I Need a Pop Filter With Every Microphone Type?
Pop filter necessity varies greatly across different microphone types, and honestly, I’ve learned this through countless recording sessions where I initially overthought the requirements.
While condenser mics absolutely demand pop filters due to their extreme sensitivity to plosives, dynamic microphones like the SM58 can often survive without one.
Though you’ll still get cleaner vocals with proper filtering, especially during close-proximity recording situations.
Can I Repair a Damaged Microphone Diaphragm or Should I Replace It?
You can attempt repair techniques like re-tensioning the diaphragm and reattaching loose coils with cyanoacrylate or specialized wax, but I’d honestly recommend diaphragm replacement for severe damage since wrinkles and tears rarely restore original sound quality.
While careful cleaning and minor coil reattachment might work, the delicate Mylar material and precision required make replacement more reliable for professional applications.
On a final note
You’ve now got the essential knowledge to match microphones with your specific recording needs, whether you’re capturing vocals in a treated studio, recording acoustic guitars in your living room, or hosting interviews in less-than-ideal spaces. Don’t overthink the technical specs-focus on polar patterns first, then sensitivity requirements for your environment. Your recording quality will improve dramatically once you stop fighting your microphone’s natural characteristics and start working with them instead.