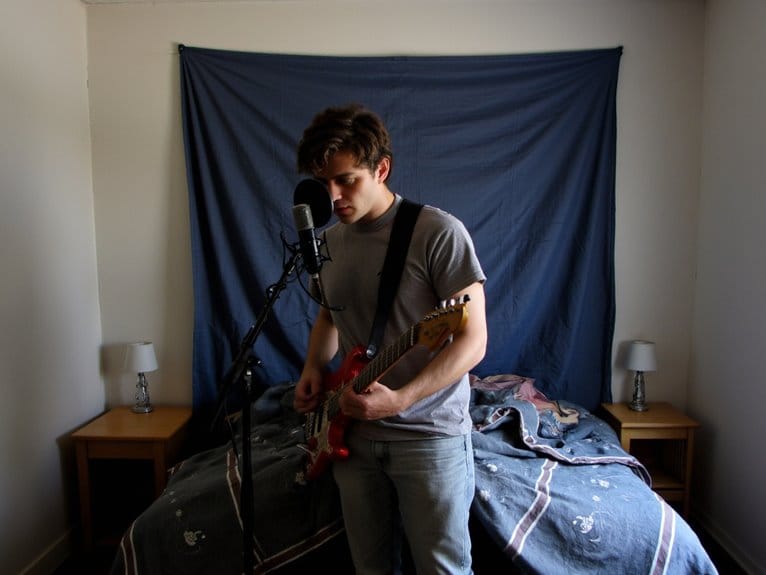
How to Use Microphones in Untreated Rooms
You’ll want to choose dynamic microphones like the Shure SM7B over condensers, since they’re less sensitive to room reflections and handle untreated spaces better. Position yourself 6-8 inches from the mic, face the room’s longest wall, and stay away from corners where standing waves gather. Use high-pass filtering around 80Hz to cut room rumble, apply narrow notches below 300Hz for problematic resonances, and add soft furnishings like blankets around your recording area to absorb reflections naturally.
We are supported by our audience. When you purchase through links on our site, we may earn an affiliate commission, at no extra cost for you. Learn more.
Notable Insights
- Choose dynamic microphones like the Shure SM7B over condensers to reduce ambient noise and room reflections.
- Position microphones 6-8 inches from the source and face the room’s longest dimension to minimize early reflections.
- Apply high-pass filtering at 40-80 Hz and use narrow notches below 300 Hz to eliminate room rumble and resonances.
- Add soft furnishings like heavy blankets, thick curtains, and rugs to absorb mid and high-frequency reflections naturally.
- Use portable reflection filters behind microphones and avoid room centers and corners to reduce standing wave interference.
Understanding Acoustic Challenges in Untreated Spaces
When you’re working in an untreated room, you’ll quickly discover that your biggest enemy isn’t the lack of expensive gear—it’s the room itself fighting against every recording decision you make.
Hard surfaces bounce sound waves chaotically, creating excessive reflections that blur your audio with unwanted reverb and phase cancellation. You’ll notice frequency imbalances where low frequencies dominate, mid-range gets masked, and highs become attenuated, making accurate EQ decisions nearly impossible.
Without proper acoustic dampening, your recordings will suffer from comb filtering and poor stereo imaging. These acoustic reflections cause timing disruptions in audio signals that further complicate your recording process. Dynamic microphones prove particularly effective in these challenging environments because their reduced sensitivity to ambient noise helps combat the chaotic reflections bouncing off your room’s hard surfaces. Choosing microphones with cardioid patterns can significantly improve your recordings by focusing on the primary sound source while rejecting unwanted background noise and reflections. Dynamic microphones are known for their rugged construction and ability to withstand heavy use while maintaining consistent performance in challenging acoustic environments. The key lies in understanding how microphone isolation techniques can minimize these issues, because once you grasp what you’re fighting against, you can start implementing strategic workarounds.
Strategic Microphone Positioning Techniques
Since you can’t magically transform your reflective walls into professional acoustic panels, I’ve learned that smart microphone positioning becomes your most powerful weapon against room acoustics that’ll otherwise sabotage your recordings.
Smart microphone positioning becomes your most powerful weapon against room acoustics that’ll otherwise sabotage your recordings.
The key lies in understanding how microphone distance affects your signal-to-reflection ratio, with closer placement capturing more direct sound while minimizing room interference.
I always position sources slightly off axis from room centers and corners, where standing waves typically accumulate, and I orient performers facing the room’s longest dimension to reduce early reflections.
Strategic use of pickup patterns, particularly cardioid condensers for dynamic isolation, helps reject unwanted ambient noise. Cardioid patterns effectively capture sound from the front while rejecting noise from the sides and rear, making them ideal for isolating your source in problematic acoustic environments.
Understanding proximity effects allows you to balance warmth against clarity, creating professional results despite challenging acoustic environments. Maintain optimal recording levels between -12 to -18 dB to ensure clean signal capture while leaving adequate headroom for dynamic vocal performances.
For rooms with particularly challenging acoustics, consider incorporating soft furnishings like blankets, curtains, or couches near your recording area to absorb excessive sound reflections without requiring permanent acoustic treatment. When recording bass instruments, incorporating a ground lift switch into your signal chain can eliminate electrical hum and buzz that often becomes more noticeable in acoustically untreated spaces.
Minimizing Room Reflections and Standing Waves
Effective microphone positioning only gets you halfway to professional-sounding recordings, because the real acoustic villains lurking in your untreated room are the reflections bouncing off every hard surface and the standing waves that turn your bass response into a roller coaster of peaks and nulls.
These frequency irregularities can vary by 35-60 dB across the spectrum, making your recordings sound colored and unnatural.
I’ve learned that strategic microphone placement near soft furnishings helps reduce these issues, while basic sound dampening from curtains, rugs, or even blankets can smooth your frequency response considerably. Maintaining the ideal 6-8 inch distance from your mouth also helps minimize room interaction while ensuring clear vocal capture.
Even minimal absorption reduces those harsh flutter echoes between parallel walls, and positioning your mic away from corners prevents standing wave excitation that would otherwise distort your bass frequencies completely. Since cardioid patterns naturally minimize room noise by capturing sound primarily from the front, they prove especially valuable in acoustically challenging environments. Additionally, quality audio interfaces with low-noise preamps help eliminate background hiss that becomes more noticeable in untreated spaces where room acoustics already challenge your signal clarity. The goal is achieving a neutral sound balance without the room’s undesirable characteristics contaminating your recordings.
Choosing the Right Microphone Type for Your Environment
Your microphone choice can make or break recordings in untreated spaces, and I’ve discovered that dynamic microphones consistently outperform their condenser counterparts when dealing with reflective walls, hard floors, and minimal acoustic treatment.
The Shure SM7B remains my go-to recommendation among microphone brands, offering exceptional cardioid pickup patterns that reject room reflections while maintaining vocal clarity. Dynamic mics handle high sound pressure levels without distortion, vital when your vocal techniques involve powerful projection or close-mic positioning. Their electromagnetic induction design makes them naturally robust and resistant to the challenging conditions found in home recording setups. For optimal results, position these microphones 2-3 inches from your mouth to capture clear audio while minimizing background interference.
Dynamic microphones like the SM7B excel in untreated spaces by rejecting reflections while handling high SPL without distortion.
While condensers like the Lauten LS208 can work in untreated rooms, they require more careful placement and typically capture unwanted ambient noise. Unlike condensers that typically require phantom power for operation, dynamic microphones offer the advantage of simpler setup requirements in challenging acoustic environments. Background noise rejection is crucial for maintaining vocal clarity when recording in spaces without proper acoustic treatment.
I’ve learned that choosing smaller diaphragm dynamics over large-diaphragm condensers markedly reduces room sound pickup, making your recordings sound more professional despite acoustic limitations.
EQ Strategies for Compensating Room Issues
When you’re working in an untreated room, strategic EQ adjustments become your primary defense against acoustic problems, requiring you to monitor frequency dips that reveal where your room is stealing energy from your recordings.
I’ve learned that making precise microphone channel adjustments through subtractive EQ can eliminate those annoying resonances and standing waves that plague most home studios, while preserving the natural character of your source material.
The choice between dynamic and condenser microphones greatly impacts your EQ strategy, since condensers often capture more room reflections that need surgical frequency cuts, whereas dynamics naturally reject some problematic frequencies but may require different compensation approaches. Condenser mics excel in capturing detail, especially for speech and vocals, but this sensitivity means they pick up more room acoustics that require careful frequency correction in untreated spaces. High-pass filters can effectively reduce low-frequency buildup that commonly occurs in smaller untreated spaces. Creating accurate frequency response measurements with microphone position variations helps identify the most problematic areas that need correction. Understanding polar patterns helps you position microphones to naturally reject unwanted room reflections before they reach your recording chain.
Monitor EQ Frequency Dips
Room resonances act like acoustic magnifying glasses, amplifying certain frequencies while creating deep notches that can make your mixes sound hollow or unbalanced, and understanding how to identify and compensate for these frequency dips becomes essential when you’re working in untreated spaces.
| Frequency Range | Common Causes | EQ Approach |
|---|---|---|
| 100-120Hz | Speaker-to-floor reflections | Narrow Q notch filters |
| 200-400Hz | Room modes, wall reflections | Cut peaks, avoid boosting dips |
| 80-150Hz | Microphone distance variations | Positioning adjustments first |
I’ve learned that boosting frequency dips demands excessive amplifier power while compromising your system’s headroom, so I focus on cutting problematic peaks instead. Your ears aren’t particularly sensitive to dips anyway, making strategic peak reduction more effective for perceived sound quality. Remember, microphone distance affects frequency response considerably, so repositioning often works better than heavy EQ compensation.
Microphone Channel Adjustments
Beyond monitoring adjustments lies the more targeted approach of shaping your microphone signals themselves, and I’ve found that strategic EQ on individual channels can dramatically improve how your recordings translate in problematic acoustic environments.
You’ll want to use high-pass filtering between 40-80 Hz to eliminate room rumble while maintaining proper gain staging, keeping your noise floor as low as possible.
Apply narrow notches to problematic frequencies below 300 Hz where standing waves accumulate, then gently reduce the 1-4 kHz range to minimize early reflections.
I typically save these channel EQ settings as presets for consistent treatment, though you’ll need to bypass them during final mix renders to avoid unwanted coloration in your master recordings.
Dynamic Vs Condenser Choices
While I’ve spent countless hours tweaking EQ settings to compensate for room problems, I’ve learned that your microphone choice can make or break the entire process before you even reach for an equalizer.
Dynamic microphones excel in untreated spaces because their lower sensitivity naturally rejects distant reflections, background noise, and room coloration that would otherwise muddy your recordings. Their robust microphone characteristics make them forgiving in acoustically imperfect environments, requiring minimal post-processing work.
Condenser microphones, despite their superior detail capture, become problematic in untreated rooms since their high sensitivity picks up every reflection, hum, and ambient sound.
For most recording applications in home studios or untreated spaces, dynamics offer cleaner results with less frustration than trying to tame an overly sensitive condenser through aggressive EQ correction.
DIY Acoustic Treatment Using Household Items
While professional acoustic treatment can cost thousands of dollars, I’ve discovered that many household items you already own can markedly improve your room’s acoustics for microphone recording.
You can create effective homemade absorption panels by stretching heavy fabric over lightweight wood frames, then stuffing them with blankets or foam mattress toppers. I’ve found that layering thick quilts with rug remnants considerably enhances sound dampening compared to using single materials alone.
For DIY diffusion techniques, strategically placed bookshelves filled with randomly spaced books scatter sound waves effectively, while plants and textured wall hangings break up harsh reflections.
Heavy curtains hung behind your microphone reduce ambient noise, and dense materials packed into corners create makeshift bass traps that’ll noticeably reduce low-frequency buildup.
Creating Improvised Isolation Barriers
When you can’t afford professional acoustic treatment, building your own isolation barriers becomes one of the most effective ways to dramatically improve your recordings in untreated spaces.
These portable setups use improvised materials like thick blankets, mineral wool, or foam panels mounted on foldable designs that you can position strategically around your microphone. The key lies in understanding reflection angles and how sound absorption works in your specific room configuration.
Effective barrier configurations require careful attention to DIY techniques that maximize direct sound capture while minimizing room reflections:
- Position barriers 2-4 feet behind your microphone using dense materials like comforters or acoustic foam
- Build foldable frames from PVC pipe or wood that collapse for easy storage and transport
- Angle panels slightly to avoid parallel surfaces that create standing waves
- Create semi-circular arrangements around vocal positions for maximum isolation
- Combine multiple thin panels rather than single thick barriers for better acoustic treatment coverage
Managing Bass Resonance and Room Modes
Bass resonance and room modes create some of the most challenging obstacles you’ll face when recording in untreated spaces, as these low-frequency issues can turn your carefully captured performances into muddy, uneven messes that sound completely different depending on where you’re listening.
Your first step involves identifying the specific problem frequencies between 100Hz and 200Hz that are causing the most dramatic peaks and nulls, which you can accomplish using free tools like Room EQ Wizard or simply by playing bass-heavy reference tracks and noting where the sound becomes boomy or disappears entirely.
Once you’ve pinpointed these troublesome frequencies, you can employ strategic microphone positioning, careful EQ adjustments, and targeted filtering techniques to work around your room’s acoustic limitations rather than fighting against them.
Identifying Problem Frequencies
The challenge of capturing clean audio in untreated rooms begins with identifying the specific frequencies that your space amplifies or cancels, particularly those pesky low-end resonances that can turn a promising recording into a muddy mess.
You’ll need baseline measurements from multiple room positions to distinguish persistent frequency anomalies from random reflections. Honestly, I’ve learned this the hard way after countless sessions wondering why my vocals sounded like they were recorded underwater.
- Use sweep tones or broadband noise signals to excite your room’s full frequency spectrum
- Position measurement microphones at various locations throughout your recording space
- Focus on frequencies below 250 Hz where room modes typically wreak havoc
- Document peaks exceeding 9 dB that indicate troublesome resonant frequencies
- Compare before-and-after measurements when applying any digital correction
Strategic Microphone Positioning
Three fundamental positioning strategies can dramatically reduce bass resonance issues in your recordings, and I’ve discovered that even small adjustments in microphone placement often yield more impressive results than expensive acoustic treatments.
First, you’ll want to position your microphone away from corners and walls where bass frequencies accumulate, as microphone proximity to these surfaces amplifies problematic room modes that muddy your recordings.
Second, adjust your mic height and angle to avoid direct alignment with reflective surfaces, which changes phase relationships and minimizes low-frequency buildup.
Finally, understanding room dynamics means placing performers near the room’s center when possible, since this reduces early reflections bouncing back into your microphone and creates cleaner, more focused recordings without extensive acoustic modifications.
EQ and Filtering
While strategic positioning helps minimize room resonance, you’ll still need EQ and filtering techniques to address the bass buildup that inevitably occurs in untreated spaces. I’ve found that surgical frequency adjustments often prove more cost-effective than expensive acoustic panels.
However, you can’t simply slash frequencies randomly—measuring your room’s acoustic phase relationships and resonance decay patterns becomes vital for effective correction.
- Use narrow Q notches to target specific problematic frequencies identified through room measurement software like REW
- Apply gentle low-shelf cuts to reduce overall bass buildup without making recordings sound thin or unnatural
- Implement high-pass filters to eliminate sub-bass rumble below your source’s useful frequency range
- Deploy multiple parametric filters for rooms exhibiting several dominant modes at different bass frequencies
- Monitor real-time spectrum analyzers during adjustments to visually track improvements in frequency response
Dealing With Reflective Surfaces and Flutter Echoes
When I first started recording in my untreated home studio, I quickly discovered that reflective surfaces can turn even the best microphone into a source of frustration, creating flutter echoes that’ll make your recordings sound like they were captured in a metallic tunnel.
Reflective surfaces transformed my expensive microphone into a source of metallic tunnel echoes that haunted every recording session.
These rapid reflections bounce between parallel walls, producing that characteristic metallic ringing that moves around the room as it fades.
You’ll notice flutter echo most in smaller rooms with hard surfaces, where room reflections create uneven frequency responses and complicate your mixing process. The simple clap test reveals these issues when you position yourself within three feet of your microphone location.
To combat this, I’ve learned to position mics away from corners and parallel surfaces, creating acoustic dead zones with strategically placed absorption materials around the recording area.
Frequently Asked Questions
Can I Use Multiple Microphones Simultaneously in an Untreated Room?
Yes, you can use multiple microphones simultaneously in an untreated room, though I’ll admit it requires careful mic placement and gain management.
You’ll want dynamic cardioid microphones positioned to face away from each other, which minimizes sound interference and bleed between channels.
Space participants farther apart than usual, angle mics non-parallel, and test your setup beforehand to avoid phase issues that’ll complicate your recording.
How Do I Handle Air Conditioning Noise While Recording?
You’ll need to tackle air conditioning noise through strategic microphone positioning, placing your dynamic mic closer to your mouth while angling it away from HVAC vents.
I’ve found that using sound-dampening materials around your recording area, combined with noise reduction software like iZotope RX during post-production, effectively minimizes background noise.
Consider recording during cooler times when you can temporarily reduce AC output.
Should I Turn off All Electronics Near My Recording Area?
You should definitely turn off unnecessary electronics near your recording area, since devices like monitors, printers, and microwaves create electromagnetic interference that microphones pick up as annoying hums and buzzes.
Smart microphone placement away from remaining electronics helps too, but I’ve found that simply unplugging devices within a few feet makes the biggest difference in untreated rooms where interference becomes more audible.
On a final note
You’ve now got the essential tools to tackle recording in less-than-perfect spaces, and honestly, most of us don’t have access to million-dollar studios anyway. By combining smart microphone positioning, strategic EQ adjustments, and budget-friendly acoustic solutions, you’ll dramatically improve your recordings without breaking the bank. Remember, even professional engineers deal with challenging rooms daily—it’s about working with what you’ve got, not against it.