How to Record Vocals: Microphone Techniques
To capture professional vocals, you’ll need the right microphone choice—dynamic mics for warm, live-friendly recordings or condensers for detailed studio work—positioned 8-10 inches from your mouth with a cardioid polar pattern for ideal noise rejection. Set your input levels between -18 dB and -12 dB to maintain clean headroom, place a pop filter 5 centimeters from the capsule, and control room reflections with acoustic treatment covering 20-30% of your space’s surfaces. These fundamentals reveal advanced techniques that’ll transform your recordings.
We are supported by our audience. When you purchase through links on our site, we may earn an affiliate commission, at no extra cost for you. Learn more.
Notable Insights
- Choose dynamic microphones for warm, consistent sound or condenser microphones for detailed studio recordings requiring phantom power.
- Position microphone 8-10 inches from mouth, adjusting closer for intimacy or farther for powerful vocals to control tone.
- Set input levels to peak between -18 dB and -12 dB, maintaining headroom below -6 dB to prevent distortion.
- Use cardioid polar patterns for solo vocals, pop filters 5 centimeters from capsule, and acoustic treatment for noise control.
- Employ gain riding during recording and teach vocalists to adjust distance based on vocal intensity for optimal dynamics.
Finding the Perfect Distance Between Microphone and Vocalist
Every recording engineer I’ve worked with has their own theory about microphone distance, but after years of tracking vocals in studios ranging from pristine control rooms to converted bedroom closets, I’ve learned that the sweet spot isn’t just about following rules—it’s about understanding how proximity effect shapes your vocal tone.
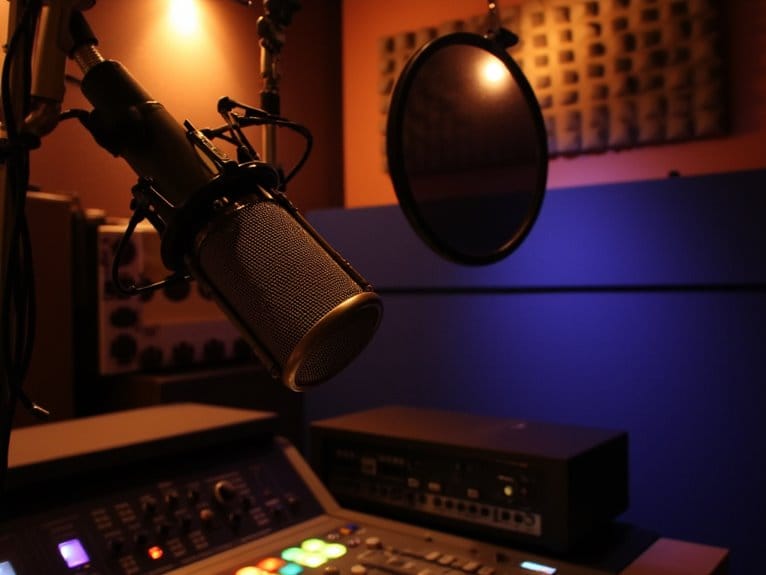
Start with 8-10 inches between your mouth and the microphone, positioning your pop filter roughly 5 centimeters from the capsule.
Too close, and you’ll get muddy low-end buildup that masks vocal resonance; too far, and you risk microphone feedback while losing that intimate presence. Remember that amplitude diminishes 6 dB every time you double the distance from the microphone, which directly impacts your signal strength and the overall character of your recording. Room acoustics can significantly influence how distance adjustments affect your recording, especially when working with budget microphones in untreated spaces.
Male vocalists often benefit from slightly closer positioning to add natural warmth, while female voices typically shine with a bit more distance to maintain clarity without excessive bass enhancement. The microphone’s frequency response also plays a crucial role in how these distance adjustments translate to your final recording quality. A high signal-to-noise ratio becomes especially important when recording at greater distances, as background noise can interfere with capturing the subtle dynamics and expressiveness of vocal performances.
Choosing the Right Microphone Type for Your Voice
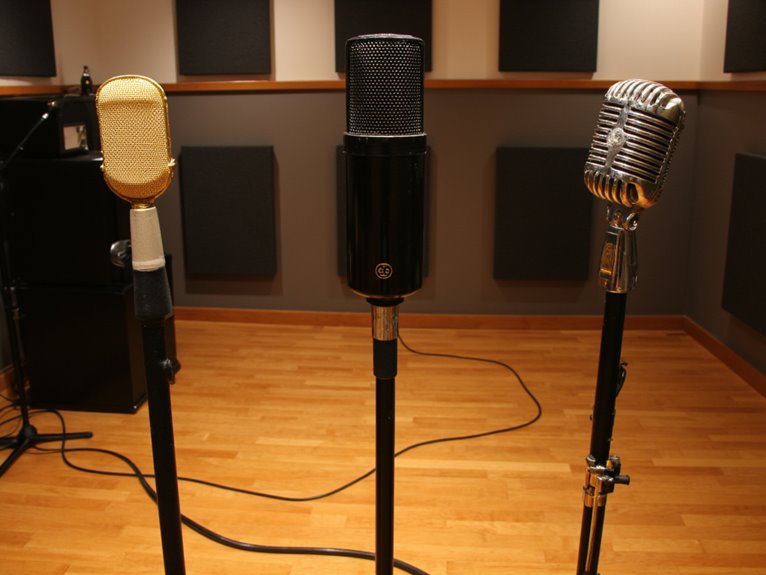
Now that you’ve nailed the ideal recording distance, you’ll need to select the right microphone type for your specific voice. I can tell you from years of experience that this decision will make or break your vocal recordings.
The fundamental choice between condenser and dynamic microphones depends heavily on your recording environment, vocal style, and volume levels, with each type offering distinct advantages that complement different singing approaches. Dynamic microphones are particularly valued for their warm clarity in both studio and live settings, making them an excellent choice for vocalists who need consistent performance across different venues.
Additionally, understanding polar patterns—particularly cardioid, omnidirectional, and figure-8 configurations—will help you control room acoustics, minimize background noise, and capture your voice with the precision and character it deserves. Dynamic microphones excel in live performance situations due to their exceptional background noise rejection and robust construction that can withstand heavy use. Large-diaphragm condensers are particularly effective for capturing vocal depth and nuanced details, making them ideal for delicate performances and studio environments. For versatile recording capabilities, consider microphones that offer switchable polar patterns, allowing you to adapt to different recording situations and achieve optimal sound capture for various vocal styles and room acoustics.
Condenser Vs Dynamic Mics
| Feature | Condenser | Dynamic |
|---|---|---|
| Sensitivity | High detail capture | Lower, warmer sound |
| Power Requirements | 48V phantom power | Plug-and-play |
| Best Environment | Controlled studio | Live performance |
Microphone placement tips favor condensers for studio vocals needing air and presence, while gain control techniques require more attention with dynamics due to their lower output requiring increased preamp gain.
The feel of microphones can significantly enhance vocal performance and delivery, influencing both technique and comfort during recording sessions.
Dynamic microphones feature a rugged design that makes them particularly well-suited for high-volume recording situations and demanding live performance environments.
Polar Pattern Selection
While choosing between condenser and dynamic mics gets most of the attention, selecting the right polar pattern will dramatically impact how your voice cuts through the mix and interacts with your recording environment.
I’ve found that understanding pickup directionality becomes essential when you’re dealing with less-than-perfect acoustic spaces, which frankly describes most home studios. The pickup pattern exists in a three-dimensional space originating from the microphone capsule, affecting how sound reaches the mic from different directions.
Here’s how I approach pattern selection for different vocal scenarios:
- Cardioid patterns work best for solo vocals, podcasting, and voice-overs where you need focused pickup with minimal room noise.
- Omnidirectional patterns suit group vocals and situations where you want natural, open sound with ambient characteristics.
- Advanced polar patterns like supercardioid offer specialty microphone usage for live performance situations requiring tighter pickup control.
Figure-8 patterns excel for vocal duets or interview setups where spatial separation matters most. Understanding each pattern type aids in choosing the right microphone for your specific recording requirements.
Understanding Polar Patterns and Directional Characteristics
When you’re setting up to record vocals, understanding how your microphone responds to sound from different directions can make the difference between a professional-sounding track and an amateur mess filled with unwanted noise.
Your Polar Pattern Preferences directly influence the Directionality Impact on your recordings, determining which sounds get captured and which get rejected.
Cardioid patterns excel at isolating vocals by capturing sound primarily from the front while rejecting rear noise, making them ideal for most vocal sessions. Dynamic microphones with cardioid patterns are particularly effective at rejecting background noise, especially in untreated rooms and noisy environments. Dynamic cardioid microphones focus on front-facing sound sources, effectively rejecting unwanted ambient sound.
Omnidirectional mics capture sound equally from all directions, creating natural ambiance but potentially introducing unwanted room reflections.
Supercardioid and hypercardioid patterns offer tighter directivity for challenging acoustic environments, while bi-directional patterns work well for duets or interviews where you need front-and-back sensitivity. The proximity effect increases bass response when vocalists move closer to the microphone, which can add warmth but may require careful positioning. These polar patterns help you sculpt the balance between your direct vocal signal and the natural room acoustics.
Setting Input Levels and Managing Gain Staging
Once you’ve dialed in your microphone’s polar pattern, the next vital step involves setting proper input levels and managing your gain staging, which I’ll admit can make or break your vocal recording before you even hit the record button.
Your microphone gains should be adjusted so peaks hit between -18 dB and -12 dB, giving you that essential safety margin to prevent unwanted distortion.
Proper gain staging with peaks between -18 dB and -12 dB creates that crucial safety buffer protecting your recordings from distortion.
Here’s my three-step approach for ideal audio levels:
- Set preamp gain so your loudest vocal parts reach -12 dB to -6 dB
- Monitor signal-to-noise ratio using visual metering tools for precise adjustments
- Maintain headroom by keeping peaks consistently below -6 dB threshold
This systematic approach guarantees clean recordings while preserving dynamic range for mixing flexibility later. When using an audio interface, ensure your device has low-noise preamps to eliminate background hiss and maintain professional-quality vocal recordings throughout your gain staging process.
Most condenser microphones require phantom power from your audio interface or mixer to operate their internal preamps, so verify this compatibility before beginning your recording session.
Controlling Room Acoustics and Reflections
After you’ve dialed in your gain staging, the next essential step involves taming your recording space through strategic acoustic treatment, because even the most expensive microphone can’t overcome a room that’s working against you.
You’ll need to understand how sound absorption materials like bass traps, acoustic panels, and diffusers work together to control reflections, frequency buildup, and unwanted reverb that can muddy your vocal clarity.
The placement of these materials, combined with ideal room positioning of both your microphone and yourself as the vocalist, determines whether you’ll capture that professional, intimate sound or end up battling comb filtering and room modes that’ll haunt your mix later.
When using condenser microphones, you’ll need 48V phantom power from your audio interface or mixer to properly operate these sensitive capsules that excel at capturing vocal detail and room ambience.
To capture this professional sound quality, your audio interface should support 24-bit/192kHz resolution with high-headroom instrument inputs and low-noise preamps to ensure the acoustic improvements translate into superior recording fidelity.
Sound Absorption Materials
While I’ve spent countless hours in poorly treated rooms that made my vocals sound like they were recorded in a bathroom, I’ve learned that proper sound absorption materials can transform even the most acoustically challenging space into a usable recording environment.
Understanding different acoustic panel types and sound absorption methods will help you choose the right solution for your specific needs.
The most effective materials for vocal recording include:
- Mineral wool and fiberglass panels – Dense, broadband absorption perfect for professional studios
- Fabric-wrapped foam panels – Lightweight, budget-friendly option targeting higher frequencies
- Nitrile Butadiene Rubber panels – Alternative solution when structural modifications aren’t possible
You’ll want panels covering 20-30% of your room’s surface area, focusing on first reflection points behind your microphone and opposite walls to eliminate problematic resonances.
Optimal Room Positioning
Even with the best absorption materials in place, you’ll sabotage your vocal recordings if you position yourself and your microphone in acoustically problematic areas of the room.
Smart vocal placement strategies begin with avoiding corners, where bass buildup creates undesirable low-frequency resonances that’ll muddy your sound. Room symmetry effects cause equally frustrating issues—that dead-center spot where reflections converge creates phase problems you don’t want.
Instead, position yourself slightly off-center and off-axis from the room’s midpoint, facing the longer wall in rectangular spaces to minimize flutter echoes.
Start with your microphone 6 to 12 inches away, then experiment during rehearsal to find that sweet spot where direct vocal clarity meets just enough natural room character.
Preventing Plosives With Pop Filters and Placement Angles
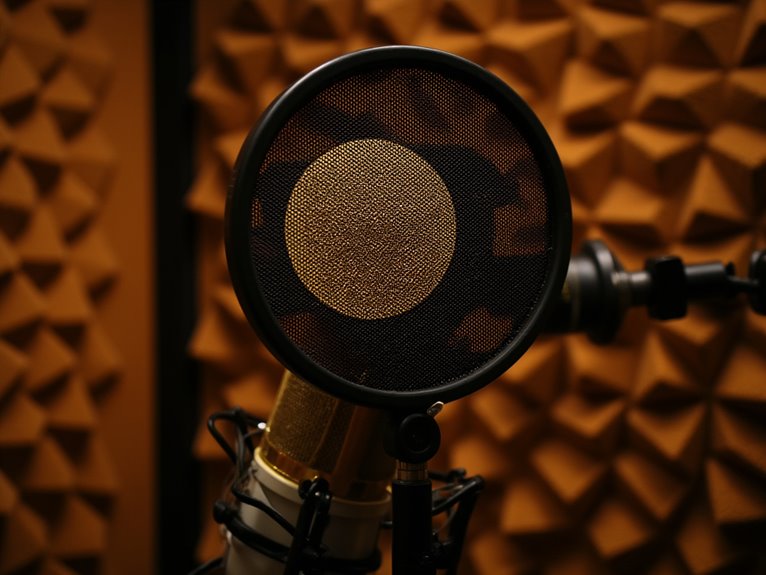
Recording clean vocals means conquering one of the most persistent enemies in the studio: plosives, those explosive bursts of air that turn perfectly good takes into unusable clips riddled with popping sounds.
Understanding pop filter types and ideal placement will transform your vocal recordings from amateur to professional quality.
Your choice between nylon mesh and metal mesh filters matters greatly, with metal options preserving high-frequency clarity while nylon provides gentler diffusion.
For ideal placement, position your filter 4-10 inches from the vocalist’s mouth, maintaining several inches between the filter and microphone capsule.
Consider these essential positioning techniques:
- Angle your microphone 45 degrees off-axis to divert air bursts away from the capsule
- Aim slightly toward the nose rather than directly at the mouth
- Encourage diagonal singing across the microphone instead of straight-on delivery
Managing Sibilance and Harsh Consonants
Although you’ve mastered the art of preventing pops with proper filter placement, there’s another vocal enemy lurking in your recordings that can turn professional-sounding takes into harsh, ear-piercing disasters: sibilance.
Those sharp “S,” “T,” and “Ch” sounds occupy the 5-10 kHz range, where frequency analysis becomes essential for maintaining vocal clarity.
I’ve found that strategic microphone placement, keeping vocalists about eight inches away from dynamic mics like the SM57, notably reduces sibilance pickup compared to sensitive condensers.
When prevention isn’t enough, de esser techniques using specialized dynamic processing can target these problematic frequencies without dulling your entire vocal track.
The key lies in setting thresholds that trigger only on sibilant peaks, achieving effective sibilance reduction while preserving the natural brightness that makes vocals shine in your mix.
Troubleshooting Common Recording Problems
While multi-microphone setups can produce stunning results, they won’t matter much if you’re battling fundamental recording problems that plague even experienced engineers—and trust me, I’ve made every mistake in the book at least twice.
Room acoustics top the list, where excessive background noise and poor positioning create muddy, boxy vocals that no amount of post-processing can fully rescue.
Microphone placement errors, particularly recording too close or far from your vocalist, destroy tonal balance and capture unwanted resonances.
Gain staging mishaps cause clipping or noisy recordings, while over-compression crushes dynamic range and exaggerates sibilance.
Before hitting record, invest time in vocal warm ups and recording rehearsal sessions—they’ll prevent most performance issues like plosives and inconsistent delivery that complicate mixing later.
Frequently Asked Questions
How Much Should I Spend on a Vocal Microphone for Home Recording?
You’ll want to budget around $150 for decent recording quality without breaking the bank.
Though I’ve found that budget microphones like the Audio-Technica AT2020 deliver surprisingly solid performance at this price point.
Don’t forget you’ll need additional accessories like pop filters and shock mounts, which add another $30-50 to your total investment for best results.
What Vocal Warm-Up Exercises Should I Do Before Recording Sessions?
You’ll want to start with breathing techniques like diaphragmatic exercises and hissing exhales to establish proper airflow control.
I always recommend lip trills and humming to loosen your articulatory muscles, followed by vocal scales to warm your range smoothly.
Tongue twisters help with diction clarity, while sirens stretch your voice effectively. Spend 5-10 minutes on these exercises before recording.
How Do I Sync Vocals With Backing Tracks in My Recording Software?
I’ll walk you through essential vocal alignment techniques that’ll save you countless hours of frustration.
First, you’ll want to adjust your DAW’s latency compensation settings, ensuring your buffer size matches across all devices.
Record while monitoring the backing track through headphones, then use visual waveform alignment against your timeline grid.
These software settings tips, combined with crossfades between edits, create seamless synchronization.
What Backup Equipment Should I Have During Important Vocal Recording Sessions?
You’ll want backup microphones, spare XLR cables, and extra pop filters as your first line of defense against equipment failure.
I always keep duplicate audio interfaces and preamp options ready, since losing your signal chain mid-session kills momentum.
Don’t forget backup recording software licenses, reliable studio monitors for reference, and portable acoustic treatment panels that you can quickly reposition if your primary setup fails unexpectedly.
On a final note
You’ve now got the essential microphone techniques that’ll transform your vocal recordings from amateur to professional quality. Remember, there’s no single “perfect” setup—your voice, room, and equipment will dictate the best approach. Start with proper distance and gain staging, then experiment with positioning until you find what works. Don’t overthink it; trust your ears, and you’ll develop the instincts needed for consistently great vocal captures.

