How to Position Microphones for Optimal Recording
Position your microphone 4-6 inches from the sound source to achieve balanced warmth and clarity while avoiding the proximity effect‘s muddy bass buildup. I’ve found that aligning with the capsule’s invisible axis—that imaginary line extending from the microphone’s diaphragm—makes the difference between amateur and professional sound quality. Use on-axis positioning for natural tone, or experiment with slight off-axis angles to reduce excessive brightness, and you’ll discover techniques that transform your recordings completely.
We are supported by our audience. When you purchase through links on our site, we may earn an affiliate commission, at no extra cost for you. Learn more.
Notable Insights
- Position vocal microphones 4-6 inches away for balanced warmth and clarity while avoiding proximity effect bass buildup.
- Use on-axis positioning for natural tone, or try off-axis angles to reduce excessive brightness and frequency issues.
- Choose appropriate miking styles: close miking (2-12 inches) for isolation, distant miking (3-8 feet) for natural soundstage.
- Consider polar patterns when positioning – cardioid and shotgun mics naturally reject unwanted sound from sides and rear.
- Make small positional adjustments and record test takes to evaluate tonal changes, documenting successful placements for reference.
Understanding Distance and Angle Fundamentals
When you’re setting up microphones for any recording session, understanding the relationship between distance and angle isn’t just technical theory—it’s the foundation that’ll make or break your sound quality.
Your recording environment demands careful consideration of microphone orientation, where proper distance placement follows the longest dimension rule for most instruments, typically positioning vocal mics 4-6 inches from the source.
The proximity effect with cardioid models boosts bass frequencies when you’re too close, while farther placement emphasizes mid-range tones. For classical guitar recording, placing microphones near the sound hole enhances resonance and tonal richness.
Axis alignment directly affects your captured sound, with slight off-axis positioning reducing unwanted brightness. A level difference of 15 dB indicates sound at 30° off-center, helping you understand how positioning affects your stereo image.
Different polar patterns influence your recording angle and pickup characteristics, ultimately affecting the perceived soundstage width in stereo recordings, making experimentation essential for achieving ideal results. For overhead recording scenarios, maintaining equal distances from multiple sound sources like snare and kick drums prevents phase issues that can compromise your stereo imaging. Poor microphone placement can lead to disappointing sound quality even when the musical performance itself is excellent.
Choosing the Right Microphone Placement Style
Building on those distance and angle fundamentals, you’ll find that selecting the appropriate placement style becomes your next critical decision in achieving professional-quality recordings. Close miking offers maximum isolation strategies, placing your microphone within inches of the source to capture pristine detail while minimizing environmental interference. Distant miking emphasizes capturing ambiance, positioning mics several feet away to include natural room character and spatial depth. Ambient miking focuses entirely on environmental acoustics, while spot miking targets specific elements within larger ensembles.
| Placement Style | Distance Range | Primary Purpose |
|---|---|---|
| Close Miking | 2-12 inches | Maximum isolation |
| Spot Miking | 1-3 feet | Selective highlighting |
| Distant Miking | 3-8 feet | Natural soundstage |
| Ambient Miking | 8+ feet | Room character |
| Blended Setup | Variable | Combined approach |
Effective blending techniques often combine multiple styles, creating positional dynamics that balance directness with atmospheric context through strategic microphone layering. Off-axis positioning provides an additional technique that minimizes unwanted noise while maintaining tonal balance, making it particularly useful for live recording environments. Dynamic microphones with cardioid polar patterns excel at focusing audio capture on the primary source while effectively rejecting background noise during recording sessions. For cymbal recording specifically, overhead positioning at 2 to 4 feet promotes natural sound decay while close-mic techniques at 6 to 12 inches help manage tone balance. Remember that closer mic placement activates the proximity effect, which boosts low frequencies and can enhance thinner sources or be controlled by adjusting distance rather than instrument settings.
Finding Your Microphone’s Sweet Spot
Every microphone has that magical zone where your voice transforms from merely audible to genuinely enchanting, and I’ve spent countless hours hunting down these elusive sweet spots across different recording scenarios.
Your mic placement journey begins with understanding that the ideal distance typically falls between 6-12 inches from your mouth, though voice characteristics vary markedly between individuals. I’ve learned that moving closer increases low-frequency response, which can enhance warmth but sometimes muddies tonal clarity.
Sound testing becomes essential here—trust your ears over visual cues when adjusting position. Recording techniques like covering one ear help gauge frequency balancing, while mic sensitivity determines how ambient noise affects your capture quality. For cardioid microphones, use a cupped hand technique to aid in finding the optimal recording position. Speaking directly into the microphone maintains high-frequency clarity that preserves the crisp detail in your vocal recordings. Experimenting with different angles during placement can yield dramatically different tonal results, allowing you to shape the character of your frequency response to match your artistic vision.
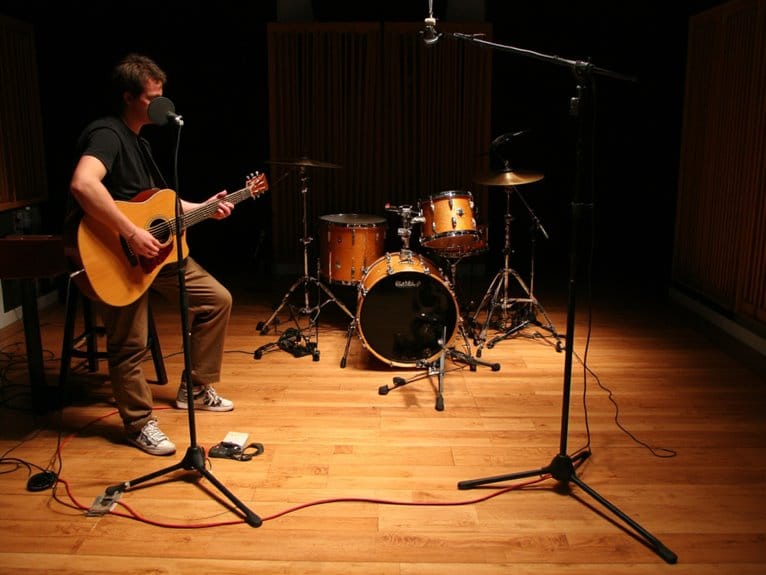
Setting Up Vocal Booth Recording
Although I’ve experimented with makeshift recording setups in everything from walk-in closets to bathroom stalls, creating a proper vocal booth requires methodical attention to acoustic fundamentals that transform any small space into a professional recording environment.
Your vocal booth setup begins with selecting an enclosed space that minimizes external noise infiltration while providing adequate room for comfortable movement. I’ve found that effective soundproofing techniques include installing staggered wall studs, applying dense materials like Sonopan, and sealing every gap with acoustic weather stripping to prevent sound leakage. Install Rockwool Safe and Sound insulation within wall cavities using two layers to maximize sound absorption and isolation.
Position your large-diaphragm condenser microphone at consistent distances from your vocal source, maintaining vertical alignment while incorporating pop filters to eliminate plosives and breath sounds that compromise recording quality. The microphone should be positioned between 3 to 12 inches from the vocalist at a 45° angle to ensure optimal sound quality and minimize background noise. When using multiple microphones simultaneously, proper setup prevents phase issues that can degrade your recording quality. Ensure your audio interface provides phantom power support to properly operate condenser microphones and achieve professional recording standards.
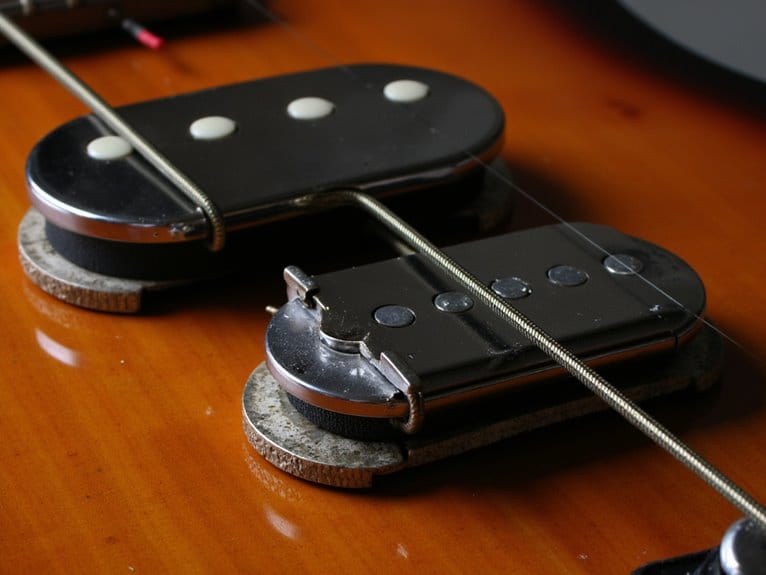
Aligning With Microphone Capsule Axis
When you’re setting up your microphone, understanding the capsule axis becomes essential because this invisible line determines where your mic captures sound most accurately.
I’ve learned through countless sessions that even small positioning changes can dramatically affect your recording quality.
You’ll notice that placing your sound source directly on-axis, typically 4-6 inches away, delivers the clearest, most natural tone, while off-axis positioning tends to roll off those crisp high frequencies that make vocals sparkle.
The distance you choose between your mouth and the capsule doesn’t just control volume levels, it actually shapes the entire tonal character of your recording, influencing everything from proximity effect warmth to the balance of direct sound versus room reflections. For stereo recording applications, you can achieve excellent mono compatibility by using coincident pair techniques where microphones receive sound simultaneously from the same position, ensuring your recording maintains its quality when played through a single speaker.
Experimenting with off-axis positioning can help you mitigate sibilance while enhancing your overall sound quality, though this technique requires careful testing to find the optimal angle for your specific voice and microphone combination.
Dynamic microphones like the Shure SM7B require interfaces with at least 60dB gain to achieve optimal performance without compromising signal-to-noise ratios.
Dynamic microphones excel at rejecting background noise, making them particularly valuable for podcast recording in untreated rooms where acoustic control is limited.
On-Axis Vs Off-Axis
Understanding how your microphone aligns with the sound source fundamentally shapes the character of your recordings, and I’ve found that mastering on-axis versus off-axis positioning is one of the most powerful tools in your mic placement arsenal.
On-axis placement delivers brighter, more focused sound by capturing direct waves head-on, while off-axis angling softens harsh frequencies and reduces sibilance naturally. These mic alignment tips become essential when you’re dealing with overly bright sources, as slight axis adjustment techniques can warm your tone without sacrificing clarity.
I often use off-axis positioning to tame proximity effect‘s boominess, especially with cardioid mics where 90-degree angles neutralize excessive bass buildup while maintaining essential vocal presence and articulation.
Distance and Tonal Impact
While microphone positioning involves multiple variables, distance from your sound source creates the most dramatic tonal shifts you’ll encounter in recording, and I’ve learned that understanding this relationship with capsule axis alignment can transform mediocre recordings into professional-quality captures.
Distance strategies directly influence proximity effects, which emphasize low frequencies as you move closer to the capsule. This bass emphasis can enrich vocals naturally, though excessive closeness muddies your sound capture and introduces unwanted distortion that’ll require post-processing fixes.
| Distance | Tonal Characteristic |
|---|---|
| 2-4 inches | Heavy bass emphasis, potential muddiness |
| 4-6 inches | Balanced warmth with clarity |
| 8-12 inches | Natural tone, reduced proximity effects |
| 1-2 meters | Ambient character, room influence |
| 2+ meters | Natural ensemble balance |
Proper axis alignment guarantees consistent tonal adjustments while maintaining frequency response accuracy throughout your recording sessions.
On a final note
You’ve now got the essential techniques to position your microphones like a seasoned engineer, though admittedly, it’ll take practice to develop that instinctive feel for the perfect spot. Remember that distance, angle, and environmental awareness work together—you can’t optimize one while ignoring the others. Trust your ears, make incremental adjustments, and don’t be afraid to experiment. Your recordings will improve dramatically once you’ve mastered these fundamental positioning principles.