How to Maintain and Care for Your Microphones
You’ll extend your microphone’s lifespan considerably by maintaining a 6-12 inch distance while gripping the middle section, performing daily alcohol wipe-downs on shared mics, and storing them in cases with silica gel packs at 50-77°F with humidity below 60%. Clean dynamic mics with soft cloths, handle condensers minimally, and avoid liquids on ribbon mics entirely. Conduct twice-yearly inspections, use pop filters and shock mounts for protection, and keep audio cables separate from power sources. The specifics get more nuanced depending on your particular setup.
We are supported by our audience. When you purchase through links on our site, we may earn an affiliate commission, at no extra cost for you. Learn more.
Notable Insights
- Clean microphones daily with isopropyl alcohol wipes and perform weekly deep cleaning of removable components like windscreens.
- Store microphones in protective cases with humidity below 60% and temperatures between 50-77°F away from direct sunlight.
- Use pop filters, shock mounts, and windscreens to protect microphones from plosives, vibrations, and environmental contaminants.
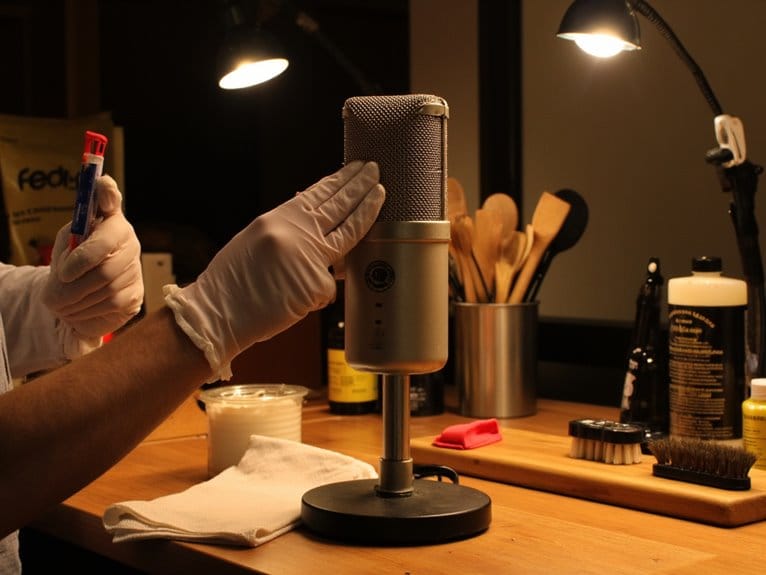
- Handle microphones by gripping the middle section gently and maintain 6-12 inches distance from mouth during use.
- Conduct bi-annual health checks focusing on sound clarity and performance, with more frequent inspections for heavily-used equipment.
Proper Handling and Usage Techniques
While I’ve spent countless hours watching performers unknowingly sabotage their audio quality through poor microphone technique, I can confidently say that mastering proper handling and usage techniques will transform your sound from amateurish to professional in ways you’ll immediately notice.
Correct placement means maintaining that sweet spot of 6-12 inches from your mouth, positioning the diaphragm at mouth level while angling slightly to avoid those harsh plosives that’ll make listeners cringe.
Your grip techniques matter more than you’d think—hold the microphone by its middle section with a gentle, steady grasp, never covering that top grille where sound enters. Using pop filters helps protect your microphone from saliva and debris while reducing unwanted plosive sounds. Additionally, using shock mounts can further enhance your recording quality by isolating the microphone from vibrations. This setup not only improves clarity but also contributes significantly to eliminating microphone handling noise. Experimenting with different microphone positions can also yield beneficial results, ensuring a clean sound capture without distractions.
I’ve seen too many vocals ruined by simple proximity mistakes and handling noise. Remember to keep your wrist relaxed during gripping to allow for smooth movement and prevent excess tension that can affect your performance quality.
Dynamic microphones provide exceptional durability and reliability for live performance situations where frequent handling is inevitable. Features like rugged steel mesh grilles and advanced shock mount systems enhance resistance against mechanical noise.
Cleaning and Hygiene Best Practices
Beyond mastering those handling fundamentals, I’ve learned that maintaining your microphone’s cleanliness directly impacts both its longevity and your audio quality in ways that’ll surprise you.
Proper microphone sanitation prevents bacterial growth while preserving ideal frequency response, something I discovered after neglecting my first condenser mic. Always remember to unplug the microphone before beginning any cleaning routine to prevent electrical shock and potential damage.
Poor mic hygiene doesn’t just breed germs—it slowly degrades your sound quality until that crisp audio becomes muddy disappointment.
Your cleaning frequency should align with usage intensity, but here’s my proven approach:
- Daily wipe-downs using microfiber cloths with isopropyl alcohol for shared microphones.
- Weekly deep cleaning of removable components like windscreens and pop filters.
- Compressed air treatment for grilles and hard-to-reach ports monthly.
- Complete disinfection after each user in professional environments.
Never spray liquids directly onto capsules, and always allow complete air-drying before storage to prevent moisture damage. Use warm water with washing liquid when cleaning removable grilles and windscreens to effectively remove accumulated dirt and debris.
Essential Accessories for Protection
Since investing in proper protective accessories has saved me from countless equipment disasters, I can’t stress enough how these tools transform your microphone from a vulnerable piece of gear into a resilient recording powerhouse.
Pop filters with metal grids eliminate plosives while protecting diaphragms from vocal bursts, and shock mounts using rubberized brass isolate vibrations that would otherwise compromise recordings.
Windscreens reduce breath noise while shielding against dust and moisture, while adjustable boom arms minimize handling damage through secure positioning. Quality mic stands with weighted bases provide essential vibration reduction during recording, supporting microphones between 2-4 pounds while offering height adjustability for various recording setups.
The accessory benefits extend beyond protection to improved audio quality, though accessory compatibility requires checking mount specifications for your specific microphone model. These accessories are essential for both studio and live performance environments where consistent audio clarity matters most.
Protective cases with foam inserts safeguard equipment during transport, preventing the internal shock that destroys sensitive components. Additionally, proper gain staging helps prevent audio issues that can damage your microphone’s internal components when signal levels are set incorrectly. Reflection filters create portable acoustic treatment that absorbs sound waves around your microphone, making them invaluable for improving recording quality in untreated home studio environments.
Storage Guidelines and Environment Control
After you’ve invested in quality protective accessories, you’ll need to establish proper storage protocols that maintain your microphones’ performance and longevity through careful environmental management.
The two most critical factors I’ve learned to monitor are creating ideal storage conditions—which includes controlling temperature, humidity, and dust exposure—and selecting the right protective cases that provide adequate cushioning, compartmentalization, and moisture barriers.
These storage fundamentals, when implemented correctly, can prevent the gradual degradation that often occurs when microphones sit unused for extended periods, ensuring they’re ready for immediate use when you need them. Dynamic microphones generally operate well in various temperatures and do not require regular maintenance, making them particularly suitable for long-term storage. Professional microphones with 24-bit capture capabilities require especially careful storage to preserve their sensitive internal components and maintain their superior audio quality standards. Consider adding silica gel packs to your storage cases to absorb excess moisture and protect internal components from humidity-related damage. Remember to detach cables before placing microphones in storage to reduce stress on connectors and prevent unnecessary wear on both the microphone and cable components.
Optimal Storage Conditions
Five critical environmental factors determine whether your microphone survives long-term storage or becomes an expensive paperweight, and I’ve learned through years of equipment management that maintaining proper storage conditions isn’t just recommended—it’s essential for preserving your investment.
Controlling humidity levels and temperature stability requires constant vigilance, but these four storage fundamentals will protect your gear:
- Maintain humidity below 60% using silica gel packets in sealed cases, especially for condenser mics vulnerable to corrosion.
- Keep temperatures between 50-77°F away from direct sunlight, radiators, and heat-generating electronics.
- Ensure adequate ventilation without creating airtight environments that trap moisture and cause condensation.
- Avoid environmental contaminants like chemicals, smoke, and coastal salt air that accelerate component degradation.
Proper storage isn’t glamorous, but it’s infinitely cheaper than replacing damaged equipment. Your commitment to proper microphone care demonstrates your dedication to craft and professional approach to audio production.
Protective Cases Selection
While environmental controls protect your microphones from the elements, choosing the right protective case transforms good storage practices into bulletproof equipment security. I’ve learned that effective case materials, specifically multi-layer PVC with 600D Oxford Nylon exteriors, provide the durability foundation you need for professional transport.
The design features that matter most include telescopic plastic tubes extending from 125mm to 340mm, accommodating various microphone sizes while maintaining spatial separation. Water-resistant zip systems prevent moisture ingress, while clear tubes offer visual confirmation of your equipment’s condition. Professional cases feature hexagonal tube ends that prevent rolling off flat surfaces during fieldwork setup and breakdown.
| Feature Category | Specifications |
|---|---|
| Capacity | Up to 3 small diaphragm microphones |
| Tube Length | 125-180mm and 200-340mm options |
| Protection Level | Water-resistant with impact shielding |
Consider adding silica gel packets for enhanced moisture control during extended storage periods.
Regular Maintenance and Inspection Schedule
Anyone who’s worked with audio equipment long enough knows that microphones don’t maintain themselves.
I’ve learned through years of experience that establishing a consistent inspection schedule can mean the difference between professional-quality recordings and frustrating technical failures during critical moments.
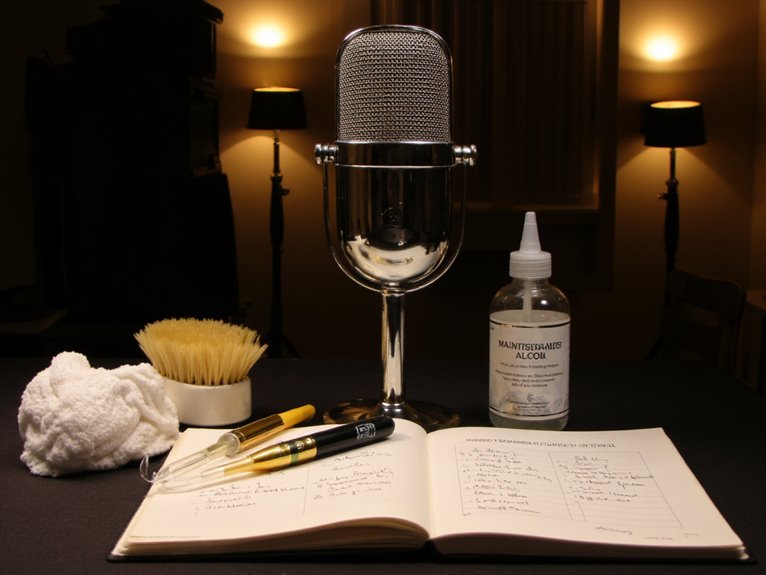
Your maintenance approach should incorporate proper inspection techniques while maintaining detailed maintenance logs for accountability.
Here’s what I recommend for ideal microphone care:
- Conduct health checks twice yearly, focusing on physical condition, cable integrity, and sound clarity assessment
- Schedule frequent inspections for heavily-used equipment or challenging environments with moisture accumulation
- Document inspection dates and findings to track performance trends and maintenance history effectively
- Utilize slow operational periods for inclusive preventive maintenance and thorough equipment evaluation
This systematic approach guarantees consistent performance.
Type-Specific Care Requirements
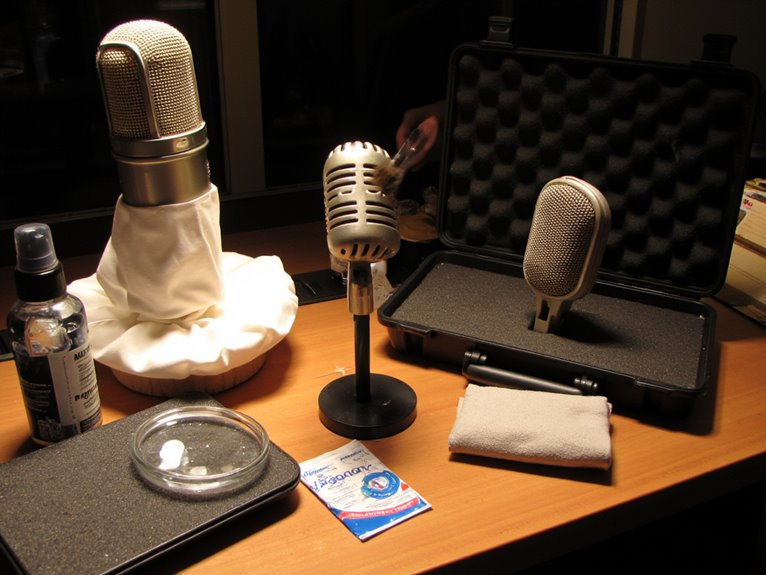
Beyond establishing your regular inspection routine, I’ve discovered that different microphone types demand distinctly different care approaches, and what works perfectly for a rugged dynamic mic can actually damage a delicate ribbon microphone.
Dynamic durability allows for routine cleaning with soft cloths and gentle anti-bacterial wipes, though you’ll still want to avoid moisture penetrating the grille.
Condenser sensitivity requires minimal liquid contact, silica gel storage packets, and extra handling precautions to protect those delicate diaphragms from shock damage.
Ribbon fragility demands the most careful treatment—never use liquid cleaners, avoid strong airflows, and store them in custom protective cases.
Professional condenser microphones like the RØDE NT1 with their low-mass diaphragms need especially gentle handling to preserve their exceptional frequency response and ultra-low noise performance. For those looking to enhance their vocal quality during broadcasts, investing in a professional condenser microphone is crucial. The RØDE NT1 is often regarded as the best condenser mic for streaming, thanks to its clarity and detail in audio capture. Proper setup and maintenance are essential to ensure that the microphone delivers its full potential, making it a favorite among content creators.
Regular cleaning and maintenance are important for longevity, involving careful cleaning of the exterior, periodic replacement of pop filters, and ensuring phantom power functionality.
Understanding these microphone types helps you tailor your maintenance approach, ensuring each mic receives appropriate care rather than applying one-size-fits-all methods that could cause expensive damage.
Frequently Asked Questions
How Often Should I Replace My Microphone’s Internal Components or Capsule?
You shouldn’t replace your microphone’s internal components or capsule on a fixed schedule, since no predetermined capsule replacement frequency exists in proper microphone maintenance tips.
I recommend replacing these delicate parts only when you notice confirmed performance issues like distortion, sensitivity loss, or unusual noise that cleaning can’t resolve.
With proper care, including moisture protection and gentle handling, your capsule and internal components can last decades without needing replacement.
Can I Use the Same Microphone for Both Indoor and Outdoor Recording?
You can absolutely use the same microphone for both environments, though I’ve found that success depends on choosing the right type and accessories.
Dynamic mics like the SM58 handle indoor acoustics and outdoor conditions well, while condensers work better indoors.
For outdoor conditions, you’ll need windshields and proper power solutions, but with appropriate gear, one quality microphone serves both purposes effectively.
What Is the Typical Lifespan of a Professional Microphone With Proper Care?
With proper care, you’ll get 30-40 years from professional microphones, though microphone durability factors like component quality and usage environment greatly impact longevity.
I’ve seen electret elements maintain performance for decades, losing less than 1dB sensitivity after ten years.
Watch for aging microphone signs including degraded switches, crackling connections, or reduced output levels, which typically appear much later in wired mics compared to wireless systems.
Should I Purchase Extended Warranties or Insurance for Expensive Microphone Equipment?
You should consider extended warranty and insurance options for microphones over $500, especially if you’re frequently traveling or performing live.
Insurance typically costs $6-12 monthly and covers theft, accidental damage, and transportation risks that warranties exclude.
I’d recommend insurance over extended warranties since it provides broader protection, including off-premises coverage that’s essential for gigging musicians and audio professionals.
How Do I Safely Transport Multiple Microphones During Frequent Travel or Touring?
I’ve learned that investing in hard-shell microphone cases with foam-lined compartments is essential for protecting your gear during frequent touring, as these provide superior shock absorption compared to soft bags.
My travel tips include organizing each mic in designated compartments, keeping cables separately coiled, and maintaining consistent storage temperatures to prevent component degradation from humidity variations.
On a final note
You’ve now got the essential knowledge to keep your microphones performing at their peak, from proper handling techniques to storage protocols that’ll extend their lifespan considerably. I’ve found that consistent maintenance routines, combined with quality protective accessories, prevent most common issues before they develop into costly repairs. Remember, your microphones are precision instruments that reward careful attention with years of reliable, professional-quality performance when you follow these guidelines consistently.