How to Eliminate Guitar Pickup Noise and Interference
You can eliminate guitar pickup noise by implementing proper shielding with copper foil tape in your guitar’s cavities, establishing solid grounding connections to avoid ground loops, and positioning yourself away from electromagnetic interference sources like fluorescent lights and computer monitors. Single-coil pickups naturally pick up more hum than humbuckers, but wax potting problematic pickups reduces microphonic feedback while strategic cable management and isolated power supplies clean up your signal chain for professional results that I’ll explore further below.
We are supported by our audience. When you purchase through links on our site, we may earn an affiliate commission, at no extra cost for you. Learn more.
Notable Insights
- Shield guitar cavities with copper foil tape connected to ground to create a Faraday cage that blocks electromagnetic interference.
- Use star grounding patterns and ensure all connections have 0-1 ohm resistance to prevent ground loops and AC hum.
- Position yourself away from fluorescent lights, computers, and power cables while adjusting guitar angle relative to amplifiers.
- Apply wax potting to problematic pickups using paraffin and beeswax to eliminate microphonic feedback and unwanted noise.
- Install buffers at the beginning of your signal chain and use isolated power supplies to maintain signal integrity.
Understanding the Root Causes of Pickup Noise and Hum
When I first started troubleshooting pickup noise issues years ago, I quickly learned that understanding the root causes isn’t just helpful—it’s absolutely essential for implementing effective solutions.
Different pickup types exhibit varying susceptibility to electrical interference, with single coils acting like antennas that readily absorb electromagnetic fields from computers, fluorescent lighting, and power cables. Humbuckers, conversely, use dual coils wound in opposite directions to cancel common-mode interference, making them inherently quieter.
The characteristic 50/60 Hz AC mains hum you’re hearing stems from your local power grid frequency, while that persistent buzzing often originates from wireless devices, loose wiring connections, or inadequate grounding. Proper grounding is essential for each component in your signal chain to prevent these unwanted electrical artifacts. Professional audio mixers with built-in phantom power provide clean power distribution that can help reduce electrical noise throughout your signal chain. Many professional microphone systems use cardioid pickup patterns to minimize unwanted background noise and focus on the primary sound source.
Environmental factors, including nearby transformers and even electrified railway tracks, compound these issues considerably. Single coil pickups contain one magnet and a single length of wire, which makes them particularly vulnerable to electromagnetic interference. Investing in an affordable audio interface with proper USB connectivity can help eliminate ground loops and interference commonly found in basic recording setups.
Shielding and Grounding Your Guitar for Maximum Noise Reduction
After spending countless hours diagnosing pickup noise issues, I’ve discovered that proper shielding and grounding represents the most effective long-term solution for eliminating electromagnetic interference in guitars.
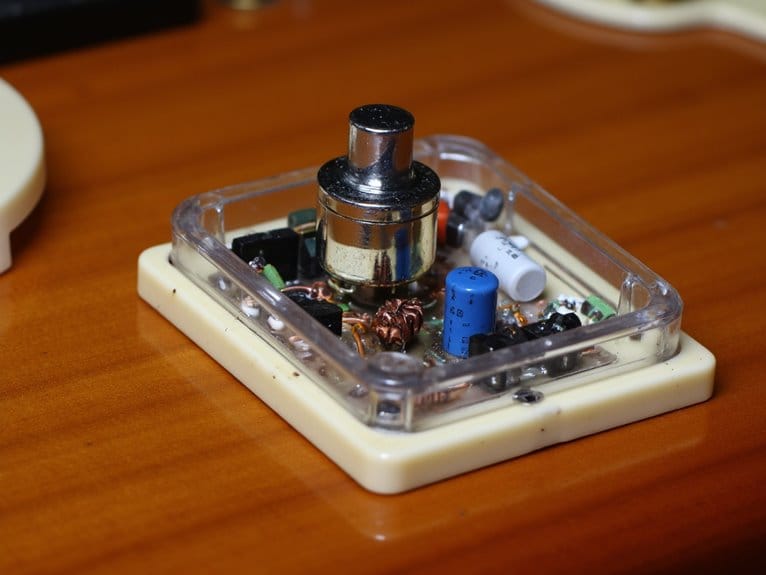
Creating a Faraday cage using conductive materials like copper foil tape inside your guitar’s cavities blocks RF noise from reaching sensitive electronics. I always shield pickup cavities and control compartments completely, soldering overlapping seams to guarantee continuous conductivity.
Effective grounding techniques require connecting all shielding to your guitar’s ground point, typically the output jack. I use star grounding patterns to avoid problematic ground loops that introduce hum. When checking ground quality, I measure resistance at grounding points and aim for 0 to 1 ohm for optimal performance.
For musicians recording through audio mixers, selecting models with XLR connections ensures professional-grade signal quality and reduces noise pickup compared to standard instrument cables. Professional audio interfaces with phantom power capabilities also provide cleaner signal paths when recording direct guitar signals through high-quality preamps. When miking guitar amplifiers, positioning ribbon microphones at least three inches away delivers exceptional warmth while minimizing electromagnetic pickup from the amp’s transformers.
| Shielding Area | Priority Level |
|---|---|
| Pickup Cavities | Critical |
| Control Cavity | Critical |
| Pickguard Back | High |
| Cavity Walls | Medium |
| Wood Routes | Medium |
Always test connections with a multimeter after installation.
Pickup Modifications and Wax Potting Techniques
Three fundamental modifications can transform problematic pickups into reliable, noise-free components, with wax potting standing as the most accessible and reversible solution for eliminating microphonic feedback.
Your wax selection determines both tonal preservation and protection effectiveness, with paraffin and beeswax offering peak melting points around 120-140°C while maintaining low dielectric constants that won’t muddy your sound.
The potting process involves gently melting your chosen wax using controlled heat sources like crock pots, then fully immersing pickups for complete coil saturation before allowing excess material to drain and cool evenly. Quality construction and materials in pickup components can significantly reduce the occurrence of microphonic feedback and extend the lifespan of your modifications.
I’ve found that vintage, unpotted pickups benefit most dramatically from this treatment, though you should only pot pickups exhibiting actual noise issues—unnecessary modifications can eliminate desirable microphonic character that some players prefer. Active pickups often provide superior noise reduction through built-in preamps, making wax potting less critical for these designs.
When evaluating the need for pickup potting, consider how string gauge selection affects the pickup’s response to vibrations and mechanical feedback, as heavier gauge strings can increase pickup sensitivity to microphonic noise.
Signal Chain and Electronic Solutions for Cleaner Sound
While pickup modifications address noise at the source, your signal chain‘s electronic components often introduce their own unwanted artifacts that can overshadow even perfectly waxed pickups, making strategic buffering and impedance management your next crucial battleground.
Smart buffer placement at your pedalboard’s beginning preserves signal integrity, preventing high-frequency loss across long cable runs and multiple pedals. I’ve found that avoiding several true bypass pedals before your buffer dramatically reduces signal degradation.
Buffer placement at your pedalboard’s start prevents high-frequency loss and signal degradation across multiple pedals and long cable runs.
Position your noise gate after distortion and modulation effects but before time-based pedals like delay and reverb for maximum effectiveness. Ground loop isolation through transformer-based devices eliminates that persistent hum plaguing multi-amp rigs.
Consider implementing zero-latency monitoring through dedicated headphone outputs to maintain accurate timing when tracking guitar parts in your home studio setup. USB-powered interfaces can simplify your recording chain while maintaining 48 kHz sample rates that effectively balance audio quality with system performance.
- Use isolated power supplies with proper filtering to prevent shared ground noise
- Install high-quality shielded cables to minimize electromagnetic interference
- Implement strategic buffering to maintain consistent signal strength throughout your chain
Budget-friendly isolated power supplies effectively diminish ground loops and interference while providing independent outputs for each pedal, resulting in significantly cleaner signals compared to daisy chain alternatives.
Environmental Setup and Playing Position Strategies
Beyond optimizing your signal chain electronics, mastering your physical environment and playing position creates an often-overlooked foundation for eliminating pickup noise that can make the difference between amateur and professional sound quality.
Environmental awareness starts with identifying EMI hotspots by slowly moving your guitar around the room, listening for noise fluctuations near fluorescent lights, computer monitors, and transformers.
Smart playing adjustments include experimenting with guitar angles relative to amplifiers, using hum-cancelling pickup positions like your Strat’s middle setting, and maintaining distance from power cables.
Route your guitar cables away from electrical sources, guarantee proper grounding connections, and avoid extension cords with questionable ground integrity that’ll worsen your noise situation considerably.
Frequently Asked Questions
Can Different Guitar String Materials Affect Pickup Noise Levels?
Different string materials definitely affect your guitar’s noise levels. You’ll find nickel-plated steel strings produce more electromagnetic interference, while pure nickel strings generate less pickup noise and warmer, quieter output overall.
Do Active Pickups Eliminate All Noise Compared to Passive Pickups?
Active vs passive pickups show significant noise reduction differences, but actives don’t eliminate all noise. You’ll still experience occasional interference and hum, though actives dramatically reduce noise compared to passives, especially in high-gain situations.
Will Changing My Guitar’s Bridge or Tailpiece Reduce Pickup Interference?
Changing your bridge materials and tailpiece design can reduce some pickup interference, especially if you’re switching from steel to non-ferrous materials like brass. However, it won’t eliminate all noise issues completely.
On a final note
You’ve got the tools to eliminate pickup noise, from proper shielding and grounding techniques to strategic environmental adjustments. I’ve found that combining multiple approaches—wax potting your pickups, optimizing your signal chain, and positioning yourself away from interference sources—yields the best results. Don’t expect miracles overnight; noise reduction requires patience and systematic troubleshooting. Start with the basics like grounding and shielding, then work through each solution methodically until you achieve that clean, professional tone you’re after.