How to Choose the Right Audio Interface for Your Needs
Start by determining your budget tier—under $100 for basic needs, $150-$300 for mid-range quality, or $500+ for professional features. Count your audio sources including microphones, instruments, and line devices to establish input requirements, ensuring at least one XLR input for professional mics. Check connectivity options like USB for affordability or Thunderbolt for speed, targeting 16-32 sample latency performance. Consider future expansion needs and software bundles that’ll enhance your recording capabilities.
We are supported by our audience. When you purchase through links on our site, we may earn an affiliate commission, at no extra cost for you. Learn more.
Notable Insights
- Determine your budget tier (under $100, $150-$300, or $500+) and prioritize sound quality over flashy features for maximum value.
- Count your current audio sources and plan for simultaneous recording needs, ensuring at least one XLR input for professional microphones.
- Choose connectivity based on your setup: USB for cost-effectiveness, Thunderbolt for speed, or PCIe for minimal latency requirements.
- Consider build quality and portability needs, with heavier units typically offering more robust construction and better heat dissipation.
- Plan for future expansion by selecting interfaces with ADAT ports, modular compatibility, and scalable input/output options for growth.
Determine Your Budget and Value Requirements
Everyone faces the same fundamental question when shopping for audio equipment: how much should I actually spend to get what I need?
Your budget breakdown should start with three clear tiers: starter interfaces under $100, mid-range options between $150-$300, and high-end models exceeding $500.
Three budget tiers guide smart audio interface shopping: under $100 for starters, $150-$300 mid-range, and $500+ premium options.
I’ve found that prioritizing sound quality over flashy features during your value assessment typically yields better results, especially when you’re matching specific needs rather than buying expensive all-in-one units.
Budget-friendly interfaces like the Behringer U-Phoria series or Focusrite Scarlett models can perform exceptionally well for solo musicians and podcasters, while premium brands command thousands but offer multi-channel I/O and advanced software integration that most home studio users honestly don’t require. Most quality options are priced between $70-$150, offering budget-conscious users high-quality recording capabilities with software bundles that enhance the overall value proposition. Remember that more expensive interfaces often feature higher-quality components that deliver superior sound clarity and reduced noise floors, though good recordings are still achievable with lower-priced options when paired with proper technique. Entry-level options like the Behringer UMC22 provide MIDAS-designed preamps at budget-friendly prices while maintaining professional recording standards. Additionally, interfaces with on-board DSP can reduce the strain on your computer’s processor while providing access to premium plugins for real-time processing.
Assess Your Input and Output Needs
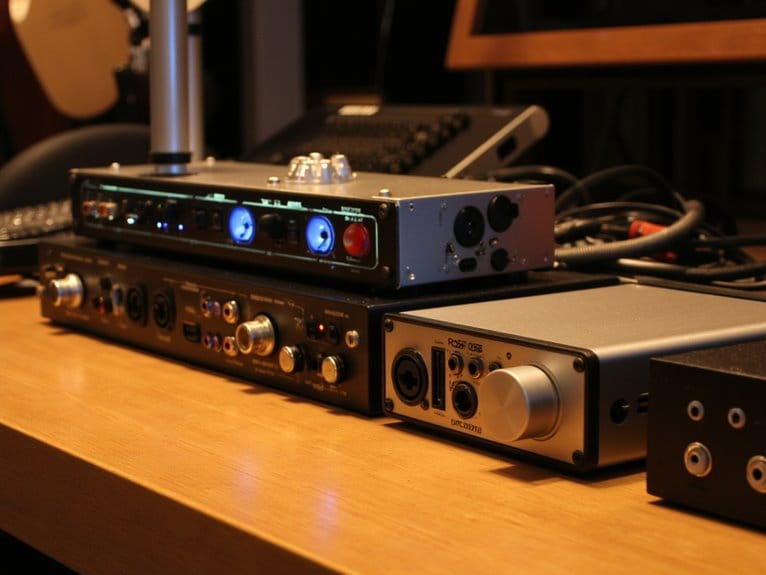
When you’re selecting an audio interface, I’ve found that accurately counting your current audio sources—microphones, instruments, and line-level devices—provides the foundation for determining your minimum input requirements.
Though you’ll want to add at least one or two extra inputs for unexpected recording situations. Your output needs depend on whether you’re monitoring through studio speakers, multiple headphone feeds for band members, or routing signals to external processors, with each scenario requiring different connector types and signal paths.
Planning for future expansion means considering not just your immediate setup, but also potential growth in your recording ambitions, guest appearances, or equipment additions that could quickly outgrow a minimally-equipped interface. If you’re a guitarist or bassist, make sure your interface includes high Z inputs for connecting instruments directly without requiring a separate DI box. At minimum, ensure your chosen interface provides at least one XLR input for professional microphones, as this connection type is essential for quality recording. The key differences among audio interface devices lie in their features rather than overall quality, making this planning even more crucial for long-term satisfaction.
Most quality interfaces support 24-bit/192kHz resolution to ensure superior audio fidelity and minimal noise during your recordings.
Count Your Audio Sources
Before I plunge into the technical specifications that’ll make your head spin, let’s tackle the most fundamental question that determines everything else about your audio interface purchase: how many sound sources you’ll actually be recording.
Understanding your audio source types means cataloging every microphone, guitar, keyboard, and drum machine you’ll connect simultaneously, not sequentially. The mic preamp count becomes vital here, as you’ll need dedicated preamps for each microphone requiring phantom power needs, while instrument level inputs handle guitars and basses directly.
Consider these essential factors when counting sources:
- Current equipment inventory – microphones, instruments, and line-level devices
- Simultaneous recording requirements – how many sources record together
- Stereo input usage – keyboards and effects requiring paired channels
- Future source plans – anticipated gear additions within two years
Signal routing flexibility, monitor speaker requirements, headphone output options, and output type compatibility all depend on this foundational count. Modern producers often incorporate deep bass sounds from drum machines and synthesizers that require dedicated line inputs to preserve their full frequency range. Remember that Direct Monitoring capabilities can significantly reduce latency issues during your recording sessions.
Plan for Future Expansion
While counting your current audio sources provides the foundation for interface selection, I’ve learned through countless studio expansions that planning ahead prevents the expensive mistake of outgrowing your interface within months of purchase.
Smart expansion planning centers on digital upgrades that accommodate growth without requiring complete system overhauls. ADAT compatibility delivers eight additional channels per port, while MADI handles large-scale installations requiring extensive I/O. Future technologies like Dante and AVB networking offer scalable solutions that adapt as your studio evolves.
| Expansion Technology | Maximum Channels |
|---|---|
| ADAT | 8 per port |
| MADI | 64+ channels |
| Dante | 512+ channels |
| AVB | Unlimited |
Consider interfaces with Thunderbolt connectivity for high-channel-count applications, plus ethernet ports supporting networked audio solutions. These features future-proof your investment against tomorrow’s recording demands. Remember that instrument-level signals from guitars and basses require dedicated instrument inputs or DI boxes due to their high impedance characteristics.
Quality preamp design ensures clean amplification and sufficient gain for dynamic microphones, which typically require more power to achieve optimal recording levels.
Understand Audio Quality Specifications
Since audio interfaces serve as the critical bridge between your analog instruments and digital recording environment, understanding their technical specifications isn’t just helpful—it’s essential for making an informed purchase that’ll serve your creative goals.
When evaluating audio quality, you’ll encounter key specifications that directly impact your recording results, from signal clarity to frequency accuracy in reproduction.
The most critical specifications to examine include:
- Dynamic Range – Premium interfaces achieve 120dB or better, while affordable options typically reach 116-119dB
- Bit Depth – 24-bit support provides markedly better quality than 16-bit recording
- THD+N Values – High-quality interfaces maintain levels well below 0.01% for transparent audio
- Conversion Technology – Advanced ADC/DAC chips with parallel path processing reduce noise floors considerably
These specifications determine whether your interface preserves the original character of your recordings. The quality of analog-to-digital conversion fundamentally affects how accurately your microphones and instruments translate into digital recordings. Additionally, sample rates of 48 kHz represent the standard for professional recording, though some interfaces support up to 192 kHz for specialized applications.
Professional interfaces should prioritize AD/DA converters with dynamic ranges exceeding 110 dB to ensure optimal recording clarity and playback detail. Modern interfaces now incorporate visual Gain Halos to help monitor recording levels and prevent clipping during sessions.
Evaluate Connectivity Options and Latency Performance
Once you’ve established your quality requirements, the connectivity pathway between your interface and computer becomes the determining factor in whether you’ll experience seamless recording sessions or frustrating technical bottlenecks.
USB advantages include cost-effectiveness and universal compatibility, while Thunderbolt performance delivers professional-grade speed for demanding monitoring setups. FireWire relevance persists for existing equipment, though PCIe speed remains unmatched for internal installations requiring minimal latency benchmarks.
Ethernet applications suit complex network environments where multiple devices need coordination.
Sample comparisons reveal that interfaces achieving 16-32 samples outperform standard options, making buffer optimizations essential for real-time performance. The Motu M2 demonstrates this principle with its ultra-low 2.5 ms latency specification, ensuring tight recordings without distracting delays.
Power stability affects everything from preamp consistency to digital conversion accuracy, so don’t overlook whether your chosen connection can reliably supply necessary voltage without external adapters. For demanding microphones like the Shure SM7B, ensure your interface’s XLR connection can provide adequate phantom power to support any inline preamps or gain boosters you might need.
Consider Build Quality and Portability Factors
Beyond the technical specifications that determine real-time performance capabilities, the physical characteristics of your audio interface will dictate how well it survives daily use and whether it’ll accompany you beyond your primary recording space.
Build quality directly impacts your interface’s longevity and sound integrity, with metal chassis offering superior electromagnetic shielding compared to plastic alternatives. However, portability considerations often create compromises that’ll affect your purchasing decision.
When evaluating these factors, I prioritize these key aspects:
- Weight versus durability – heavier units typically feature more robust construction
- Power requirements – bus-powered models enhance mobility but may limit functionality
- Material composition – aluminum frames provide excellent heat dissipation and protection
- Connection reliability – quality ports resist wear from frequent plugging and unplugging
For example, the PreSonus AudioBox GO demonstrates how manufacturers can achieve ultra-portable design at just 8.2 ounces while maintaining steel chassis construction for enhanced durability. The ESI Amber i1’s compact and lightweight design at 1.1 pounds exemplifies how modern USB interfaces can balance portability with professional functionality.
Ultimately, you’ll need to balance studio-grade durability against travel-friendly convenience based on your specific workflow requirements.
Review Software Bundles and Additional Features
Why settle for just hardware when most audio interfaces arrive with extensive software packages that can dramatically reduce your initial investment in studio essentials? These bundles typically include streamlined DAWs like Studio One Artist or Ableton Live Lite, providing immediate recording capabilities without separate purchases.
| Software Type | Common Examples | Value Proposition | Learning Support |
|---|---|---|---|
| DAWs | Studio One Artist, Pro Tools | Professional recording out-of-box | Templates included |
| Plugins | Studio Magic Suite, Virtual instruments | Enhanced production value | Interactive tutorials |
| Utilities | Driver tools, Audio routing | Streamlined connectivity | Setup guides |
| Extras | Cloud storage, Updates | Long-term accessibility | User communities |
When conducting bundle comparisons, I’ve noticed that software accessibility and plugin variety often outweigh hardware specifications, especially for beginners who benefit from thorough user tutorials and standardized workflows.
Match Interface Capabilities to Your Recording Setup
While software bundles provide excellent value, the real foundation of your recording success depends on selecting an interface whose technical specifications align perfectly with your current setup and recording ambitions.
The audio interface features you choose must complement your recording techniques, whether you’re capturing intimate acoustic performances or complex multi-instrument arrangements.
Your interface’s capabilities should match these essential requirements:
- Channel count that accommodates simultaneous recording needs
- Connectivity type compatible with your computer and workflow demands
- Integration features supporting your DAW and existing studio gear
- Expandability options through ADAT or modular inputs for future growth
I’ve learned that mismatched specifications often create frustrating bottlenecks, so carefully evaluate your current recording methods and anticipated studio evolution when making this critical decision.
Compare Preamp Quality and Phantom Power Options
Although your interface’s input count and connectivity options form the technical foundation of your recording setup, the quality of its preamps ultimately determines how faithfully your microphones capture sound, making this specification arguably more significant than raw channel numbers.
When evaluating preamp performance, I focus on signal-to-noise ratios exceeding 110dB, which premium interfaces consistently deliver alongside transparent frequency response from 20Hz to 20kHz.
Your phantom power requirements depend heavily on microphone choices, since condenser mics demand the standard +48V for ideal performance and longevity.
Input flexibility becomes vital when you’re switching between dynamic and condenser microphones regularly, as individual channel phantom power control prevents potential damage.
Quality preamps maintain audio clarity through minimal harmonic distortion while preserving signal integrity and output reliability across varying input levels.
Verify Computer and DAW Compatibility
Even the most impressive preamp specifications become irrelevant when your carefully chosen interface can’t communicate properly with your computer and recording software, which I’ve discovered through several frustrating experiences with seemingly perfect gear that simply wouldn’t cooperate.
Before purchasing, you’ll need to verify these compatibility fundamentals:
- Connection compatibility – Match interface ports (USB, Thunderbolt, FireWire) with your computer’s available connections.
- Operating system support – Confirm your OS version works with the interface’s current drivers.
- Driver installation requirements – Check if you need proprietary drivers or if it’s class-compliant.
- DAW integration – Verify your recording software recognizes the interface and supports its features.
I’ve learned that even minor mismatches between your operating system and driver requirements can transform an expensive interface into an attractive paperweight.
Plan for Future Expansion and Upgrade Paths
When you’re selecting an audio interface, you’ll want to think beyond your current needs and consider how your setup might grow over the next few years, because nothing’s more frustrating than outgrowing expensive gear six months after purchase.
I’ve learned that focusing on scalable input/output options, modular system compatibility, and professional upgrade pathways can save you significant money and headaches down the road, especially when your bedroom studio evolves into something more ambitious.
The smart approach involves choosing interfaces with expansion ports like ADAT or Thunderbolt connections, which allow you to add more channels and capabilities without replacing your core unit entirely.
Scalable Input/Output Options
Since you’re investing in an audio interface that’ll hopefully serve your studio for years to come, I’d recommend starting with a thorough assessment of your current input and output needs while building in substantial room for growth.
Smart scalability hinges on selecting interfaces with robust digital expansion capabilities, particularly ADAT and SPDIF connectivity that’ll accommodate external preamps or converters down the road.
Consider these essential scalability factors:
- Channel count flexibility – Choose interfaces offering 2-4x your current requirements
- Cascading capabilities – Look for units that daisy-chain for seamless expansion
- Modular breakout options – Add I/O stages incrementally as budgets allow
- Multi-protocol support – USB, Thunderbolt, and Ethernet compatibility maximizes longevity
For multi user environments, prioritize simultaneous I/O capacity and independent headphone mixes.
Modular System Compatibility
While selecting an interface with solid I/O scalability represents just the first step in future-proofing your studio, modular system compatibility opens entirely new dimensions for creative expansion that I’ve found many producers overlook until they’re already invested in incompatible gear.
Your modular equipment selection demands careful attention to signal handling capabilities, since modular-level signals pack considerably higher amplitudes than standard audio. I’ve learned this the hard way when my first interface couldn’t handle Eurorack’s hot output levels without distortion.
| Feature | Standard Audio | Modular Systems |
|---|---|---|
| Signal Level | Line/Mic Level | Modular Level (High) |
| Routing Flexibility | Basic | Complex Patching |
| Expansion Options | Limited | Modular Growth |
Effective modular signal routing requires ADAT expansion, MIDI-CV integration, and balanced outputs that accommodate both studio monitors and external processing gear seamlessly.
Professional Upgrade Pathways
Beyond modular compatibility lies perhaps the most critical consideration I’ve encountered in my years of studio development: establishing clear professional upgrade pathways that won’t leave you starting from scratch every few years.
Interface compatibility becomes paramount when you’re investing in external preamps, converters, and processors that’ll outlast your current setup. Smart digital expansion planning guarantees your interface grows with your ambitions rather than constraining them.
Consider these upgrade-friendly features:
- Multiple digital I/O formats (ADAT, MADI, AES/EBU) for diverse expansion options
- Dedicated line inputs that bypass preamps entirely for external gear integration
- Robust onboard DSP reducing computer dependency as projects become more complex
- Future-proof connectivity like Thunderbolt or USB-C for long-term computer compatibility
You’ll thank yourself later for choosing manufacturers with proven track records of driver updates and backward compatibility.
Frequently Asked Questions
Can I Use Multiple Audio Interfaces Simultaneously on the Same Computer?
Yes, you can use multiple audio interfaces simultaneously, though it requires careful planning for ideal audio performance.
I’ve found that interfaces sharing multi-device drivers, like M-Audio’s Delta series, work seamlessly together, while mixing different brands often creates synchronization headaches.
Your multi device setup options include Mac’s Aggregate Device utility, Windows ASIO4ALL, or hardware expansion through ADAT connections for better timing.
Do Audio Interfaces Work With Tablets and Smartphones for Mobile Recording?
Yes, you can achieve tablet compatibility and mobile recording with audio interfaces, though it requires careful consideration of your device’s hardware specifications.
Most tablets and smartphones work with USB or Bluetooth-enabled interfaces, but you’ll likely need adapters for proper connectivity.
Android devices can be inconsistent performers with external audio hardware, while iOS generally offers better compatibility.
Bus-powered, portable interfaces work best for mobile recording sessions.
What’s the Difference Between Bus-Powered and Externally Powered Audio Interfaces?
Bus-powered interfaces draw power through USB, offering you portability and fewer cables, while externally powered units use wall adapters for consistent power delivery.
I’ve found bus powered benefits include mobility and reduced ground loop risks, though externally powered drawbacks involve potential hum and less portability.
External power typically provides better headphone amplification and handles multiple inputs more effectively, but you’ll sacrifice convenience for that enhanced performance capability.
Can I Daisy-Chain Audio Interfaces to Increase My Channel Count?
Yes, you can daisy-chain compatible audio interfaces using protocols like Thunderbolt, MADI, or FireWire to dramatically expand your channel count.
The daisy chaining benefits include cost-effective I/O expansion and reduced cable clutter, though you’ll face channel count limitations based on bandwidth and manufacturer specifications.
I’ve seen setups with four Antelope Orion32+ units chained together, but you’ll need proper clock synchronization and compatible drivers for seamless operation.
Do I Need Separate Drivers for Each Audio Interface Brand?
Yes, you’ll need separate interface drivers for each brand since most manufacturers develop proprietary software optimized for their specific hardware’s routing capabilities, control panels, and ASIO performance.
While macOS often uses universal Core Audio drivers that work across brands, Windows typically requires brand-specific drivers for full functionality.
Brand compatibility issues arise when mixing interfaces from different manufacturers, as each driver package is designed exclusively for that company’s products.
On a final note
You’ve now got the framework to choose an audio interface that’ll serve your recording needs without breaking the bank or leaving you frustrated with limited connectivity. I’ve found that taking time upfront to honestly assess your current requirements, while keeping one eye on potential future expansion, saves countless headaches down the road. Don’t overthink it—match your budget to your actual needs, and you’ll be recording quality audio soon enough.

