Hi-Hat Setup and Playing Techniques
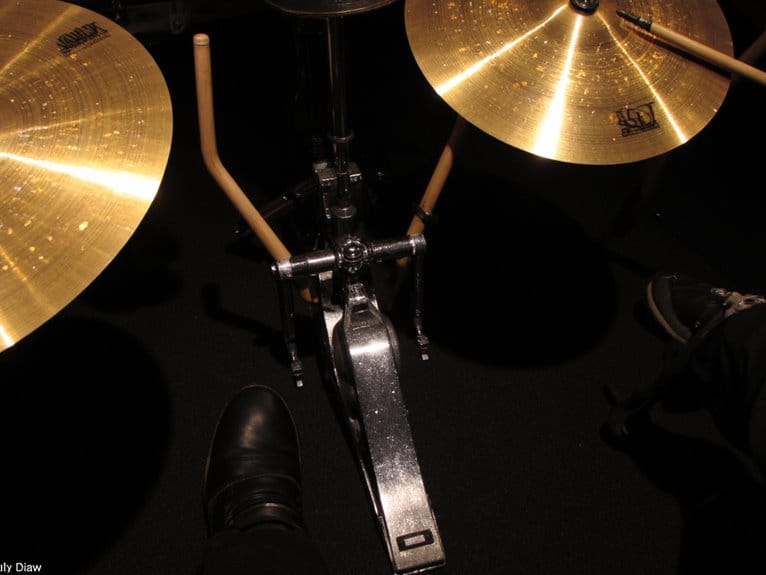
Position your hi-hat stand at 10-11 o’clock relative to your seat, setting the height so your stick’s butt end aligns with a piano’s F note. Adjust cymbal spacing wider for open, louder tones or tighter for crisp rock control, while setting spring tension loose for jazz responsiveness or tight for metal’s quick attacks. Use heels-down technique for sharp chick sounds and heels-up for lighter strokes, practicing ankle movements to reduce fatigue during extended sessions and complex passages that demand seamless shifts.
We are supported by our audience. When you purchase through links on our site, we may earn an affiliate commission, at no extra cost for you. Learn more.
Notable Insights
- Position hi-hat at 10-11 o’clock relative to your seat, parallel to kick pedal for optimal reach and sensitivity.
- Adjust cymbal spacing wider for open, loud tones or tighter for crisp control in rock and funk styles.
- Set spring tension loose for jazz subtlety, medium for rock balance, or tight for metal’s quick response needs.
- Use heels-down technique for crisp chick sounds and heels-up approach for quicker, lighter stroke execution.
- Maintain equipment monthly by checking bolts, lubricating moving parts, and inspecting clutch felts for optimal performance.
Essential Hardware Components and Assembly Process
Mastery of hi-hat setup begins with understanding the intricate hardware components that work together to create one of drumming’s most expressive instruments. Your primary elements include the main vertical tube supporting the lower cymbal, the foot pedal mechanism connected to an internal rod, and the adjustable clutch securing your top cymbal.
I’ve found that ensuring hardware compatibility between different manufacturer components prevents frustrating assembly issues down the line. The tripod base provides essential stability, while tension springs control your pedal’s responsiveness and feel. This tripod design ensures stability while allowing for height and angle adjustments essential for the drummer’s comfort.
During assembly, you’ll unfold the legs first, secure the vertical tube at comfortable height, attach the pedal mechanism, then mount both cymbals with proper spacing. Most hi-hat cymbals are 14 inches in diameter, which provides the standard size for optimal sound and playing versatility. Professional drummers often benefit from memory locks that allow them to consistently recreate their preferred height and positioning settings across different performances and practice sessions. Basic assembly tools like drum keys help fine-tune your complete kit setup effectively.
Ergonomic Positioning and Stand Placement
Three critical positioning decisions will transform your hi-hat from a basic timekeeper into an ergonomic extension of your natural playing motion, and I’ve learned through countless setup adjustments that getting these fundamentals right prevents the shoulder aches and wrist strain that plague drummers who rush through this process.
Position your hi-hat at 10:30 relative to your snare drum’s 12:00 orientation, maintaining ideal distance for seamless changes without crowding your playing space. Height adjustment should place the cymbals where your stick’s butt end aligns with a piano’s F note when resting naturally.
| Setup Element | Positioning Guidelines |
|---|---|
| Stand Angle | 45 degrees left of snare, legs adjusted for stability |
| Cymbal Tilt | Slight forward angle toward player for rebound |
| Pedal Tension | Adjustable to match foot strength, minimize fatigue |
These ergonomic adjustments create the foundation for comfortable, injury-free playing during extended sessions. Installing the bottom cymbal first ensures proper balance and weight distribution throughout the entire hi-hat assembly process. Consider placing a drum rug beneath your entire kit to prevent hardware movement and protect your practice space flooring during intense playing sessions.
Cymbal Spacing Techniques for Sound Control
While most drummers obsess over cymbal brands and stick weights, I’ve discovered that the humble gap between your hi-hat cymbals wields more sonic power than any expensive upgrade you’ll find in a music store catalog.
Your spacing choices directly control everything from sustain and wash to pedal response and rhythmic precision.
Hi-hat spacing isn’t just setup—it’s your secret weapon for controlling sustain, wash, pedal feel, and rhythmic attack.
Wider gaps deliver louder, more open tones perfect for ambient playing, while tighter spacing creates the crisp control that rock and funk demand.
I’ve learned that dynamic adjustments throughout your performance—using moderate default spacing combined with foot pressure variations—offer superior control compared to fixed positioning.
This approach enables thorough tonal exploration, allowing you to sculpt everything from aggressive chops to shimmering washes without touching your clutch settings.
Cymbal Selection and Proper Arrangement
Before you even think about tweaking your hi-hat spacing, the cymbals themselves determine whether you’ll achieve the sonic foundation your music demands.
Cymbal sizes ranging from 12 to 16 inches create distinct sound profiles, with smaller diameters delivering bright jazz tones while larger ones produce heavy metal aggression. Alloy types like B8 and B20 bronze fundamentally shape your tonal preferences, affecting brightness and complexity.
Weight variations between your top and bottom cymbals enable sophisticated hi hat combinations—I’ve found heavy bottoms paired with light tops offer exceptional dynamic control.
Finish effects considerably impact your sound’s character, with brilliant surfaces cutting through dense mixes while traditional finishes provide warmer complexity. MS63 brass construction provides excellent durability and consistent sound quality, making it a reliable choice for intermediate to professional drummers.
Matching these elements to genre suitability guarantees your setup supports rather than fights your musical style. Professional drummers often employ hand-hammered cymbals for their superior sonic complexity and controlled wash, which enhances the subtle dynamics essential for jazz and other nuanced musical styles.
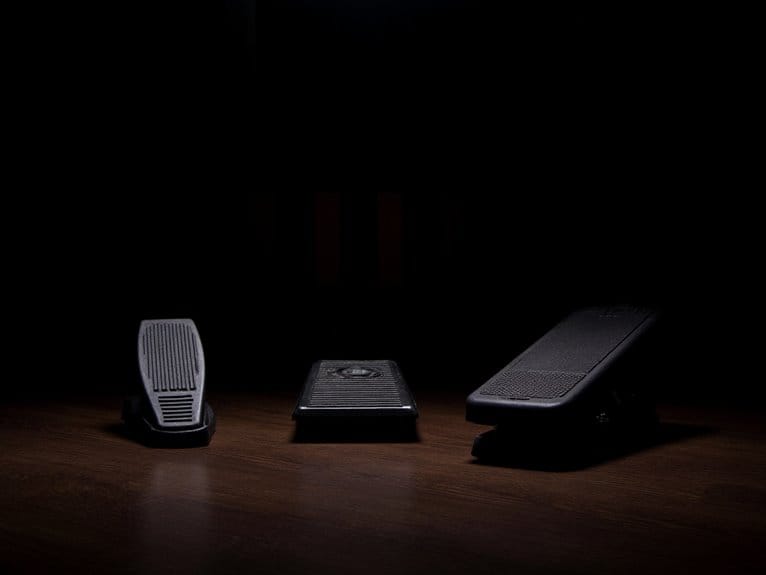
Pedal Setup and Foot Technique Optimization
Now that you’ve got your cymbals properly selected and arranged, you’ll need to fine-tune your pedal positioning, master efficient foot movements, and dial in the spring tension to create a responsive setup that matches your playing style.
Your pedal height and angle directly impact how quickly you can shift between hi-hat work and kick drum patterns, while proper foot technique determines whether you’ll maintain control during complex passages or struggle with fatigue after just a few songs.
I’ve found that most drummers overlook spring tension adjustments, but this simple tweak can transform a sluggish, unresponsive pedal into a precision instrument that responds to every subtle foot movement. Just like with audio equipment where signal-to-noise ratio affects clarity, your pedal’s responsiveness depends on eliminating mechanical interference that can muddy your articulation.
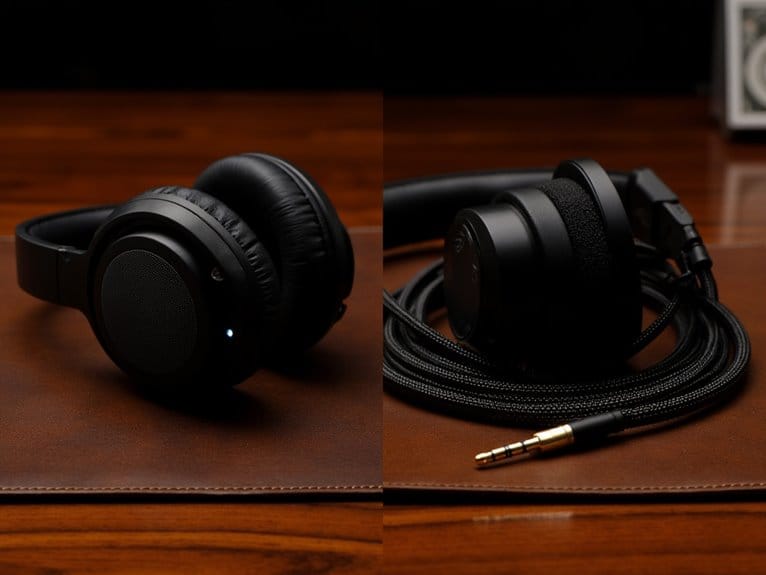
During extended practice sessions, quality sound isolation headphones can help you focus on perfecting your hi-hat technique without outside distractions interfering with your rhythm development.
For drummers looking to blend acoustic and electronic elements, consider incorporating dual-zone triggers that can detect both head and rim strikes while preserving your natural hi-hat sound dynamics.
Pedal Height and Positioning
Three fundamental elements determine whether your hi-hat setup will enhance or hinder your playing: cymbal height, pedal positioning, and mechanical assembly, each working together to create the foundation for precise foot technique and peak sound control.
Position your cymbals just above snare level, though height variations depend on genre—jazz drummers typically prefer higher settings for stick control, while metal players favor lower positions for speed.
Your pedal sensitivity improves dramatically when you place the hi-hat stand at the 10-11 o’clock position relative to your seat, keeping it parallel to your kick pedal.
Don’t forget the assembly order: metal disc first, felt washers next, then bottom cymbal, ensuring your wing nuts are tight enough for stability but loose enough for smooth operation.
Foot Motion and Technique
With your hi-hat positioned perfectly, the real magic happens when you master the subtle dance between your foot and that pedal—a skill that’ll make or break your groove no matter how expensive your cymbals are.
Developing proper foot rhythm starts with understanding these fundamental technique variations:
- Heels down technique – keeps your foot grounded while producing crisp chick sounds without unwanted splashes.
- Heels up approach – enables quicker, lighter strokes perfect for steady rhythms and complex patterns.
- Rocking motion – creates smooth opening/closing patterns that flow naturally with your groove.
Motion efficiency comes from using ankle movement primarily, avoiding excessive leg motion that causes fatigue.
Advanced techniques like coordinated pressure release and subtle foot modulation add dynamic expression to your playing.
Training exercises focusing on 3-note groups and metronome practice build endurance, while addressing common issues like sloppy chatter improves overall pedal coordination.
Spring Tension Adjustments
While your foot technique might be flawless, spring tension acts as the invisible force that’ll either amplify your skills or sabotage them completely—and I’ve watched countless drummers struggle with timing simply because they overlooked this essential adjustment.
Your hi-hat’s spring tension directly controls pedal sensitivity, determining how much effort you’ll need for each cymbal movement. Most stands feature an adjustable knob that slides and rotates through multiple settings, allowing precise calibration for your playing style.
| Playing Style | Tension Setting | Pedal Sensitivity |
|---|---|---|
| Jazz/Subtle | Loose | High responsiveness |
| Rock/Pop | Medium | Balanced control |
| Metal/Funk | Tight | Quick response |
| Extended Sessions | Light-Medium | Reduced fatigue |
I’ve found that tighter spring tension delivers rapid pedal responsiveness for aggressive styles, while looser settings provide enhanced control for delicate passages, though you’ll need to prevent cymbal sinking from insufficient support.
Troubleshooting Common Setup Issues
Even the most carefully assembled hi-hat setup can develop frustrating issues that’ll have you questioning your sanity during practice sessions, but I’ve found that most problems stem from a handful of predictable culprits that are surprisingly easy to diagnose and fix.
When cymbal wobbling occurs, your first instinct should be checking the bottom cymbal’s seating position, since an incorrectly placed cymbal creates instability that affects your entire performance.
Clutch adjustment issues typically manifest as non-engagement when you press the pedal, usually caused by a loose wing nut that simply needs tightening.
Here’s my troubleshooting priority list:
- Check clutch tightness – loose wing nuts cause 90% of engagement problems
- Verify cymbal alignment – misaligned edges create inconsistent sound and premature wear
- Inspect felt washers – missing pieces after disassembly compromise stability and function
If your hi-hat stand lacks memory locks, you’ll find yourself constantly readjusting height and angle settings between performances, which can lead to inconsistent playing feel and wasted setup time.
If you’re still experiencing sound quality issues after addressing these mechanical problems, consider that microphone placement and mounting systems can significantly impact your hi-hat’s recorded clarity and isolation from other drum elements.
Maintenance and Hardware Care
Once you’ve solved those pesky setup problems, keeping your hi-hat hardware in peak condition becomes your next priority. I’ve learned through countless hours behind the kit that a little preventive care beats emergency repairs every single time.
Regular cleaning schedules should include wiping down pedals with soft cloths, removing grime that accumulates on moving parts and reduces smoothness. I check all screws, bolts, and nuts monthly since loose hardware creates unwanted rattling and affects playability.
Light lubrication of chains, wing nuts, and footboard hinges prevents stiffness, though I’ve made the mistake of over-lubricating before. When considering hardware upgrades, inspect clutch felts and spring tension regularly, as worn components compromise your hi-hat’s responsiveness and overall performance.
Just like with shock-mounted capsules in microphones that absorb vibrations from stands and floor contact, your hi-hat stand benefits from isolation pads that reduce unwanted resonance transfer to the floor.
Frequently Asked Questions
Can I Use Mismatched Cymbal Brands for My Hi-Hat Setup?
You can absolutely use mismatched cymbal brands for hi-hats. Cymbal compatibility isn’t brand-dependent, and sound blending between different manufacturers often creates unique, interesting tones that many drummers prefer over matched pairs.
What’s the Ideal Hi-Hat Height Relative to My Snare Drum?
Position your hi-hat 5-6 inches above your snare drum rim for ideal hi hat positioning. This snare relationship allows comfortable stick movement between drums while preventing knuckle collisions during fast shifts and aggressive playing styles.
Should I Oil My Hi-Hat Stand’s Moving Parts Regularly?
You should establish a regular maintenance schedule for oiling your hi-hat stand’s moving parts. This prevents squeaking, guarantees smooth pedal action, and minimizes performance impact from sticky or unresponsive mechanical components during playing.
On a final note
You’ve now got the foundation for dialing in your hi-hat setup, from hardware assembly to pedal technique refinement. Remember, there’s no universal “perfect” setup—what works for jazz might feel awkward in metal contexts. I’ve found that small adjustments, like cymbal spacing tweaks or tension modifications, often yield surprising improvements in both sound quality and playing comfort. Keep experimenting with these variables until you discover your ideal configuration.