Fret Leveling: When and How It’s Done
When you notice string buzzing, dead notes, or inconsistent intonation despite proper setups, your guitar likely needs fret leveling-a process that requires careful assessment with tools like fret rockers and notched straight edges to identify uneven wear patterns. I’ve found that this meticulous procedure involves adjusting the truss rod, masking the fretboard, then systematically sanding with 320-grit paper before crowning each fret with specialized files and polishing through progressive grits to achieve ideal playability-though mastering these techniques demands understanding several critical considerations.
We are supported by our audience. When you purchase through links on our site, we may earn an affiliate commission, at no extra cost for you. Learn more.
Notable Insights
- Fret leveling is needed when experiencing string buzzing, dead notes, inconsistent intonation, or visible fret wear and damage.
- Check neck straightness with a notched straight edge and adjust the truss rod before beginning any fret work.
- Level frets using a sanding beam with 320-grit sandpaper, marking progress with Sharpie and checking frequently to prevent over-sanding.
- Crown frets with specialized files using controlled strokes to create centered, symmetrical rounded peaks for proper intonation.
- Polish frets through progressive grits from 400 to 1500 sandpaper, finishing with steel wool for smooth string movement.
Signs Your Guitar Needs Fret Leveling
When you’re experiencing frustrating buzzing, dead notes, or inconsistent intonation despite multiple setup adjustments, your guitar’s frets have likely developed the kind of unevenness that only proper leveling can fix.
These fret symptoms become apparent when you notice string buzz over specific frets, or when certain notes sound muted despite proper fretting technique. A fret rocker tool spanning three frets will rock back and forth if the middle fret sits higher than its neighbors, confirming uneven wear patterns that create playability issues.
You’ll also spot visual cues like dents, grooves, or flattened fret tops under bright lighting, while sharp fret ends catching your fingers during play indicate the need for professional attention to restore peak performance.
Essential Tools and Step-by-Step Process
Success in fret leveling hinges on having the right tools and following a methodical approach, because even the most skilled hands can’t compensate for inadequate equipment or rushed technique.
You’ll need a notched straight edge to check neck straightness without interference from uneven frets, plus a sanding beam wrapped in 320-grit sandpaper for leveling.
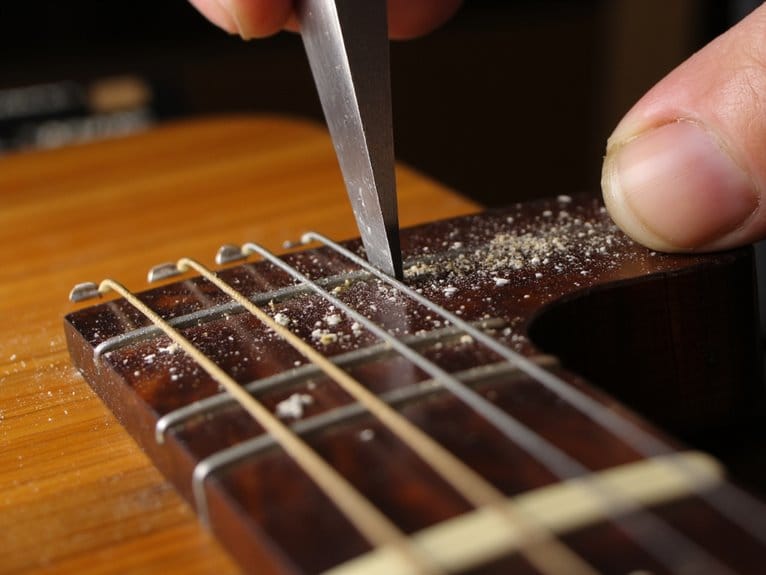
Start by adjusting your truss rod, then mask the fretboard completely. Mark all frets with a Sharpie to track progress, then sand across frets with short, even passes.
I’ve learned that checking frequently prevents over-sanding disasters. Use a fret rocker to identify problem spots, maintaining consistent pressure throughout.
The Sharpie marks disappear where you’ve sanded, providing clear visual feedback for uniform results.
Crowning, Polishing, and Common Pitfalls to Avoid
After you’ve leveled your frets to perfection, the real artistry begins with crowning, because this process transforms those flat-topped frets back into the rounded peaks that make your guitar sing.
Proper crowning techniques involve using specialized files with controlled, even strokes, centering that crown peak precisely on each fret’s width to maintain accurate intonation. You’ll want to work gradually, addressing problematic areas first before refining to achieve symmetrical crowns throughout the neck.
Following crowning, polishing techniques become essential for removing file marks and creating smooth string movement.
Progress through sandpaper grits from 400 to 1500, then finish with steel wool or polishing compounds for that mirror-like surface.
Avoid over-filing and protect your fingerboard with masking tape-trust me, these details separate amateur work from professional results.
On a final note
You’ve now got the essential knowledge to tackle fret leveling, though I’ll admit it’s not exactly a weekend hobby project. While you can certainly attempt this yourself with patience and proper tools, don’t hesitate to consult a professional luthier if you’re working with an expensive instrument or feel uncertain about any step. Your guitar’s playability depends on precision, and sometimes experience trumps enthusiasm.