Essential Drum Room Layout and Workflow Considerations
You’ll need a medium-to-large room (150-300+ square feet) with 13-16 foot ceilings, positioning your kit 1-2 meters from walls while covering 25-50% of surfaces with acoustic treatment. Install floor-to-ceiling bass traps in all corners, place your mixing console within arm’s reach at eye level, and maintain organized cable management for quick microphone adjustments. Strategic equipment placement, proper sound isolation techniques, and pre-saved session templates streamline your workflow, though mastering these fundamentals opens doors to advanced recording techniques.
We are supported by our audience. When you purchase through links on our site, we may earn an affiliate commission, at no extra cost for you. Learn more.
Notable Insights
- Position drums 1-2 meters from walls in rooms 150-300 sq ft with high ceilings to prevent muddy low frequencies.
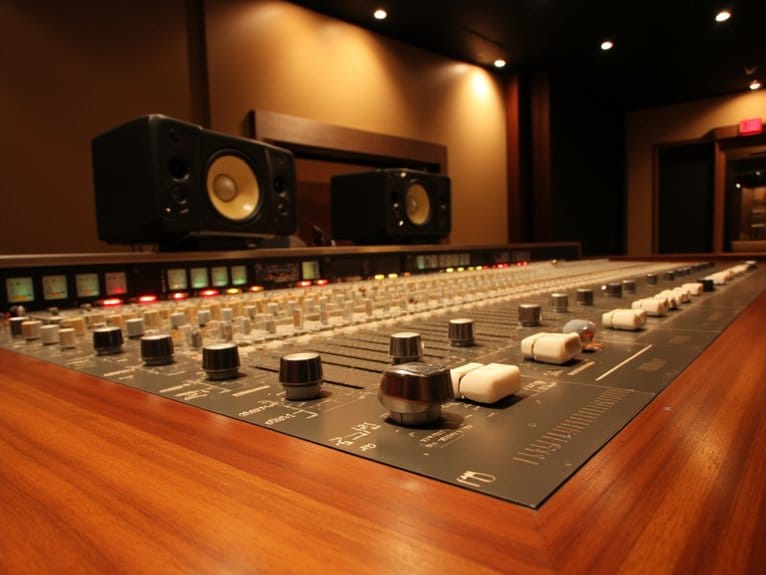
- Place mixing console at arm’s reach with monitor speakers forming an equilateral triangle at ear level.
- Install bass traps in all 12 corners and cover 25-50% of surfaces with acoustic treatment panels.
- Arrange microphones and cables for quick access while keeping XLR routing away from drum performance areas.
- Use pre-saved session templates and maintain organized equipment placement to streamline recording workflow efficiency.
Optimizing Room Dimensions and Shape for Drum Performance
While most musicians focus on their gear and technique, I’ve learned that the room itself might be the most overlooked element in achieving great drum sound.
The room you record in matters more than the expensive microphones and drums you’re using.
You’ll want to prioritize medium to large spaces, ideally 150-300 square feet minimum, though I’ve found 300+ square feet provides the expansive resonance that really makes drums sing.
The magic happens when you avoid parallel surfaces entirely—room angles that break up standing waves and flutter echoes will dramatically improve your sound quality. Acoustic treatments can significantly enhance sound quality even in rooms with standard rectangular shapes.
Height variations are equally important; you’ll need 13-16 foot ceilings to accommodate those deep kick drum frequencies around 40 Hz, since standard 8-foot ceilings muddy your low-end. Proper microphone positioning becomes compromised when ceiling height restricts optimal placement angles and distances.
Non-parallel walls and angled surfaces create natural diffusion that expensive treatment often can’t replicate. For apartment dwellers or noise-sensitive environments, incorporating practice pads can provide an effective solution for skill development without disturbing neighbors.
Strategic Drum Kit Positioning and Orientation
Once you’ve established your room’s acoustic foundation, you’ll need to position your kit strategically within that space. Consider how distance from walls affects sound reflection, where your bass drum should face for ideal projection, and whether you’re setting up for recording or live performance scenarios.
I’ve learned through years of trial and error that even a perfectly tuned kit can sound muddy or harsh when positioned incorrectly. Reflective surfaces like bare walls create unwanted echoes that’ll plague your recordings or practice sessions. Start by placing your stool first to establish the optimal playing area before arranging any other components.
Your kit’s orientation becomes particularly vital when you factor in camera angles for video recording, audience sightlines for performances, and the complex interplay between your drums and the room’s natural acoustics.
Distance From Reflective Surfaces
When you’re setting up your drum kit, the distance from reflective surfaces becomes one of those critical factors that can make or break your sound quality, even though it’s something many drummers overlook until they hear those unwanted phase cancellations creeping into their recordings.
I’ve learned that maintaining proper spacing directly impacts drum resonance and how reflection patterns interact with your microphones, particularly those overhead mics that capture your kit’s overall balance.
- Position your kit at least 1-2 meters from reflective walls to reduce destructive interference
- Place overhead mics 2-3 meters above floor level, avoiding strong wall reflections
- Keep snare drums away from parallel surfaces that create phase issues
- Find your room’s acoustic sweet spot, typically away from corners and parallel walls
- Install acoustic panels at early reflection points when wall proximity is unavoidable
For professional drum recordings, consider integrating a rack mount mixer with USB audio interface capabilities to capture multiple microphone inputs simultaneously while maintaining optimal signal routing from your strategically positioned kit.
Bass Drum Wall Orientation
Something I’ve discovered through countless hours of drum setup experimentation is that your bass drum’s orientation relative to the room’s walls fundamentally shapes your entire kit’s low-frequency response.
Honestly, it’s one of those decisions that’ll either give you that punchy, articulate kick sound you’re after or leave you fighting against muddy, boomy resonances that no amount of EQ can fully fix.
When you’re considering bass drum placement, facing it directly into a corner creates that thick, boomy sound through boundary reinforcement, while positioning it toward open room space delivers clearer, more natural tone.
Wall reflection becomes your friend or enemy depending on proximity—keeping at least two feet from reflective surfaces reduces problematic standing waves that’ll muddy your attack.
Camera Angle Considerations
While getting your bass drum positioned for ideal room acoustics sets the foundation for great sound, you’ll quickly realize that visual documentation of your drumming requires just as much strategic thinking about kit orientation.
Frankly, I’ve learned the hard way that camera angles can make or break whether your audience actually sees what you’re playing.
Your camera position strategies should prioritize these drum visibility techniques:
- Position overhead cameras to capture cymbal work and stick patterns while including partial head visibility for context
- Place side cameras on the right to showcase ride cymbal techniques and hand coordination details
- Use telephoto lenses (70-200mm f/2.8) for distant shots during live performances or larger room setups
- Implement ultra-wide lenses (14-24mm f/2.8) for close-range impact shots that maintain kit spatial relationships
- Orient your kit to allow clear sightlines, leaving extra space on your right side for maximum ride cymbal coverage
Acoustic Treatment Placement and Coverage Guidelines
Since I’ve spent countless hours fine-tuning drum rooms over the years, I can tell you that proper acoustic treatment placement makes the difference between a muddy, echo-prone space and a professionally controlled recording environment. Your acoustic paneling techniques should focus on covering 25-50% of wall and ceiling surfaces, with panels positioned at the 4-6 foot height range to match sound reflection planes from your kit.
| Location | Treatment Type | Purpose |
|---|---|---|
| Behind Kit | Absorption Panels | Reduce direct reflections |
| Side Walls | Absorbers/Diffusers | Minimize flutter echo |
| Ceiling Above | Acoustic Clouds | Control vertical reflections |
| Opposite Walls | Diffusion Panels | Maintain room liveliness |
Your room coverage strategies should balance absorption with diffusion, preventing over-deadening while controlling problematic reflections that compromise your recordings. Just as drummers must consider tonal balance when selecting drumheads for optimal sound quality, your acoustic treatment choices require careful consideration of how different materials and placements will affect the overall sonic character of your recording space.
Bass Trap Installation and Low-Frequency Management
After working through hundreds of drum room projects, I’ve learned that bass traps represent your most critical investment in low-frequency control, transforming boomy, undefined spaces into tight, punchy recording environments.
Different bass trap types target specific frequency absorption ranges, with corner-mounted units delivering maximum impact where low-frequency energy accumulates most aggressively.
- Prioritize floor-to-ceiling corner placement in all 12 dihedral corners for maximum low-frequency capture.
- Build rigid wooden frames using high-density insulation like Roxul Rockwool for effective absorption below 250 Hz.
- Target trihedral corners where three surfaces meet, as these spots accumulate the deepest bass waves.
- Ensure gap-free installation between traps and surfaces to prevent bass leakage around treatment.
- Combine with broadband absorbers for balanced room acoustics across the entire frequency spectrum.
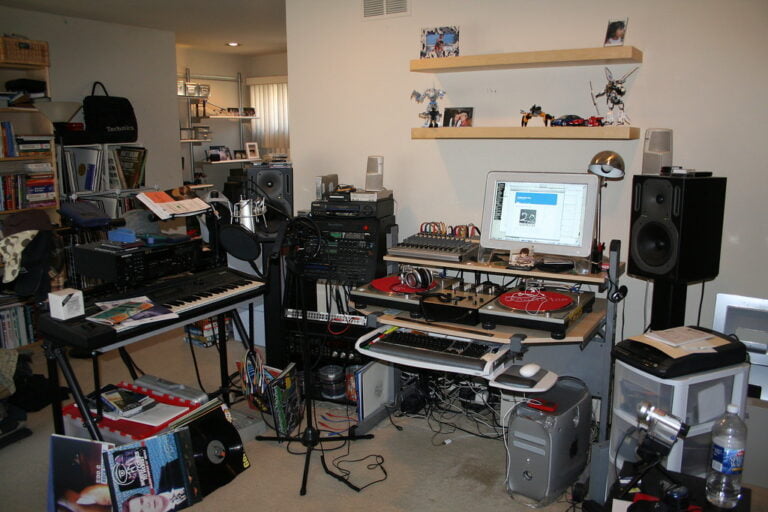
Workflow Efficiency and Ergonomic Setup
Once you’ve dialed in your room’s acoustics with proper bass trapping, the physical layout and workflow organization become your next battleground for creating professional drum recordings. Smart ergonomic adjustments keep you comfortable during those marathon sessions, while workflow flexibility determines whether you’re capturing magic or fighting your setup.
| Setup Element | Best Position |
|---|---|
| Mixing Console | Within arm’s reach, eye level |
| Monitor Speakers | Ear level, equilateral triangle |
| Drum Kit | Clear sightlines, comfortable access |
| Cable Management | Organized, no trip hazards |
| Session Templates | Pre-saved, genre-specific |
Just as guitarists need proper impedance matching between their headphones and amps for optimal sound quality, drummers must ensure their monitoring setup maintains clean signal paths and appropriate load handling for accurate playback during recording sessions. Quality hardware durability is essential for maintaining consistent performance during extended recording sessions, as unstable stands or failing components can interrupt the creative flow. I’ve learned that positioning everything strategically—from adjustable seating to accessible control surfaces—eliminates those frustrating moments when inspiration strikes but your workspace fights back, allowing you to focus entirely on capturing that perfect drum sound.
Sound Isolation and Noise Control Methods
While an ergonomically optimized workflow keeps you comfortable during long recording sessions, proper sound isolation guarantees your drum tracks don’t become neighborhood warfare.
I’ve learned that effective soundproofing strategies require both structural modifications and strategic acoustic materials placement to contain those thunderous snare hits.
Your sound isolation arsenal should include:
- Double wall construction with 1-inch air gaps and IB3 clips to decouple framing
- Mass-loaded vinyl barriers within wall cavities for dense sound blocking
- Rubber floor underlayment beneath flooring to absorb impact noise
- Acoustic door seal kits and specialized caulk for sealing air leaks
- 4-inch thick acoustic panels covering 40% of wall surfaces with air gaps
Focus on sealing every gap, crack, and penetration point, because sound finds weaknesses like water finds holes in a boat.
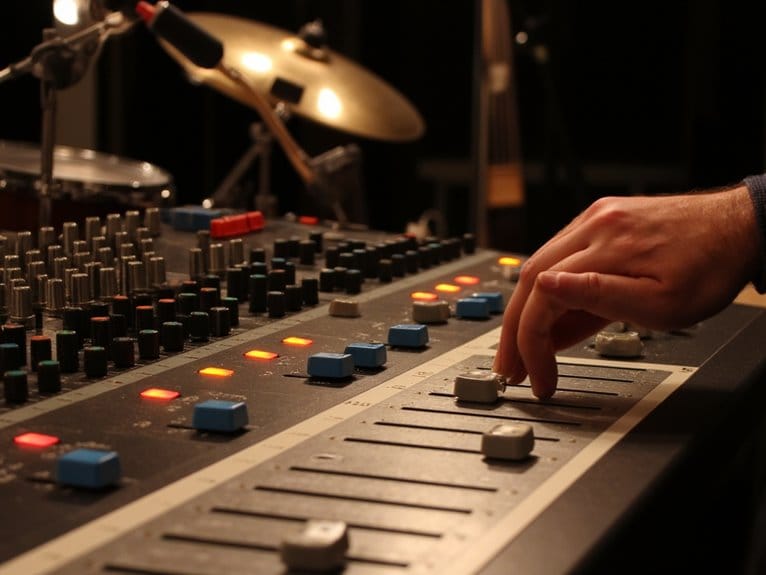
Recording Setup and Equipment Accessibility
When I first started recording drums, I’d spend half my session time untangling cables and adjusting mic stands, learning the hard way that strategic equipment placement saves more time than any expensive preamp ever could.
You’ll want to position your mic stands flexibly, allowing quick swaps between stereo techniques like ORTF, Blumlein, or XY patterns without complete teardowns.
Keep different microphone types—dynamic, condenser, and ribbon mics—within arm’s reach since you’ll need to experiment with placements during sessions.
Smart cable management means routing your XLR cables away from the drum area, possibly through separate spaces or hallways to avoid clutter.
Since dynamic microphones require no phantom power and generate their own signal, they’re particularly convenient for drum recording setups where you’re frequently repositioning equipment.
Consider using cardioid microphones for overhead positioning as they effectively minimize background noise and unwanted reflections that can muddy your drum sound.
Professional audio interfaces with TotalMix FX software enable real-time monitoring adjustments during drum sessions, eliminating the need to interrupt performances for technical changes.
This setup lets you focus on capturing the perfect drum sound rather than wrestling with equipment logistics.
Frequently Asked Questions
What’s the Ideal Temperature and Humidity Range for Drum Room Environments?
You’ll want 70-72°F temperature with 40-50% humidity for ideal drum maintenance. Consistent climate control prevents wood warping, finish cracking, and hardware corrosion while maintaining tuning stability and extending your kit’s lifespan.
How Often Should Acoustic Panels Be Cleaned or Replaced Over Time?
You should perform panel maintenance every 3-4 months for deep cleaning, with light dusting done routinely. Your cleaning frequency may increase in dusty environments. Replace panels when cleaning can’t restore acoustic performance or eliminate persistent odors.
Can Electronic Drums Be Used in the Same Room Layout as Acoustic Drums?
You can definitely use electronic drums in the same room as acoustic drums. The benefits integration includes flexible positioning, improved sound isolation, and quieter practice sessions without requiring separate spaces or additional acoustic treatment.
On a final note
You’ve now got the foundation for a drum room that’ll serve you well, whether you’re tracking thunderous metal or delicate jazz brushwork. Remember, there’s no perfect setup – even seasoned engineers like myself still tweak placement and treatment based on each project’s needs. Start with these fundamentals, trust your ears, and don’t be afraid to experiment until you find what works best for your space and style.