Drum Tuning: Achieving the Perfect Sound
You’ll achieve professional drum sounds by using a diagonal crisscross pattern when adjusting tension rods, making half-turn increments while tapping near each lug to check pitch consistency. Start with proper drumhead selection—clear heads provide brighter projection while coated versions offer warmth—then gradually increase tension across all lugs. Press firmly on the drumhead to eliminate wrinkles, and consider your shell material’s tonal characteristics during the tuning process. Master these fundamentals to reveal advanced techniques.
We are supported by our audience. When you purchase through links on our site, we may earn an affiliate commission, at no extra cost for you. Learn more.
Notable Insights
- Use a diagonal crisscross pattern when adjusting tension rods, making half-turn increments while tapping near each lug.
- Select drumheads based on desired sound: clear heads provide brighter projection while coated heads offer warmth and character.
- Tune drums to harmonically compatible frequencies to enhance musical cohesion and overall kit sound quality.
- Apply dampening materials like gel pads or pinstripe heads incrementally to control unwanted overtones without overdoing it.
- Press down firmly on drumheads to remove wrinkles and gradually increase tension while checking pitch around each tension rod.
Essential Techniques and Patterns for Proper Drum Tuning
The foundation of exceptional drum sound lies in mastering proper tensioning techniques, which I’ve learned through years of fine-tuning everything from jazz kits to heavy metal setups.
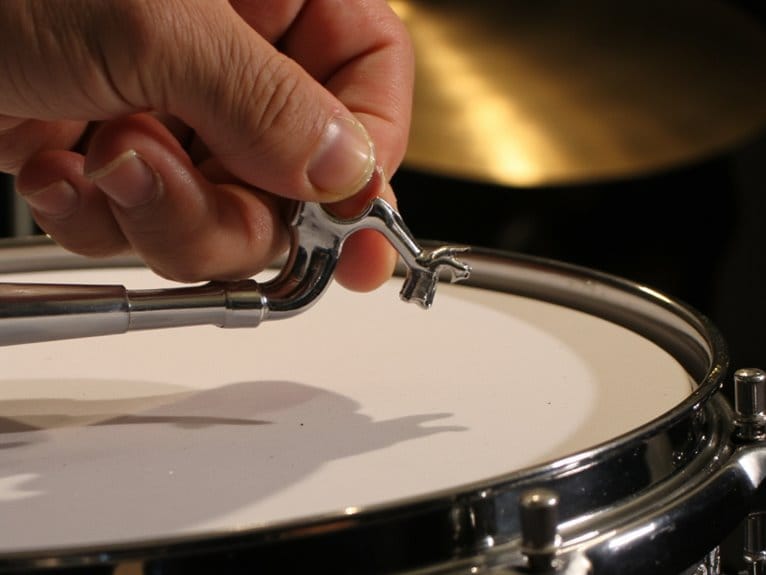
You’ll want to use your drum key in a diagonal, crisscross pattern, making half-turn increments while tapping near each tension rod to check for uniform pitch.
Press down firmly on the drumhead initially to seat it properly, removing those annoying wrinkles that’ll mess with your tuning stability. The shell material you’re working with—whether birch, brass, or poplar—will significantly influence how your drum responds to these tuning adjustments.
Smart drumhead selection matters just as much as technique, since different heads respond differently to tension rod adjustments. Clear drumheads will give you a brighter projection compared to coated heads that offer more warmth and character.
I’ve found that gradually increasing tension, then constantly checking pitch around each lug, prevents those frustrating inconsistencies that can ruin an otherwise perfect kit setup. Professional drummers often keep two drum keys on hand to speed up the tuning process by adjusting opposite tension rods simultaneously.
When mic’ing your newly tuned snare, consider the frequency response range of your microphone since the ideal 50Hz to 18kHz range captures both the drum’s body resonance and subtle high-frequency nuances.
Understanding Pitch, Intervals, and Musical Harmony in Drum Sets
Unlike melodic instruments that follow predictable harmonic series, drums create complex pitch relationships through their inharmonic overtone spectra, which means you’ll need to approach drum tuning with a different mindset than you’d use for a piano or guitar. Your pitch perception becomes essential when establishing harmonic tuning relationships between drums, as each drum’s fundamental frequency interacts with others to create either consonant or dissonant combinations.
| Drum Type | Frequency Range | Common Intervals |
|---|---|---|
| Kick Drum | 80-150 Hz | Perfect Fourth |
| Snare | 120-250 Hz | Perfect Fifth |
| Floor Tom | 60-110 Hz | Minor Third |
| Rack Toms | 100-600+ Hz | Major Third |
Understanding these relationships allows you to tune your kit to complement specific keys, creating chord-like combinations that enhance musical cohesion rather than fighting against your band’s harmonic structure. A well-trained ear helps you recognize pitch differences and discrepancies, enabling more precise tuning adjustments that achieve the harmonic intervals you’re targeting between your drums. The precision drum tuner provides musicians with the ability to store tuned pitches for consistent re-tuning across multiple drumming sessions.
Sound Shaping Through Damping and Professional Tools
After establishing those harmonic relationships between your drums, you’ll often discover that certain drums ring too much or produce unwanted overtones that muddy your carefully crafted tuning, which is where dampening becomes your most valuable sound-shaping tool.
I’ve found that effective dampening strategies start with understanding your material options, from silicone gel pads like Drumtacs for subtle control to pre-damped heads with built-in foam rings for aggressive overtone reduction.
Professional tools such as Evans EQ pads for bass drums, Remo Pinstripe heads with control rings, and strategically placed duct tape strips provide reliable resonant control without sacrificing your drum’s fundamental character.
The key lies in incremental application—I always start small and gradually increase dampening until achieving the perfect balance between sustain and clarity for your specific musical context. These techniques prove equally valuable whether you’re working with acoustic kits or adapting methods from electronic drum kits to enhance your sound control options. Since drum heads account for 80% of a drum’s sound, controlling these resonance issues through dampening becomes essential for maintaining your carefully tuned foundation.
On a final note
You’ve now got the fundamental techniques to transform your drums from chaotic noise into musical perfection. I’ve learned through countless hours behind the kit that proper tuning isn’t just about tension rods and pitch matching, though those elements remain essential. Remember, you’re balancing multiple variables—head tension, harmonic intervals, damping materials—to achieve your desired sound. Don’t expect immediate mastery; even experienced drummers occasionally struggle with stubborn snares that refuse to cooperate with their tuning efforts.