Drum Kit Maintenance Schedules and Procedures
You’ll want to clean your drum kit after each session using microfiber cloths, avoiding harsh chemicals like ammonium hydroxide that damage finishes. Replace batter heads every 3-6 months depending on your playing frequency, while resonant heads need changing every third replacement cycle. Monthly hardware inspections should focus on tension rods and moving parts, applying light machine oil to pivot points every 1-2 months. Deep seasonal cleaning requires complete disassembly, and proper storage prevents costly repairs that experienced drummers know come from neglecting these essential protocols.
We are supported by our audience. When you purchase through links on our site, we may earn an affiliate commission, at no extra cost for you. Learn more.
Notable Insights
- Use microfiber cloths daily to remove dust and sweat, followed by damp cleaning with mild dish soap for stubborn grime.
- Replace batter heads every 3-6 months based on playing frequency, with resonant heads changed every third top head replacement.
- Inspect hardware monthly for wear and rust, applying light machine oil to pivot points every 1-2 months.
- Tune drums using star pattern tensioning, starting with resonant head first, then matching or slightly exceeding top head pitch.
- Perform seasonal deep cleaning by completely disassembling kit and storing in cool, dry environments with quality covers.
Daily and Session-Based Cleaning Routines
While I’ve seen countless drummers pack up their kits immediately after playing, I can’t stress enough how those extra five minutes spent on basic cleaning will save you hundreds of dollars in premature hardware replacement and refinishing costs down the road.
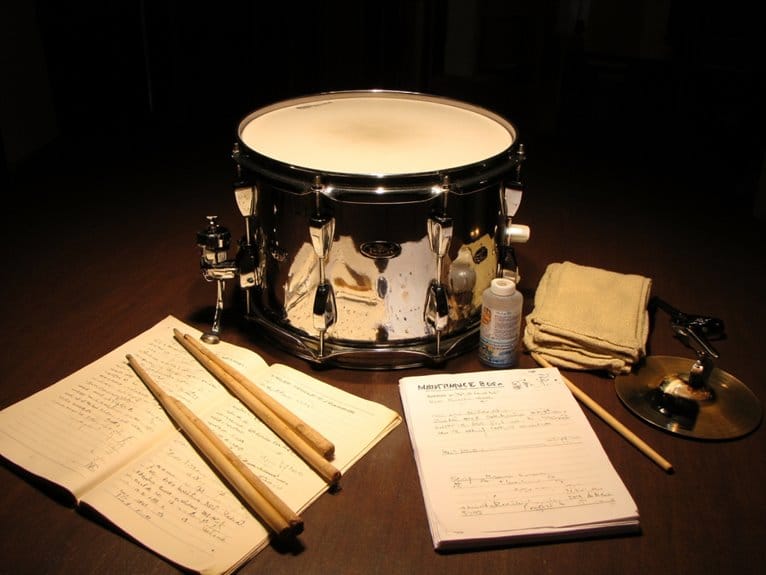
Your session wiping routine should start with a microfiber cloth, gently removing dust, sweat, and stick residue from shells and hardware before moisture sets in. I recommend dry wiping first, then switching to a slightly damp cloth with mild dish soap for stubborn grime, always followed by thorough drying.
Your routine checks should include tension rod tightness, lug cleanliness, and quick interior dusting when removing heads, ensuring both acoustic quality and hardware longevity through consistent maintenance habits. Always avoid cleaners containing Ammonium Hydroxide as these can damage your drum’s finish and compromise the shell’s integrity over time. Additionally, inspect your drum heads for signs of wear and tear during each session, as timely replacement is essential for maintaining optimal performance and sound quality.
Drum Head Care and Replacement Guidelines
Beyond keeping your kit spotless after each session, you’ll find that drum heads themselves demand their own specific attention schedule. Frankly, I’ve watched too many drummers ignore the warning signs until their snare sounds like a cardboard box.
Your batter head replacement schedule depends entirely on playing frequency and style, with snare heads typically lasting three to six months under regular use. Professional players change heads before every show, while weekend warriors might stretch replacements to a year or more.
Resonant head longevity exceeds batter heads remarkably since they don’t absorb direct stick impact. Bottom drum heads can be switched out every third top head replacement, which enhances drum sound while maintaining cost efficiency.
Watch for visual cues like dents, cracks, or tuning difficulties, and always replace heads before recording sessions to guarantee top-notch sound quality for your performances.
Hardware Inspection and Lubrication Protocols
Although drum heads grab most of the attention during maintenance routines, I’ve learned through countless late-night gigs that neglecting your hardware will leave you scrambling for backup equipment when a pedal seizes up mid-song.
Nothing kills the energy of a live performance faster than hardware failure striking at the worst possible moment.
You’ll want to inspect stands, pedals, and tension rods monthly, checking for hardware wear, rust, or loosening components that could fail during performance. I focus on moving parts like pedal hinges and wing nuts, since these experience the most stress during playing sessions.
For lubrication techniques, apply light machine oil to pivot points every one to two months, wiping excess buildup that attracts dust and debris.
Clean chrome surfaces with appropriate polish, avoiding abrasive materials that scratch finishes, and store everything in dry environments to prevent corrosion.
Tuning Techniques for Optimal Sound Quality
When you’ve got your hardware dialed in and ready for action, the real magic happens through proper tuning techniques that transform a collection of drums into a cohesive, professional-sounding kit.
These tuning fundamentals start with selecting appropriate drumheads based on your playing style, whether you need single-ply brightness or double-ply durability for harder hitting.
Here’s my proven approach for achieving consistent results:
- Seat new heads properly by pressing firmly at the center, then finger-tighten all tension rods before using your drum key.
- Follow the star pattern when tensioning, making gradual half-turn increments while tapping near each lug to monitor pitch changes.
- Balance your batter and resonant heads by tuning the bottom head first, then matching or slightly exceeding that pitch on top.
Smart tonal adjustments through internal tuning often eliminate the need for external dampening, giving you cleaner, more professional results.
Seasonal Deep Cleaning and Storage Practices
While proper tuning keeps your drums singing beautifully during active playing seasons, there’s nothing quite like the satisfaction of giving your entire kit a thorough seasonal deep cleaning that’ll extend its lifespan and maintain that crisp, professional sound you’ve worked so hard to achieve.
Your cleaning frequency should align with annual cycles, preferably during off-seasons when you’re not actively gigging or rehearsing regularly.
Schedule your deep cleaning sessions during musical downtime when your drums aren’t needed for performances or practice.
Start by completely disassembling your kit, removing drumheads, lugs, and tension rods for complete access to every surface. Clean bearing edges with fine sandpaper if needed, then polish shells and hardware with appropriate products.
For storage solutions, invest in quality drum covers or hard cases, reduce head tension by half, and store everything in cool, dry environments to prevent warping and corrosion damage.
Frequently Asked Questions
How Much Should I Budget Annually for Drum Kit Maintenance and Repairs?
You should budget around $100 annually for drum maintenance costs, including head replacements and cleaning supplies. For thorough repair budget planning, add 25-50% extra for unexpected hardware repairs and emergencies.
Can I Use Household Cleaning Products Safely on My Drum Kit?
Yes, you can safely use certain household cleaners on drum surfaces. Non-ammonia glass cleaners, 50-50 vinegar-water solutions, and diluted dish soap work well. Avoid abrasive cleaners and always test first.
What Tools Are Essential for Basic Drum Kit Maintenance at Home?
You’ll need a drum key for tuning, screwdrivers for hardware adjustments, soft cloths for cleaning, and lubricants for moving parts. Don’t forget equipment storage like cases and a small container for organizing screws during maintenance.
On a final note
You’ve now got the essential knowledge to keep your kit performing at its peak, though I’ll admit these routines might seem overwhelming at first. Remember, consistent daily cleaning, regular head replacements, and proper hardware maintenance aren’t just busy work – they’re investments in your sound quality and equipment longevity. Don’t skip the seasonal deep cleans either; your drums will thank you.


