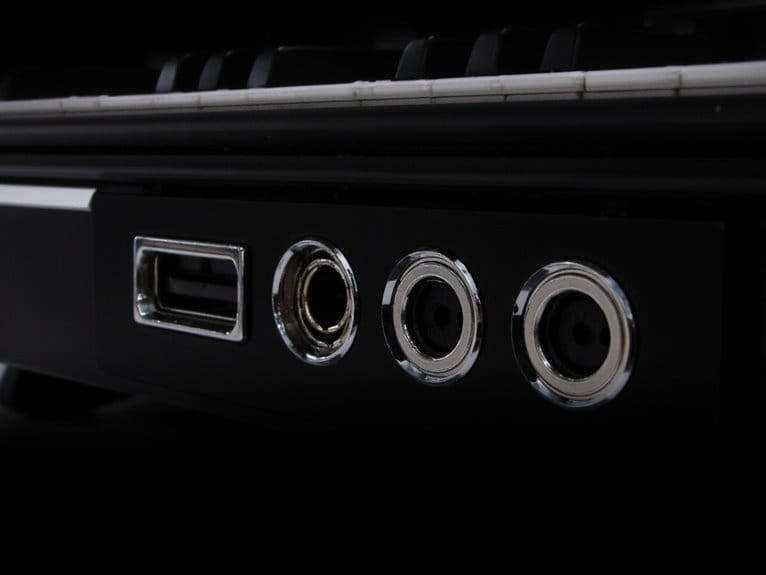
Digital Piano Connectivity: MIDI, USB, and Audio Outputs
Your digital piano’s connectivity arsenal includes USB Type B ports for seamless computer integration, traditional 5-pin MIDI DIN connectors offering optical isolation, and balanced audio outputs that minimize noise during recording sessions. I’ve found USB connections provide plug-and-play simplicity with 12 Mbps data rates, while MIDI operates at 31,250 bits per second but delivers rock-solid timing precision. Bluetooth MIDI enables wireless performance with 3-50ms latency, though USB remains superior for studio work requiring ideal buffer settings and ASIO drivers to capture your instrument’s full dynamic range and tonal complexity.
We are supported by our audience. When you purchase through links on our site, we may earn an affiliate commission, at no extra cost for you. Learn more.
Notable Insights
- USB Type B connections provide plug-and-play compatibility with computers, offering higher data transfer rates than traditional MIDI.
- Traditional 5-pin MIDI DIN connectors deliver optical isolation to reduce electrical noise during data transmission.
- Bluetooth MIDI enables wireless connectivity but introduces 3-50ms latency, unsuitable for precision timing requirements.
- Balanced XLR or TRS audio outputs minimize noise interference during long cable runs in live performances.
- Audio interfaces with 24-bit/192kHz resolution capture superior dynamic range and tonal details for professional recordings.
Understanding USB Type A and Type B Connections on Digital Pianos
When I first started connecting digital pianos to computers, I’ll admit the various cable types and hints confused me more than I’d like to remember, but understanding USB Type A and Type B connections doesn’t have to be nearly as complicated as it initially appears.
The USB Type B port on your digital piano appears squarish and sits on the instrument’s back panel, designed specifically to receive data cables from host devices.
You’ll connect this port to your computer using a standard USB Type A to Type B cable, where the flat rectangular USB Type A end plugs into your PC or Mac, enabling direct MIDI communication without requiring separate interfaces that traditional setups demanded. For newer MacBook models from 2016 onward, you’ll need a USB C to B cable instead of the standard USB A connection.
This USB connection provides a straightforward setup that’s ideal for using virtual instruments and software plugins with your digital piano.
MIDI Connectivity Options: Traditional 5-Pin Vs USB MIDI
Although connecting your digital piano to other devices might seem straightforward once you’ve mastered USB connections, you’ll quickly discover that choosing between traditional 5-pin MIDI and USB MIDI involves more considerations than most musicians initially realize.
Traditional MIDI uses circular 5-pin DIN connectors that transmit data at 31,250 bits per second, which, while slower than USB’s 12 Mbps capability, provides optically isolated connections that reduce electrical noise and ground loops.
Traditional MIDI’s slower 31,250 bps speed delivers superior electrical isolation, eliminating noise and ground loops that plague faster USB connections.
USB advantages include plug-and-play connectivity, higher data transfer rates, and the ability to carry multiple MIDI channels simultaneously over a single cable. USB devices operate with class compliance, enabling automatic identification and configuration by your operating system without manual driver installation.
However, you’ll find that 5-pin MIDI excels in hardware-only setups where you’re chaining multiple instruments without requiring computer intermediaries or driver installations.
Bluetooth MIDI and Audio Integration for Wireless Performance
Moving beyond traditional wired connections, you’ll find that Bluetooth MIDI and audio integration transforms your digital piano into a truly wireless performance hub. This eliminates cable clutter while maintaining the responsive connection quality that serious musicians demand.
While I’ve noticed that many players initially worry about wireless latency affecting their timing, modern Bluetooth Low Energy implementations actually deliver remarkably stable performance that rivals USB connections for most applications. Though you’ll want to understand the subtle differences between MIDI and audio transmission speeds.
The freedom to connect wirelessly with your tablet, smartphone, or computer opens up entirely new possibilities for practice sessions, live performances, and recording workflows that simply weren’t practical when you were tethered to cables.
Wireless Connection Benefits
While I’ve spent countless hours untangling MIDI cables and repositioning my digital piano to reach various devices, I can confidently say that wireless connectivity has revolutionized how we interact with our instruments in ways that extend far beyond simple convenience.
The wireless freedom eliminates cable clutter, creating a clean setup that allows greater movement during performance and practice.
You’ll discover enhanced interactive engagement through educational resources like Simply Piano and Flowkey, which provide real-time feedback on your key presses and pedal usage. This seamless integration with apps and DAWs offers flexible control over your instrument’s functions remotely, while practice enhancement features motivate consistent playing.
The improved motivation comes from accessing YouTube tutorials and backing tracks directly through your piano’s speakers, transforming your practice sessions into immersive experiences.
Latency and Performance
When it comes to wireless performance with digital pianos, latency becomes the critical factor that determines whether your Bluetooth connection enhances or hinders your musical experience.
Bluetooth MIDI typically introduces 3-50 milliseconds of delay, which might sound minimal, but you’ll notice it when playing software instruments in real-time. While newer Bluetooth versions improve latency management, they can’t eliminate the fundamental delay that wireless transmission creates.
The real challenge emerges with Bluetooth audio, which often exceeds 100 milliseconds and can reach up to one second in some configurations. This makes monitoring through Bluetooth headphones practically impossible for live performance.
Your DAW’s buffer settings, system architecture, and Bluetooth reliability all influence the final latency equation, making USB connections the preferred choice when timing precision matters most. For optimal performance, buffer sizes ranging from 64 to 256 samples provide the best balance between low latency and system stability. For professional recording applications, ASIO drivers deliver significantly lower latency and better performance compared to standard audio drivers, making them essential for serious recording sessions where every millisecond counts.
Audio Output Configurations for Recording and Live Performance
Although I’ve spent countless hours helping musicians navigate recording setups, I’m still amazed by how often people overlook the fundamental importance of proper audio output configurations when connecting their digital pianos to recording equipment or live sound systems.
Your choice between different audio output types—whether 1/4″ TRS headphone jacks, line outputs, or RCA connections—directly impacts signal quality and recording fidelity. For studio work, you’ll want dedicated audio interfaces with proper gain staging to avoid the common mistake of connecting headphone outputs to mic inputs, which creates impedance mismatches. Most professional audio interfaces offer zero-latency monitoring for real-time feedback during recording sessions, eliminating the distracting delay that can throw off your performance timing.
Live sound configurations benefit from balanced XLR or TRS outputs that minimize noise over long cable runs, while stereo setups using dual amplifiers create more realistic piano sound reproduction for audiences. Budget-conscious musicians can achieve professional results with affordable interfaces that provide professional-grade preamps comparable to higher-end models. When selecting an audio interface for digital piano recording, prioritize models with 24-bit/192kHz resolution to capture the full dynamic range and subtle tonal details that make the difference between amateur and professional recordings.
USB Host and Device Roles: Connecting Storage and External Hardware
Understanding USB connectivity on your digital piano requires grasping the fundamental difference between host and device roles, a distinction that’ll determine exactly what you can connect and how your setup will function.
USB Host ports power and control external devices, serving as the command center for your MIDI interface considerations. These connections let you link class-compliant MIDI controllers, tablets, or standalone devices directly to your piano. Meanwhile, USB Device ports handle storage management strategies, accepting flash drives for saving performances, loading sounds, and managing audio files.
| Connection Type | Primary Function | Compatible Devices | Data Direction | Setup Requirements |
|---|---|---|---|---|
| USB Host | Control external hardware | MIDI controllers, tablets | Bi-directional | Class-compliant devices |
| USB Device | Storage management | Flash drives, audio files | File transfer | Plug-and-play compatible |
| USB to Host | Computer integration | DAWs, software | MIDI data flow | Driver registration |
| Class-compliant | Universal compatibility | Cross-platform devices | Seamless operation | No custom drivers |
| Non-compliant | Proprietary connection | Brand-specific gear | Limited compatibility | Custom software required |
Driver Requirements and Software Compatibility Considerations
The complexity of driver management often catches digital piano owners off guard, particularly when they discover that seamless connectivity isn’t always as plug-and-play as modern USB standards might suggest. You’ll need to perform thorough compatibility checks before attempting driver installation, ensuring your system meets minimum requirements like Intel Core processors and 2GB RAM for stable operation.
Manufacturers like Yamaha and Korg provide dedicated USB-MIDI drivers supporting Windows 7 SP1 through Windows 11, though you might encounter registration limits of up to 10 devices. Mac users typically download specific drivers from manufacturer websites, while some pianos use class-compliant protocols for simpler setup.
I’ve found that administrator rights are often required for Windows installations, and you’ll likely need to reboot your system afterward to properly activate the drivers.
Optimizing Your Digital Piano Setup for Music Production Workflows
Once you’ve got your digital piano properly connected and drivers installed, you’ll want to streamline your setup for efficient music production. This means configuring USB audio recording paths, integrating MIDI controller functions, and establishing workflow templates that save time during creative sessions.
I’ve found that the difference between a frustrating production experience and a smooth one often comes down to these optimization steps, particularly when you’re switching between recording the piano’s built-in sounds and triggering external virtual instruments.
Your goal should be creating a setup that lets you focus on making music rather than wrestling with technical configurations. That starts with understanding how USB audio recording, MIDI integration, and workflow optimization work together in your specific DAW environment.
USB Audio Recording Setup
Why settle for mediocre recordings when your digital piano’s capable of producing studio-quality audio through proper USB setup?
I’ve found that connecting your piano’s line output to a dedicated audio interface, rather than relying on built-in computer inputs, dramatically improves recording quality by converting analog signals to pristine digital data.
Various audio interface options, from budget-friendly two-channel units to professional multi-input models, accommodate different recording techniques and studio requirements.
You’ll need to install appropriate drivers for DAW compatibility, then configure input levels within your recording software to prevent clipping while maintaining ideal dynamic range.
Using high-quality, shielded cables between your piano and interface minimizes signal degradation, while proper gain staging preserves the full frequency spectrum of your performance.
MIDI Controller Integration Methods
When transforming your digital piano into a MIDI controller for music production, I’ve discovered that understanding the connection methods available can dramatically expand your creative possibilities beyond traditional piano playing.
Your instrument’s hammer-action keys provide superior velocity sensitivity and aftertouch compared to typical MIDI controller features, making them ideal for expressive virtual instrument performance.
I’ve found that USB connections offer the most straightforward setup, functioning as plug-and-play devices with most DAWs, while traditional 5-pin MIDI DIN jacks remain valuable for hardware integration.
Digital piano advantages include authentic key feel and reliable MIDI implementation, though you’ll likely need additional control surfaces for extensive DAW manipulation since most models lack dedicated knobs, sliders, and performance pads that modern production workflows demand.
Workflow Optimization Techniques
After spending countless hours refining my digital piano production setup, I’ve learned that establishing efficient workflows can mean the difference between capturing creative inspiration and watching it slip away during tedious technical fumbling.
You’ll want to create DAW templates with pre-loaded tracks, instruments, and effects specifically tailored for your digital piano, because nothing kills momentum like spending twenty minutes configuring basic routing while your musical idea evaporates.
Smart workflow streamlining includes mapping frequently used commands to MIDI controllers, setting up dedicated audio output paths for monitoring, and organizing project folders before you start recording.
These productivity enhancements, combined with consistent naming conventions and strategic use of keyboard shortcuts, transform your setup from a technical obstacle course into a creative launchpad that actually supports your musical vision.
Frequently Asked Questions
Can I Use My Digital Piano as a MIDI Controller for Other Instruments?
Yes, you can use your digital piano as a MIDI controller for other instruments. Digital Piano compatibility with DAWs and software instruments offers MIDI controller advantages like weighted keys and authentic playing feel while triggering external sounds.
What’s the Maximum Cable Length for Reliable MIDI and Audio Connections?
MIDI cable length shouldn’t exceed 50 feet, though 20-30 feet’s more reliable. For audio cable distance, balanced XLR runs hundreds of feet reliably, while unbalanced 1/4″ cables work best under 20 feet to avoid noise.
On a final note
You’ve now got the knowledge to connect your digital piano like a pro, whether you’re streaming wirelessly via Bluetooth, recording through USB, or performing live with traditional MIDI cables. Don’t overthink it—start with basic USB connections, then expand as your needs grow. Your setup doesn’t need to be perfect from day one, and honestly, half the fun is discovering new ways to integrate your piano into your creative workflow.