Converting Your Bass to Fretless: Techniques and Considerations
Converting your fretted bass to fretless involves heating each fret with a soldering iron before carefully removing them with fret pullers, then filling the slots with epoxy resin, super glue, or wood putty depending on your reversibility preferences. You’ll need to sand the fingerboard to achieve consistent radius contouring, lower your string action considerably compared to fretted setups, and adjust intonation precisely since there’s no margin for error without frets guiding your finger placement, releasing expressive microtonal possibilities that’ll transform your playing style entirely.
We are supported by our audience. When you purchase through links on our site, we may earn an affiliate commission, at no extra cost for you. Learn more.
Notable Insights
- Heat frets with a soldering iron before removal to soften glue and prevent fingerboard chipping during extraction.
- Use a sanding beam to contour the fingerboard radius and apply epoxy treatment for smoothness and durability.
- Set string action lower than fretted basses while maintaining 10 thou nut clearance to eliminate buzzing issues.
- Professional conversion costs $325-$450 while DIY approaches require $100-$200 in tools and materials for completion.
- Fretless conversion enables softer tones and microtonal expression but demands precise intonation skills without fret guidance.
Fret Removal and Slot Filling Methods
Converting your bass to fretless isn’t as intimidating as it might seem, though I’ll admit the first time I tackled this project, I spent more time staring at my bass than actually working on it.
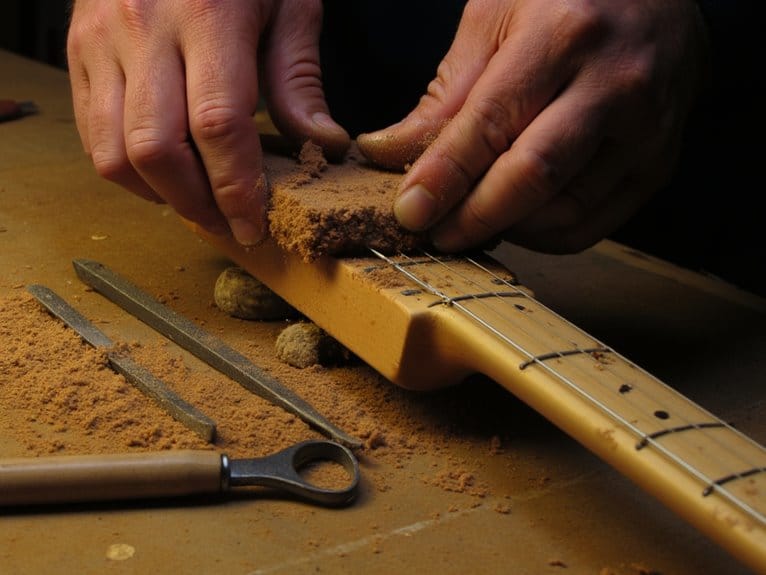
Start your fret removal process by heating each fret with a soldering iron, which softens the underlying glue and prevents fingerboard chipping. Use specialized fret pullers or end nippers to gently pry along the fret’s length, working gradually to avoid wood splitting.
Once you’ve removed all frets, clean the slots thoroughly with a razor blade to eliminate glue residue. Use an old toothbrush for additional cleanup to ensure all debris is removed from the slots. Canned air can provide additional assistance in blowing out stubborn debris from hard-to-reach areas. For slot filling, choose between epoxy resin for durability, super glue for quick application, or wood putty for easier future removal if you change your mind.
Neck and Fingerboard Preparation
Once you’ve filled those fret slots and they’re properly cured, the real precision work begins with preparing your neck and fingerboard for its new fretless life. I’ll guide you through checking neck relief under normal string tension, which mimics actual playing conditions and reveals how your neck naturally responds to string pull and gravity.
| Preparation Step | Tool Required | Critical Measurement |
|---|---|---|
| Neck Relief Check | Precision Straight Edge | 17th Fret Position Distance |
| Radius Contouring | Full-Length Sanding Beam | Consistent String Height |
| Fingerboard Treatment | Epoxy/Oil Application | Surface Smoothness |
| Position Markers | Side Dot Installation | Standard Fret Locations |
Your fingerboard treatment determines playability longevity, whether you choose epoxy coating for durability or specialized oils for natural feel. Understanding the buckling phenomenon helps you anticipate how your neck will behave differently under string tension compared to when it’s unstrung during the conversion process. Use a radius gauge to ensure consistent string height across all strings, matching the gauge radius to your fingerboard’s curvature for optimal playing comfort.
Setup and Action Adjustments for Fretless Playing
After all that meticulous fingerboard preparation, you’ll discover that setting up your newly fretless bass requires a completely different approach to action and intonation than what you’re used to with fretted instruments.
String height can actually be set lower than on fretted basses, but you’ll need to find that sweet spot where buzzing disappears without sacrificing sustain. Start with your outer strings, adjusting them to the lowest possible height that still rings clearly, then match your middle strings to the fingerboard radius for consistent playability.
Your intonation setup becomes absolutely critical now, since there aren’t any frets to guide pitch accuracy—every millimeter of finger placement matters, so expect to spend considerable time fine-tuning each saddle position. Making small incremental adjustments during this process will help you achieve the most precise intonation possible without overshooting your target.
Pay special attention to your nut slot height, maintaining at least 10 thou clearance to prevent buzzing issues that could compromise your fretless tone. Quality zero-latency monitoring becomes especially important when recording your fretless bass, as any timing delays can throw off the precise finger positioning that fretless playing demands.
Cost Analysis and Reversibility Options
Before you commit to pulling those frets, let’s talk money—because while converting your bass to fretless won’t break the bank like buying a vintage Fender, it’s not exactly pocket change either.
A complete conversion typically runs between $325 and $450, though budget constraints might push you toward DIY approaches that’ll still cost $100-$200 for tools and materials.
Here’s what affects your wallet:
- Professional fret removal, slot filling, and fretboard finishing comprise the major expenses.
- DIY methods require fret pullers, wood files, paint, varnish, and sandpaper investments.
- Additional setup costs for nut adjustments or ramps add another $50-$100.
- Restoration techniques for reversing conversions cost considerably more than the original conversion.
Keep in mind that reversing the process isn’t straightforward or inexpensive if you change your mind later.
The DIY approach offers significant savings, especially when you can source project parts through yard sales, classified ads, and online auctions to reduce material costs. Consider investing in a quality bass preamp pedal to enhance your fretless tone once the conversion is complete.
Sound Quality and Playability Changes
While fretted basses deliver that familiar metallic bite and percussive attack we’ve all grown accustomed to, converting to fretless fundamentally transforms your instrument’s sonic DNA in ways that’ll either make you fall head-over-heels in love or leave you questioning your life choices.
You’ll immediately notice the softer “bwoww” character replacing sharp fretted attacks, while gaining access to seamless slides and microtonal expressions that’ll expand your musical vocabulary greatly.
The sound characteristics become heavily dependent on your finger placement accuracy and technique refinement, demanding more precise intonation skills than you might expect. Unlike fretted instruments that confine you to 12 distinct notes, fretless conversion opens up all sounds across the sonic spectrum, allowing for the incorporation of Eastern musical scales that transcend traditional Western limitations.
Your string choices will significantly impact the final result, with flatwounds providing smoother vintage tones and reduced fingerboard wear, while roundwounds offer brighter clarity at the cost of increased friction. The conversion also unlocks vocal-like qualities in your bass tone, creating expressive articulation possibilities that simply cannot be achieved with traditional fretted instruments.
On a final note
You’ve now got the roadmap for converting your bass to fretless, though I’ll admit the process demands patience and precision that’ll test your commitment. Whether you’re pulling frets yourself or hiring a professional, you’ll need to weigh the $200-800 investment against buying a dedicated fretless instrument. The tonal transformation you’ll achieve, with that signature mwah and enhanced sustain, makes this modification worthwhile for serious players seeking expressive possibilities.