Connecting Your Electronic Kit to Recording Software
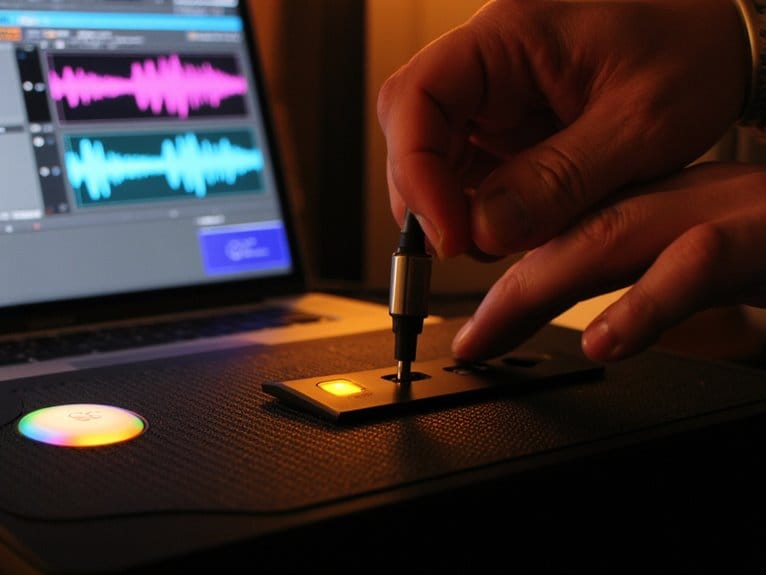
You’ll need either a USB cable for modern drum modules or a MIDI-to-USB interface for older models with 5-pin DIN outputs to connect your electronic kit to recording software. Configure your DAW to recognize the drum signals, set up individual tracks for each drum voice, and install proper drivers for seamless communication. Audio recording captures actual sound waves while MIDI stores performance data, offering different advantages for post-recording editing. The setup process involves several essential steps that’ll guarantee professional-quality results.
We are supported by our audience. When you purchase through links on our site, we may earn an affiliate commission, at no extra cost for you. Learn more.
Notable Insights
- Modern drum modules connect directly via USB, while older models require a MIDI-to-USB interface converter.
- Configure your DAW with ASIO drivers, minimum 8GB RAM, and create separate labeled tracks for each drum voice.
- Audio recording captures actual sound waves immediately; MIDI recording stores performance data allowing extensive post-recording editing flexibility.
- Install current drivers and firmware updates to prevent communication issues and ensure seamless hardware-software integration.
- Set preamp gain around -12 dBFS for clean signals and configure input monitoring to prevent audio bleed.
Connection Methods and Hardware Setup
When you’re ready to connect your electronic drum kit to recording software, you’ll find that modern technology has made this process surprisingly straightforward, though the specific method depends entirely on your drum module’s capabilities and your recording goals.
Most contemporary modules feature built-in USB ports, allowing direct computer connection with standard USB cables after installing manufacturer-specific drivers. For older units lacking USB connectivity, you’ll need a MIDI-to-USB interface that converts traditional 5-pin DIN signals into computer-readable data.
Module compatibility determines your cable types and connection approach, whether you’re transmitting MIDI data for virtual instruments or routing actual audio through an interface. Each method serves different purposes, from triggering software drums to capturing your module’s internal sounds directly. An audio interface becomes essential when you want to record the direct audio output from your drum module using standard 1/4-inch or XLR cables. Professional interfaces typically offer 24-bit/192 kHz recording capabilities to ensure high-quality audio capture from your drum module. Zero-latency monitoring prevents timing delays that could affect your playing performance during recording sessions. Remember to disable built-in effects on your module to maintain better control during the mixing process.
Digital Audio Workstation Configuration
Once you’ve successfully connected your electronic kit to your computer, you’ll need to configure your Digital Audio Workstation to recognize and properly record your drum signals. This involves selecting the right DAW for your needs, setting up individual tracks for each drum voice, and mapping your kit’s MIDI outputs to the corresponding software inputs.
I’ve found that proper DAW configuration can make the difference between a frustrating recording session and a smooth, creative workflow, especially when you’re dealing with multi-zone pads and complex cymbal triggers that need precise channel assignments. Modern DAWs provide comprehensive tools that effectively replace traditional studio equipment, giving you professional-grade recording capabilities from your home setup.
Your DAW selection will largely depend on your budget, operating system, and feature requirements, but the core setup process remains remarkably similar across most professional recording platforms. Many budget-friendly audio interfaces offer plug-and-play compatibility with popular recording software, making the initial setup process much more straightforward. When choosing drivers for your audio interface, prioritize ASIO drivers over WDM options for superior performance and reduced latency during recording sessions. To minimize audio delays during recording, ensure your buffer sizes are set between 64 to 256 samples for optimal low-latency performance.
DAW Selection and Installation
Why does selecting the right Digital Audio Workstation feel like choosing a musical soulmate?
You’ll need software that understands your electronic kit’s language, processes MIDI data efficiently, and won’t crash during your most inspired moments. My DAW recommendations start with your operating system: Logic Pro excels on Mac with extensive MIDI integration, while FL Studio‘s affordability suits Windows users perfectly.
Ableton Live dominates electronic music production with its unique session view, making it ideal for live performance setups.
Installation challenges often revolve around system requirements—you’ll need 8GB RAM minimum, sufficient hard drive space for sample libraries, and compatible audio drivers like ASIO for Windows or Core Audio for Mac.
Consider Reaper’s generous trial period before committing, and remember that some DAWs bundle essential plugins requiring separate installation steps.
Track Creation and Configuration
Three fundamental steps transform your DAW from an empty canvas into a professional recording environment: creating dedicated tracks, configuring inputs correctly, and establishing proper monitoring pathways.
I’ve learned that proper track labeling saves countless hours during mixing sessions, while strategic DAW organization prevents the chaos that derails otherwise promising recordings.
Your signal routing foundation requires these essential configurations:
- Create dedicated audio tracks for each drum element, selecting appropriate input modes that match your interface channels
- Label tracks clearly using descriptive names like “Kick,” “Snare,” or “Hi-Hat” for instant identification during editing
- Configure monitoring setup with real-time input monitoring enabled, using headphones to prevent unwanted audio bleed
- Adjust preamp gain to achieve ideal levels around -12 dBFS, ensuring clean signal capture without clipping distortion
Input Mapping Setup
After establishing your track structure and signal paths, the technical backbone of your recording setup depends entirely on how well your DAW communicates with your audio interface through proper input channel mapping configuration.
You’ll need to assign specific DAW track inputs to match the physical interface inputs where your electronic kit’s outputs connect, creating a direct correspondence between hardware and software channels. This signal routing process involves selecting your audio interface’s ASIO driver within the DAW’s preferences, then mapping each drum pad’s output to its designated track input.
I’ve found that confirming proper routing through visual input meters prevents recording frustrations later, while enabling input monitoring allows real-time performance feedback through your headphones or studio monitors.
Audio Vs MIDI Recording Options
When you’re setting up your electronic drum kit with recording software, understanding the fundamental difference between audio and MIDI recording will dramatically impact your workflow, creative possibilities, and final sound quality.
Audio recording captures the actual sound waves your kit produces, delivering immediate playback without requiring additional virtual instruments, while MIDI recording stores performance data that you can edit extensively after tracking.
Audio captures your kit’s actual sound for instant playback, while MIDI records editable performance data requiring virtual instruments.
Here’s what each option offers:
- Audio quality provides the exact tonal characteristics and nuances of your kit’s built-in sounds.
- MIDI advantages include complete flexibility to change drum sounds, timing, and velocity after recording.
- Audio files work universally across platforms but consume more storage space.
- MIDI data requires compatible virtual instruments but offers unlimited editing possibilities.
Choose based on whether you prioritize immediate results or maximum flexibility.
Audio Interface Setup and Optimization
While your electronic drum kit might sound fantastic through its built-in speakers, you’ll need a properly configured audio interface to access its full potential in your recording software. I’ve learned that getting this setup right from the start saves countless hours of troubleshooting later.
Start by selecting appropriate connection methods—I prefer XLR outputs when available—then adjust input gain levels between -20 dB and -10 dB to maintain signal strength without clipping. Ensure your interface provides adequate phantom power compatibility for any conditioned microphones you might add to capture room ambience alongside your electronic kit. If you’re considering adding ribbon microphones to your setup, remember they require quality preamps with at least 50 dB of gain for optimal performance.
Configure your buffer size carefully, balancing CPU load against latency management; I typically start at 128 samples for recording. Set your sample rate to 48 kHz for most projects, optimize your system using ASIO drivers, establish proper output configuration for monitoring techniques, and you’ll achieve professional results consistently. Consider interfaces with Gain Halos for visual feedback on your input levels, which helps prevent clipping and ensures optimal recording quality.
Driver Installation and Firmware Updates
Before you can access your electronic kit’s full recording potential, you’ll need to tackle the often-overlooked foundation of driver installation and firmware updates—and I’ll admit, this step used to intimidate me until I realized it’s actually straightforward when you follow the right sequence.
Understanding driver types and installation options makes the difference between seamless recording and frustrating compatibility issues. Firmware importance can’t be overstated, as outdated firmware creates communication problems between your kit and computer.
Outdated firmware and wrong drivers create the compatibility nightmares that turn simple recording sessions into technical troubleshooting marathons.
Here’s my recommended update processes sequence:
- Download firmware updates from manufacturer’s website first
- Install firmware following exact manufacturer instructions to prevent bricking
- Choose kernel-mode drivers for extensive recording capabilities
- Restart your system to complete driver installation and enable full hardware support
This methodical approach guarantees peak performance and prevents the driver conflicts that plague rushed installations. Once your drivers are properly installed, you can take advantage of MIDI connectivity features that allow seamless integration with digital audio workstations for professional recording results.
Post-Recording Editing and Mixing Techniques
Once you’ve captured your electronic kit performance, you’ll want to refine those MIDI tracks through careful manipulation of velocity curves, timing quantization, and note positioning to achieve the polished sound that separates amateur recordings from professional productions.
I’ve found that applying audio processing effects like compression, EQ, and reverb to your drum samples can dramatically transform the character of your kit, whether you’re aiming for that punchy rock sound or the spacious ambience of a concert hall. Budget reverb pedals under $70 can provide professional-quality effects without breaking your recording budget.
The beauty of working with MIDI data lies in your ability to swap drum samples, adjust individual hit velocities, and even replace entire kit pieces without re-recording a single note.
For budget-conscious producers, consider that harmonic content and brightness can be enhanced through strategic sample layering and processing, proving that professional-sounding results don’t always require expensive gear.
When integrating your electronic kit recordings with other instruments, dual-zone triggering capabilities allow for more nuanced dynamics and expression that translate beautifully in the final mix.
MIDI Track Manipulation
Transform your recorded MIDI performances into polished, expressive compositions by mastering the art of post-recording manipulation, where precision editing meets creative enhancement. Your electronic kit’s raw MIDI data becomes infinitely malleable through strategic editing techniques.
Essential MIDI manipulation techniques include:
- MIDI quantization techniques – Correct timing imperfections while preserving natural groove through selective beat alignment.
- Dynamic velocity adjustment – Shape musical expression by modifying note intensities using velocity curves and randomization.
- MIDI clip looping with groove template application – Create seamless repetitions while imprinting rhythmic feel onto your drum patterns.
- Multi clip editing with MIDI effect automation – Simultaneously manipulate multiple sections while programming dynamic parameter changes.
I’ve found that folding your piano roll to specific scales streamlines note selection, while recording MIDI effects output onto separate tracks makes generated patterns visible and editable.
Audio Processing Effects
After capturing your electronic kit’s MIDI performance, the real magic happens when you immerse yourself in audio processing effects, where raw drum sounds transform into polished, professional-quality recordings that rival commercial productions.
You’ll discover that audio effects like EQ shape your frequency balance, ensuring each drum element occupies its proper sonic space without competing frequencies muddying your mix. Compression controls dynamic range, tightening loose hits while preserving natural feel—though I’ve learned restraint prevents over-squashing your drums into lifeless pancakes.
Reverb settings create dimensional depth, placing your kit within believable acoustic environments, while modulation techniques add subtle movement and width. Strategic panning enhances stereo imaging, positioning each element precisely across the soundstage for maximum impact and clarity.
Modern digital mixers with built-in DSP suites provide comprehensive effects processing capabilities, including reverb and delay effects that can enhance your drum recordings with professional-grade signal processing. Like guitar effects pedals that shape core tone, your DAW’s processing effects provide the essential foundation for crafting professional drum sounds, with true bypass capabilities ensuring signal clarity remains intact throughout your processing chain.
Frequently Asked Questions
Can I Record Drums While Other Band Members Play Simultaneously?
You can absolutely achieve simultaneous recording with your electronic drums while band members play. This band collaboration setup requires a multi-input audio interface and DAW configured for multiple tracks, enabling real-time performance capture.
Will My Electronic Kit Work With Tablet Recording Apps?
Your electronic kit’s tablet compatibility depends on its output connections and your chosen app’s performance capabilities. You’ll likely need adapters or audio interfaces, but most modern recording apps support external devices effectively.
On a final note
You’ve now got the complete roadmap for connecting your electronic kit to recording software, from initial hardware setup through final mix optimization. While I’ll admit the driver installation process can be frustrating at times, you’ll find that proper configuration of your audio interface, combined with understanding the differences between MIDI and audio recording workflows, transforms your home studio into a professional-grade production environment that delivers consistently reliable results.

