Cable Guide: Every Connection Type Explained
You’ll encounter dozens of cable types throughout your tech setup journey, from RJ45 ethernet connectors supporting gigabit speeds with T568A/B standards to HDMI 2.1 cables delivering 48 Gbit/s for 10K resolution. Audio connections range from basic TS mono jacks to TRRS smartphone connectors, while ethernet categories span Cat5’s 100 Mbps limit to Cat6A’s full 10 Gbps performance. Coaxial cables use braided copper shielding for EMI protection, and legacy options include VGA, SCART, and RCA connectors for older equipment compatibility. Understanding these specifications helps you match exact requirements to ideal performance capabilities.
We are supported by our audience. When you purchase through links on our site, we may earn an affiliate commission, at no extra cost for you. Learn more.
Notable Insights
- RJ45 connectors support gigabit Ethernet speeds with T568A/T568B standards, while fiber optic cables eliminate electromagnetic interference for backbone networks.
- Cat6A cables deliver 10 Gbps performance over 100 meters with 500 MHz bandwidth, providing future-proofing for commercial environments.
- HDMI 2.1 supports up to 48 Gbit/s bandwidth for 10K resolution with audio, while DisplayPort handles 8K displays for professional computing.
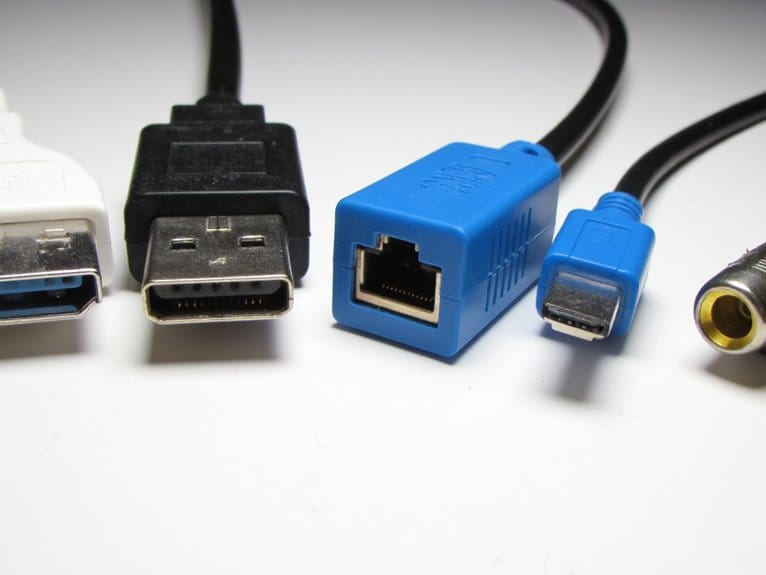
- USB-C replaces legacy Mini DisplayPort connections, with USB4 offering faster speeds than USB 2.0’s 480 Mbps standard.
- Audio connections range from basic TS mono connectors to TRRS smartphone jacks combining output and microphone input functionality.
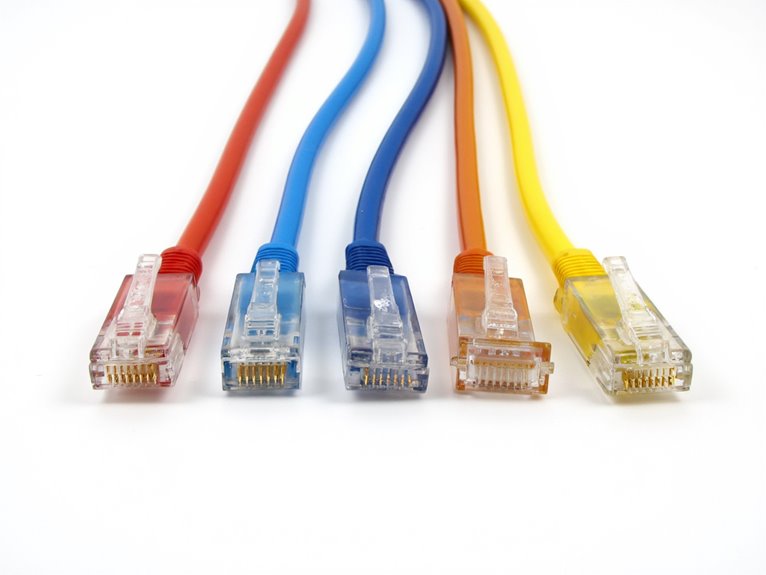
Network Cable Connectors: RJ45, RJ11, and Fiber Optic Standards
Think of network cable connectors as the handshakes between your devices and the digital world – they’re the essential intermediaries that determine whether you’ll experience lightning-fast data transfer or frustrating connection drops.
RJ45 features include 50 micro-inch gold plating, supporting gigabit speeds through T568A and T568B wiring standards, while maintaining signal integrity across 1000+ mating cycles.
RJ11 limitations become apparent when you need high-speed networking – these smaller connectors handle only 4-6 positions for basic telephony, making connector compatibility with modern Ethernet impossible.
Fiber optics eliminate electromagnetic interference entirely, offering SC, LC, and ST connector types that deliver precise core alignment with less than 0.3 dB insertion loss, perfect for backbone networking applications.
Ethernet Cable Categories: From Cat5 to Cat6A Performance Specifications
When you’re selecting Ethernet cables for your network, understanding the performance differences between Cat5, Cat6, and Cat6A becomes essential for making informed decisions about speed, distance, and future-proofing your infrastructure.
I’ve found that while Cat5 cables hit a wall at 100 Mbps, Cat6 cables offer significant performance advantages with their ability to handle Gigabit speeds over full 100-meter runs, plus 10 Gbps at shorter distances up to 55 meters.
Cat6A takes these capabilities even further, delivering full 10 Gbps performance across the entire 100-meter distance while providing enhanced shielding options that make it the go-to choice for demanding commercial environments.
Cat5 Speed Limitations
Understanding Cat5’s speed limitations becomes essential when you’re evaluating whether your current network infrastructure can handle today’s demanding applications, and frankly, the numbers tell a sobering story about this aging cable standard.
| Specification | Cat5 | Cat5e |
|---|---|---|
| Maximum Speed | 100 Mbps | 1000 Mbps |
| Bandwidth | 100 MHz | 100-350 MHz |
| Ideal Length | 100 meters | 50 meters (max speed) |
| Applications | Legacy/Basic | Modern Gigabit |
Cat5’s 100 Mbps ceiling creates significant bottlenecks for streaming, file transfers, and cloud applications that you’re likely running daily. The Cat5 obsolescence becomes apparent when you consider that modern devices expect gigabit connectivity, making Cat5e benefits increasingly attractive with its tenfold speed improvement and enhanced interference resistance through improved cable construction.
Cat6 Performance Advantages
Frequently overlooked but genuinely impressive, Cat6 cables represent a substantial leap forward from their predecessors, delivering 250 MHz bandwidth that’s literally 2.5 times what you’ll get from Cat5 or Cat5e’s modest 100 MHz capacity.
Honestly, this isn’t just marketing fluff-the enhanced frequency range translates into real-world performance gains that I’ve witnessed transform sluggish networks into responsive, future-ready infrastructures.
The Cat6 advantages become apparent through superior crosstalk reduction, achieved via tightly wound wire pairs and center splines that maintain network stability even in challenging environments.
You’ll appreciate the enhanced performance supporting 1 Gbps speeds across 100 meters, perfect for medium distance applications requiring high speed connectivity.
This bandwidth efficiency enables future proofing networks while remaining backward compatible, making Cat6 ideal for high speed applications in commercial settings where reliability matters most.
Cat6A Enhanced Capabilities
While Cat6 cables certainly deliver impressive performance gains, Cat6A takes networking infrastructure to an entirely different level with its remarkable 500 MHz frequency capacity-literally double what you’ll find in standard Cat6-and I’ve seen firsthand how this enhanced bandwidth translates into rock-solid 10 Gigabit Ethernet performance across the full 100-meter distance that enterprise networks demand.
The Cat6A advantages extend beyond raw speed, delivering approximately 25% improved near-end crosstalk rejection and 37% better return loss characteristics, which means fewer transmission errors and more reliable connections.
I’ll admit the cables are thicker due to enhanced shielding and tighter twisted pairs, but modern manufacturing has reduced their bulk considerably while maintaining superior cabling performance that future-proofs your network investment.
Coaxial Cable Construction and Electromagnetic Interference Protection
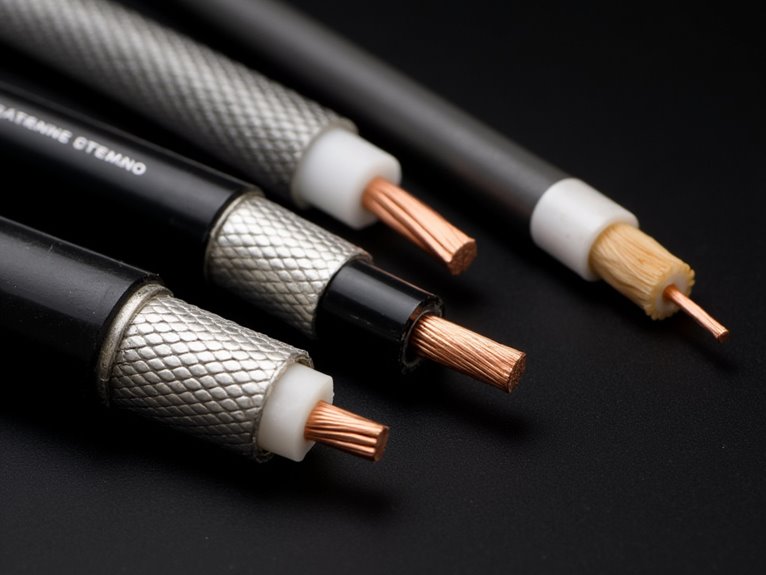
The engineering marvel behind coaxial cable‘s widespread success lies in its ingenious concentric design, where multiple layers work together like a well-orchestrated team to deliver clean signals while keeping unwanted electromagnetic interference at bay.
Your coaxial cable features a center conductor, typically solid copper or copper-clad steel, wrapped by an insulating dielectric made from polyethylene, foam, or PTFE materials that separate it from the outer shield.
This braided copper or foil outer conductor acts like a Faraday cage, providing robust EMI shielding that confines electromagnetic fields within the cable while blocking external interference.
The outer plastic jacket adds mechanical protection, while the concentric structure maintains precise impedance control, minimizing signal reflection and ensuring your data travels cleanly without distortion or unwanted noise pickup.
HDMI and DVI Cables for High-Definition Video Transmission
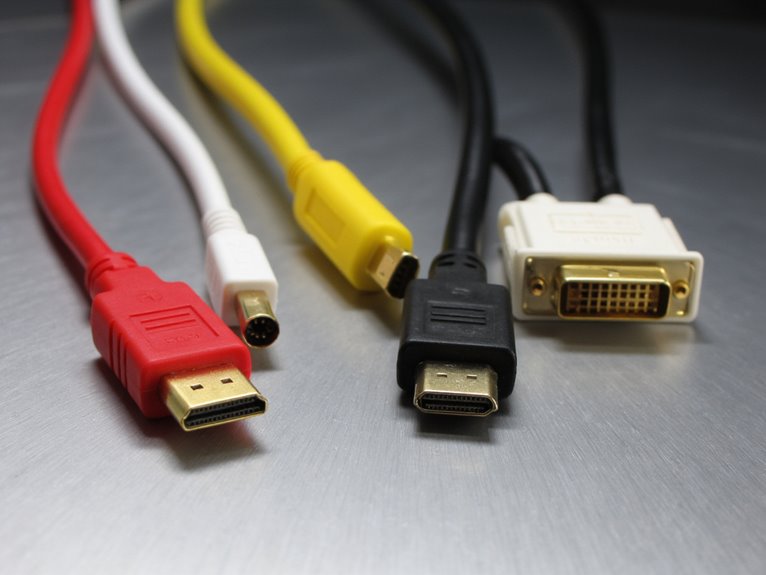
When you’re connecting modern displays to computers, gaming consoles, or media players, you’ll inevitably encounter two dominant cable standards that have shaped high-definition video transmission for the past two decades: HDMI and DVI.
While both deliver crisp digital video, their capabilities differ markedly in bandwidth, design, and practical applications.
DVI advantages include robust compatibility with legacy systems and professional environments where video-only transmission suffices, supporting resolutions up to 2560 × 1600 through dual-link configurations.
HDMI features encompass superior bandwidth capabilities, with version 2.1 reaching 48 Gbit/s for 10K resolution support, plus integrated multi-channel audio transmission.
Key distinctions include:
- Physical design: HDMI’s compact 19-pin connector versus DVI’s bulky, screw-secured interface
- Signal transmission: HDMI carries both audio and video, while DVI requires separate audio cables
- Modern compatibility: HDMI dominates consumer electronics with advanced features like HDCP protection
Audio Jack Varieties: TS, TRS, and TRRS Connector Configurations
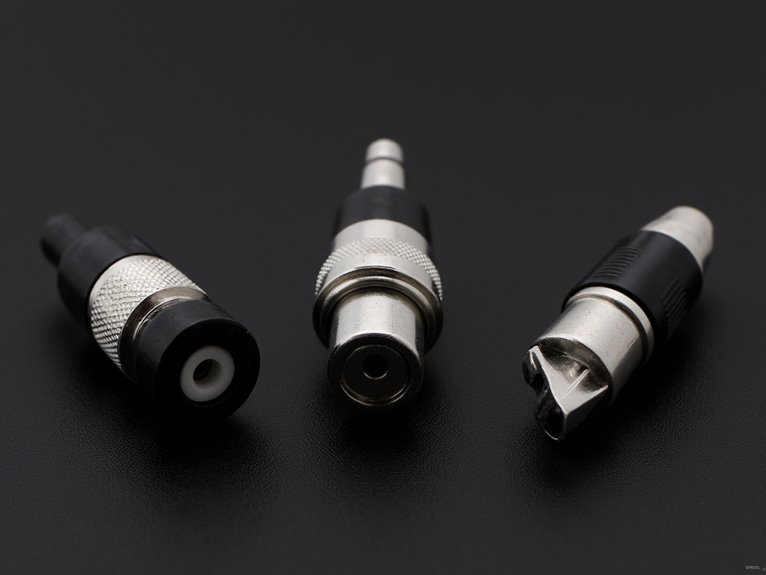
After exploring high-definition video connections, you’ll find that audio jacks present their own fascinating world of technical variations, each designed with specific signal-carrying capabilities that directly impact your listening and recording experience.
The three primary configurations-TS for basic mono audio, TRS for stereo channels or balanced signals, and TRRS for integrated microphone functionality-represent an evolution in connector design that I’ve witnessed transform from simple instrument cables to sophisticated smartphone headset compatibility.
Understanding these distinctions becomes essential when you’re selecting the right cable for your setup, whether you’re connecting a guitar to an amplifier, plugging in studio headphones, or troubleshooting why your headset microphone isn’t working with certain devices.
TS Mono Audio Basics
Simplicity defines the TS (Tip-Sleeve) mono audio connector, and I’ve found it’s often the most misunderstood jack in the audio world despite being the most straightforward.
You’ll recognize it by the single black insulating band separating the tip conductor, which carries your audio signal, from the sleeve that serves as ground reference.
The unbalanced design makes TS connectors particularly susceptible to signal interference over longer runs, though their cable durability remains excellent in professional environments.
They’re the standard choice for:
- Electric guitar and bass connections to amplifiers
- Keyboard mono outputs and synthesizer line connections
- Effects pedal signal chains and stompbox interfaces
While TS connectors lack the interference rejection of balanced alternatives, they deliver reliable mono audio transmission for short-distance applications under ten meters.
TRS Stereo Channel Configuration
Adding a third conductor transforms everything, and I’ll admit the TRS (Tip-Ring-Sleeve) configuration initially confused me more than it should have, particularly when manufacturers use identical connectors for completely different signal types.
You’ll find TRS connector applications spanning from basic headphone outputs to professional studio equipment, where the tip carries your left channel, ring handles the right, and sleeve provides common ground.
The stereo audio advantages become immediately apparent when you’re mixing tracks, as channel separation eliminates interference between left and right signals.
While cable durability considerations matter for any connector, TRS designs prove remarkably robust across 3.5mm and 6.35mm variants.
Additionally, balanced signal benefits emerge in professional setups, where TRS wiring greatly reduces noise and interference compared to standard unbalanced connections. Professional environments like recording studios rely on TRS balanced connections for common-mode rejection that effectively cancels external noise affecting both conductors.
The quality of the connection also depends on the connector materials, as gold-plated connectors resist tarnishing and corrosion while maintaining signal purity over extended use.
TRRS Microphone Integration Features
The TRRS (Tip-Ring-Ring-Sleeve) connector’s four-conductor design revolutionizes how we handle audio communication, and honestly, I can’t imagine modern mobile devices functioning without this ingenious configuration that simultaneously manages stereo audio output and microphone input through a single 3.5mm jack.
The second ring carries your microphone signal while maintaining exceptional audio quality through dedicated pathways for left and right channels.
Modern devices incorporate sophisticated features that make TRRS connectivity seamless:
- Auto-detection capabilities automatically adapt between CTIA and OMTP standards for universal compatibility
- Interference-free operation guarantees simultaneous audio playback and microphone recording without signal degradation
- Balanced connection support enables professional-grade audio applications in specific configurations
This versatility explains why you’ll find TRRS connectors dominating smartphones, tablets, and communication headsets-they’re simply the most efficient solution for all-encompassing audio functionality. However, TRRS connectors can potentially cause connectivity issues due to their four-conductor complexity.
While TRRS connectors offer convenience for mobile and portable applications, professional recording environments typically favor XLR microphones for their superior audio quality and expandable system capabilities.
USB Standards and Connector Types Across Device Categories
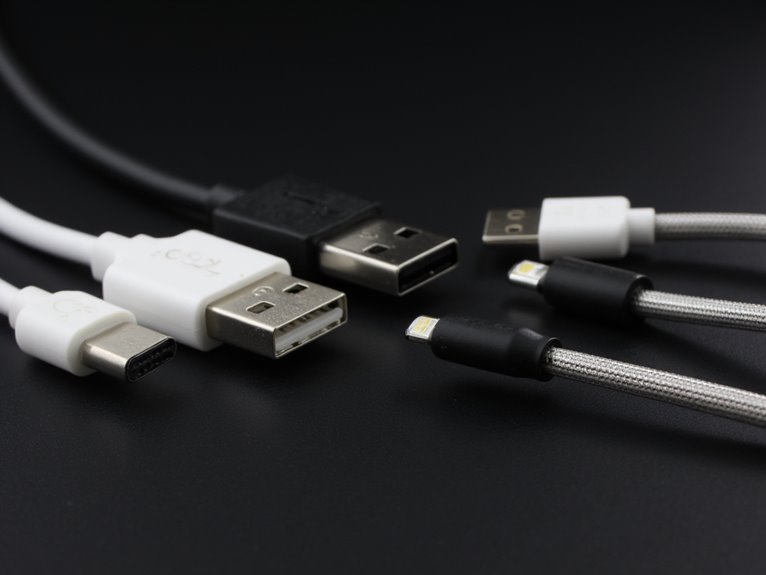
While I’ve spent countless hours untangling cables behind desks, I’ve learned that understanding USB connector types isn’t just about knowing which plug fits where-it’s about recognizing how different standards and physical designs serve specific device categories and use cases.
USB advancements have created distinct ecosystems: smartphones evolved from Mini-B to Micro-B, now embracing USB-C’s charging evolution and 40 Gbps capabilities.
Type A’s connector longevity makes it perfect for keyboards and mice, while Type B’s square design suits printers requiring stable connections.
Device compatibility becomes essential when you’re dealing with USB 2.0’s 480 Mbps versus USB4’s blazing speeds-your external drive’s performance depends entirely on matching the right connector type with appropriate standards.
DisplayPort and Mini-DisplayPort for Computing Environments
When you’re working with high-resolution displays in professional computing environments, DisplayPort and Mini DisplayPort connections offer the bandwidth, technical capabilities, and multi-monitor support that standard video interfaces simply can’t match.
You’ll find these ports particularly valuable if you’re running 4K monitors, setting up dual-display workstations, or gaming setups where every frame matters, since they handle everything from basic 1080p to cutting-edge 8K resolutions depending on the version.
Whether you’re using a desktop workstation with full-size DisplayPort or a sleek ultrabook with Mini DisplayPort, both connectors deliver identical performance specs for their respective versions, though compatibility with your specific devices will determine which one you’ll actually need.
High-Resolution Video Support
Excellence in visual fidelity reaches its peak when you’re choosing between DisplayPort and Mini DisplayPort for high-resolution computing applications, since both connectors deliver identical performance capabilities despite their dramatically different physical sizes.
I’ve found that both interfaces support uncompressed video signals, enabling crystal-clear 4K at 60 Hz and beyond, depending on your version.
The DisplayPort versatility shines through advanced specifications, while Mini DisplayPort advantages include space-saving designs without sacrificing quality.
- Ultra-High Resolution: DP 2.1 supports 4K at 240 Hz or 8K at 60 Hz with 10-bit chroma subsampling
- HDR Enhancement: Both formats deliver advanced HDR video formats for superior dynamic range
- Future-Proof Bandwidth: DP 2.0 enables 16K at 60 Hz with 77.4 Gbps throughput
You’ll experience identical visual quality regardless of connector size.
Computing Device Compatibility
Across modern computing environments, I’ve discovered that DisplayPort and Mini DisplayPort compatibility extends far beyond simple plug-and-play connections, encompassing a complex ecosystem where physical form factors, device categories, and professional requirements intersect to determine ideal connectivity solutions.
Mini DisplayPort history traces back to Apple’s 2008 introduction for space-constrained devices, though you’ll find it’s gradually losing ground to USB-C implementations in newer systems. DisplayPort features remain consistent between both connector sizes, meaning your MacBook’s Mini DP delivers identical 4K capabilities as desktop workstations with full-size ports.
I’ve observed that while gaming setups typically favor standard DisplayPort’s robust locking mechanisms, ultrabooks and compact devices still rely on Mini DP’s 30% smaller footprint for maintaining sleek profiles without sacrificing professional display performance.
RCA Connectors for Analog Audio and Video Applications
Simplicity often trumps complexity in the world of audio and video connections, and RCA connectors represent this principle perfectly, having served as the backbone of analog signal transmission since their development by Radio Corporation of America in the 1930s.
Understanding RCA connector history reveals their enduring popularity stems from low-cost manufacturing and straightforward design, though you’ll encounter RCA advantages limitations when dealing with electromagnetic interference over longer distances.
You’ll find RCA signal types encompass various formats:
- Analog audio through white and red channels for stereo sound
- Composite video via yellow connectors for basic video transmission
- Digital audio using orange S/PDIF connections for modern compatibility
RCA color coding simplifies identification, while RCA adapters usage extends functionality through HDMI converters and XLR professional interfaces, ensuring RCA audio video systems remain relevant despite newer digital standards.
Speaker Wire Specifications for Audio Signal Transmission
Precision in speaker wire selection determines whether your audio system delivers its full potential or falls short of expectations, and I’ve learned through years of testing that the right wire specifications can mean the difference between muddy, distorted sound and crystal-clear audio reproduction.
Thicker wires reduce resistance over longer distances, maintaining audio quality through proper impedance matching with your speakers. Cable flexibility matters for installation compatibility, especially when routing through tight spaces or around corners.
Environmental factors like temperature and humidity affect wire longevity, making regular wire maintenance essential for sustained performance. Understanding these performance factors helps you choose between 12 AWG for long runs, 14 AWG for medium distances, or 16 AWG for standard home setups.
Legacy Connection Types: SCART, S-Video, and VGA Standards
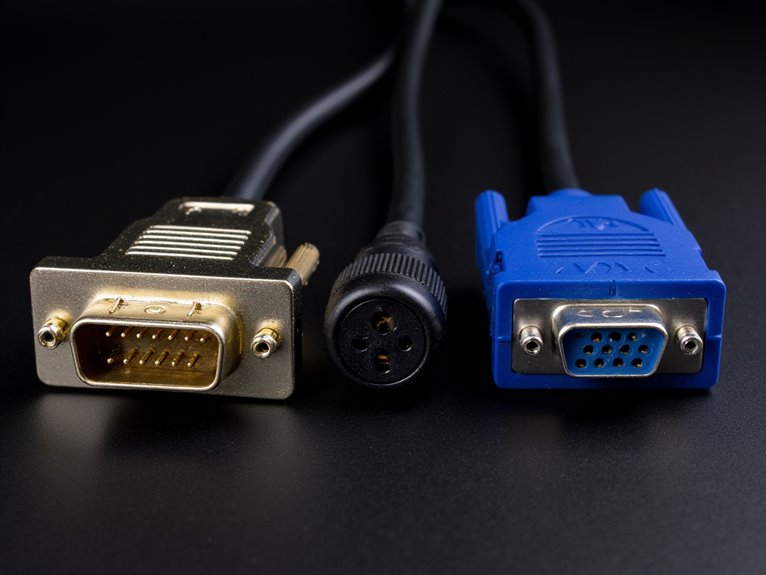
Technology’s relentless march forward has left several connection standards in its wake, and I’ve spent countless hours working with SCART, S-Video, and VGA cables that once dominated the audio-visual landscape before digital connections took over.
SCART advantages included extensive audio-visual connectivity through its 21-pin design, offering excellent SCART compatibility across European equipment while delivering impressive legacy cable performance with RGB signals.
SCART’s robust 21-pin architecture delivered unmatched analog connectivity and RGB excellence across European AV equipment for decades.
Key characteristics of these standards include:
- SCART: Bidirectional analog audio/video with RGB support up to 15-meter cable runs
- S-Video: Separate luminance/chrominance signals improving video transmission quality over composite
- VGA: Analog computer display standard supporting VGA resolutions from 640×480 to 2048×1536
Despite S Video limitations like standard-definition restrictions and audio requirements for separate cables, these connections served reliably before HDMI’s dominance.
Cable Selection Criteria: Matching Requirements to Performance Capabilities
How do you navigate the overwhelming maze of cable specifications when every application demands different performance characteristics, and a single wrong choice can compromise your entire system’s functionality?
I’ll admit, matching requirements to performance capabilities isn’t rocket science, but it requires understanding several critical factors.
Your cable’s current capacity must handle electrical loads without overheating, while voltage rating needs to exceed maximum operating levels.
Consider ambient temperature ranges, material durability under stress, and appropriate cable insulation levels for your environment.
Signal quality depends heavily on controlling electrical noise and minimizing attenuation effects over distance.
Environmental factors like moisture, physical stress, and chemical exposure directly impact life expectancy, so you’ll want protective jackets and shielding that match your installation conditions.
Frequently Asked Questions
How Do I Properly Dispose of Old Electronic Cables and Connectors?
You’ll want to start proper cable recycling by separating different connector types, removing any batteries or hazardous components first.
I’d recommend checking local electronic waste programs since they’re equipped to handle various cable materials safely.
Don’t toss them in regular trash-that contaminates landfills unnecessarily.
Many retailers offer take-back programs, and functioning cables can be donated to extend their lifecycle before recycling.
Can I Repair a Damaged Cable Connector Myself or Should I Replace It?
You can handle minor cable repair yourself using crimp connectors, heat shrink tubing, or wire nuts for simple jacket damage.
However, connector replacement becomes necessary when dealing with complex shapes like HDMI or USB ports.
I’d recommend attempting DIY repairs only on basic cables with accessible damage, since improper techniques can create safety hazards.
Specialized connectors require professional replacement for reliable performance.
What Tools Do I Need to Crimp My Own Network Cable Connectors?
You’ll need crimping tools specifically designed for RJ45 connectors, which typically include integrated cutting and stripping functions in one device.
I recommend multi-functional crimpers that handle both solid and stranded cable types, including CAT5e and CAT6.
You’ll also need RJ45 connectors, though some crimping tools can’t accommodate proprietary Cat6A connectors.
A network tester helps verify your connections afterward, ensuring you’ve achieved proper termination.
How Do I Test if My Cable Is Working Properly Before Installation?
Before installation, you’ll want to perform cable testing using a multimeter or dedicated cable tester to verify continuity across all conductors.
I recommend checking each wire pair for opens, shorts, and proper signal integrity by testing resistance between pins. Use a network cable tester if available, as it’ll automatically verify wiring patterns and detect miswires that could cause connectivity issues later.
Are Expensive Cables Always Better Than Cheaper Alternatives for Home Use?
For most home setups, you won’t notice meaningful cable performance differences between budget and premium options, since digital signals either work or they don’t at typical distances.
My price comparison testing shows $10 cables often match $100 versions in picture quality, though expensive cables do offer better build materials, longer warranties, and improved durability for frequent plugging scenarios.
On a final note
You’ve now got the knowledge to tackle any cable situation that comes your way, whether you’re setting up a home theater, upgrading your network, or connecting vintage equipment. I’ve found that understanding these fundamentals saves countless hours of troubleshooting and prevents costly mistakes. Remember, choosing the right cable isn’t just about compatibility-it’s about maximizing performance while staying within your budget and meeting your specific requirements.