Audio Software Integration With Hardware Guide
You’ll achieve seamless audio software-hardware integration by installing manufacturer-specific drivers from official sources, connecting your audio interface using proper XLR and TRS cables, and configuring MIDI controllers through your DAW’s input panel. Set buffer sizes between 64-512 samples for ideal latency management, enable direct monitoring for real-time feedback, and verify all input/output selections match your physical setup. Advanced users can implement hardware inserts and network-based routing for professional-grade results that’ll expand your creative possibilities considerably.
We are supported by our audience. When you purchase through links on our site, we may earn an affiliate commission, at no extra cost for you. Learn more.
Notable Insights
- Download manufacturer-specific drivers from official websites and regularly update them for optimal hardware-software compatibility and performance.
- Use proper cables for connections: XLR for microphones, 1/4″ TRS for instruments, and power off equipment before connecting.
- Configure ASIO drivers with 64-512 sample buffer sizes to achieve sub-10ms latency for real-time audio processing.
- Enable direct monitoring on audio interfaces to hear input signals immediately without processing delays during recording.
- Set up hardware inserts using dedicated send/return routing with minimum 4×4 interfaces for external processor integration.
Essential Hardware Connection and Driver Installation
Before diving into the exciting world of audio production, you’ll need to establish a solid foundation through proper hardware connection and driver installation-a process that might seem intimidating at first, but I’ve found it becomes second nature once you understand the essential steps.
Driver compatibility represents the cornerstone of successful audio hardware integration, requiring verification that your hardware matches your operating system’s specifications before proceeding.
Verifying hardware compatibility with your operating system specifications before installation prevents costly integration failures and ensures seamless audio production workflow.
The installation process demands downloading manufacturer-specific drivers directly from official websites, never third-party sources that could introduce instability.
Following manufacturer instructions precisely, connecting hardware via appropriate interfaces like USB or dedicated ports, then rebooting guarantees proper system registration.
I always emphasize checking for regular updates afterward, as manufacturers frequently release performance improvements and compatibility fixes.
Establishing proper system synchronization becomes critical when incorporating digital expansion capabilities like ADAT Lightpipe into your setup.
When selecting your audio interface, prioritize devices that support 24-bit/192kHz resolution for professional-grade recording quality that meets industry standards.
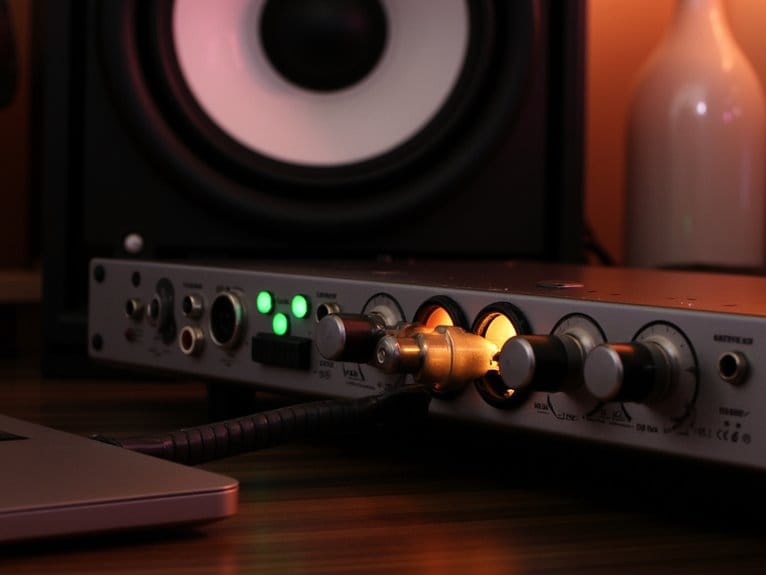
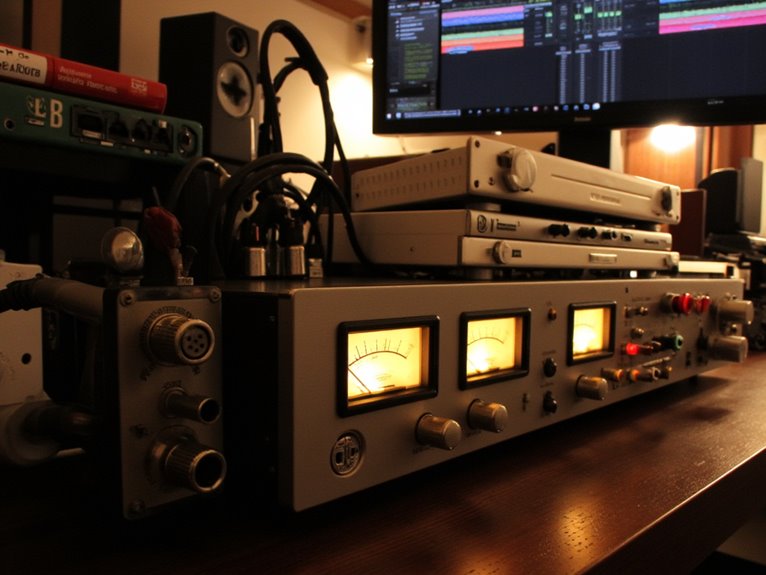
Audio Interface Setup and Cable Configuration
Once your drivers are properly installed, the real magic happens when you begin connecting your audio interface-a process that transforms your computer into a professional recording hub, though I’ll admit the cable jungle can look overwhelming at first glance.
Understanding different cable types becomes essential for maintaining signal integrity throughout your setup. You’ll want male XLR to female XLR cables for microphones, connecting to your first channel input, while guitars typically use 1/4″ TS or TRS cables into the second channel.
Studio monitors connect via 1/4″ TRS or RCA cables from your main outputs, and I recommend powering off everything before making connections to prevent equipment damage and guarantee clean signal paths. For Thunderbolt interfaces specifically, you must use the proper Thunderbolt cables as regular USB-C or Mini DisplayPort cables won’t provide optimal performance. Audio interfaces also provide phantom power through XLR connections, enabling you to power condenser microphones that require this 48-volt supply for proper operation.
MIDI Controller Integration and Recognition
While your audio interface handles the analog side of recording, your MIDI controller serves as the creative command center that’ll transform how you interact with virtual instruments, though I’ve seen countless musicians struggle with the initial setup process.
Most modern controllers connect via USB with plug-and-play functionality, but you’ll occasionally encounter devices requiring manual driver downloads from the manufacturer’s website. Once connected, navigate to your DAW’s MIDI input configuration panel, enable the device, and test recognition by playing a few notes.
Controller mapping becomes essential for hands-on parameter control, with MIDI learn functions simplifying the assignment process. The choice between semi-weighted keys versus fully weighted models affects your playing experience, as fully weighted options provide more authentic piano feel but may require adjustment for rapid passages.
When MIDI troubleshooting becomes necessary, check device manager listings and verify no conflicting software intercepts your controller’s signals. Audio interfaces with low latency capabilities ensure your MIDI commands trigger virtual instruments with minimal delay, creating a more responsive playing experience that matches the feel of acoustic instruments.
Hardware Insert Implementation During Recording
Hardware inserts represent one of the most rewarding yet technically demanding aspects of modern recording, allowing you to blend the warmth and character of analog gear with digital workflow convenience.
You’ll need at least a 4×4 interface to handle simultaneous send and return routing, with outputs 3 and 4 typically dedicated to your hardware chain while outputs 1 and 2 handle monitor playback.
The main hardware insert challenges involve latency management and session recall complexity, since processed signals must travel through converters and external gear before returning to your DAW. Understanding the differences between auxiliary sends and insert points is crucial, as sends operate in parallel while inserts interrupt the entire signal path.
Implementing proper delay compensation methods becomes essential, whether through manual track shifting or plug-in delay adjustments, ensuring your hardware-processed signals align perfectly with other tracks during recording and mixing sessions.
Consider using ADAT connectivity to expand your interface’s input capacity when working with multiple hardware processors simultaneously, as this allows for seamless integration of additional channels without compromising your primary recording inputs.
External Processing Routing Through DAW Systems
Beyond the real-time processing capabilities we’ve explored with hardware inserts, external processing routing opens up a broader world of creative possibilities that I’ve found particularly rewarding when you need maximum flexibility during mixing sessions.
Unlike inserts that process your entire signal linearly, send/return routing lets you blend processed and dry signals, which I’ve discovered is essential for achieving that perfect wet/dry balance with reverbs and delays.
You’ll route audio from your DAW to external processors via interface outputs, then back through inputs to dedicated return tracks, though you’ll need careful signal path management to avoid phase issues.
I always recommend setting up proper latency compensation when incorporating analog characteristics from dynamic processors, as this workflow truly shines for complex sound design applications.
Control Surface Mapping and Software Synchronization
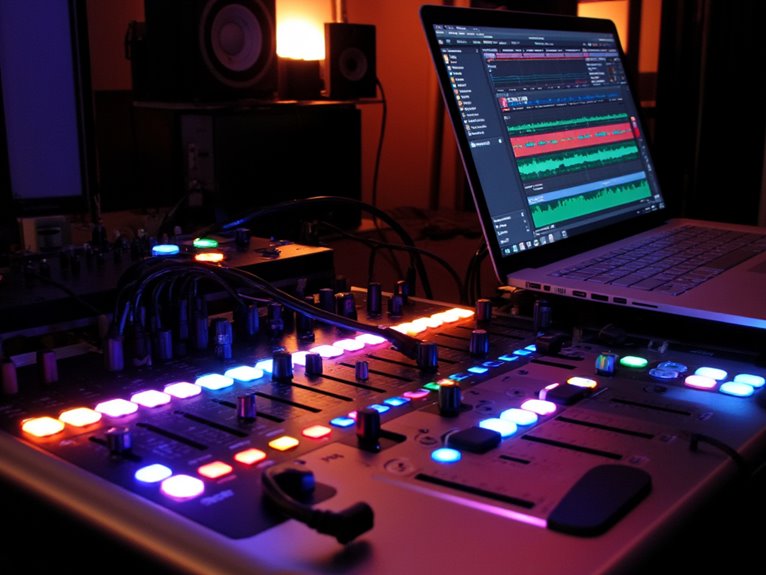
When you’re ready to bridge the gap between tactile hardware control and your software’s endless parameters, control surface mapping becomes the foundation that transforms a collection of knobs and faders into an intuitive extension of your creative process.
Modern control surface customization relies heavily on protocols like Mackie Control Universal, which guarantees your hardware communicates seamlessly with virtually any DAW through standardized transport controls, track selection, and two-way feedback systems.
Standardized protocols like Mackie Control Universal create the seamless communication bridge between your hardware controls and any professional DAW.
I’ve found that software mapping flexibility truly shines when you utilize learn functions to assign physical controls to specific parameters, creating custom banks that extend beyond your surface’s physical limitations.
The real magic happens when motorized faders and LED rings provide real-time feedback, maintaining perfect synchronization between your hardware movements and software parameter changes.
Advanced Network-Based Audio System Integration
When you’re ready to move beyond traditional audio interfaces and embrace the future of professional audio, network-based systems offer unprecedented flexibility through Ethernet audio routing. This allows you to send hundreds of channels over a single cable while maintaining studio-quality fidelity.
I’ve found that mastering network synchronization protocols like AES67 and Dante becomes essential as you scale your setup, since these standards guarantee your distributed audio components stay perfectly locked together across your entire network infrastructure.
You’ll discover that this approach transforms how you think about audio routing, replacing physical patch bays with software-based matrices that can instantly reconfigure your entire signal flow without touching a single cable.
Ethernet Audio Routing
Building upon traditional audio routing limitations, Ethernet audio routing represents a fundamental shift in how we approach large-scale audio system integration, transforming complex installations from hardware-dependent configurations into flexible, software-controlled networks.
You’ll find that Ethernet protocols like AVB, CobraNet, and Dante provide exceptional audio flexibility through Layer-2 implementations that work with standard switches, while Layer-1 protocols require dedicated networks but offer specialized performance characteristics.
I’ve observed that routing topologies-whether star, daisy-chain, or ring configurations-directly impact network performance and latency considerations, particularly when you’re managing 64+ audio channels simultaneously.
Signal integrity remains paramount as you scale systems, though modern audio scalability solutions maintain excellent system interoperability across multiple protocols within unified control platforms.
Network Synchronization Protocols
While Ethernet audio routing establishes the physical pathways for your audio signals, network synchronization protocols serve as the invisible conductor that keeps everything perfectly timed across your distributed system. You’ll encounter three primary approaches, each addressing specific timing challenges in modern audio networks.
| Protocol Type | Best Use Case | Key Advantage |
|---|---|---|
| O2 Protocol | Real-time music systems | Named services, OSC compatibility |
| PTP Strategies | Broadcast IP networks | Sub-microsecond accuracy |
| Wordclock Techniques | Traditional digital audio | Direct sample-rate synchronization |
Modern IP Synchronization demands careful consideration of your network’s asynchronous nature, where timestamp relationships replace continuous clock signals. I’ve found that PTP implementations, particularly in SMPTE ST 2110 environments, offer the precision you’ll need for professional broadcast applications, though proper grandmaster configuration remains absolutely critical for maintaining network-wide coherence across your audio infrastructure.
Custom Hardware-Software Development Strategy
Because custom hardware-software development requires a strategic approach that balances technical complexity with practical implementation, I’ve found that establishing a thorough development strategy from the outset prevents costly revisions and guarantees seamless integration between your audio software and specialized hardware components.
Your development workflow should begin with extensive sensor compatibility analysis, evaluating each component’s communication protocols, power requirements, and data throughput capabilities.
I recommend prototyping early interactions between your audio processing algorithms and hardware interfaces, which helps identify potential bottlenecks before they become expensive problems.
- Form strategic partnerships with hardware vendors who offer robust technical support and documentation
- Implement version control systems that track both firmware revisions and software iterations simultaneously
- Develop custom firmware solutions that optimize audio latency and processing efficiency for your specific use case
- Create detailed integration plans with clear milestones for testing hardware-software communication protocols
When selecting audio interfaces for your custom development, prioritize devices with 24-bit/192kHz resolution to ensure your hardware can capture the detailed audio quality necessary for professional applications.
Additionally, ensure your development environment includes proper cable testing procedures to verify signal integrity and eliminate connectivity issues that could compromise your custom hardware-software integration.
Latency Management and Real-Time Monitoring
How can you eliminate the frustrating delay that turns real-time audio monitoring into a sluggish, unusable experience that destroys creative flow?
I’ve discovered that effective latency optimization techniques start with selecting ASIO drivers, which consistently outperform MME or WASAPI alternatives by delivering sub-10ms delays that remain imperceptible during recording sessions.
Your buffer size calculations become critical here-dividing samples by sample rate reveals whether you’re operating within acceptable thresholds, typically 64-512 samples depending on CPU capabilities.
Buffer size mathematics determine your recording fate-calculate samples divided by sample rate to discover if you’re hitting those crucial performance thresholds.
Real time feedback methods improve dramatically when you enable direct monitoring functions, bypassing computer processing entirely for immediate input signal feedback.
While this limits you to dry signals without effects processing, the trade-off guarantees tight, professional recordings that maintain creative momentum without technical frustrations.
Many budget-friendly interfaces now include zero-latency monitoring capabilities built into their hardware design, making professional-grade performance accessible even for entry-level setups.
Core Audio achieves even lower roundtrip latency than ASIO, averaging 2-4ms compared to ASIO’s 5-8ms, making it the superior choice for macOS users seeking optimal performance.
Troubleshooting Hardware-Software Communication Issues
Three fundamental categories of hardware-software communication breakdowns can transform your perfectly functioning audio setup into a silent, unresponsive nightmare that’ll have you questioning every technical decision you’ve ever made.
I’ve learned that loose connections, driver incompatibilities, and software conflicts create the unholy trinity of audio frustration. When your system starts generating audio feedback or refuses to recognize connected devices, systematic hardware diagnostics become your best friend.
You’ll need to verify physical connections, update drivers from manufacturer websites, and eliminate resource-hogging background applications that interfere with device communication.
- Check all cable connections and test alternative ports to isolate faulty hardware
- Download latest drivers and uninstall conflicting audio software completely
- Temporarily disable antivirus programs during driver installation processes
- Verify correct input/output device selections match your physical hardware setup
Frequently Asked Questions
Can I Use Vintage Analog Gear With Modern Digital Workstations?
You can absolutely integrate vintage analog gear with modern DAWs, though I’ve found that hardware integration challenges like latency compensation and proper impedance matching require careful attention.
While vintage emulation techniques in software have improved dramatically, nothing quite replaces the authentic harmonic saturation and dynamic response of actual vintage units.
You’ll need quality converters, balanced cabling, and sometimes robotic control systems for seamless workflow integration between your analog hardware and digital workspace.
How Do I Prevent Ground Loops When Connecting Multiple Hardware Units?
You’ll prevent ground noise by using USB isolators between your computer and audio interface, which breaks the electrical connection causing audio interference.
I recommend lifting cable shields at one end only, employing balanced XLR connections whenever possible, and establishing a single star ground point for all equipment.
Ferrite beads on USB cables help suppress high-frequency noise that exacerbates ground loop issues.
What’s the Difference Between Balanced and Unbalanced Connections for Audio Quality?
Balanced connections use two signal wires with opposite polarity plus ground, enabling superior signal integrity through differential noise cancellation, while unbalanced cables carry single signals referenced to ground.
You’ll notice balanced cables excel at noise reduction, especially over long runs or in electrically noisy environments, maintaining cleaner audio signals.
Unbalanced connections work fine for short distances but become susceptible to interference beyond 25-30 feet.
Can I Run Multiple DAWS Simultaneously With the Same Hardware Interface?
You can run multiple DAWs simultaneously, but it depends on your system and drivers.
Mac users have better luck with CoreAudio’s multi-client support, while Windows ASIO drivers typically restrict access to one application.
I’ve found that DAW performance suffers under heavy loads, and proper output routing becomes essential.
Some interfaces offer multi-client drivers, though Pro Tools always demands exclusive access regardless of platform.
How Do I Backup and Restore Hardware Device Settings and Configurations?
You’ll want to start with device cloning through your hardware’s built-in backup utilities, which I’ve found work better than third-party solutions for most audio interfaces.
Most modern devices offer settings export through their control software or web interface, letting you save complete configurations as files.
I recommend backing up after each major change, storing files on USB drives or cloud storage, and testing restored settings immediately to make certain everything’s working properly.
On a final note
You’ve now got the foundational knowledge to tackle most hardware-software integration challenges, though admittedly I’ve probably overwhelmed you with technical details along the way. Your success depends on methodical setup procedures, proper driver management, and patience during the inevitable troubleshooting sessions. Remember, even experienced engineers occasionally wrestle with stubborn hardware conflicts, so don’t get discouraged when your first attempt doesn’t work perfectly.