Acoustic Treatment for Small Home Studios: Tailoring Solutions to Limited Spaces
Hey there! Are you struggling to get that professional sound quality in your small home studio? No worries, we've got your back. In this article, we're diving into the world of acoustic treatment and how to tailor solutions specifically for limited spaces.
We are supported by our audience. When you purchase through links on our site, we may earn an affiliate commission, at no extra cost for you. Learn more.
Let's talk about the importance of optimizing speaker placement. You know, it's like finding the perfect spot for a plant in your garden – it needs just the right amount of sunlight to thrive. Similarly, placing your speakers in the optimal position can make a world of difference in how your sound fills the room.
But hey, we can't forget about managing those pesky low-frequency issues. It's like trying to tame a wild beast – you need the right tools and techniques to keep it under control. We'll explore ways to minimize bass buildup and achieve a more balanced sound in your small space.
And let's not overlook the importance of sound isolation. You don't want your neighbor's dog barking or the sound of traffic seeping into your recordings, right? We'll share some tips on improving sound isolation without breaking the bank.
Whether you're on a tight budget or love getting your hands dirty with some DIY projects, we've got you covered. We've got all the knowledge and expertise to help you maximize the benefits of acoustic treatment in your small space.
So, let's get started and turn that tiny home studio into a sound oasis! Are you ready? Let's do this!
Understanding the Importance of Acoustic Treatment
Why is acoustic treatment important for your small home studio? In order to achieve professional-quality sound recordings and mixes, it is crucial to create an optimal acoustic environment. Without proper treatment, your small home studio may suffer from various acoustic issues that can degrade the quality of your recordings and mixes. These issues include excessive reverberation, unwanted reflections, standing waves, and frequency imbalances. Acoustic treatment helps to address these problems by controlling the way sound behaves in your studio space. By strategically placing absorption panels, diffusers, and bass traps, you can minimize reflections, reduce reverberation, and achieve a more balanced frequency response. This allows you to accurately hear and evaluate your recordings, leading to better decision-making during the mixing process. Ultimately, investing in acoustic treatment for your small home studio is an essential step towards achieving professional results and elevating your creative output.
Assessing the Acoustic Challenges in Small Home Studios
To effectively address the acoustic challenges in your small home studio, you must first identify the specific issues that are affecting the sound quality. Small home studios often face several acoustic challenges due to limited space and lack of professional acoustic treatment. These challenges include excessive reverberation, standing waves, flutter echoes, and low-frequency buildup. Excessive reverberation can cause a loss of clarity and definition in your recordings, while standing waves can create uneven frequency response and resonance issues. Flutter echoes can result in a blurred and unnatural sound image, and low-frequency buildup can lead to boomy and muddy recordings. By understanding and assessing these specific challenges, you can implement targeted acoustic treatment solutions to achieve optimal sound quality in your small home studio.
Choosing the Right Acoustic Panels for Limited Spaces
To effectively address the acoustic challenges in your small home studio, you can choose the right acoustic panels that are specifically designed for limited spaces. When it comes to choosing the right acoustic panels, it's important to consider the size of your studio and the specific acoustic issues you are facing. In limited spaces, it is crucial to maximize the effectiveness of each panel. Look for panels that are compact and can be easily mounted on walls or ceilings, without taking up too much space. Additionally, consider the absorption coefficient of the panels, as this will determine their effectiveness in reducing unwanted reflections and reverberations. Opt for panels with a high absorption coefficient, especially in the frequency ranges that are most problematic in your studio. By selecting the right acoustic panels for your limited space, you can create a more controlled and balanced sound environment for your recordings and mixes.
Optimizing Speaker Placement for Balanced Sound
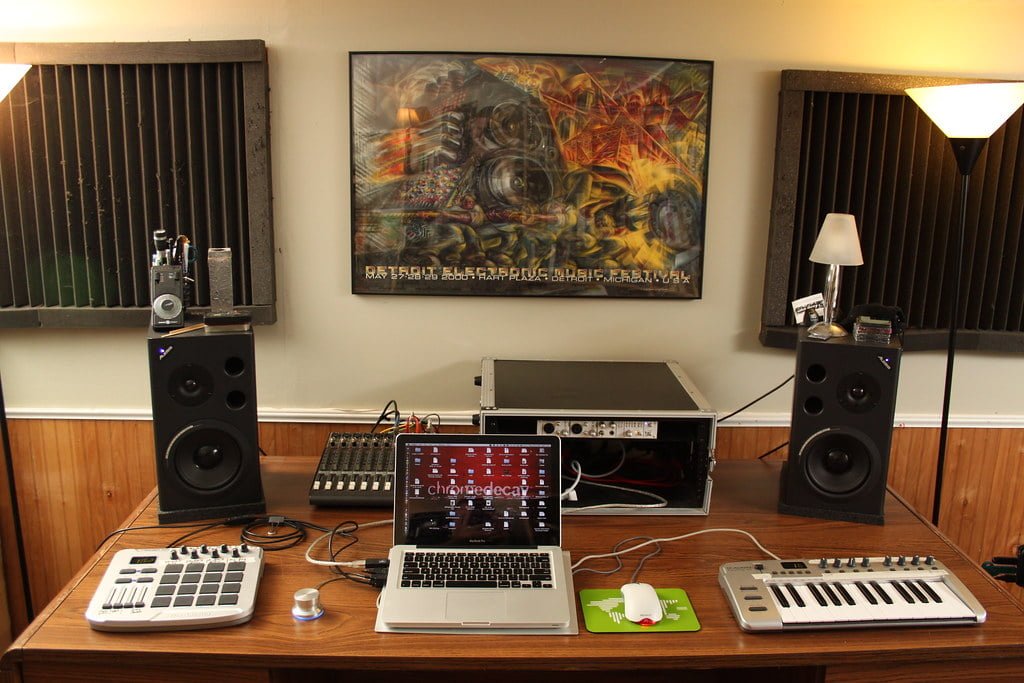
Achieve balanced sound in your small home studio by optimizing the placement of your speakers. The positioning of your speakers can significantly impact the overall sound quality and accuracy of your monitoring system. To achieve a balanced sound, it is essential to consider the room's dimensions, speaker distance from walls, and the listening position. Start by placing your speakers equidistant from the walls to minimize unwanted reflections. Avoid placing them too close to corners, as this can cause excessive bass buildup. Experiment with different speaker angles and distances from your listening position to find the sweet spot with the most accurate sound reproduction. Additionally, consider using speaker isolation pads or stands to minimize vibrations and improve audio clarity. By carefully optimizing your speaker placement, you can create an immersive and accurate listening experience in your small home studio.
Managing Low-Frequency Issues in Small Rooms
Now, let's address how to effectively manage low-frequency issues in small rooms. Low-frequency issues can be a challenge in small home studios due to the limited space available. To tackle this problem, consider using bass traps. Bass traps are acoustic treatments designed to absorb low-frequency sound waves and reduce unwanted resonances in the room. Placing bass traps in the corners of the room can help minimize the buildup of low-frequency energy. Additionally, using a subwoofer with room correction software can help optimize the low-frequency response in your small studio. This software analyzes the room's acoustics and adjusts the subwoofer's output to compensate for any problematic frequencies. By implementing these solutions, you can effectively manage low-frequency issues in your small home studio and achieve a more balanced and accurate sound.
Improving Sound Isolation in Small Home Studios
By implementing sound isolation techniques in your small home studio, you can effectively minimize external noise and create a more controlled and focused acoustic environment. Sound isolation is crucial in ensuring that unwanted noise from neighboring rooms or outside sources does not interfere with your recordings. One effective method is to use acoustic foam panels to absorb and reduce sound reflections. These panels can be strategically placed on walls, ceilings, and even doors to create a barrier that prevents sound from escaping or entering the room. Additionally, installing soundproof curtains or acoustic seals on windows and doors can further enhance sound isolation. Another option is to construct a separate room within your existing space, using materials with high sound transmission class (STC) ratings to create a well-insulated and isolated area for recording. By prioritizing sound isolation, you can create an optimal environment for capturing clean and professional audio in your small home studio.
DIY Acoustic Solutions for Budget-Friendly Options
To further enhance the sound isolation in your small home studio, consider exploring DIY acoustic solutions for budget-friendly options. These solutions can help you create a more controlled and accurate listening environment without breaking the bank. One of the simplest and most effective DIY options is to use broadband absorbers made from materials like mineral wool or fiberglass. These absorbers can be built into panels and strategically placed on walls and corners to reduce unwanted reflections and improve overall sound quality. Another budget-friendly option is to use diffusers, which scatter sound waves and create a more balanced acoustic environment. Diffusers can be made using materials like wood or foam, and they can be placed on walls or ceilings to break up standing waves and enhance the clarity of your recordings. By exploring these DIY acoustic solutions, you can achieve professional-level sound quality in your small home studio while staying within your budget.
Maximizing the Benefits of Acoustic Treatment in Small Spaces
To fully maximize the benefits of acoustic treatment in small spaces, it is important to strategically optimize the placement of absorbers and diffusers. Absorbers are designed to reduce unwanted reflections and echoes, while diffusers help to scatter sound waves and create a more balanced acoustic environment. In small home studios, where space is limited, it becomes crucial to place these acoustic treatment solutions in the most effective positions. Start by identifying the primary reflection points in your room, which are typically the walls directly facing the speakers. Install absorbers in these areas to minimize early reflections and improve clarity. Additionally, consider placing diffusers on the rear wall to create a sense of depth and spaciousness. By strategically optimizing the placement of absorbers and diffusers, you can achieve a more accurate and controlled listening environment, enhancing the overall quality of your recordings and mixes.
Conclusion
In conclusion, acoustic treatment is essential for achieving optimal sound quality in small home studios. By understanding the importance of acoustic treatment, assessing the acoustic challenges, and choosing the right acoustic panels, you can tailor solutions to limited spaces. Optimizing speaker placement, managing low-frequency issues, improving sound isolation, and considering DIY options are all effective ways to maximize the benefits of acoustic treatment in small spaces. With these techniques, you can create a balanced and professional sound environment for your home studio.


