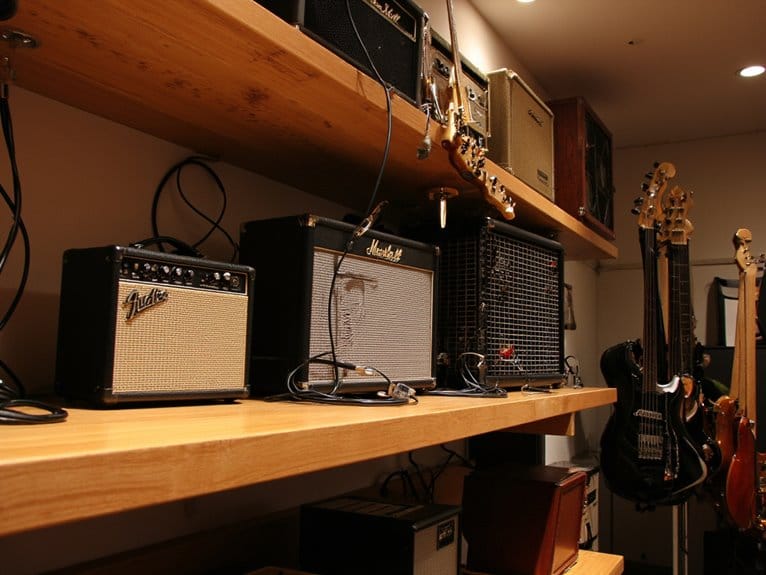
Essential Studio Accessories: Stands, Cases, and More
You’ll need essential studio accessories to transform your workspace into a professional recording environment, starting with sturdy microphone stands that handle 2.2-2.6 pound capacities and boom arms offering 360-degree positioning flexibility. Invest in quality headphone stands for proper ventilation, instrument stands with padded cradles to prevent damage, and hard cases featuring high-impact ABS construction for transport protection. Don’t overlook cable management solutions, pop filters for vocal clarity, and shock mounts that isolate sensitive condensers from vibration interference-exploring these fundamentals will elevate your entire studio setup.
We are supported by our audience. When you purchase through links on our site, we may earn an affiliate commission, at no extra cost for you. Learn more.
Notable Insights
- Choose microphone stands based on weight capacity, base stability, and height requirements for your specific recording applications.
- Boom arms provide flexible positioning, workspace optimization, and ergonomic comfort while maintaining professional audio quality standards.
- Audio interfaces require proper connectivity options, adequate phantom power, and sufficient input/output ports for your setup needs.
- Studio headphones should prioritize sound isolation and frequency response, with closed-back models for recording and open-back for mixing.
- Acoustic treatment including absorption panels, bass traps, and proper monitor placement significantly improves professional sound quality.
Microphone Stand Selection and Setup
Every microphone stand in your studio serves as the foundation for capturing quality audio, and I’ve learned through countless recording sessions that choosing the wrong stand can sabotage even the most expensive microphones.
Your first consideration should be microphone weight capacity, as desktop stands typically handle 2.2 to 2.6 pounds while heavier condensers demand robust steel constructions. Base stability becomes vital when you’re dealing with performers who move around, where round bases minimize trip hazards and tripod designs provide broader support.
Desktop stands handle lightweight mics up to 2.6 pounds, but heavy condensers need steel construction and stable tripod bases.
I’ve made setup errors by ignoring ideal height requirements, positioning acoustic guitar mics at waist level versus overhead drum placements. Stand portability matters for touring, while proper mic angles depend on reliable adjustment mechanisms. Proper stand positioning also helps maintain the ideal distance from sound sources, as SPL decreases by 6 dB with each doubling of distance, directly affecting your microphone’s sensitivity requirements and overall recording quality.
Effective space management requires boom arms that extend 27 to 42 inches without cluttering your workspace. Professional stands feature weighted bases that enhance vibration reduction during recording sessions, significantly improving audio quality by minimizing handling noise and stand movement.
Tripod Designs for Maximum Stability
While single-tube tripod legs might seem adequate for basic microphone stands, I’ve discovered through years of studio work that twin-tube designs provide the structural integrity you’ll need when supporting heavier condenser mics or dealing with active performers.
Superior tripod stability depends on several critical factors that I’ve learned to prioritize when selecting studio equipment.
Key elements for maximum stability include:
- Leg design with 15mm+ diameter tubes for enhanced rigidity and vibration resistance
- Spreader systems at ground or mid-level to prevent lateral movement and maintain alignment
- Foot adaptability using rubber for smooth floors or spiked variants for textured surfaces
- Center column minimization to keep gravity centers low and reduce sway potential
- Build quality featuring precision manufacturing and environmental resistance for consistent performance
Boom Arms for Flexible Positioning
When you’re ready to move beyond the limitations of fixed tripod positioning, boom arms offer the flexible microphone placement that can transform your studio workflow. This allows you to position your mic precisely where you need it without cluttering your workspace.
I’ve found that the real advantages of boom arms become apparent when you consider their ability to swing out of the way during non-recording activities, rotate through multiple angles for ideal pickup patterns, and integrate seamlessly with existing desk setups through secure C-clamp mounting systems.
You’ll discover that proper boom arm selection involves understanding load capacities, extension ranges, and how these mechanical positioning tools can enhance your overall studio ergonomics while maintaining professional audio capture standards.
Boom Arm Benefits
As someone who’s spent countless hours wrestling with rigid microphone stands and awkward desk setups, I can confidently say that boom arms represent one of the most transformative upgrades you’ll make to your audio workspace.
The arm flexibility allows precise microphone height adjustments, enabling ideal positioning within that sweet 15-30 cm proximity range for enhanced sound clarity while maintaining equipment durability through stable mounting.
- Enhanced audio quality through ideal positioning that captures the proximity effect’s warmth while reducing handling noise
- Workspace optimization that frees valuable desk space and maintains a professional, clutter-free appearance
- Ergonomic comfort that eliminates awkward postures and reduces fatigue during extended recording sessions
- Professional versatility suitable for podcasting, streaming, gaming, and interview scenarios
- Convenient repositioning with 360-degree rotation for mid-session adjustments
When pairing boom arms with dynamic microphones like the Shure SM7B, proper positioning becomes even more critical since these microphones require close proximity to achieve optimal signal-to-noise ratios.
Many professional models feature boom arm lengths ranging from 16 to 30 inches, providing the telescoping boom functionality that accommodates everything from intimate voiceover work to dynamic live performances.
Positioning and Angles
Beyond the immediate benefits of adding a boom arm to your setup, the real magic happens when you understand how proper positioning and angles can make or break your recording quality.
I’ve learned that positioning your boom arm at exactly 90 degrees to the light stand simplifies boom arm adjustments greatly, allowing your softbox to pivot horizontally for straightforward angling.
When you angle off 90 degrees, you’re creating unnecessary complexity that requires separate adjustment of both the boom arm pivot and your mounted modifier, making precise positioning tedious.
For maximum stability, always align your boom arm direction with the stand’s longest leg, and guarantee angle precision by positioning the weight vector from 12 o’clock to 6 o’clock to prevent loosening under gravity.
Studio Setup Integration
While proper boom arm positioning forms the foundation of quality recordings, integrating these versatile tools into your studio setup opens up possibilities that’ll transform how you approach microphone placement and workspace efficiency.
Your boom arm becomes the centerpiece of studio ergonomics, eliminating floor stands while maximizing desk real estate through compact clamp bases that you can reposition without tools.
Accessory compatibility guarantees seamless integration across your equipment:
- Standard 5/8″-27 and 3/8″ threading accommodates most microphones with optional adapters
- Shock mounts and mic clips attach directly for enhanced noise reduction
- Integrated cable management keeps your workspace organized and professional-looking
- Desktop clamps and flange mounts offer temporary or permanent mounting solutions
- Weight capacities between 2.4-3.5 lbs support standard studio microphones reliably
When choosing microphones for your boom arm setup, consider that condenser microphones excel in controlled studio environments where their superior sensitivity can capture nuanced vocal details and acoustic instrument harmonics. Optimal positioning at 6-12 inches from your source captures strong direct signals while reducing unwanted room reflections.
Headphone Stands for Equipment Care
The humble headphone stand might seem like an unnecessary accessory at first glance, but I’ve learned through years of studio work that it’s actually one of the smartest investments you can make for protecting your audio equipment. Beyond simple headphone protection, these stands excel at cable organization while preventing the costly damage that comes from leaving expensive headphones scattered on your desk.
| Problem | Solution |
|---|---|
| Tangled cables destroying your workflow | Integrated cable routing keeps everything neat |
| Sweat and dust degrading your investment | Proper ventilation and elevation preserve materials |
| Accidental damage from desk clutter | Dedicated storage prevents costly accidents |
A quality stand maintains your headphones’ structural integrity, promotes airflow around ear cushions, and creates that professional studio aesthetic that keeps your workspace organized and efficient.
Instrument Stands for Safe Storage
When you’ve spent serious money on instruments, leaving them propped against walls or scattered across your studio becomes a recipe for expensive disasters that I’ve unfortunately witnessed too many times in professional settings.
Proper instrument stability depends heavily on choosing stands with appropriate stand material construction, whether you’re supporting delicate acoustic guitars or heavy keyboards that demand robust steel frameworks.
- Guitar stands feature padded cradles protecting necks and bodies from scratches while preventing accidental falls.
- Keyboard stands offer adjustable heights with rubberized grips ensuring secure positioning during performance.
- Microphone stands provide tripod bases with boom arms for flexible positioning across various recording scenarios.
- Music stands include telescoping shafts with wireframe or solid-backed desks accommodating different environments.
- Rack mount stands utilize all-steel construction supporting mixers and professional audio equipment reliably.
Hard Cases for Equipment Protection
Disasters happen faster than you’d expect in the equipment world, and I’ve learned through expensive mistakes that soft cases simply can’t handle the brutal realities of professional transport and storage demands.
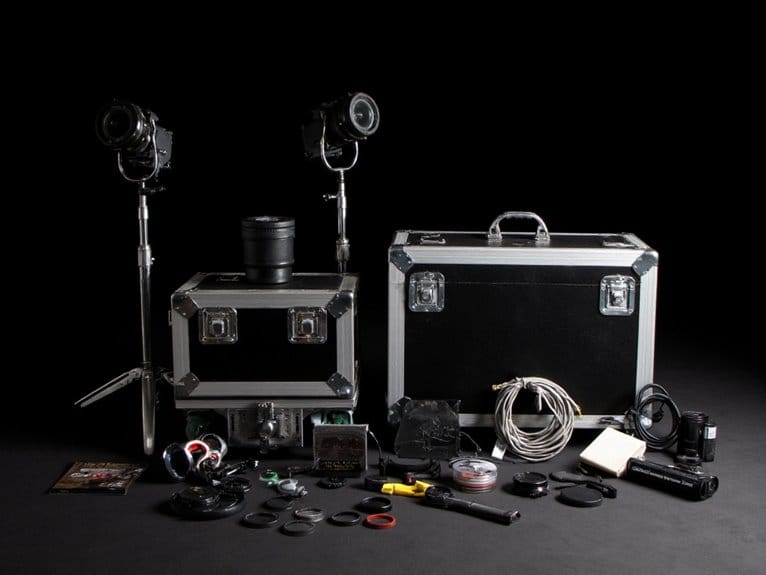
Hard case advantages become crystal clear when you’re dealing with high-impact ABS plastic or aluminum construction that meets military-grade MIL-STD-810 standards, providing shock resistance that actually protects your gear during drops and crushing forces.
Equipment storage reaches professional levels with waterproof gaskets, dustproof seals, and customizable foam interiors that cradle instruments perfectly, eliminating movement-related damage.
I’ve watched colleagues lose thousands in damaged electronics because they skimped on protection, while reinforced corners, tamper-proof locks, and chemical resistance guarantee your investment survives harsh studio environments and transport scenarios.
Soft Cases and Portable Solutions
When you’re moving studio equipment regularly, soft cases offer the perfect blend of lightweight protection benefits and practical portability that hard cases simply can’t match.
You’ll find that padded compartment features provide adequate cushioning for most gear while keeping your load manageable, especially during those long shoots where every ounce matters on your shoulders.
I’ve discovered that portable storage solutions with internal organization systems make accessing your equipment faster and more intuitive, transforming how efficiently you can work in different locations.
Lightweight Protection Benefits
Although I’ve hauled countless camera bags, lighting kits, and studio accessories over the years, I can tell you that switching to lightweight soft cases has transformed how I approach mobile photography work.
The ergonomic design and transport ease eliminate the shoulder strain that plagued my earlier shoots, while lightweight materials like nylon and polyester provide surprising impact resistance without the bulk.
These cases offer remarkable durability factors through shock absorption and abrasion resistance, creating a snug fit that protects your gear during frequent usage. The cost efficiency makes them accessible for photographers at any level, encouraging regular protection habits.
Key benefits include:
- Reduced fatigue during extended location shoots
- Quick setup and breakdown capabilities
- Flexible handling of modular equipment configurations
- Compact storage when cases aren’t needed
- Enhanced equipment longevity through consistent protection
Padded Compartment Features
Since I’ve spent years fumbling with poorly designed camera bags that left my gear rattling around like dice in a cup, I can tell you that well-engineered padded compartment features represent the difference between arriving at a shoot with pristine equipment versus discovering your favorite lens has developed mysterious new scratches.
Quality compartments utilize customizable foam interiors, dividers, and modular padding systems that you can rearrange to accommodate different gear configurations.
The best designs incorporate 600 Denier polyester construction, reinforced stitching, and water-resistant materials that protect against impacts, moisture, and dust ingress.
Custom design options allow precision-cut foam cutouts shaped for specific devices, while multiple compartments separate your main gear from accessories, cables, and documentation for peak organization.
Portable Storage Solutions
Beyond well-designed compartments lies another critical consideration that I’ve learned through countless shoots where mobility made the difference between getting the shot and missing it entirely: portable storage solutions that actually work in the field.
Modern soft cases deliver portable case benefits through water-resistant fabrics, reinforced stitching, and shock-absorbing padding that protects your gear during transit. You’ll appreciate the adjustable shoulder straps and trolley sleeves that reduce fatigue, while multiple pockets keep accessories organized and accessible.
- Modular storage options with reconfigurable inserts accommodate different equipment types
- Compact folding design saves space when empty during travel
- Dust-resistant materials maintain equipment cleanliness on location
- Compatible with digital storage devices and portable power banks
- Available in various colors for easy equipment category identification
Cable Management and Organization
Three years into running my home studio, I learned the hard way that proper cable management isn’t just about aesthetics-it’s about maintaining your sanity, protecting expensive equipment, and creating a workspace that actually functions efficiently.
Cable identification starts with color-coded labels: red for power, blue for audio, yellow for network, which transforms troubleshooting from a nightmare into a simple glance. Cable labeling with printed stickers beats handwritten tags every time, while heat shrink tubing with printed IDs provides durability in busy setups.
Cable organization involves strategic cable routing using adhesive clips under desks, separating power from signal cables to reduce electromagnetic interference by roughly 40%. A metal chassis for your audio interface helps minimize noise interference compared to plastic alternatives, making proper cable separation even more effective.
Cable bundling with Velcro straps allows adjustments without damage, though cable safety demands avoiding tight bundles. Wireless solutions and minimalism in cables reduce clutter considerably, balancing reliability with workspace freedom.
Professional audio setups benefit from XLR connectivity alongside other balanced connections to ensure clean signal transfer and reduce noise interference in studio environments.
Pop Filters for Vocal Clarity
While I initially thought pop filters were just another studio accessory to separate beginners from their money, my first attempt at recording vocals without one taught me exactly why they’re considered essential equipment rather than optional gear.
Those harsh plosive sounds from “p” and “b” consonants completely ruined what I thought was a perfect take, forcing me to understand that pop filter benefits extend far beyond preventing embarrassing retakes.
Pop filter materials typically include woven nylon or fine metal mesh, with proper pop filter placement positioned 2-3 inches from your mouth.
Understanding pop filter usage means recognizing they’re essential for close-mic vocals, podcasting, and voice-over work, while also protecting your microphone from saliva damage. Multi-layered windscreens and pop filters can help reduce both wind and mechanical noise for cleaner recordings.
When setting up your recording chain, consider pairing your microphone and pop filter with a budget audio mixer that includes phantom power for condenser microphones and built-in effects to enhance your vocal recordings.
- Reduces plosive consonant intensity and frequency distortion
- Prevents audio clipping from sudden air bursts
- Protects microphone capsules from corrosive saliva damage
- Minimizes retakes during recording sessions
- Extends overall microphone lifespan considerably
Shock Mounts and Vibration Control
Although many home studio owners treat shock mounts as an afterthought, my expensive lesson came during what I thought would be a simple acoustic guitar recording session, where every footstep from my upstairs neighbor transformed into low-frequency rumbles that completely destroyed an otherwise perfect performance.
That’s when I discovered shock mounts aren’t just accessories-they’re essential vibration dampening tools that provide vital mic isolation from structural noise.
You’ll find three main types: elastic suspension mounts using spider-like elastic nets, hard mounts for heavy microphones, and soft mounts with specialized dampening materials.
Modern options like Rycote’s Lyre technology offer superior durability over traditional elastic bands, while universal mounts accommodate microphone diameters from 18mm to 55mm, ensuring compatibility with most condenser mics for cleaner recordings.
Since the diaphragm acts as a thin membrane that vibrates from sound waves, even minor mechanical interference can significantly compromise your recording quality.
While dynamic microphones are generally less sensitive to vibrations, condenser and ribbon microphones require shock mount protection to prevent their delicate diaphragms from picking up handling noise and mechanical interference.
Audio Interface Connectivity Options
When you’re selecting an audio interface for your studio setup, you’ll need to take into account whether USB or analog connections best serve your recording needs, since USB offers convenient plug-and-play functionality while analog provides the purest signal path for critical listening applications.
Your choice of interface should also accommodate the number of simultaneous input and output ports you require, whether that’s a simple two-channel setup for solo work or an eight-channel configuration for full band recordings.
Additionally, you’ll want to verify your interface provides adequate phantom power for condenser microphones, typically delivering the standard 48V required by most professional vocal and instrument mics.
Modern affordable interfaces now commonly include USB-C connectivity alongside traditional USB connections, streamlining the connection process to both computers and mobile devices for enhanced portability and faster data transfer.
For professional recording environments demanding high channel counts, consider Thunderbolt interfaces that can handle up to 256 I/O channels with superior performance and sub-2ms latency.
USB Vs Analog Connections
Since I’ve spent years testing various audio interfaces and connection types in my home studio, I can tell you that choosing between USB and analog connections isn’t just about plugging cables into your gear-it’s about understanding how different connection methods affect your recording workflow, sound quality, and future expansion possibilities.
USB connections offer digital advantages through their straightforward plug-and-play setup and ability to handle multiple channels simultaneously, while analog connections provide analog flexibility with superior preamp quality and expandability options.
- USB 2.0 supports 32 audio channels; USB 3.0 handles over 100 channels concurrently
- XLR microphones through interfaces deliver better sound quality than integrated USB mics
- USB microphones limit upgrade paths due to built-in converters
- Audio interfaces with analog inputs allow future-proofing and multi-instrument setups
- Latency differences between connection types remain negligible for home studios
Professional audio interfaces supporting 24-bit/192kHz resolution deliver superior digital conversion quality compared to basic USB microphones with fixed converters. When recording stereo sources, ensuring frequency-matched microphones prevents channel imbalance that can compromise your recordings regardless of connection type.
Multiple Input Output Ports
After settling on your connection method, you’ll discover that modern audio interfaces pack an impressive array of input and output ports, each designed for specific recording scenarios and signal types.
| Input Type | Signal Level | Best For |
|---|---|---|
| XLR/Mic | Low (-60dBu) | Microphones, vocals |
| Instrument | Medium (-20dBu) | Electric guitars, basses |
| Line | High (+4dBu) | Synths, mixers, preamps |
| S/PDIF | Digital | External converters |
You’ll appreciate how combo inputs maximize flexibility, accepting both XLR and quarter-inch connections. For multi channel routing, ADAT outputs enable digital audio передач of eight channels simultaneously, while balanced signal advantages become apparent when connecting monitors through TRS outputs. The analog vs digital comparison really shows during tracking sessions-digital S/PDIF maintains pristine signal integrity, whereas analog connections offer that subtle warmth many engineers prefer. Professional interfaces should include 48V phantom power to support condenser microphones, which dramatically improves vocal recording quality compared to dynamic alternatives. Audio interfaces excel at multi-track recording capabilities that enable capturing multiple instruments simultaneously during complex sessions.
Phantom Power Requirements
One critical feature you’ll encounter on virtually every audio interface is phantom power, a 48-volt DC current that flows through XLR cables to power condenser microphones and their delicate internal electronics.
Understanding microphone compatibility becomes vital since different microphone types have varying phantom power requirements, and incorrect usage can damage expensive equipment.
Here’s what you need to know about phantom power implementation:
- Condenser microphones require phantom power for their active electronics and capsule polarization
- Dynamic microphones don’t need phantom power since they generate voltage mechanically
- Ribbon microphones can be damaged by phantom power and should be used with caution
- Most interfaces feature a dedicated “48V” button near XLR inputs for easy activation
- Quality balanced XLR cables guarantee stable phantom power delivery and prevent signal interference
Always disable phantom power before connecting or disconnecting microphones to prevent voltage dissipation damage to sensitive components.
When phantom power is properly supplied, condenser microphones typically thrive with transparent solid-state preamps that maintain signal integrity without adding unwanted coloration.
Studio Headphones and Monitoring
Choosing the right studio headphones represents perhaps the most important decision you’ll make for your monitoring setup, as these tools become your primary window into the sonic world you’re creating. Your headphone selection should prioritize sound isolation and frequency response over flashy features, particularly when studio acoustics aren’t perfect.
Closed-back models like the Beyerdynamic DT 770 Pro excel at noise cancellation during recording sessions, while open-back designs such as the Sennheiser HD 490 PRO offer superior sound clarity for mixing tasks.
Comfort factors become vital during extended sessions, making lightweight construction and quality ear pad maintenance essential considerations. Different headphone types serve distinct purposes, so invest in protective cases to safeguard your monitoring investments.
Acoustic Treatment Considerations
Your studio’s acoustic environment plays an essential role in achieving professional results, and I’ve learned through years of mixing that even the most expensive monitors can’t overcome poor room acoustics.
You’ll need to address three fundamental areas: controlling reflections that muddy your sound, managing standing waves that create uneven frequency response, and optimizing monitor placement to guarantee accurate sound reproduction.
These considerations work together as a system, where addressing one problem without the others often leads to disappointing results that’ll have you second-guessing your equipment instead of your room.
Room Reflection Control Methods
When you’re setting up a studio or critical listening environment, controlling room reflections becomes one of the most essential factors in achieving accurate sound reproduction. I’ve learned through years of acoustic consulting that even the best monitors can sound mediocre in an untreated space.
Acoustic measurements reveal exactly where problems occur, while proper soundproofing techniques address specific frequency issues.
Strategic reflection control combines multiple approaches for ideal results:
- Place absorption panels on side walls from one foot behind speakers to one foot past your listening position
- Install diffusion panels on front and rear walls to scatter sound waves naturally
- Position bass traps in vertical corners where low-frequency energy accumulates most severely
- Use acoustic analysis tools to identify problematic reflection points and frequency buildups
- Balance absorption with diffusion to maintain natural room ambiance while controlling problematic reflections
Standing Wave Management
Understanding standing wave properties starts with room dimension impact-your space’s measurements directly determine problematic standing wave frequencies.
I’ve learned that strategic bass trap design in corners, combined with acoustic panel effectiveness along walls, provides the foundation for control.
Sound diffusion strategies scatter these waves, while measurement techniques using tone generators help identify trouble spots.
Advanced active control systems and adaptive materials offer cutting-edge solutions, though structural modifications remain the most permanent fix.
Monitor Placement Optimization
While bass traps and diffusers tackle room resonances, the physical positioning of your monitors determines whether you’ll actually hear the improvements.
Strategic monitor alignment requires placing speakers at ear height, typically 1.2 to 1.4 meters from the floor, while maintaining adequate wall distance to prevent early reflections from compromising your mix decisions. Room symmetry becomes essential here, as equal distances from side walls guarantee consistent reflection characteristics that preserve stereo imaging accuracy.
- Position monitors to form an equilateral triangle with your listening position for ideal stereo imaging
- Maintain several feet of wall distance to minimize comb filtering and phase cancellation effects
- Angle drivers precisely toward your ears while keeping monitors upright, never on their sides
- Achieve room symmetry by firing down the longest axis when possible for better low-frequency response
- Implement reflection management through strategic acoustic panel placement at mirror points
Essential MIDI and Control Equipment
Since modern music production relies heavily on digital audio workstations, MIDI controllers serve as the vital bridge between your creative ideas and the software that brings them to life.
Budget MIDI options like the Arturia MiniLab 3 offer portable MIDI solutions with fundamental workflow enhancement strategies, while advanced MIDI functionalities appear in controllers like the Native Instruments Kontrol S88 Mk3, featuring polyphonic aftertouch and expressive performance features.
Controller compatibility optimization becomes significant through MIDI integration tools such as Arturia’s Control Center, which enables extensive MIDI customization techniques including firmware updates, template mapping, and real-time diagnostics.
Whether you’re triggering samples with pad controllers or manipulating parameters through rotary encoders, the right MIDI setup transforms your studio into a responsive, intuitive creative environment.
Frequently Asked Questions
How Often Should Studio Accessories Like Stands and Cases Be Replaced?
Your accessory lifespan depends on several replacement factors I’ve observed through years of studio work.
Steel stands typically last 3-5 years with regular use, while cases need replacement every 2-4 years depending on transport frequency.
High-usage environments require annual inspections, though stationary setups can extend beyond five years.
Material quality, load capacity, and environmental conditions notably impact when you’ll need replacements.
What’s the Ideal Studio Room Size for Optimal Accessory Placement and Workflow?
You’ll want room dimensions around 12 feet wide by 18-20 feet long with 9-10 foot ceilings for ideal workflow enhancement, though I’ve worked in smaller spaces successfully.
This size provides adequate spacing for monitor stands, mic stands, and flight cases without creating acoustic dead zones or cluttered pathways.
The rectangular layout enables distinct zones for tracking and mixing while maintaining clear sightlines and unobstructed movement between equipment stations.
Are Expensive Studio Accessories Worth the Investment for Home Recording Setups?
When conducting your cost benefit analysis, I’ve found that expensive studio accessories often justify their price through superior equipment longevity and reduced replacement costs.
You’ll see diminishing returns beyond mid-tier options, though quality stands prevent vibration issues that can ruin takes, while robust cases protect your gear during transport.
For serious home producers, investing in reliable accessories typically pays off through improved workflow efficiency and fewer equipment failures over time.
How Do I Prevent Static Electricity Damage When Handling Sensitive Studio Equipment?
You’ll want to implement proper static control methods, which I’ve learned include maintaining 40-50% humidity levels, using anti-static mats connected to earth ground, and touching grounded metal before handling gear.
Effective grounding techniques involve copper wires attached to equipment cabinets for safe discharge, wearing leather-soled shoes instead of rubber, and installing anti-static covers on sensitive devices like mixers and microphones.
What Safety Precautions Should I Take When Setting up Studio Equipment?
When setting up studio equipment, I always prioritize electrical safety by inspecting all devices for damage before use, keeping them away from water sources, and avoiding outlet overloads.
Equipment stability requires placing stands on level surfaces with safety chains as backups, while I maintain clear walkways through proper cable management.
You’ll want adequate fire extinguishers nearby, emergency procedures communicated, and protective gear available for complex setups.
On a final note
You’ve covered the fundamental accessories that’ll transform your recording space from amateur to professional, though honestly, I’ve seen plenty of great recordings made with budget gear and clever positioning. Your microphone stands, headphone storage, and acoustic treatment don’t need to break the bank, but they absolutely need to function reliably when you’re capturing that perfect take. Invest wisely, prioritize stability over aesthetics, and you’ll build a studio that serves your creativity for years.

