Microphone Preamp Guide: Built-In Vs External
You’ll find that built-in preamps in audio interfaces offer convenience and adequate performance for most home recording, typically providing 10-60 dB of gain with around -110 dB noise floors, while external preamps deliver superior component quality, cleaner gain exceeding 70 dB, and notably better signal-to-noise ratios averaging -129 dB. Built-ins work perfectly for moderate gain requirements and programming tracks, but externals become essential when you’re recording quiet sources, need more than 60 dB gain, or want that analog warmth and character that transforms your recordings from decent to professional-grade, and understanding the technical differences will help you determine which investment makes sense for your specific studio goals.
We are supported by our audience. When you purchase through links on our site, we may earn an affiliate commission, at no extra cost for you. Learn more.
Notable Insights
- Built-in preamps offer convenience and cost-effectiveness but are limited to 10-60 dB gain with higher noise floors around -110 dB.
- External preamps provide superior performance with over 70 dB clean gain, lower self-noise (-129 dB EIN), and dedicated circuitry without space constraints.
- Built-in preamps typically deliver neutral, transparent sound while external preamps offer tonal coloration options through tubes, transformers, and analog warmth.
- External preamps excel for final vocals and acoustic instruments requiring sonic detail, while built-ins suffice for programming tracks and moderate gain applications.
- Upgrade to external preamps when needing more than 60 dB gain, experiencing noise issues, or requiring advanced features for professional recording quality.
What Are Microphone Preamps and Why Do You Need Them
The heart of any professional recording setup lies in understanding signal flow, and I’ve learned that microphone preamps serve as the essential bridge between your microphone’s whisper-quiet output and the robust signal levels that your audio equipment actually needs to function properly.
Microphone preamps form the crucial bridge between your mic’s weak signal and the line levels your recording gear demands.
Different microphone types produce incredibly weak signals, often just microvolts to millivolts, which honestly surprised me when I first measured them with an oscilloscope. Dynamic mics require more amplification due to their robust passive design, while sensitive condenser microphones produce stronger output signals that typically need less gain.
Preamp functions center on amplifying these tiny signals up to 70 dB, transforming mic-level outputs into line-level signals that your audio interface, mixer, or DAW can actually process without introducing unwanted noise.
Without this critical amplification step, you’ll struggle with poor signal-to-noise ratios, forcing you to crank up gain later in your chain, which amplifies noise alongside your desired audio.
Proper gain staging targets around -20 dBFS for optimal signal-to-noise ratios, preventing distortion and noise issues while capturing a dynamic range that includes both quiet details and loud sounds.
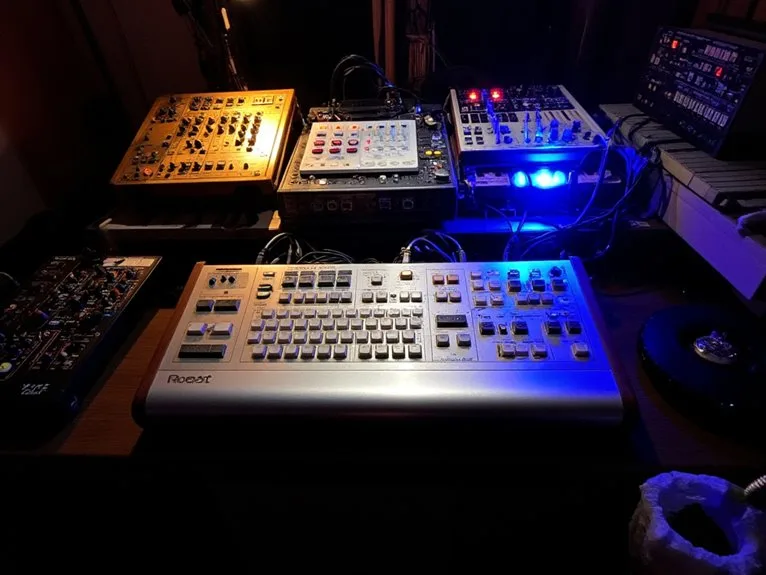
Built-In Preamps: Design Philosophy and Implementation
Millions of audio interfaces, mixers, and recording devices rely on built-in preamps that represent a fascinating study in engineering compromise, where designers must balance sonic performance against the harsh realities of cost, space, and power consumption.
I’ve observed that effective preamp design typically employs non-inverting amplifier configurations with carefully selected gain-setting resistors, often utilizing specialized ICs like the THAT1510 or SSM2019 to achieve predictable noise performance.
Integration challenges become apparent when you’re working within single-supply power constraints, requiring mid-supply biasing techniques that wouldn’t be necessary in external units.
The best implementations distribute gain across multiple stages, use low-impedance capacitors for voltage stability, and employ high-precision components to minimize equivalent input noise while maintaining the compact footprint that makes built-in solutions so appealing.
Engineers must also design these circuits to accommodate diverse microphone types, ensuring the preamp’s input impedance remains at least 5 times higher than the microphone’s output impedance to achieve optimal voltage transfer and preserve signal integrity across the audio spectrum.
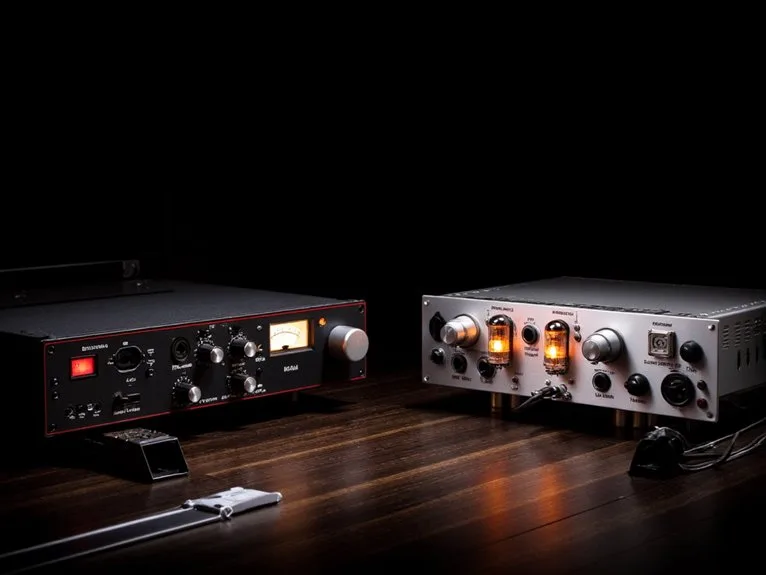
External Preamps: Dedicated Hardware Advantages
While built-in preamps serve their purpose admirably within integrated systems, external preamps represent a significant leap forward in sonic capability, offering dedicated circuitry that isn’t constrained by the power, space, and electromagnetic interference limitations I’ve discussed in previous sections.
These standalone units deliver substantial preamp benefits, including clean gain levels exceeding 70 dB for ribbon and moving coil microphones that demand more amplification than typical built-in designs can provide.
The sound enhancement comes from dedicated power supplies, advanced shielding, and isolated ground schemes that minimize electrical noise and interference. Proper gain staging guarantees that each device operates at peak levels, avoiding clipping and maintaining consistent voltage between devices.
You’ll notice warmer saturation characteristics, lower noise floors during sensitive recordings, and greater flexibility in your signal chain, allowing creative control that transforms ordinary captures into professional-quality audio with distinct tonal character.
Many professional audio interfaces feature ultra-low-noise preamps with up to 69 dB gain, though external units can exceed these specifications for demanding applications.
Component Quality Differences Between Internal and External Units
Five fundamental component categories separate internal preamps from their external counterparts, and I’ve found these differences create measurable impacts on your recording quality that extend far beyond simple marketing claims.
External units consistently outperform internal designs through superior component selection and construction methods that prioritize component longevity over cost-cutting measures:
- Premium capacitors and transformers deliver enhanced sonic integrity compared to budget-friendly internal alternatives.
- Advanced power supply designs provide improved signal stability and wider headroom for demanding applications.
- Enhanced chassis construction offers superior electromagnetic shielding and noise rejection capabilities.
- Complex circuit architectures enable multiple gain stages and tonal shaping features impossible in space-constrained internal units.
While build aesthetics matter less than performance, external preamps’ robust construction typically translates into decades of reliable operation versus the shorter lifespan of interface-integrated components. Professional external preamps incorporate low-noise preamps that eliminate background hiss and significantly enhance the listener’s experience during critical recording sessions. External preamps can deliver exceptional gain levels up to 80dB, making them ideal for gain-hungry microphones like ribbon mics and vintage dynamics that require substantial amplification.
Gain Range and Noise Performance Comparison
When you’re comparing built-in interface preamps against external units, you’ll find that gain capabilities, noise performance, and signal-to-noise ratios reveal significant differences that directly impact your recording quality.
External preamps typically offer up to 80 dB of gain compared to the sub-60 dB range of most built-in preamps, which becomes essential when you’re working with low-output ribbon microphones or capturing quiet acoustic sources that demand substantial amplification.
The noise floor measurements and SNR specifications tell an equally important story, as external units generally maintain cleaner signal paths with lower self-noise. For demanding applications like the Shure SM7B, external gain boosters such as the Cloud Microphones Cloudlifter CL-1 can provide up to +25dB of clean boost to overcome the microphone’s inherently low output characteristics.
External preamps can also provide their own phantom power with dedicated 48V supplies, which simplifies compatibility requirements and reduces dependency on your audio interface for microphone power.
Though I’ve found that understanding these numbers requires looking beyond the marketing specs to real-world performance metrics.
Maximum Gain Capabilities
Understanding maximum gain capabilities becomes essential when I’m evaluating whether a microphone preamp can handle the full spectrum of recording scenarios, from whisper-quiet ribbon microphones to thunderously loud guitar amplifiers.
Built-in preamps typically offer 10-60 dB gain ranges, which works for most situations, though external preamps often extend beyond 70-80 dB for specialty applications. Your gain settings directly impact preamp efficiency, particularly when working with challenging sources.
Here’s what affects maximum gain performance:
- Noise floor rises as you push gain above 50-60 dB on built-in preamps
- External preamps maintain cleaner signal at higher gain levels through superior components
- Vintage ribbon microphones may require 70+ dB gain for proper levels
- Signal-to-noise optimization occurs before reaching maximum gain thresholds
When working with high-gain scenarios, microphone self-noise becomes a critical factor since it combines with preamp noise to determine your overall signal-to-noise ratio performance.
Most recording scenarios work well within 60 dB limits.
Noise Floor Differences
Maximum gain numbers only tell part of the story, because the real performance difference between built-in and external preamps becomes apparent when you examine their noise floor characteristics across different gain settings.
| Feature | Built-In Preamps | External Preamps |
|---|---|---|
| Noise Floor (Ideal) | -128 dBu | Lower, more consistent |
| High Gain Performance | Degrades considerably | Maintains quality |
| Component Quality | Cost-effective parts | Premium components |
| Power Supply Design | Basic implementation | Optimized shielding |
I’ve noticed that noise floor fluctuations become particularly problematic when you’re pushing built-in preamps to their limits, especially with low-output microphones like ribbon mics or the SM7B. External preamps maintain cleaner gain stages through superior circuit design and thermal management, which directly impacts microphone compatibility across your entire setup, making them essential for professional applications requiring consistent, low-noise performance. Dynamic microphones like the Shure SM58 benefit significantly from external preamps due to their rugged construction and vocal clarity requirements in professional recording environments. Strong DAW integration is critical for streamlining the workflow between your preamp selection and recording software, helping to reduce reliance on mouse navigation during sessions.
Signal-to-Noise Ratio Performance
Beyond maximum gain specifications, signal-to-noise ratio performance reveals the true difference between built-in and external preamps, particularly when you’re working with challenging recording scenarios that demand higher amplification levels.
When I evaluate preamp compatibility across different setups, the SNR differences become immediately apparent:
- Gain Range Impact – External preamps offer wider gain ranges with finer control, maintaining cleaner amplification at higher settings where built-in preamps struggle.
- Noise Floor Variations – Quality external preamps typically achieve -129 dB EIN compared to consumer interfaces around -110 dB, creating a substantial 19 dB performance gap.
- Measurement Context – SNR specifications vary dramatically based on input voltage and reference levels, requiring careful comparison at standardized conditions.
- Practical Applications – Poor SNR forces aggressive noise reduction techniques during post-processing, potentially compromising audio fidelity.
The input preamp converts microphone signals to standardized line levels before entering the signal chain, making this conversion quality critical for maintaining optimal signal-to-noise ratios throughout the entire recording process.
Sound Character and Tonal Coloration Options
When you’re choosing between built-in interface preamps and external units, you’ll encounter a fundamental decision between transparent, clean amplification versus colored, character-rich sound that can dramatically shape your recordings.
I’ve found that while interface preamps excel at neutral, uncolored reproduction that preserves your microphone’s natural tone, external preamps offer analog warmth through tubes, transformers, and vintage circuitry that adds harmonic richness and musical saturation to your signal chain.
Your sonic signature selection becomes vital here, since external preamps can provide everything from subtle tube warmth to aggressive transistor coloration, giving you creative control that built-in preamps simply can’t match.
This choice becomes particularly important when working with condenser microphones, which capture subtle details so effectively that they reveal both the benefits of high-quality external preamp circuitry and any limitations of basic built-in amplification stages.
Transparent Versus Colored Sound
As someone who’s spent countless hours comparing preamps in studios, I’ve learned that one of the most fundamental decisions you’ll face involves choosing between transparent and colored sound characteristics, a choice that’ll greatly impact your recording’s final character.
Transparent preamps function as a “wire with gain,” prioritizing sound purity and natural tonal balance through linear circuit designs with minimal distortion. They’re perfect for classical, jazz, and folk recordings where authenticity matters most.
Here’s what you need to evaluate:
- Transparent preamps preserve your source’s original character without adding coloration
- Colored preamps intentionally modify sound, adding warmth, body, or harmonic saturation
- Tube circuits provide varying degrees of coloration, from subtle to pronounced character enhancement
- Your genre preference should guide selection-transparency for fidelity, coloration for personality
Analog Warmth Benefits
While colored preamps certainly add their own character to recordings, the specific type of coloration you choose makes all the difference in your final sound, and that’s where analog warmth becomes particularly valuable for engineers seeking musical enhancement rather than clinical accuracy.
The analog coloration you’ll get from quality external preamps introduces pleasing harmonic distortion that enriches your recordings with subtle musical overtones, creating that coveted fullness without harshness.
These saturation effects occur naturally when signal levels approach the analog medium’s threshold, adding soft compression and smoothing transients in ways that digital processing simply can’t replicate.
You’re fundamentally getting natural dynamic control that improves your sound’s character while maintaining the harmonic complexity that makes analog recordings feel more alive and three-dimensional in your mix.
Much like how tube amplifiers deliver warm, harmonically rich sound compared to their solid-state counterparts, external analog preamps provide that same harmonic richness that enhances the musical character of your recordings.
Sonic Signature Selection
Beyond the analog warmth we’ve explored, you’ll discover that choosing the right sonic signature becomes the defining factor in shaping your recordings’ character.
I’ve found that understanding each preamp topology‘s unique voice helps you match the perfect tool to your creative vision.
Each preamp type delivers distinct sonic characteristics that dramatically affect your recordings’ final sound:
- Tube preamps add harmonic richness and subtle saturation, smoothing frequency response in the top-end while enhancing vocal presence.
- Solid-state designs provide transparent, fast transient capture with minimal coloration for critical recording situations.
- Hybrid preamps combine tube warmth with solid-state precision, offering switchable sonic signatures within one unit.
- FET preamps deliver tighter transient response compared to tubes’ rounded, compressed character.
Understanding these fundamental differences helps you select preamps that complement your microphones and sources perfectly. The optimal frequency response for capturing the full sonic spectrum ranges from 20 Hz to 20 kHz, ensuring both bass and high treble sounds are accurately reproduced. The preamp’s tonal character becomes especially important when paired with condenser microphones, which capture the full frequency spectrum and reveal every nuance of the preamp’s sonic signature.
Microphone Type Compatibility and Performance
When selecting a microphone preamp, understanding how different preamp topologies interact with various microphone types becomes essential for achieving your desired sonic character and ideal performance levels.
Tube preamps add warmth that complements condenser and ribbon microphones, enhancing richness through harmonic coloration, while solid-state designs provide transparent amplification that pairs perfectly with dynamic microphones and high-output condensers.
You’ll find that microphone compatibility extends beyond topology to practical considerations like gain requirements, where ribbon mics demand high-gain, low-noise preamps due to their delicate output levels. Vintage ribbon microphones should never be connected to phantom power as it can risk damage to their delicate components.
Features like phantom power, impedance matching, and pad switches directly impact preamp performance across different microphone types, making versatility vital when working with diverse microphone collections in your studio setup.
Condenser microphones typically require phantom power from the preamp to energize their internal electronics, making this compatibility essential for proper operation with these sensitive transducers.
Recording Scenarios Where Each Type Excels
Choosing between built-in and external microphone preamps often comes down to matching the right tool to your specific recording situation, and I’ve found that understanding these scenarios can save you both money and frustration in your studio journey.
Understanding which preamp fits your recording scenario saves both money and studio frustration down the road.
When examining preamp comparisons across different recording scenarios, the choice becomes clearer:
- Built-in preamps excel when you’re programming instrumental tracks occasionally, using condenser microphones, or need workflow simplicity with moderate gain requirements under 50 dB.
- External preamps shine for final vocals, live instruments demanding sonic detail, and situations requiring high gain beyond 50 dB where interface preamps introduce noise.
- Dynamic microphones typically benefit more from external preamp upgrades than condensers.
- Professional environments favor external units for superior noise reduction and signal integrity.
For complex setups involving multiple microphones, you can combine both approaches by routing external preamps through a mixer before connecting to your audio interface for enhanced flexibility and control.
Workflow Integration and Setup Complexity
When you’re setting up your recording chain, the path your signal takes from microphone to DAW becomes the foundation of your entire workflow. I’ve learned that understanding this routing can save you countless hours of troubleshooting later.
Your ability to monitor recordings in real-time without latency issues depends heavily on whether you choose built-in preamps with direct monitoring features, or external units that might require additional routing through your interface’s software mixer.
The flexibility you gain or lose in equipment choices extends beyond just preamps themselves, affecting everything from your cable management strategy to how easily you can swap components when different recording situations demand specific sonic characteristics.
Signal Chain Routing
Understanding your signal chain routing becomes essential when you’re deciding between built-in and external preamps, as each approach dramatically affects your workflow complexity and creative flexibility.
Your preamp selection directly influences signal path optimization, determining whether you’ll enjoy streamlined simplicity or advanced routing capabilities.
Built-in preamps offer straightforward connections-microphone to interface to computer-while external preamps require additional patching through line inputs.
Here’s what I’ve learned about routing considerations:
- Cable management: Built-in preamps minimize connections, reducing failure points and setup time.
- Gain staging: External preamps demand manual analog level control before conversion.
- Outboard integration: External units enable insertion of compressors or EQs between preamp and interface.
- Routing flexibility: External preamps allow parallel processing and multiple destination sends.
Your choice ultimately depends on whether you prioritize convenience or customization in your recording workflow.
Live Monitoring Capabilities
Three critical factors determine how effectively you’ll monitor your performance during recording sessions: latency performance, signal quality, and workflow complexity.
Built-in preamps excel at streamlined setup, requiring fewer cables and eliminating potential configuration errors that could disrupt your live performance.
However, external preamps often deliver superior signal quality through cleaner gain stages and lower noise floors, creating more pleasant monitoring experiences.
While external units introduce additional complexity through extra wiring and power requirements, they compensate with advanced monitoring techniques like multiple output mixes, footswitch controls, and direct monitor outputs that bypass digital conversion latency.
Your choice depends on whether you prioritize setup simplicity or enhanced monitoring features for professional live performance applications.
Equipment Flexibility Considerations
Although I’d love to tell you that choosing between built-in and external preamps is straightforward, the reality involves maneuvering a complex web of workflow integration decisions that’ll greatly impact your recording setup’s flexibility and daily operation.
Built-in preamps excel at simplicity, combining amplification and analog-to-digital conversion in one streamlined package, while external units offer superior tonal customization through dedicated analog circuitry and advanced controls. Your choice fundamentally affects signal routing complexity and system expandability.
Consider these workflow factors:
- Preamp integration with DAWs requires minimal configuration for built-in units versus potential latency considerations with external gear.
- Signal routing becomes increasingly complex when combining multiple external preamps compared to bundled interface solutions.
- External preamps allow system expansion beyond interface input limitations for larger recording sessions.
- Built-in solutions maintain compact portability for mobile setups while external units demand additional rack space.
Cost Analysis and Budget Considerations
When you’re weighing the financial commitment of upgrading your recording setup, the cost difference between built-in and external preamps becomes immediately apparent, with external units typically demanding several times the investment of their integrated counterparts.
Audio interfaces with built-in preamps range from $200 to $600, while quality external preamps start around several hundred dollars and climb into the thousands for professional-grade multichannel units.
Smart budgeting strategies should consider your channel requirements, since cost-per-channel efficiency improves with multichannel external preamps for simultaneous recording needs.
You’ll also need to factor in additional cables, potential interface upgrades, and power supplies for external units.
However, these long term investments deliver superior sound quality, reduced noise, and enhanced sonic character that can minimize post-production work.
When to Upgrade From Built-In to External Preamps
While upgrading from built-in to external preamps isn’t always necessary, several clear indicators signal when it’s time to make the investment, and I’ve found that recognizing these signs early can save you considerable frustration in your recording sessions.
Recognizing the right time to upgrade your preamps early can prevent countless hours of recording frustration and disappointing results.
Here are four key scenarios that warrant upgrading:
- You’re using dynamic or ribbon microphones that require more than 60 dB of gain, which exceeds most audio interfaces’ capabilities.
- You notice noise and distortion when pushing your interface preamps above 35-50 dB gain levels.
- You need advanced features like high-pass filters, PAD switches, or tonal shaping controls that built-in preamps lack.
- You’re recording final vocals or acoustic instruments where superior clarity and lower noise floors become critical.
Consider reputable preamp brands when your recording quality expectations outgrow your current audio interfaces’ limitations.
Making the Right Choice for Your Recording Needs
Since you’ve identified when an upgrade makes sense, the next step involves evaluating your specific recording requirements against the practical realities of your studio setup, budget constraints, and long-term audio goals.
Consider your microphone collection first, as external preamps dramatically improve preamp sensitivity with low-output dynamic and ribbon mics, while high-output condensers show minimal gains.
If you’re primarily recording vocals or acoustic instruments where audio clarity matters most, external units justify their expense through superior noise performance and tone-shaping capabilities.
However, built-in preamps handle digital instruments and casual recording adequately, making them sufficient for project studios focused on electronic music production rather than pristine acoustic capture requiring professional-grade signal processing.
Frequently Asked Questions
Can I Use Multiple External Preamps Simultaneously With One Audio Interface?
You can definitely run multiple external preamps with one audio interface, though your preamp setup requires careful planning.
I’ve found that ADAT connections work best for linking several units, while proper audio routing through line inputs prevents signal overload.
You’ll need to sync everything to your interface’s master clock to avoid timing issues, but modern interfaces like the Focusrite Scarlett series handle this synchronization quite well.
Do Tube Preamps Require Warm-Up Time Before Recording Sessions?
Yes, you’ll need to warm up your tube preamps before recording sessions, and I’ve learned this the hard way after capturing thin, harsh vocals during rushed sessions.
The warm up duration typically ranges from 15-30 minutes, allowing tube characteristics like warmth, smoothness, and reduced harshness to fully develop as the vacuum tubes reach their ideal operating temperature and electrical stability.
Will Using External Preamps Void My Audio Interface Warranty?
Using external preamps won’t void your audio interface warranty coverage since you’re not modifying internal components or opening the unit.
I’ve found that warranty terms focus on physical tampering, not external connections, ensuring equipment compatibility remains intact.
However, you’ll want to avoid damage from improper setup or power issues, as manufacturers won’t cover problems caused by external gear misuse or electrical faults.
Can I Bypass Built-In Preamps Completely When Using External Units?
You can’t completely bypass built-in preamps in most audio interfaces, though certain preamp configurations allow workarounds.
The audio signal typically passes through internal preamps even at unity gain, except when interfaces offer insert points or dedicated line returns.
I’ve found that while you can minimize their impact by setting gain to zero, true bypass requires specific hardware designs that most consumer interfaces simply don’t provide.
Do External Preamps Work With USB Microphones or Only XLR?
External preamps don’t work with USB microphones due to USB compatibility limitations, since USB mics have built-in preamps and ADCs with no analog inputs for external signals.
You’ll need XLR microphones to use external preamps, which then connect to audio interfaces for digital conversion.
USB mics are designed as standalone units, so adding external preamps won’t improve sound quality since there’s no way to bypass their internal circuitry.
On a final note
You’ve got the technical foundation now, and honestly, the choice isn’t as overwhelming as it initially seems. If you’re recording vocals occasionally with decent results from your audio interface, stick with what works. However, when you’re chasing that professional polish, dealing with demanding microphones, or expanding your studio setup, external preamps deliver measurable improvements in clarity, headroom, and character that’ll elevate your recordings markedly.