Professional Recording Techniques by Instrument
Professional recording success depends on matching your microphone techniques to each instrument’s unique sound characteristics-position condensers above a flute’s embouchure hole while avoiding direct airflow, place dynamics 2-4 feet from brass bells to prevent overwhelming your mix, and use the Glyn Johns three-mic approach for balanced drum recordings. String instruments require careful distance miking with large diaphragm condensers, avoiding direct f-hole alignment to prevent muddiness. Master these fundamentals and you’ll discover advanced spatial techniques that transform ordinary sessions.
We are supported by our audience. When you purchase through links on our site, we may earn an affiliate commission, at no extra cost for you. Learn more.
Notable Insights
- Position microphones 2-4 feet from brass instrument bells and near left hand area for woodwinds to capture optimal tonal balance.
- Use large diaphragm condensers for cellos/basses and small diaphragm condensers for violins, maintaining 3-7 feet distance for natural resonance.
- Apply dynamic microphones like Shure SM57 for drums and high SPL situations, utilizing overhead positioning and proper spacing techniques.
- Implement XY stereo configuration with cardioid microphones angled at 90 degrees to ensure mono compatibility and superior dynamic range.
- Maintain signal-to-noise ratios above 80 dB and record at 24-bit/48kHz sampling rates for professional sound quality standards.
Woodwind Instruments: Microphone Placement and Techniques
Most engineers underestimate the complexity of recording woodwind instruments, often placing a single microphone near the bell and wondering why the sound feels hollow or disconnected from what they’re hearing in the room.
Here’s what I’ve learned: woodwinds emit sound from multiple toneholes, not just the bell, requiring strategic microphone distance to capture this three-dimensional sonic character.
For flutes, you’ll want to aim at the embouchure hole from above, avoiding direct airflow while maintaining proper sound balance.
Clarinet and oboe benefit from positioning near the left hand area, where vital toneholes contribute greatly to articulation.
Condenser microphones excel at capturing the detailed highs and midrange that define woodwind character, though excessive closeness risks emphasizing breath noise over musical content.
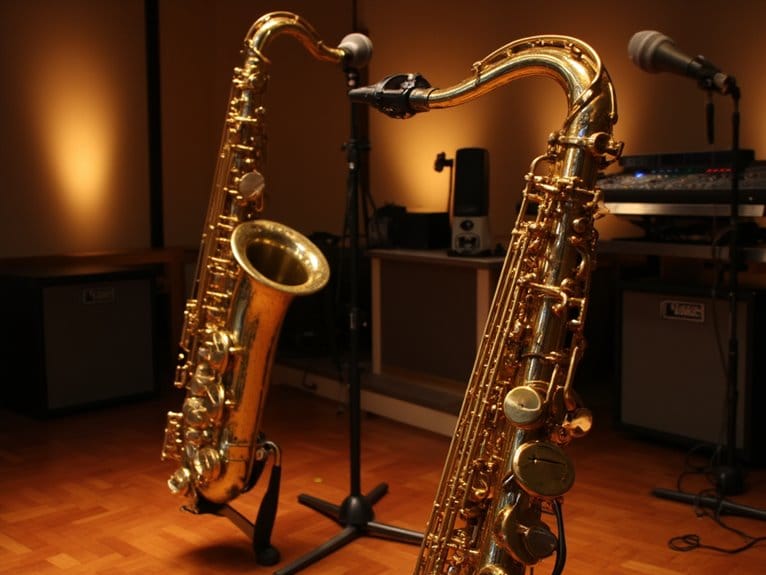
Brass Instruments: Capturing Power and Projection
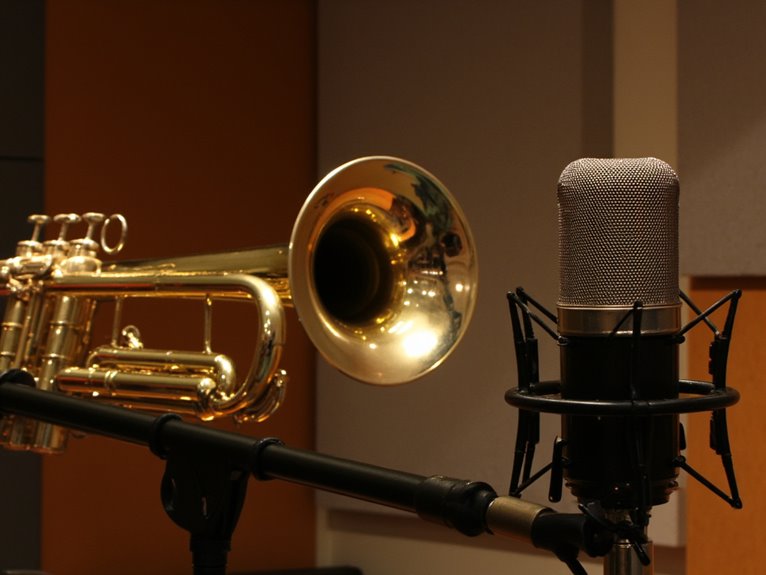
Unlike the delicate, multi-point sound emission of woodwinds, brass instruments project their power primarily through the bell, creating a focused beam of sound that can easily overwhelm your microphones if you’re not prepared for the sheer acoustic energy they produce.
These recording challenges require strategic microphone placement, positioning your mics 2-4 feet from the bell’s edge rather than directly in front.
Strategic microphone positioning 2-4 feet from the bell’s edge prevents overwhelming your recording equipment while capturing brass instruments’ full acoustic power.
I’ve learned that ribbon microphones excel at taming brass’s natural harshness while preserving musical expression, though you’ll want to blend them with condensers for complete tonal balance. Proper gain staging ensures each microphone operates at peak levels while avoiding the clipping that can occur when capturing brass instruments’ explosive transients.
Your studio setup should accommodate their massive dynamic range by capturing ambient sound-distant miking up to 20 feet maintains natural brass techniques without sacrificing the room’s acoustic contribution to the overall sonic picture.
When dealing with brass instruments’ extreme volume levels, dynamic microphones prove invaluable due to their ability to handle high sound pressure without distortion, making them essential backup options for close-miking scenarios.
Drum Kit: Multi-Microphone Setup Strategies
When you’re ready to tackle drum recording, you’ll discover that capturing a full kit presents one of audio engineering‘s most complex challenges.
It requires you to balance multiple sound sources that span the entire frequency spectrum while maintaining phase coherence across your microphone array.
Your approach to microphone placement fundamentally shapes your sonic outcome, whether you’re using a minimalist two-mic setup or extensive multi-microphone configuration.
Sound experimentation becomes essential as you discover that exact positions vary dramatically between kits, players, and session goals.
Consider these proven strategies:
- Basic Two-Mic Setup – Position one overhead for highs, one near floor tom angled toward snare
- Glyn Johns Three-Mic Technique – Overhead at 40 inches, side mic at 3 o’clock, close kick mic
- Multi-Mic Detail Setup – Individual close mics on each element for maximum mixing flexibility
When using multiple dynamic microphones simultaneously in your drum setup, proper spacing and cardioid patterns help minimize interference between channels while maintaining optimal isolation.
String Instruments: Natural Sound Capture Methods
As you shift from the rhythmic complexity of drums to string instruments, you’ll find that capturing strings requires a completely different mindset, one that prioritizes the organic interplay between bow articulation and wooden resonance over the percussive impact and timing precision that defines drum recording.
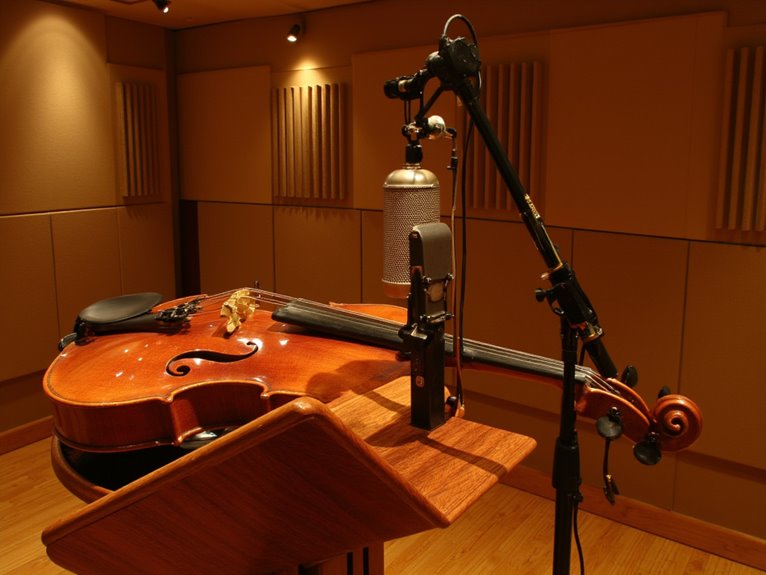
When selecting microphone types, I recommend large diaphragm condensers for cellos and basses to capture warmth, while small diaphragm condensers excel on violins for detailed clarity.
Your placement strategies should emphasize distant positioning, typically 3-7 feet from players, allowing natural blend and room character to emerge. For solo work, position cardioid condensers about three feet away, avoiding direct f-hole alignment to prevent boominess while preserving the instrument’s authentic tonal characteristics. Achieving a signal-to-noise ratio above 80 dB is essential for professional string recordings to ensure the delicate dynamics and subtle articulations cut through without unwanted background hiss.
The condenser microphones you choose will require phantom power from your audio interface or mixing console, so ensure your recording setup can provide the necessary 48V power supply for optimal performance.
Room Acoustics and Environmental Considerations
The room you’re recording in matters more than you might think, and I’ve learned the hard way that even the most expensive microphones can’t salvage a poorly treated space.
Room dimensions following golden ratios, proper acoustic treatment with absorption materials, and strategic diffuser placement create the foundation for professional recordings. Sound isolation protects against environmental factors that’ll ruin your best takes.
Here’s what I prioritize for ideal space usage:
- Bass traps in corners – Low-frequency control prevents muddy recordings that plague untreated rooms.
- Liveness management balance – Mix absorption and diffusion to avoid overly dead spaces while controlling reflections.
- Monitoring feedback elimination – Proper acoustic treatment around your listening position guarantees accurate mix decisions.
Smart environmental considerations and thoughtful room design trump expensive gear every time, making your recording space work for you rather than against you.
Specialized and Ethnic Instruments: Adaptive Approaches
Recording specialized and ethnic instruments has taught me that conventional microphone placement techniques often fall flat, requiring adaptive approaches that respect each instrument’s unique acoustic fingerprint and cultural context.
You’ll find that cultural nuances considerably influence how these instruments project sound, whether through distributed sources like finger holes and bells, or complex tonal characteristics that single-mic setups simply can’t capture effectively.
I’ve learned that instrument authenticity depends heavily on understanding each piece’s sound projection points, using small-diaphragm condensers positioned strategically to balance proximity with unwanted noise reduction.
Multi-mic techniques, particularly X/Y configurations with omnidirectional patterns, help capture the complete sonic picture while pop filters manage breath sounds near mouthpieces, ensuring you preserve the instrument’s traditional character without compromising recording quality. Essential accessories like shock mounts provide additional isolation from handling vibrations that can interfere with delicate ethnic instrument recordings.
When recording ensembles with these specialized instruments, maintaining proper signal-to-noise ratios between 70-120 dB becomes crucial for separating delicate instrumental details from background interference.
Microphone Selection for Different Instrument Types
Choosing the right microphone for each instrument becomes second nature once you understand that different transducer types excel at capturing specific sonic characteristics.
Though I’ll admit it took me years of trial and error to fully grasp these relationships. Modern microphone technology trends emphasize versatility, but acoustic treatment importance can’t be overlooked when selecting your capture method.
Here’s my practical breakdown for instrument-specific microphone selection:
- Drums and Bass: Dynamic microphones like the Shure SM57 handle high SPL without distortion, making them perfect for aggressive rock sounds and powerful low-frequency reproduction.
- Wind Instruments: Small diaphragm condensers provide the detailed frequency response needed for capturing breathy, complex tones from flutes, oboes, and bassoons.
- Acoustic Instruments: Large diaphragm condensers capture rich harmonic content in guitars and pianos, delivering warm, balanced recordings. Look for microphones with 24-bit/48kHz sampling rates to ensure professional sound quality in your recordings.
Remember that condenser microphones require phantom power to operate, typically 48V, which your audio interface or mixing console must provide for proper functionality.
Stereo Recording Techniques for Enhanced Spatial Quality
You’ll find that mastering stereo recording techniques transforms your spatial audio quality dramatically. XY microphone configurations offer precise localization through their 90-degree cardioid arrangement that minimizes phase issues while maintaining excellent mono compatibility.
The Mid-Side recording method provides unmatched flexibility, allowing you to adjust stereo width during post-production by manipulating the ratio between the forward-facing cardioid and side-facing figure-eight microphones. This gives you creative control I wish I’d understood earlier in my career.
Your polar pattern selection becomes critical here, as cardioid patterns work beautifully for controlled environments while figure-eight patterns capture more ambient information. This requires careful consideration of your room acoustics and the spatial character you’re trying to achieve.
XY Microphone Configuration
When you’re looking to achieve a stable, focused stereo image with excellent mono compatibility, the XY microphone configuration stands as one of the most reliable coincident pair techniques I’ve encountered in my years of recording.
This setup uses two cardioid microphones positioned with capsules nearly touching, angled typically at 90 degrees, though you can adjust this angle to widen your stereo field at the cost of some mono compatibility.
Here’s what makes XY configuration particularly effective:
- Superior dynamic range due to coincident placement eliminating phase cancellation issues
- Simplified microphone alignment with capsules stacked vertically or bracket-mounted for consistent positioning
- Reliable mono compatibility since level differences, rather than timing differences, create the stereo imaging
I’ve found this technique excels for acoustic instruments and ensembles where you need clear articulation.
Mid-Side Recording Method
While the XY configuration delivers solid results through its straightforward approach, I’ve found that the Mid-Side (MS) recording method offers something truly special: unprecedented control over your stereo image long after you’ve left the recording session.
The Mid Side advantages become immediately apparent when you realize you can adjust stereo width during mixing without affecting your centered content. You’ll position a cardioid mic facing your source, with a figure-8 mic perpendicular to capture ambient information.
| Component | Function | Result |
|---|---|---|
| Mid Mic | Direct sound capture | Mono-compatible center |
| Side Mic | Ambient stereo info | Adjustable width |
| MS decoding | Polarity inversion + panning | Dynamic stereo control |
This technique guarantees perfect mono compatibility while maintaining that coveted flexibility for post-production adjustments.
Polar Pattern Selection
The flexibility that MS recording provides extends beyond just stereo width control-it fundamentally depends on your microphone’s polar pattern characteristics, and I’ve learned that understanding these pickup patterns can make or break your entire stereo recording strategy.
The polar pattern benefits you’ll gain from proper selection directly influence your stereo image control, whether you’re capturing intimate acoustic performances or expansive orchestral arrangements.
Consider these essential polar pattern applications for stereo recording:
- Cardioid patterns offer excellent source isolation and room noise rejection, making them ideal for XY and ORTF configurations where you need focused directional pickup.
- Omnidirectional patterns capture natural room ambience in spaced pair techniques, though they require careful phase management.
- Supercardioid patterns provide tighter directional control in challenging acoustic environments, reducing unwanted reflections while maintaining spatial coherence.
Minimizing Noise and Unwanted Artifacts During Recording
Although I’ve spent countless hours in studios where the hum of fluorescent lights could drive you absolutely mad, I’ve learned that minimizing noise and unwanted artifacts during recording isn’t just about having expensive gear-it’s about understanding how sound behaves in your environment and making smart decisions before you ever hit the record button.
Your recording environment requires strategic soundproofing strategies, from installing an acoustic ceiling to managing sound reflection patterns that compromise audio clarity. I’ve discovered that effective isolation techniques, like positioning microphones away from HVAC units and using shock mounts, dramatically reduce ambient noise pickup better than any post-production fix. Proper room treatment or artificial reverb should be added to prevent a dry sound when using close miking techniques that provide sonic detail but can increase sound pressure levels.
Proper noise masking through careful microphone selection and placement creates cleaner recordings from the start. For handheld recording situations, maintaining a relaxed grip while holding both the microphone and cable with the same hand significantly reduces handling noise caused by cable movement and mechanical vibrations.
Frequently Asked Questions
How Do I Prevent Microphone Cables From Creating Interference During Recording Sessions?
You’ll want to use high-quality microphone cables with braided copper cable shielding, which I’ve found provides superior noise rejection compared to aluminum alternatives.
Keep your cables short, avoid coiling excess length while plugged in, and route them away from power cables with vertical crossings when necessary.
Guarantee proper signal ground connections through your audio interface, and I always recommend using ground lift switches on DI boxes when dealing with problematic ground loops that create unwanted hum.
What Digital Audio Formats Provide the Best Quality for Professional Instrument Recordings?
You’ll want WAV format or AIFF format for professional recordings since they’re uncompressed and preserve every detail I’ve captured during sessions.
I typically use 24-bit depth with 48kHz sample rates for high resolution audio that maintains dynamic range.
FLAC works too if you need smaller files without quality loss, though I’ll admit WAV remains my go-to standard since it’s universally compatible across all professional audio equipment.
How Should I Set Recording Levels to Avoid Clipping With Dynamic Instruments?
You’ll want to establish proper gain structure by setting peaks around -6 dBFS, maintaining average levels near -18 dBFS RMS to preserve dynamic range.
I’ve learned that adjusting input gain at the preamp stage, not fader levels, prevents clipping while accommodating sudden transients from drums or brass instruments.
Keep meters in green zones with occasional yellow peaks, never red, since digital clipping can’t be recovered during post-production.
What Backup Procedures Should I Follow During Important Recording Sessions?
You’ll need thorough backup checklists that guarantee file redundancy throughout critical sessions, because I’ve learned that real-time backup protocols prevent catastrophic data loss when systems crash unexpectedly.
Create multiple copies on separate drives immediately after each take, implement automated backup software that captures incremental versions, and maintain detailed logs documenting storage locations, file versions, and backup timestamps for efficient recovery tracking.
How Do I Synchronize Multiple Recording Devices When Capturing Large Ensembles?
You’ll need timecode synchronization for your multi device setup, starting with one master clock generator that feeds timing signals to all recorders and cameras.
I’ve found that jamming timecode into each device before recording, then monitoring for drift throughout longer sessions, prevents sync nightmares later.
Record a clear count-in pulse, label everything consistently, and your post-production workflow becomes considerably smoother when aligning multiple audio sources.
On a final note
You’ve now got the essential recording techniques that’ll transform your instrument captures from amateur to professional quality. Whether you’re positioning mics on a delicate violin, managing the explosive dynamics of brass sections, or crafting that perfect drum sound with multiple microphones, these methods will serve you well. Remember, I’ve learned that room acoustics matter just as much as your gear choices, so don’t overlook your recording environment when chasing that pristine sound.