Recording Chain Optimization: From Input to Output
Recording chain optimization requires you to carefully manage signal flow from microphone selection through final output, starting with proper preamp gain structure that maintains 30-60 dB of clean amplification while avoiding overloads. You’ll need cardioid polar patterns for source isolation, strategic high-pass filtering between 80-120Hz to eliminate rumble, and precise threshold settings for compression ratios of 2:1 to 4:1 on vocals. The techniques below reveal exactly how each component affects your sound quality.
We are supported by our audience. When you purchase through links on our site, we may earn an affiliate commission, at no extra cost for you. Learn more.
Notable Insights
- Choose microphones based on application: dynamic mics for durability and noise rejection, condensers for detailed vocal capture and sensitivity.
- Set proper gain structure by calibrating master faders first, then adjusting channel faders near unity to prevent signal overloads.
- Implement noise reduction through physical barriers like acoustic panels and electronic gates with precise threshold and timing settings.
- Apply high-pass filtering between 80-120Hz for vocals to eliminate rumble while preserving essential fundamental frequencies.
- Use frequency-specific compression and multi-band processing to control problematic peaks without affecting the entire frequency spectrum.
Microphone Selection and Placement Fundamentals
When I first started building recording chains, I quickly learned that microphone selection isn’t just about grabbing the most expensive condenser mic on the shelf—it’s about understanding how different microphone types, polar patterns, and placement strategies work together to capture your sound with precision and character.
Dynamic mics excel in live settings due to their durability and ability to handle high sound pressure levels, while large diaphragm condensers deliver the rich, detailed vocal reproduction that makes podcasters sound professional. However, condenser microphones generate more self-noise than dynamic microphones due to their active electronics, which is an important consideration when recording quiet sources.
Your miking techniques considerably impact the final result, with cardioid patterns providing excellent source isolation and proximity effect adding warmth when you position the capsule closer to your source.
Smart microphone upgrades should prioritize matching your specific application rather than chasing specs.
While USB microphones offer plug-and-play convenience for solo podcasting and home office setups, XLR microphones provide superior signal chain control and scalability for professional recording environments where audio quality and future expansion capabilities are paramount.
Pre-Amplification and Signal Gain Structure
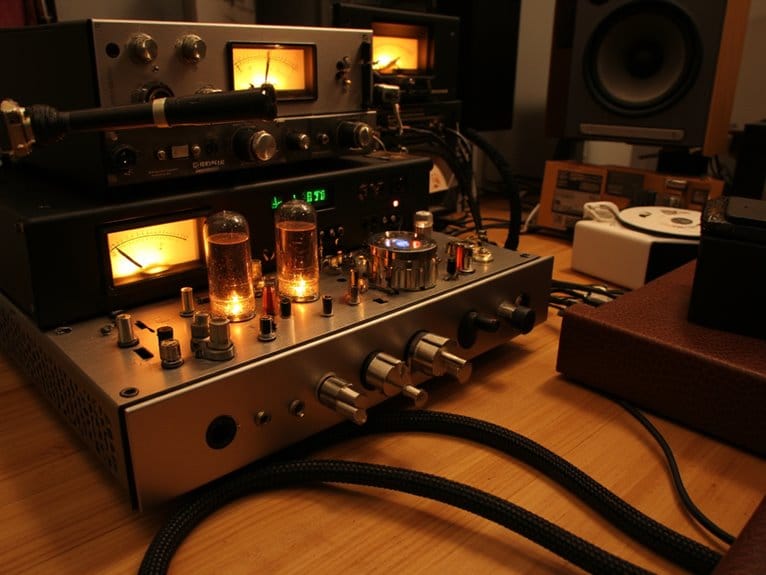
Once you’ve nailed your microphone choice and placement, the signal that emerges from your mic is barely a whisper—typically just a few millivolts that won’t drive anything meaningful in your recording chain.
That’s where your preamp becomes absolutely critical, converting those microscopic signals into robust line levels that’ll properly feed your interface, mixer, or recorder.
Your preamp transforms those feeble microphone signals into the powerhouse line levels your recording equipment actually needs to function properly.
I’ve learned that proper preamp calibration methods start with setting your master faders around their sweet spot, then approaching channel faders near unity gain while adjusting preamp gain as your primary level control.
Smart gain distribution strategies involve balancing amplification across multiple stages rather than overloading any single point. Modern audio interfaces often feature visual indicators like Gain Halos that help monitor recording levels effectively during this gain staging process.
To put this amplification requirement in perspective, line-level signals are approximately 1,000 times stronger than mic-level signals, which explains why preamps need to deliver substantial gain—typically 30-60 dB of clean amplification.
Source-Level Noise Reduction Techniques
When you’re tackling source-level noise reduction, you’ll find that physical barriers and electronic gates represent your first line of defense against unwanted audio contamination.
Though I’ve learned the hard way that implementing them requires more finesse than simply cranking up settings.
Physical barrier implementation involves strategically placing acoustic panels, isolation shields, and room treatments between your source and microphone, creating measurable improvements in your signal-to-noise ratio of 6-12 dB depending on frequency range and barrier density.
Electronic gate configuration works alongside these physical solutions by establishing precise threshold levels, attack times of 0.1-10 milliseconds, and release parameters that automatically silence background noise during quiet passages.
This ensures your recording chain maintains peak clarity from the very first stage.
Dynamic microphones like the Shure SM7B excel in challenging environments because they naturally reject ambient noise and handle high sound pressure levels without requiring extensive post-processing adjustments.
Quality headphone amplifiers with proper impedance matching allow you to monitor these noise reduction techniques accurately, as low-impedance headphones require around 1W while high-impedance models often need 1.5W-2W for optimal performance without distortion.
Physical Barrier Implementation
Since recording environments rarely offer perfect acoustic conditions straight out of the box, I’ve found that implementing physical barriers represents your most fundamental line of defense against unwanted noise infiltration and sound leakage.
Your acoustic insulation strategy should encompass multiple layers, combining mass-loaded vinyl for blocking transmission with acoustic foam for absorbing reflections, while bass traps handle those problematic low frequencies that standard panels miss.
Effective noise reduction through physical barriers requires:
- Sealing gaps with acoustic caulk and rubber gaskets around doors, windows, and electrical outlets.
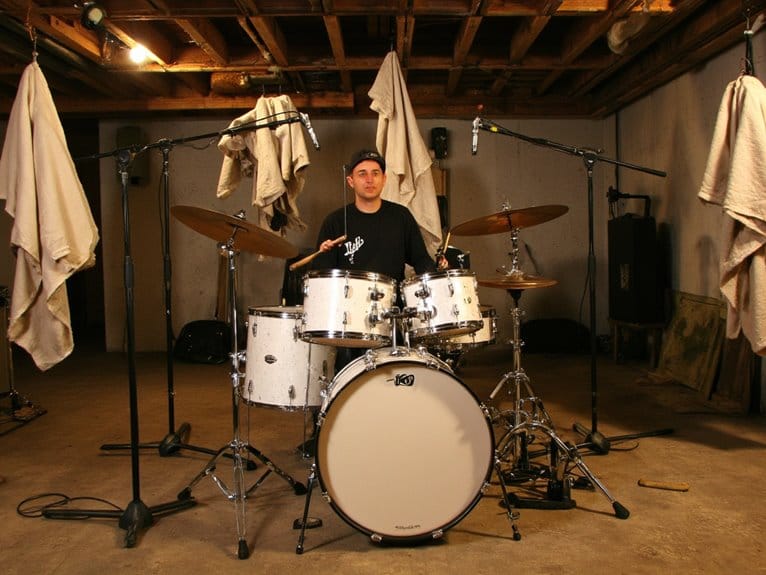
- Installing soundproof curtains or blankets as temporary solutions for budget-conscious setups.
- Positioning diffusion panels strategically to scatter sound waves and minimize standing wave formation.
- Creating isolation chambers using multiple barrier types for critical recording applications.
Additionally, maintaining proper cable shielding throughout your recording chain helps minimize electromagnetic interference that can compromise your carefully constructed acoustic environment. Professional microphone connections with balanced cables provide enhanced protection against EMI and maintain signal integrity over longer distances within your treated space.
Electronic Gate Configuration
While physical barriers establish your foundational defense against environmental noise, electronic noise gates offer precision control at the source level, allowing you to dynamically eliminate unwanted sounds before they contaminate your recording chain.
| Parameter | Purpose |
|---|---|
| Threshold Balance | Sets trigger point for gate activation |
| Gate Attack | Controls opening speed to avoid artifacts |
| Release Time | Manages natural-sounding closure shifts |
| Hold Duration | Maintains gate state after signal drops |
| Dynamic Range | Determines attenuation strength when closed |
I’ve found that proper threshold balance requires at least 15 dB noise ratio separation for clean gating artifacts-free operation. Your gate attack and release time settings prevent unnatural signal shaping, while multi band gating targets specific frequency ranges. Beyond basic cleanup, creative applications include rhythmic patterns and texture control, transforming gates from simple noise reduction tools into expressive instruments for dynamic sound design.
Polar Pattern Optimization for Vocal Capture
Although microphone polar patterns might seem like technical jargon that only engineers need to worry about, they’re actually one of the most practical decisions you’ll make in your vocal chain. They directly affect how much room noise, reflections, and unwanted sound bleeds into your recordings.
Your polar pattern choice fundamentally shapes microphone acoustics and vocal modulation capture. Here’s what I’ve learned works best:
- Cardioid patterns deliver exceptional front-facing sensitivity while rejecting rear noise, making them perfect for home studios with minimal acoustic treatment.
- Supercardioid configurations provide narrower pickup angles, increasing isolation in noisy environments but requiring more precise placement.
- Omnidirectional options capture natural room ambiance when you want spacious, atmospheric vocal recordings.
- Multi-pattern microphones offer flexibility but may introduce slight coloration compared to dedicated single-diaphragm designs.
The type of microphone you choose matters significantly, as condenser microphones excel at capturing vocal nuances and breath details that dynamic mics might miss due to their superior sensitivity and broader frequency response.
Cardioid microphones provide about 20 dB rear rejection, which significantly reduces feedback from stage monitors and ambient noise during vocal recordings.
Physical Filtering With Pop Shields and Windscreens
After optimizing your microphone’s polar pattern, you’ll need to address the physical barriers between your voice and the capsule, which means understanding how pop filter placement and windscreen materials directly impact your recording quality.
I’ve found that the distance you position your pop shield from both the microphone and your mouth creates a critical acoustic buffer zone, typically requiring 4-6 inches from the mic capsule and 6-8 inches from your lips to effectively diffuse plosive air bursts without compromising frequency response.
Your choice between dual-layer nylon mesh, single-layer fabric, or metal screening materials will determine not only the level of plosive protection you achieve, but also the subtle tonal characteristics that filter through to your final recording.
Pop Filter Placement Techniques
How exactly should you position that pop filter to achieve professional-sounding vocals without sacrificing clarity or introducing unwanted artifacts into your recordings?
I’ve found that mastering pop filter distance and pop filter angle makes the difference between amateur and professional-sounding recordings.
The key lies in understanding how airflow travels from your vocalist’s mouth to your microphone’s diaphragm.
Here’s my tried-and-tested approach:
- Set ideal distances – Position the filter 2-4 inches from your mic capsule, with 6-8 inches between vocalist and filter.
- Angle strategically – Keep the filter parallel to your microphone diaphragm while tilting slightly to catch unexpected airflow.
- Secure mounting – Tighten clamps firmly and use flexible goosenecks for precise adjustments during sessions.
- Monitor dynamically – Listen through headphones and adjust placement based on vocal power and singing style.
Windscreen Material Selection
Which windscreen material will give you the cleanest recordings without sacrificing the natural character of your microphone?
Your windscreen materials analysis starts with understanding that foam windscreens work perfectly for indoor recordings, providing 15-20 dB noise reduction with minimal high-frequency loss.
However, when outdoor recording considerations come into play, you’ll need windjammers—synthetic fur over foam—which deliver superior 25 dB wind protection in speeds up to 6 m/s.
I’ve found that static air chambers offer the best wind protection, though they require audio adjustments due to acoustic changes.
For budget-conscious creators, DIY materials like spandex and sports mesh provide decent wind dispersion with only 0.7-1 dB high-frequency cut, making them surprisingly effective alternatives.
High-Pass Filtering for Low-End Management
Every audio engineer I’ve worked with has grappled with unwanted low-frequency rumble, and I’ll admit that learning to properly manage this issue took me longer than I’d care to remember.
High pass filter applications become essential when you’re dealing with environmental noise, handling vibrations, or multi-mic setups that create muddy low-end buildup.
Your cutoff frequency settings typically range from 80Hz to 150Hz for vocals and instruments, though I’ve found these parameters depend heavily on your specific source material and recording environment:
- Set vocals between 80-120Hz to eliminate rumble without thinning the voice
- Apply 100-150Hz cuts on guitars to prevent bass frequency masking
- Use gentler 6dB/octave slopes to maintain natural tonal characteristics
- Monitor for over-filtering that removes essential fundamental frequencies
Presence Enhancement Through Mid-Range Boosting
While high-pass filtering cleans up the bottom end of your mix, I’ve discovered that the real magic happens when you start strategically boosting the midrange frequencies, particularly in that critical 2-6 kHz presence zone where vocals and lead instruments truly come alive.
Your approach to midrange clarity depends heavily on frequency awareness and precise presence control, since this busy spectral region contains most fundamental harmonics that define tonal balance.
I’ve found that gentle boosts around 3-4 kHz dramatically improve detailed articulation without introducing harshness, while dynamic enhancement techniques like harmonic exciters add warmth and harmonic richness that makes instruments cut through dense arrangements.
The key to maintaining mix transparency lies in avoiding overuse—subtle moves create engaging results, while aggressive boosting quickly leads to listener fatigue and compromised sonic quality. Modern mixers often incorporate built-in DSP effects that can enhance these presence frequencies with professional-grade processing capabilities.
Professional mixing requires understanding that frequency masking between instruments can compromise clarity, making strategic EQ decisions essential for preventing competing elements from occupying the same spectral space.
Corrective EQ for Problem Frequency Removal
After you’ve enhanced presence in the midrange, the next crucial step involves identifying and surgically removing problematic frequencies that muddy your mix, mask important elements, or create listener fatigue through harsh resonances.
I’ve learned that surgical EQ techniques require methodical frequency spectrum analysis, starting with narrow bandwidth sweeps to isolate unwanted resonances before making precise cuts.
Here’s my proven process for effective corrective EQ:
- Sweep with narrow bands to identify problematic frequencies through soloing
- Apply high-pass filters to eliminate low-end rumble and unnecessary sub-bass content
- Target specific problem areas like boxiness (200-300 Hz) and nasal tones (500-700 Hz)
- Cut before boosting to preserve headroom and maintain natural tonal balance
This subtractive approach creates space for important mix elements while eliminating harshness. Understanding your frequency response characteristics is essential, as flat response provides transparency while targeted cuts preserve the natural tonal balance across the 20Hz-20kHz spectrum.
Dynamic EQ and Multi-Band Processing
When you’re working with dynamic EQ and multi-band processing in your recording chain, I’ve found that mastering frequency-specific compression techniques becomes essential for addressing those problematic peaks that only show up during certain vocal passages or instrumental hits.
You’ll want to pay close attention to your multi-band attack settings, since each frequency range responds differently to dynamic processing, and what works perfectly for controlling harsh sibilants around 6-8kHz might completely destroy the natural attack of your kick drum in the low end.
The real magic happens when you dial in your dynamic response control properly, allowing each band to react independently to signal levels while maintaining the musical character of your source material. Implementing zero-latency monitoring during this process prevents timing disruptions that could affect your real-time adjustments and overall performance quality.
Professional audio interfaces with their superior 24-bit/192kHz digital conversion capabilities ensure that your multi-band processing maintains maximum fidelity throughout the entire signal path, preserving the subtle nuances that make dynamic EQ adjustments truly transparent.
Frequency-Specific Compression Techniques
Three distinct approaches dominate frequency-specific compression in modern recording chains, each offering unique advantages for controlling dynamics across targeted frequency ranges.
I’ve found that mastering these compression nuances markedly improves your mixing strategies, though it took me years to understand their subtle differences.
Essential Frequency-Specific Compression Techniques:
- De-essing for vocal clarity – Target 3-8 kHz sibilant frequencies using specialized compressors with precise frequency targeting.
- Multi-band splitting for mastering – Apply different compression ratios across low, mid, and high frequencies for enhanced dynamic control.
- Key filtering for selective triggering – Use side-chain filters to activate compression based on specific frequency content while processing the full spectrum.
- Spectral analysis integration – Employ spectrum analyzers to identify problematic frequencies before applying sound shaping and gain restoration techniques.
Multi-Band Attack Settings
While frequency-specific compression provides excellent dynamic control, mastering multi-band attack settings requires understanding how different frequency ranges respond to compression timing, and I’ve discovered that even subtle adjustments can dramatically alter your mix’s punch and clarity.
Your attack time strategies should vary dramatically across frequency bands, with fast settings in low frequencies tightening drum impacts while slower mid-range times preserve vocal naturalness.
I’ve learned that effective frequency band management means adjusting attack times based on each band’s musical content, using aggressive low-frequency compression to control boom without sacrificing high-end sparkle.
You’ll find that narrowing bandwidth reduces artifacts, while automating thresholds guarantees consistency throughout your track’s dynamic sections.
Dynamic Response Control
Although static EQ has served producers well for decades, I’ve found that dynamic EQ represents one of the most significant advances in frequency control, combining the surgical precision of traditional filtering with the adaptive intelligence of compressor-style processing.
You’ll discover that dynamic response control revolutionizes how you approach problematic frequencies, applying corrections only when signal levels exceed your defined thresholds, which preserves natural dynamics while maintaining superior tonal balance preservation throughout your mixes.
Here’s how dynamic EQ enhances your recording chain:
- Threshold-based activation guarantees frequency adjustments occur only when needed, preventing over-processing
- Real-time adaptation responds to signal fluctuations, maintaining consistent dynamic range management
- Surgical precision targets specific resonances without affecting surrounding frequencies
- Transparent operation preserves musical integrity while controlling problematic peaks automatically
Creative Frequency Shaping for Vocal Character
When I first discovered that vocal character isn’t just about the singer’s natural tone but how you sculpt frequencies during recording, it completely changed my approach to capturing performances that cut through dense mixes with unique personality.
Your vocal texturing techniques should focus on strategic EQ sweeping across the spectrum, creating movement that keeps listeners engaged. I’ve found that automated narrow filters, combined with frequency modulation effects, can transform ordinary vocals into enthralling performances.
| Technique | Frequency Range | Effect | Risk |
|---|---|---|---|
| High Shelf Boost | Above 12 kHz | Airiness, openness | Sibilance issues |
| Presence Enhancement | Around 5 kHz | Vocal clarity | Harshness |
| Midrange Tweaking | 400-800 Hz | Balanced presence | Boxy sound |
| Low-End Boost | 50-150 Hz | Warmth, depth | Muddiness |
Dynamic EQ targeting only the loudest signal parts gives you surgical control without compromising natural vocal dynamics.
Compression Ratio and Threshold Configuration
When you’re configuring compression settings, the relationship between ratio and threshold becomes the foundation that determines whether your vocal sits naturally in the mix or sounds artificially processed.
I’ve found that starting with moderate ratio selections around 3:1 to 4:1 gives you enough control without sacrificing the natural dynamics that keep vocals engaging, while threshold setting techniques should target those peaks that poke out uncomfortably without catching every subtle inflection.
Your attack and release timing will then work together with these core settings to shape how aggressively the compressor responds to transients, creating either smooth, transparent control or more obvious pumping effects depending on your artistic vision.
Ratio Selection Guidelines
Since compression ratio fundamentally determines how aggressively your compressor responds once a signal crosses the threshold, I’ve found that understanding this relationship becomes the cornerstone of achieving professional-sounding dynamics control.
Through years of ratio experimentation, I’ve discovered that compression balancing requires matching your ratio choice to both your source material and musical context.
Here’s my proven approach for ratio selection:
- Start conservative with 2:1-3:1 ratios for vocals and acoustic instruments, preserving their natural expression while smoothing problematic peaks.
- Use medium ratios (4:1-5:1) for drums and bass, providing controlled punch without sacrificing impact or presence in your mix.
- Apply aggressive ratios (6:1+) sparingly for hip-hop or trap genres, where heavily processed sounds serve the artistic vision.
- Monitor constantly using both meters and critical listening, adjusting threshold settings to complement your chosen ratio for ideal musical balance.
Threshold Setting Techniques
Three critical elements determine your compression’s effectiveness, but I’ve learned that threshold placement often makes or breaks the entire dynamic control equation. Your threshold adjustment strategies should begin with positioning the threshold just below your signal’s average peaks, creating a baseline for subsequent fine-tuning across different audio sources and musical contexts.
Effective dynamic control techniques require understanding how threshold interacts with your chosen ratio settings, as these parameters work in tandem to shape your audio’s character.
I’ve found that vocals typically benefit from moderate threshold placement with 2:1 to 4:1 ratios, while drums often need lower thresholds to capture transients effectively.
Attack Release Timing
The relationship between attack and release timing transforms your compression from a basic dynamic control tool into a sophisticated audio shaping instrument, and I’ve discovered that mastering these parameters requires understanding how they interact with your previously established threshold and ratio settings.
Attack envelope shaping determines whether you preserve natural transients or create controlled peaks, while release smoothing techniques maintain musical flow between compressed sections.
Here’s my proven approach for optimizing these critical timing parameters:
- Match attack times to transient character – Use 1-10ms for sharp percussion, 10-30ms for vocals to preserve natural punch.
- Sync release to tempo – Calculate millisecond intervals matching your song’s BPM for rhythmic coherence.
- Monitor gain reduction meters – Guarantee needle returns near zero between transients to prevent pumping artifacts.
- A/B test continuously – Compare processed versus unprocessed signals to maintain musicality while achieving control.
Attack and Release Time Optimization
Mastering compression’s attack and release controls transforms your recordings from amateur-sounding projects into polished, professional tracks that compete with commercial releases.
I’ve learned that transient control begins with understanding how fast attack times between 10-30 ms tighten percussive elements while preserving their punch, whereas slower settings around 30-50 ms maintain natural character on vocals and bass.
Your dynamic range benefits when you match release times to your song’s tempo—fast releases enhance presence in aggressive genres, while slower settings smooth ballads without flattening them.
You’ll avoid pumping artifacts by experimenting within these ranges, adjusting based on each instrument’s mix role, and monitoring for breathing effects that signal overly aggressive timing settings.
When monitoring your compressed signals through powered PA speakers, ensure adequate wattage and clear frequency response to accurately assess your compression choices across all audio frequencies during the mix process.
Parallel Compression for Enhanced Body and Sustain
While aggressive compression can crush your mix’s natural dynamics, I’ve discovered that parallel compression offers the perfect solution by blending heavily compressed signals with your original dry tracks, creating fuller body and enhanced sustain without sacrificing the transient punch that makes recordings feel alive.
This upward compression technique preserves your dynamic range while adding density through careful audio layering, making it invaluable for mixing cohesion across multiple elements.
Essential parallel compression workflow:
- Route signals to auxiliary buses with aggressive compressor settings using high ratios and fast attack/release times
- Apply threshold adjustment to achieve 15-20 dB gain reduction on the compressed channel
- Blend gradually starting with the compressed track low in the mix
- Monitor phase alignment to prevent comb filtering between parallel paths
These mixing techniques deliver professional-sounding results without the lifeless feel of over-compression. Quality preamps can significantly enhance the fidelity of your parallel compression chains by providing cleaner gain staging and better signal-to-noise ratios throughout your recording chain. When working with dynamic microphones like the Shure SM7B, ensure your audio interface provides adequate clean gain of at least 60dB to maintain optimal signal quality before compression processing.
De-essing Frequency Targeting and Threshold Control
Building on those dynamics-preserving techniques, I’ve found that controlling harsh sibilance requires the same surgical precision, though here we’re targeting specific frequency ranges rather than broad dynamic control.
Effective sibilance frequency identification typically focuses on the 5–8 kHz range, where most problematic “esses” live, though I’ll always use spectrum analyzers to pinpoint exact frequencies rather than guessing.
Your threshold adjustment techniques become critical here—set too low and you’ll dull the entire vocal, too high and harsh sibilants slip through untouched.
I prefer using de-essers with listen modes to solo the targeted frequencies, then adjusting thresholds gradually while monitoring for that sweet spot between natural speech clarity and harshness elimination, often combining automated processing with manual gain reduction for truly transparent results.
Spatial Processing With Reverb and Delay Integration
Once you’ve tamed those harsh frequencies with surgical de-essing, the next frontier involves crafting dimensional space around your vocals through strategic reverb and delay integration, where I’ve discovered that the magic happens not in individual effect settings but in how these time-based processors interact to create convincing acoustic environments.
The real magic happens not in individual effect settings but in how time-based processors interact to create convincing acoustic environments.
Here’s my approach to spatial processing mastery:
- Match delay timing to your song’s BPM – synchronizing echo feedback creates musical cohesion rather than rhythmic chaos.
- Layer different reverb types strategically – combining room reverb for intimacy with hall reverb for grandeur adds dimensional complexity.
- Use shared reverb sends across multiple tracks – this creates essential audio glue that unifies your mix’s spatial footprint.
- Experiment with spatial layering through stereo panning – phase-flipped delays positioned across the stereo field enhance perceived width and depth dramatically.
Frequently Asked Questions
How Do I Optimize My Recording Chain for Different Vocal Styles and Genres?
Start by matching your mic choice to the vocal technique—dynamic mics handle aggressive rock vocals, while condensers capture delicate jazz nuances.
I’ve found that understanding genre characteristics drives every decision: hip-hop needs low-end emphasis and tight compression, classical requires minimal processing to preserve natural resonance, and pop demands bright EQ with controlled dynamics.
Adjust your entire chain accordingly.
What’s the Ideal Order for Processing Plugins in a Vocal Recording Chain?
Your vocal plugin order should start with corrective EQ to clean unwanted frequencies, followed by pitch correction and compression for dynamics control.
I typically place de-essing after compression, then add saturation for character.
Your second-stage EQ settings come next for tonal shaping, with reverb and delay as final spatial effects.
This sequence prevents each processor from negatively affecting subsequent plugins’ performance.
How Do I Maintain Consistent Vocal Levels Across Multiple Recording Sessions?
You’ll need to control your recording environment meticulously, keeping room temperature, mic placement, and preamp settings identical across sessions.
I document every technical parameter, including input gain and compression settings, then use consistent vocal dynamics by having singers warm up similarly each time.
Automation during mixing helps me level out any remaining inconsistencies, though proper tracking technique prevents most issues upfront.
What Are the Best Practices for Vocal Chain Automation During Mixing?
I’ve found that automating your vocal chain requires strategic timing, starting with volume automation before touching vocal effects or dynamic processing.
You’ll want to automate compressor thresholds during intense sections, adjust reverb sends between verses and choruses, and fine-tune de-esser sensitivity for sibilant phrases.
I typically save pitch correction automation for last, ensuring natural vibrato remains intact while maintaining consistent tone throughout your mix.
How Do I Troubleshoot Latency Issues in Real-Time Vocal Recording Chains?
When troubleshooting vocal recording delays, you’ll need to systematically identify latency sources by checking your audio interface drivers first, then examining buffer settings and active plugins.
I’ve found that testing different monitoring options, like direct hardware monitoring versus software monitoring, quickly reveals whether the bottleneck exists in your interface or DAW processing chain, allowing you to pinpoint exactly where those milliseconds are accumulating.
On a final note
You’ve now got the complete roadmap from microphone capsule to final output, and honestly, it’s a lot to digest initially. Don’t try implementing everything simultaneously—that’s a recipe for analysis paralysis, trust me. Start with proper gain staging and mic placement, since these fundamentals affect everything downstream. Once you’ve mastered those basics, gradually incorporate the advanced techniques like parallel compression and spatial processing to develop your signature sound.

