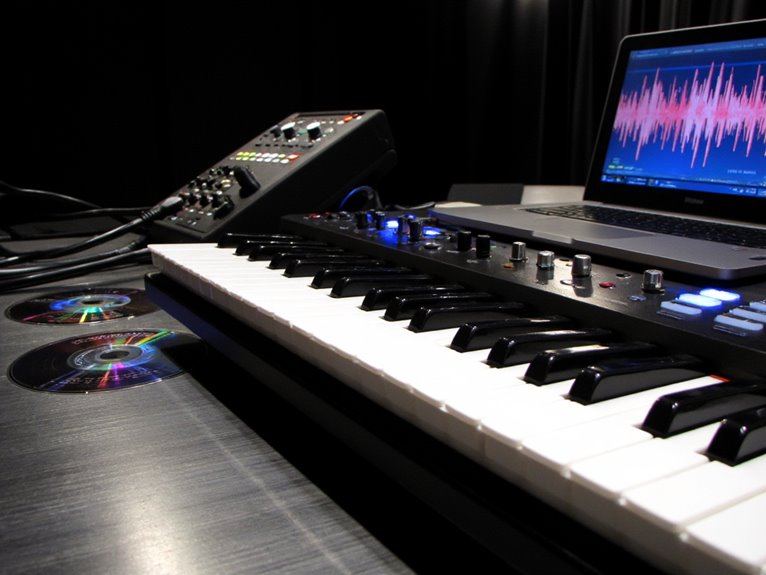
Complete MIDI Setup Guide: Controllers, Interfaces, and Connections
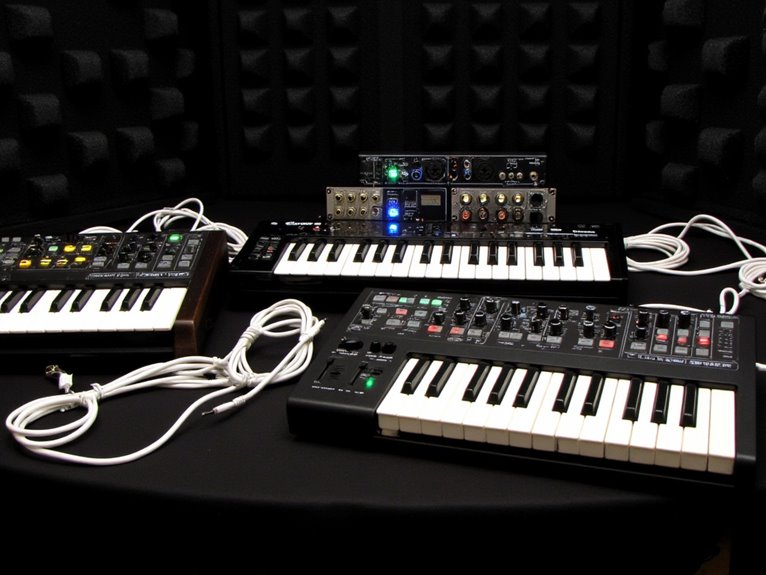
You’ll need to choose between 25-key compact controllers for portability or 88-key models for full expression, then decide on weighted keys for piano feel or unweighted for electronic music speed. Connect via USB for simple plug-and-play setups or 5-pin DIN for professional studio reliability, ensuring your DAW supports Mackie Control Protocol for seamless integration. Install manufacturer drivers, verify device recognition in your system settings, and map essential controls like knobs to EQ and faders to volume first-though mastering advanced features requires understanding the deeper technical considerations.
We are supported by our audience. When you purchase through links on our site, we may earn an affiliate commission, at no extra cost for you. Learn more.
Notable Insights
- Choose MIDI controller size and key action based on your needs: 25-key for portability, 88-key for expression, weighted for piano technique.
- Connect via USB MIDI for convenience, 5-pin DIN for professional reliability, or CV outputs for modular synthesizer integration.
- Ensure DAW compatibility through Mackie Control Protocol, dedicated controller scripts, or MIDI Learn functionality for seamless integration.
- Install manufacturer drivers with administrator privileges and verify device recognition in Device Manager before configuring your DAW.
- Map frequently-used parameters first, group controls logically by function, and save configurations to optimize your MIDI workflow.
Understanding MIDI Controller Types and Keyboard Sizes
Choosing the right MIDI controller size becomes one of your first critical decisions when building a music production setup, and honestly, I’ve seen more producers struggle with this choice than they’d like to admit.
MIDI controller types range from compact 25-key units weighing under 1 kg to full 88-key models exceeding 6 kg, each serving distinct player preferences and performance needs.
Compact controllers with mini keys excel in portability options while sacrificing some user experience, whereas larger keyboard layouts provide superior expressive control through full-size keys and weighted action.
Mini keys prioritize portability over playing comfort, while full-size weighted keys deliver maximum expressive control for serious production work.
Your accessibility features depend heavily on hand size and playing style, with 49-key models offering the sweet spot between two-handed capability and manageable footprint for most home studios.
Key Action Options: Weighted Vs Semi-Weighted Vs Unweighted
When you’re selecting a MIDI controller, the key action type will dramatically influence your playing experience, practice sessions, and overall musical development in ways that honestly surprised me during my first decade of production work. These key action comparisons boil down to three distinct categories, each serving different musical needs and player preferences.
| Feature | Weighted Keys | Semi-Weighted Keys | Unweighted Keys |
|---|---|---|---|
| Resistance Level | Heavy, piano-like | Moderate spring action | Light, minimal force |
| Best For | Classical, piano technique | Multi-genre versatility | Electronic music, speed |
| Fatigue Factor | Higher during extended play | Balanced comfort | Minimal finger strain |
| Price Range | Premium controllers | Mid-range options | Entry-level affordable |
Fully weighted keys with hammer action simulate acoustic piano mechanics and resistance, providing the most authentic experience for serious pianists. Most professional controllers feature velocity-sensitive keys that respond to your playing dynamics, allowing for expressive performances regardless of the key action type you choose. Choosing key types depends entirely on your musical goals and playing style preferences.
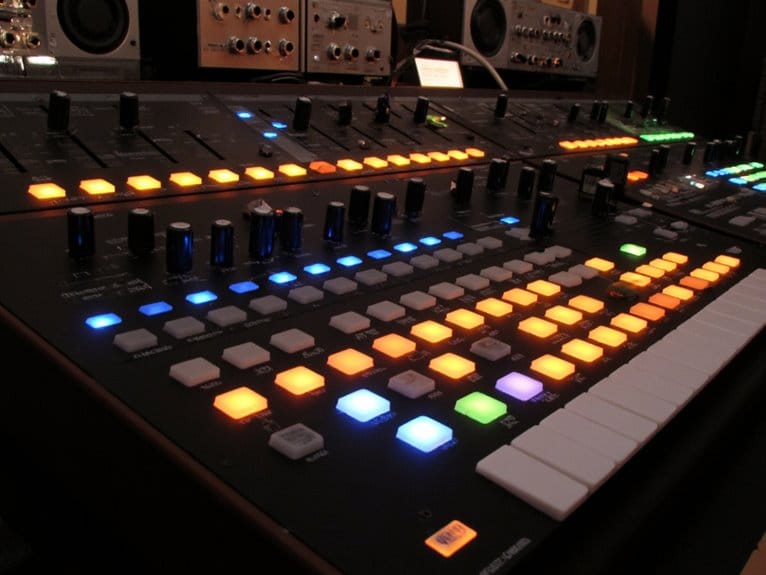
Essential Control Features: Pads, Knobs, and Faders
Beyond key action preferences, the control surface elements-pads, knobs, and faders-will determine how efficiently you’ll interact with your DAW and whether your creative workflow feels natural or frustratingly clunky.
Pad functionality centers on velocity-sensitive triggering, typically offering 8-16 pads with backlighting for performance feedback during finger drumming sessions.
Velocity-sensitive pads with backlighting provide essential performance feedback for responsive finger drumming and beat creation.
I’ve found knob customization particularly valuable, as these rotary encoders control everything from filter cutoffs to automation parameters, with endless encoders providing seamless parameter sweeping.
Fader sensitivity becomes vital for mixing tasks, where motorized versions automatically reflect DAW positions.
Controller durability matters greatly-quality pads withstand thousands of strikes, while solid knobs and faders maintain precise control over time.
Most importantly, mapping flexibility allows you to assign any control to virtually any parameter, creating personalized workflows that enhance your creative process.
Look for MPC-style drum pads that provide better dynamic control and responsive triggering for enhanced beat-making capabilities.
Many controllers feature pre-mapping capabilities for popular DAWs like Ableton Live Lite, which significantly reduces initial setup time and allows producers to start creating immediately.
Advanced Controller Functions: Aftertouch and Zone Splits
Although velocity and modulation wheels provide solid expressive control, aftertouch and zone splits represent the advanced functionality that separates professional controllers from basic keyboards, transforming your performance capabilities from simple note triggering into nuanced, multi-dimensional musical expression.
Advanced aftertouch techniques involve pressure-sensitive detection after you’ve struck keys, sending MIDI data that modulates parameters like vibrato, filter cutoff, or volume based on how hard you press down.
While polyphonic aftertouch tracks individual key pressure independently, channel aftertouch aggregates pressure across all held keys, offering simpler implementation that’s more commonly available.
Zone split strategies divide your controller into sections assigned to different MIDI channels, instruments, or sounds.
Combined with aftertouch, you’ll achieve distinct pressure controls per zone, enabling complex multi-instrument performances where left-hand bass responds to vibrato while right-hand leads trigger filter effects simultaneously.
MIDI Connectivity Options: USB Vs DIN Vs CV Outputs
When you’re setting up your MIDI system, you’ll encounter three primary connectivity options that each serve different purposes in your workflow, and understanding their strengths will help you make informed decisions about your gear purchases.
USB MIDI connections offer the convenience of single-cable power and data transmission with higher bandwidth capabilities, while traditional 5-pin DIN connections provide the rock-solid reliability that’s kept professional studios running for decades.
CV outputs take a completely different approach by using analog voltage signals instead of digital data, which opens up powerful integration possibilities with modular synthesizers and vintage equipment that don’t speak the MIDI language.
USB MIDI Basics
Three primary connection methods dominate the MIDI landscape today, and if you’re setting up any modern music production system, you’ll encounter USB MIDI, traditional DIN connections, and CV outputs in various combinations.
USB MIDI advantages include seamless software integration with DAWs, convenient plug-and-play functionality, and broad compatibility across operating systems.
However, USB MIDI challenges involve potential latency issues, dependency on computer power, and occasional driver complications. Interfaces with 16-32 samples deliver superior latency performance compared to standard options.
Understanding these core differences helps you choose appropriate connections:
- USB MIDI controllers offer versatile digital control with customizable mappings for software instruments.
- Traditional DIN connectors provide reliable hardware-to-hardware communication without computer dependency.
- CV outputs deliver analog voltage control for modular synthesizers and vintage equipment.
- Universal MIDI Packet format guarantees compatibility between MIDI 1.0 and 2.0 specifications.
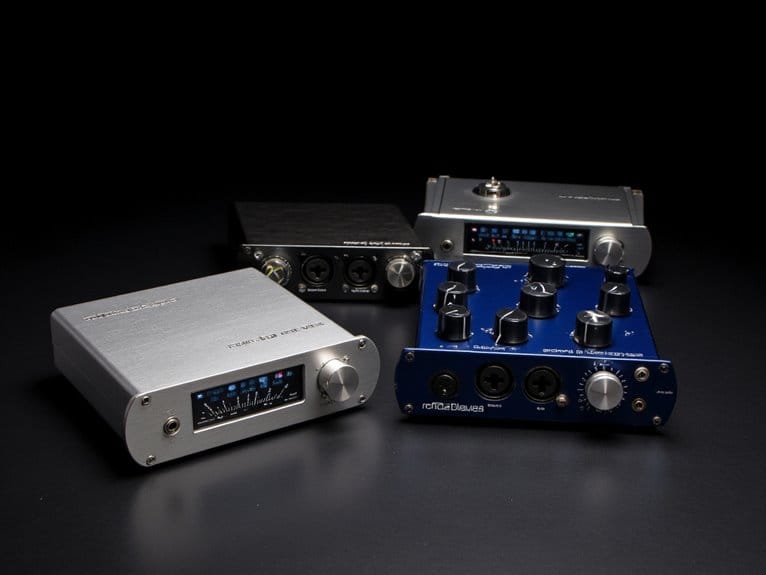
Modern MIDI setups benefit from high-quality audio interfaces that support 24-bit/192kHz resolution, ensuring superior audio fidelity when recording MIDI-triggered instruments.
Traditional DIN Connections
Five decades after its introduction, the traditional 5-pin DIN connector remains the backbone of professional MIDI setups, though I’ll admit its chunky appearance makes modern USB cables look downright elegant by comparison.
These mechanical design stalwarts offer unmatched connector durability and signal integrity, which explains their persistence in studios worldwide despite obvious connectivity challenges.
The electrical standards have evolved from 5-volt to 3.3-volt signaling, addressing modern adaptations while maintaining legacy compatibility with vintage gear.
Cable shielding improvements reduce RF interference, though the connector’s 13.2mm footprint still challenges compact hardware designs.
While only three of five pins carry MIDI data, this robust architecture facilitates reliable communication between devices, making DIN connections indispensable for serious MIDI applications.
CV Output Integration
While USB MIDI‘s 256-channel capacity sounds impressive on paper, I’ve found that many producers still crave the immediate, tactile control that CV outputs provide when working with modular synthesizers and vintage analog gear.
CV output integration transforms your digital MIDI environment into something that can speak directly to analog equipment through voltage scaling and specialized conversion hardware.
Here are the essential CV output types you’ll encounter:
- Pitch CV – Controls oscillator frequency with 1V/octave standard scaling
- Gate/Trigger – Provides note on/off signals for envelope generators
- Velocity CV – Converts note velocity into variable voltage levels
- Modulation CV – Routes MIDI controllers to analog modulation inputs
Effective MIDI integration techniques require understanding voltage standards, ensuring your digital signal conversion maintains modular synth compatibility across different analog control methods.
Unlike traditional mixers that focus on real-time control for live performances, CV output systems require precise voltage conversion to maintain signal integrity between your digital MIDI controllers and analog synthesizer modules.
Power Requirements and Portability Considerations
When you’re setting up your MIDI controller, you’ll need to understand how power affects both performance and mobility, since USB bus power offers incredible convenience for simple setups while external adapters become necessary for feature-rich devices with motorized faders or extensive LED arrays.
I’ve found that most basic controllers draw under 150 mA and work perfectly through USB alone, but once you start connecting multiple devices or using controllers with lots of bells and whistles, you’ll quickly hit the 500 mA limit of standard USB ports.
Your choice between bus power and external adapters ultimately determines whether you can grab your controller and go, or whether you’ll need to pack additional power supplies that can complicate mobile recording sessions.
For professional mobile recording setups, consider lightweight interfaces like the M-Audio M-Track Duo at just 12.7 ounces, which feature USB-powered options that eliminate the need for cumbersome power supplies when working on location. Many affordable audio interfaces also provide plug-and-play setups that simplify installation and reduce configuration complexity for mobile recording environments.
USB Bus Power Benefits
USB bus power represents one of the most practical advantages of modern MIDI connectivity, delivering both electrical power and data transmission through a single cable connection.
You’ll discover that bus power advantages eliminate the need for separate adapters, making your setup remarkably portable and efficient. USB connectivity benefits extend beyond convenience, offering genuine technical improvements for modern producers.
- Streamlined portability – Your laptop-based workflow becomes incredibly mobile without external power adapters cluttering your bag
- Reduced system complexity – Fewer cables mean fewer potential failure points and simpler troubleshooting when issues arise
- Enhanced data throughput – USB bandwidth supports multiple virtual MIDI ports, expanding beyond traditional 16-channel limitations
- Class-compliant operation – Most devices work immediately without driver installations, ensuring plug-and-play functionality across different systems
Modern audio interfaces often feature P48 switches that allow you to activate phantom power for condenser microphones while maintaining the streamlined convenience of USB bus power operation.
For professional audio streaming applications, interfaces with phantom power support enable connection to condenser microphones while maintaining the convenience of USB bus power operation.
External Power Adapter Needs
Not every MIDI device can rely on USB bus power, and when you’re working with traditional hardware that requires external adapters, you’ll need to understand the specific power requirements and how they affect your setup’s mobility.
Most MIDI devices need 9V adapters with 2.1mm barrel connectors, though voltage requirements and current ratings vary greatly between manufacturers, affecting adapter compatibility across different gear. When powering chains of multiple devices, you’ll discover that some adapters can handle up to 20 units through MIDI thru connections, while others struggle with single devices.
| Power Source | Portability | Reliability Factors |
|---|---|---|
| Wall Adapters | Limited mobility | Consistent performance |
| Battery Packs | High portability | Charging maintenance |
| MIDI Port Power | Maximum convenience | Device limitations |
| Linear Regulators | Studio-focused | Stable voltage output |
Portable solutions often mean compromising between convenience and performance impacts, since hefty power requirements can demand larger adapters that reduce your setup’s mobility.
Mobile Setup Configurations
Since mobile MIDI setups have become increasingly popular among producers and performers who need reliable gear on the go, I’ve found that understanding power requirements and portability considerations can make or break your creative workflow away from the studio.
Most USB MIDI controllers draw less than 500mA, making them perfect for bus-powered operation through your phone, laptop, or powered hub, though I always verify current compatibility before extended sessions.
Here’s my essential mobile performance tips checklist:
- Carry USB-C and micro-USB adapters for broader device compatibility across Android and iOS platforms
- Test class-compliant drivers beforehand to guarantee plug-and-play functionality without additional software installation
- Pack quality cables plus spares to prevent connection failures during critical travel gear moments
- Consider powered hubs when connecting multiple devices to avoid overloading single ports
Popular MIDI Controller Models Across Different Price Ranges
Whether you’re just starting your music production journey or you’re a seasoned professional looking to upgrade your setup, choosing the right MIDI controller can feel overwhelming given the sheer number of options available across every conceivable price point.
Trending models like the Akai MPK Mini MKIII dominate beginner picks under $150, offering exceptional portability factors that user reviews consistently praise.
Budget options including the M-Audio Oxygen 25 MK IV provide solid performance tests results, though feature comparisons reveal limited programmable controls.
Mid-range controllers like the Arturia KeyLab MKII 49 excel in brand comparisons, while professional weighted keyboards such as the Native Instruments Komplete Kontrol S88 Mk2 represent the pinnacle of build quality and software integration for serious producers.
For producers focused on beat-making and finger drumming, MIDI sample pads offer velocity-sensitive pads ranging from 4 to 16 configurations, with models like the AKAI MPD218 providing budget-friendly entry points for bedroom producers.
DAW Compatibility and Pre-Mapping Support
After selecting your ideal MIDI controller from the options we’ve explored, your next challenge involves ensuring seamless integration with your chosen Digital Audio Workstation, a process that can range from effortless plug-and-play compatibility to frustrating manual configuration sessions that’ll test your patience.
Controller compatibility varies dramatically between DAWs, with some like Reason Studios offering extensive pre-mapped templates while others, particularly Pro Tools 2024.3, have restricted third-party integration. Your mapping efficiency depends heavily on whether your DAW includes dedicated controller scripts or relies on manual MIDI Learn functionality.
Key compatibility considerations include:
- Mackie Control Protocol support for universal controller recognition
- Pre-mapped templates for popular models like Native Instruments Komplete Kontrol
- MIDI Learn capabilities when native presets don’t exist
- Controller extensions that enable advanced hardware functions
Like audio signal chains that require proper impedance matching between microphones and preamps for optimal voltage transfer, MIDI controllers benefit from compatible communication protocols to ensure reliable data transmission between hardware and software components.
Physical Setup and Hardware Connections
When you’re setting up your MIDI hardware, you’ll need to choose between USB connections for direct computer integration and traditional 5-pin MIDI cables for linking hardware devices. USB offers both power and data transfer while MIDI cables require separate power sources for your equipment.
Your power supply considerations become critical when connecting multiple USB devices through hubs, since underpowered setups can cause dropouts and connectivity issues that’ll frustrate you during recording sessions. Dynamic microphones can generally function in various temperatures and perform well with dual connectivity options when integrating audio recording into your MIDI setup.
I’ve learned that organizing your cables from the start saves countless hours later, so label everything clearly and use powered USB hubs when you’re connecting more than two or three MIDI controllers to avoid the headaches of troubleshooting phantom connection problems.
Modern MIDI controllers typically require phantom power from your audio interface when connecting through XLR inputs, with each input drawing less than 10mA of power for reliable operation.
USB Vs MIDI Connections
Two fundamental connection types dominate the modern MIDI landscape, and I’ve found that understanding their physical differences can save you countless hours of troubleshooting down the road.
USB advantages include plug-and-play convenience and universal compatibility with modern devices, while MIDI reliability shines through dedicated 5-pin DIN connectors that deliver consistent signal integrity over longer distances.
Key connection considerations I’ve encountered:
- Device power: USB cables can power smaller controllers, eliminating external adapters.
- Cable limitations: USB maxes out around 5 meters, MIDI extends to 15+ meters reliably.
- Connection flexibility: USB requires single cables, traditional MIDI needs separate IN/OUT connections.
- Compatibility scenarios: USB works seamlessly with DAWs, while legacy support demands traditional MIDI for vintage gear and professional hardware setups requiring specific usage environments and performance factors.
When building your studio setup, consider that quality audio interfaces with multiple connectivity options provide the most flexibility for integrating both USB and traditional MIDI devices into your workflow. Professional setups often benefit from 24-bit resolution capabilities when recording MIDI-triggered audio sources through the interface.
Power Supply Requirements
While connecting MIDI devices might seem straightforward, I’ve learned the hard way that overlooking power requirements can turn your studio setup into a frustrating troubleshooting session that’ll consume your entire weekend.
Understanding power supply types becomes essential when you’re dealing with different voltage standards across your gear-USB devices typically need 5V at 500mA, while traditional MIDI interfaces often require 9-12V DC power supplies with correct polarity.
I always check device manuals first, since mixing up center-positive and center-negative connections can fry expensive equipment instantly.
For complex setups, powered USB hubs distribute power efficiently to multiple controllers, while dedicated power distribution boards handle higher-voltage devices safely, ensuring your entire MIDI chain operates reliably without voltage drops or interference.
Similar to headphone amplifiers, proper impedance matching between your MIDI devices and power supplies facilitates optimal power transfer and reduces the risk of signal distortion or hardware damage.
Cable Management Tips
The moment you start connecting multiple MIDI devices, you’ll quickly discover that cable management isn’t just about aesthetics-it’s about maintaining signal integrity and preserving your sanity during late-night recording sessions.
Professional cable organization techniques prevent signal interference while wireless integration strategies reduce clutter entirely.
Essential MIDI cable management strategies include:
- Color coding methods using red labels for power cables, blue for audio connections, and yellow for MIDI/network lines
- Cable labeling systems with numbered tags and device-matched legends for rapid troubleshooting
- Physical routing using Velcro ties and cable sleeves to bundle similar connections while avoiding tight wraps
- Strategic separation keeping power cables away from audio lines to eliminate electromagnetic interference
You’ll find that investing in wireless MIDI controllers and proper cable raceways pays dividends during equipment changes and studio reorganization.
Software Configuration and Driver Installation
Once you’ve connected your MIDI hardware to your computer, the real work begins with installing the proper drivers and configuring your software to recognize and communicate with your device.
Understanding MIDI protocol basics helps tremendously during this process, as you’ll need to identify manufacturer-specific drivers compatible with your operating system. Download the latest versions from official websites, then follow installation instructions carefully, which typically involve running setup executables and rebooting your computer afterward.
Verify installation through Device Manager on Windows or Audio MIDI Setup on Mac to confirm recognition. Your DAW’s MIDI setup panel will display available devices once drivers are properly installed.
If devices aren’t appearing, driver troubleshooting usually involves reinstalling with administrator privileges or checking compatibility requirements for your specific operating system version.
Optimizing Your MIDI Workflow and Control Mapping
After you’ve successfully installed your MIDI drivers and configured your DAW to recognize your hardware, the next essential step involves optimizing how you’ll actually use these tools in your creative workflow.
Effective control mapping techniques transform your setup from functional to fluid, enabling seamless parameter adjustments that feel natural rather than forced. I’ve found that thoughtful workflow optimization prevents the frustrating hunt-and-click routine that kills creative momentum.
Here’s your roadmap for maximum efficiency:
- Map frequently-used parameters first – EQ, filter cutoffs, and volume controls deserve dedicated knobs
- Group controls logically by function – cluster all reverb settings together for muscle memory development
- Save your mapping configurations – avoid repetitive setup sessions that waste studio time
- Test mappings regularly – validate controllers respond predictably without annoying latency issues
Frequently Asked Questions
Can I Use Multiple MIDI Controllers Simultaneously With One DAW?
Yes, you can absolutely use multiple MIDI controllers simultaneously with one DAW, and I’ve found MIDI controller compatibility across modern DAWs to be excellent.
You’ll assign each controller to different MIDI channels or tracks, preventing signal conflicts while maintaining ideal DAW performance optimization. Most DAWs support unlimited devices through USB hubs or MIDI interfaces, allowing you to control separate instruments, trigger different sounds, and create complex setups without unplugging devices between sessions.
How Do I Fix MIDI Latency and Timing Issues During Recording?
You’ll need to tackle MIDI buffer adjustments first, reducing your DAW’s buffer size to 64-128 samples for ideal latency reduction techniques.
I’ve found that switching to manufacturer ASIO drivers, rather than generic ones, makes a dramatic difference in timing precision.
Close unnecessary background apps, enable high-performance mode, and use direct hardware monitoring when possible to bypass DAW processing delays entirely.
What’s the Difference Between MIDI Channels and MIDI Tracks in DAWS?
MIDI channels function as transmission pathways between devices, allowing up to 16 independent instrument controls per connection.
Meanwhile, MIDI tracks serve as your DAW’s recording and playback containers for storing performance data.
You’ll use MIDI routing to assign tracks to specific channels, enabling precise instrument targeting.
MIDI editing happens within tracks, where you manipulate note data, while channels handle the actual communication protocol between your controller and sound sources.
Can MIDI Controllers Work Without a Computer for Live Performances?
You’ll need MIDI hardware with sound engines for standalone performance, since most controllers don’t generate audio themselves.
Controllers like Novation’s Remote SL series can operate without computers when connected to external synths or sound modules via MIDI DIN ports, though you’ll need proper power adapters.
However, many popular controllers lack MIDI output ports, limiting them to computer-only use, which isn’t ideal for live situations.
How Do I Backup and Transfer My Custom MIDI Mappings?
I’ve learned that effective midi mapping techniques require systematic backup methods, and you’ll want to locate your controller’s mapping files in application-specific directories like ~/Library/Application Support on Mac or similar Windows folders.
Copy these files to external storage, not within the same software directories, then transfer them by placing copies in corresponding locations on new devices and restarting your software to guarantee proper loading.
On a final note
You’ve now got everything you need to build a solid MIDI setup that’ll serve your musical goals, whether you’re tracking in your bedroom studio or performing live gigs. I’ve found that taking time upfront to properly configure your controllers and interfaces saves countless headaches later when you’re in the creative zone. Remember, the best MIDI setup is the one that disappears into your workflow, letting your musical ideas flow without technical friction interrupting the process.