Complete Home Studio Setup Guide (Beginner to Pro)
You’ll need an audio interface to connect mics and instruments to your computer, quality headphones for monitoring, and a reliable DAW like Logic Pro X or free alternatives like Reaper. Start with a condenser microphone for vocals, add pop filters for cleaner recordings, and invest $500-$1,000 in acoustic panels and bass traps for your room. Position your setup against the short wall, match buffer sizes to minimize latency, and focus on EQ cuts plus gentle compression during mixing. The complete blueprint covers everything from budget builds to professional upgrades.
We are supported by our audience. When you purchase through links on our site, we may earn an affiliate commission, at no extra cost for you. Learn more.
Notable Insights
- Start with essential gear: audio interface, microphone, headphones, and DAW software to establish your basic recording foundation.
- Optimize room acoustics using absorption panels, bass traps, and proper positioning to capture clean, professional-sounding recordings.
- Choose beginner-friendly DAWs like GarageBand or Studio One, then upgrade to Pro Tools or Logic Pro as skills develop.
- Build a complete setup under $1,000 by prioritizing quality audio interface, proven microphones, and basic acoustic treatment first.
- Develop mixing skills through EQ cuts, gentle compression, and proper panning before advancing to mastering techniques and professional upgrades.
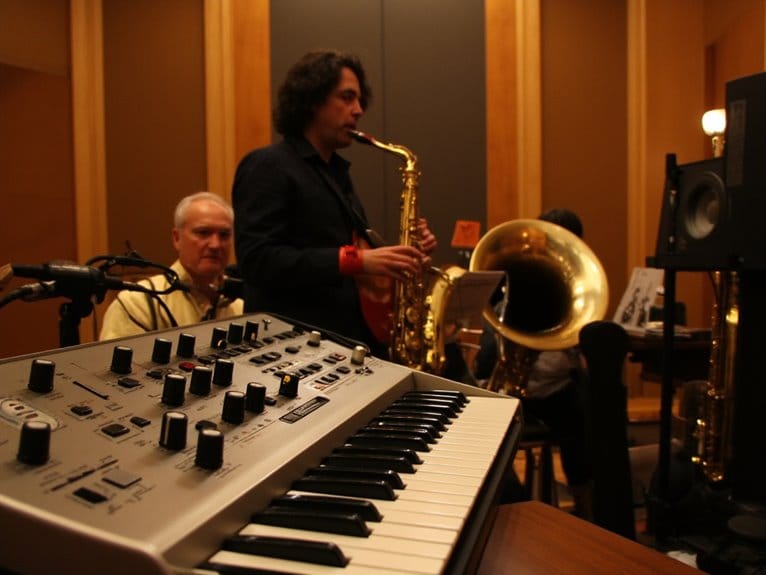
Essential Equipment for Your Home Studio
Setting up your first home studio can feel overwhelming when you’re staring at endless equipment lists, but I’ve learned that focusing on five core hardware components will give you a solid foundation without breaking the bank.
Your recording gear starts with a reliable audio interface selection, which bridges your microphones and instruments to your computer while maintaining signal integrity.
A quality audio interface acts as the crucial bridge between your analog gear and digital recording setup, preserving every nuance.
Different microphone types serve specific purposes-condensers for vocals, dynamics for loud sources-while quality headphones provide accurate monitoring when studio monitors aren’t practical.
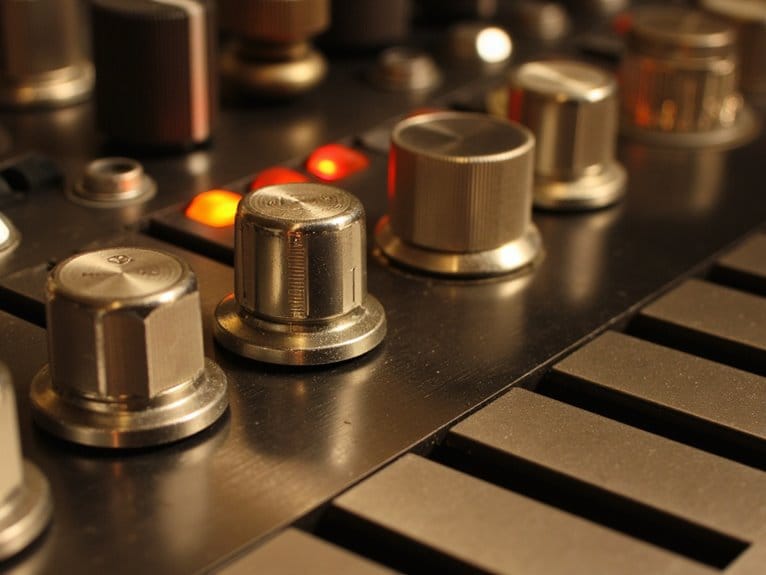
Don’t overlook MIDI controllers for virtual instruments, acoustic tools for room treatment, power conditioning to protect your investment, pop filters for cleaner vocals, and quality cables connectors to maintain signal clarity throughout your chain.
Audio interfaces offer significant advantages over built-in sound cards through superior analog-to-digital converters that capture studio-quality detail and reduce latency to just a few milliseconds.
When choosing an audio interface, ensure it provides at least 60dB gain for low-output dynamic microphones to achieve optimal recording levels without compromising sound quality.
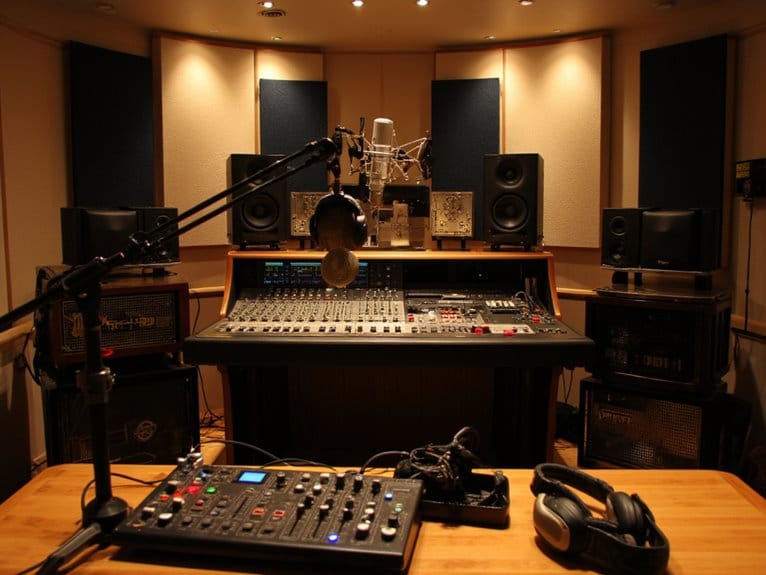
Setting Up Your Recording Space
Now that you’ve gathered your essential equipment, it’s time to transform your chosen space into an acoustically optimized recording environment that’ll actually capture the sound you’re hearing in your head.
The way you arrange your room layout, implement acoustic treatment solutions, and strategically place your equipment will make the difference between recordings that sound amateur and those that rival professional studios.
I’ve learned through countless hours of trial and error that getting these three fundamentals right from the start saves you months of frustration and expensive do-overs down the road.
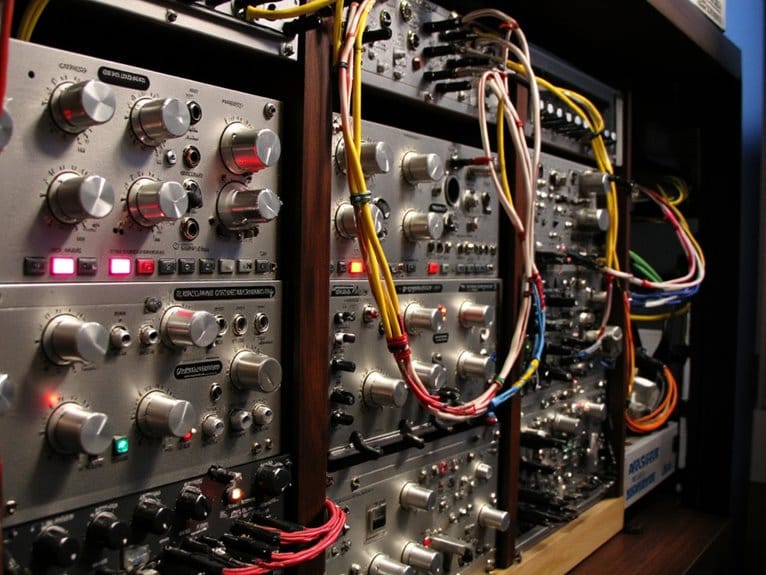
When setting up your mixer, understanding the difference between auxiliary sends and insert points becomes crucial for maintaining proper signal flow throughout your studio chain.
Part of this setup process involves properly connecting your recording gear, and if you’re using both a mixer and audio interface together, ensure you’re matching buffer sizes to minimize latency issues during recording sessions.
Room Layout Optimization
Before you even think about microphones or audio interfaces, the physical layout of your recording space will make or break your studio’s sound quality. I’ve seen too many home producers skip this essential step only to struggle with muddy mixes and frustrating recording sessions later.
Your room shape determines everything from sound reflections to acoustic treatment effectiveness, so let’s nail down your layout strategies first.
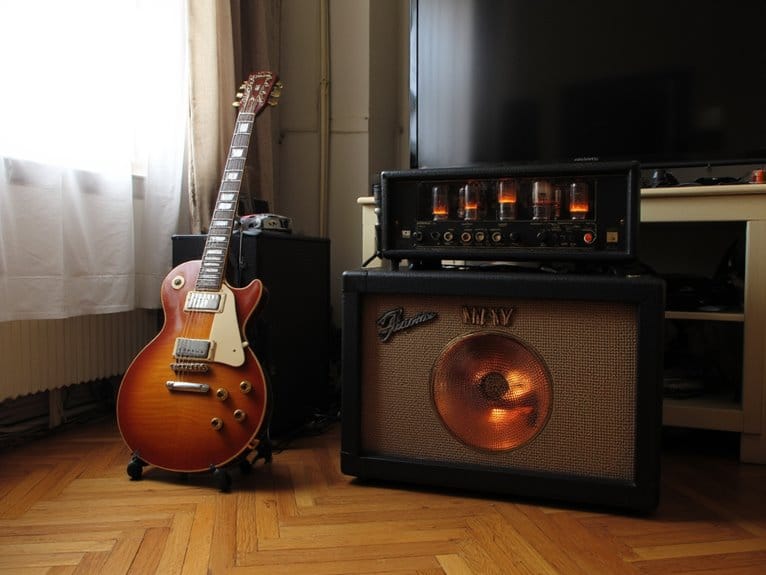
Position your listening setup against the short wall of rectangular rooms, creating clear sound paths between monitors and your ears. Arrange furniture to avoid obstructing these critical pathways while maintaining studio functionality.
Your monitor placement should form an equilateral triangle with your head, angled slightly inward. Don’t forget natural light-it keeps those long mixing sessions bearable without compromising your carefully planned acoustic environment.
Once your monitors are positioned correctly, plan where your audio mixer will sit within your setup, as it serves as the central hub for converging multiple audio sources from microphones and instruments into your final output. Quality balanced XLR outputs from your audio interface to studio monitors will ensure signal integrity throughout your recording chain.
Acoustic Treatment Solutions
Once you’ve optimized your room layout, the harsh reality hits-even the most perfectly positioned monitors can’t overcome poor acoustics.
I’ve watched countless home studio owners get frustrated with their mixes because they skipped proper acoustic treatment. Your room needs strategic intervention to control reflections, manage bass buildup, and create an accurate listening environment.
Understanding acoustic panel types and bass trap placement becomes essential for achieving professional results:
- Broadband absorption panels target mid and high frequencies at reflection points
- Bass traps require corner placement to manage low-frequency energy effectively
- Diffusers scatter sound waves while maintaining room liveliness
- Acoustic treatment kits provide thorough solutions with installation guidance
I recommend starting with a mid-range investment of $500-$1,000 for professional-grade panels and bass traps, which delivers significant improvement without breaking your budget.
Equipment Placement Strategy
Three essential decisions will make or break your studio’s functionality before you even press record, and I’ve learned through countless setup mistakes that equipment placement isn’t just about finding space-it’s about creating a workflow that supports your creativity while delivering professional results.
Monitor positioning forms your foundation, requiring an equilateral triangle between your listening position and speakers, positioned at least 30 centimeters from walls to prevent cancellation dips. Microphone stands maintain consistent positioning while reducing vibrations during recording sessions.
| Equipment | Ideal Placement | Key Consideration |
|---|---|---|
| Monitors | Back wall, 30cm minimum | Equilateral triangle setup |
| Subwoofer | Slightly off-center, rear | Enhanced low-frequency response |
| Microphones | Stands for stability | Consistent positioning essential |
| Computer | Minimize distractions | Easy control access |
| Cables | Organized management | Prevent signal degradation |
Your mixer’s position should enable easy access to the control panel while maintaining clear sightlines to performers and monitoring equipment during recording sessions. Strategic microphone placement reduces feedback risk and ensures optimal signal capture during your recording sessions.
Symmetry guarantees even sound distribution throughout your space.
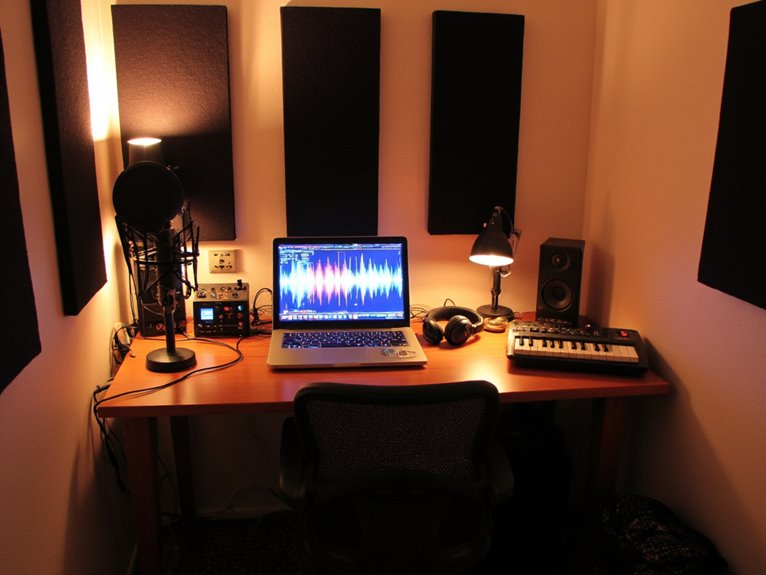
Choosing the Right Audio Recording Software
Now that you’ve optimized your recording space, you’ll need to select the digital audio workstation (DAW) that’ll serve as your creative command center, and I can tell you from experience that this choice greatly impacts your workflow efficiency and creative output.
You’ve got three main categories to evaluate: industry-standard options like Pro Tools and Logic Pro X that offer extensive feature sets, beginner-friendly alternatives such as GarageBand and Studio One that balance functionality with intuitive interfaces, and free solutions including Audacity and Reaper that provide surprising capability without the upfront investment.
The key lies in matching your current skill level, budget constraints, and specific recording needs-whether that’s multitrack band recordings, electronic music production, or simple podcast editing-to the software’s strengths and limitations.
When selecting your DAW, ensure it offers seamless integration capabilities with streaming software like OBS, especially if you plan to broadcast live performances or create content that bridges studio recording and real-time streaming.
Popular DAW Options
While the hardware components form the backbone of your home studio, the Digital Audio Workstation, or DAW, serves as the creative command center where all your musical ideas come to life through recording, editing, and mixing.
When conducting a DAW comparison for music production, you’ll discover each platform offers distinct advantages depending on your specific workflow preferences and genre focus.
Consider these leading options for your home studio:
- Pro Tools – The industry standard for professional recording and mixing, particularly favored in commercial studios
- Ableton Live – Excels in electronic music production with innovative real-time performance features and Session View
- Logic Pro – Mac-exclusive platform packed with virtual instruments, offering thorough MIDI integration for composers
- Reaper – Budget-friendly choice with extensive customization capabilities, suitable for various audio production tasks
Beginner-Friendly Software Choices
When you’re starting your home recording journey, selecting beginner-friendly software can mean the difference between enjoying the creative process and feeling overwhelmed by complex features you don’t yet need.
Audacity stands out as an excellent starting point, offering an intuitive interface with essential audio effects like reverb and distortion, while remaining lightweight enough for less powerful hardware.
Cakewalk by BandLab provides professional-grade capabilities without cost, featuring multi-track recording and virtual instrument support that’ll grow with your skills. The community support surrounding both options guarantees you’ll find answers when you’re stuck.
Reaper offers exceptional customization potential with its 60-day trial, allowing you to tailor workflows as your expertise develops through practice and experimentation.
Most affordable interfaces feature plug-and-play setups that work seamlessly with these software options, eliminating driver installation headaches for beginners.
To maximize your recording quality, ensure your chosen software is compatible with professional audio interfaces that support 24-bit/192kHz recording resolution and ultra-low-noise preamps.
Free Recording Alternatives
Budget constraints shouldn’t limit your recording ambitions, and I’ve tested dozens of free alternatives that deliver surprisingly professional results without the hefty price tags of premium software.
These free software options prove that quality recording doesn’t require breaking the bank, offering user-friendly interfaces alongside robust editing capabilities.
Here’s what I recommend for different recording needs:
- Audacity – Multi-track recording with extensive editing tools, though the interface requires patience.
- GarageBand – Mac-exclusive with intuitive design and advanced MIDI support for music production.
- Free Sound Recorder – Simple three-step process capturing both system and external audio sources.
- Ocenaudio – Spectral analysis features wrapped in straightforward design, perfect for audio restoration.
Each provides professional-grade export formats including MP3 and WAV, ensuring your recordings meet industry standards.
When paired with a quality audio interface, these free software options can deliver recordings that rival expensive studio setups, especially when choosing interfaces that support 24-bit/192kHz resolution for superior audio fidelity. Many budget-friendly interfaces include comprehensive software bundles featuring tools like Pro Tools Intro+ and Ableton Live Lite, adding significant value to your home studio setup.
Budget-Friendly Tips for Beginners
Starting your home studio journey doesn’t require breaking the bank, and I’ve learned through years of experimentation that you can build a surprisingly capable recording setup for under $1,000 if you prioritize the essentials and make strategic equipment choices.
Smart budget allocation means focusing your money on a quality audio interface first, then your DAW, since these form your recording foundation. I recommend starting with proven workhorses like the Shure SM57 microphone or Røde NT1-A, which offer excellent equipment longevity and hold their value well.
You’ll want to invest in KRK Rocket monitors for accurate playback, but don’t overlook accessories like XLR cables, pop filters, and basic acoustic treatment, which greatly impact your final recordings without demanding major financial commitments. Many interfaces include Studio One Artist and other professional software bundles that provide exceptional value for beginners getting started.
For your audio interface, the Scarlett 2i2 appeals to budget-conscious home studio enthusiasts while providing dual inputs and compatibility with various software to enhance your recording capabilities.
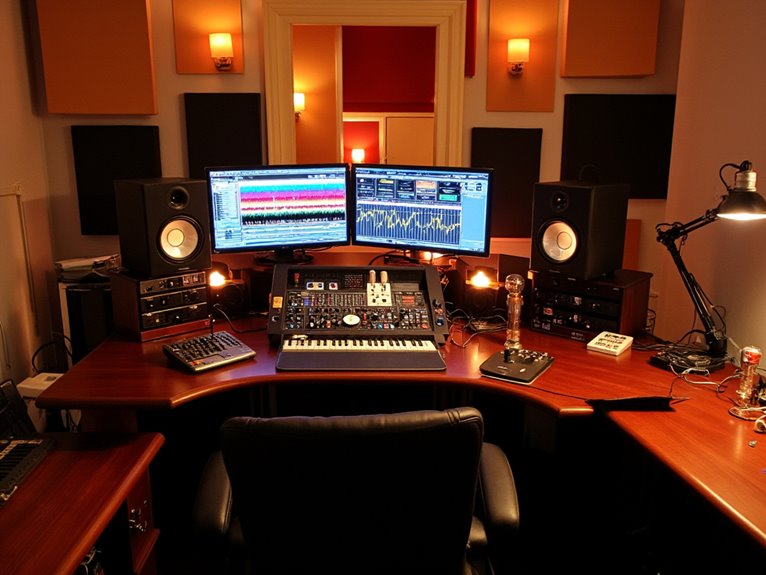
Professional Studio Upgrade Path

Once you’ve established a functional recording setup and gained experience with your initial gear, upgrading strategically becomes about enhancing specific aspects of your workflow rather than replacing everything at once.
I’ve found that the most impactful improvements often come from addressing your studio’s weakest links first.
Your professional upgrade path should focus on these key areas:
- Studio desk with rack space – Proper cable management and ergonomic design reduce fatigue during long sessions
- High quality preamps – Whether standalone units or upgraded interfaces, these preserve dynamic range and minimize noise
- Professional monitors – Size-matched to your room dimensions, quality speakers guarantee your mixes translate across playback systems
- Advanced microphone selection – From budget Audio-Technica AT2020 to professional Neumann TLM102, choose based on recording needs
Digital audio software upgrades to industry-standard DAWs like Pro Tools elevate mixing skills and recording techniques considerably.
For budget-conscious studios, microphones under $200 with 24-bit/48kHz sampling rates can deliver professional sound quality without breaking your upgrade budget.
When selecting preamps, remember that microphone-preamp pairing affects your sound significantly, with dynamic mics benefiting from tube warmth while condensers typically perform best with transparent solid-state preamps.
Advanced Recording Techniques and Methods
When your basic recording setup becomes second nature and you’re ready to push beyond standard techniques, advanced recording methods transform ordinary sessions into professionally polished productions that rival commercial studios.
Strategic microphone positioning involves combining small-diaphragm condensers placed 6-12 inches from instruments with distant ribbon mics to capture both detail and room character. Outboard processing through high-end preamps and hardware compressors adds warmth while controlling dynamics before digital conversion.
Digital noise reduction using spectral repair algorithms eliminates clicks, hums, and artifacts without compromising tonal quality. Creating acoustic ambiance involves recording in various room positions and using dedicated reverb chambers with adjustable wet/dry mixing to blend intimate close-miked signals with natural spatial reverberation.
Proper gain staging becomes critical when combining multiple microphones, as each microphone type requires different amplification levels and strategic level management to prevent phase cancellation and maintain optimal signal-to-noise ratios throughout your recording chain. Understanding polar patterns helps you select the right microphone directivity for each recording situation, as cardioid patterns excel at isolating sound sources while omnidirectional microphones maintain consistent frequency response regardless of positioning.
Acoustic Treatment and Sound Optimization
The most sophisticated recording techniques won’t save you from a room that’s fighting against your sound, and that’s where acoustic treatment becomes your secret weapon for transforming any space into a controlled recording environment.
Understanding acoustic principles means balancing absorption techniques with sound diffusion rather than killing every reflection in your mixing space.
Your treatment materials strategy should prioritize these critical zones:
- Trihedral corners for bass trapping using thick mineral wool absorbers
- Early reflection points with acoustic paneling to improve stereo imaging
- Ceiling areas above listening positions to eliminate flutter echoes
- Rear walls with diffusers to maintain room liveliness
Target 30-40% surface coverage, focusing on room reflections that muddy your sound while preserving the natural acoustics that make recordings feel alive.
Mixing and Mastering Your Recordings
While your acoustic treatment sets the stage for clean recordings, mixing and mastering represent the creative alchemy where individual tracks transform into polished, professional-sounding music that translates well across all playback systems. Your mixing techniques should focus on creating space through strategic panning, using EQ cuts to unmask frequencies, and applying gentle compression to balance dynamics without squashing the life out of your tracks.
| Mixing Stage | Primary Focus |
|---|---|
| Level Balancing | Create foundational instrument relationships |
| EQ and Panning | Carve frequency space and stereo placement |
| Compression | Control dynamics while preserving musicality |
| Effects Processing | Add depth with reverb and spatial enhancement |
Your mastering workflow involves broad EQ adjustments, transparent compression for cohesion, and limiting for final loudness control, always referencing professional tracks to maintain perspective and guarantee your music competes sonically. Many home studio setups benefit from incorporating a quality audio mixer with built-in phantom power and DSP effects to enhance your mixing capabilities during the recording and initial mixing stages.
Building Your Music Production Career
Transforming your home studio skills into a sustainable music production career requires maneuvering an industry that’s simultaneously expanding and becoming more competitive, where streaming revenues push the global market toward $30 billion by 2025 while independent producers flood digital platforms with an estimated 60,000 new tracks uploaded daily to Spotify alone.
Success in today’s music production landscape means skillfully balancing creative excellence with strategic business acumen in an oversaturated marketplace.
Your career networking and portfolio development must align with current industry trends, particularly since 64% of producers work part-time through freelance opportunities.
Strategic brand building demands consistent skill diversification across multiple areas:
- Master DAWs while developing online marketing strategies through TikTok and YouTube engagement
- Build collaboration strategies with artists and leverage social media presence for exposure
- Navigate professional resources while maintaining regular content uploads
- Balance production quality with business management responsibilities
I’ve learned that thriving requires adapting to technology changes while building genuine industry relationships.
Frequently Asked Questions
How Do I Prevent Neighbors From Complaining About Noise During Recording Sessions?
You’ll need effective soundproofing techniques like adding mass-loaded vinyl to walls, installing door sweeps, and using thick carpeting with dense pads.
I’ve found that combining sound absorption panels with bass traps greatly reduces noise transmission, while scheduling sessions during neighbor-friendly hours helps maintain goodwill.
These noise control measures, along with reducing monitor volumes and communicating proactively about recording times, will minimize complaints effectively.
What Are the Best Times of Day to Record for Optimal Sound?
I’ve found that ideal recording times fall during mid-afternoon hours, when you’ll experience optimum sound quality considerations like minimal ambient noise and stable room acoustics.
Your energy levels peak naturally during this period, while household electrical hums decrease compared to evening cycles.
Morning sessions often suffer from traffic interference, and late-night recording risks neighbor complaints plus fatigue-induced performance drops that compromise your final results.
How Often Should I Calibrate My Studio Monitors and Audio Equipment?
For proper monitor maintenance, I recommend quarterly calibration frequency in home studios, though professional setups benefit from monthly checks.
You’ll want to recalibrate after any equipment changes, room modifications, or before critical projects. Use an SPL meter to match left and right speakers at 73-79 dB, checking subwoofer integration simultaneously.
This routine prevents mix translation issues and maintains the accuracy you’ve invested in.
Can I Claim Home Studio Equipment as Tax Deductions for Business?
You can absolutely claim home studio equipment as tax deductions for business expenses, but there’s a catch – you’ll need legitimate music business activity like teaching, recording, or producing.
I’ve learned that your studio space must be used exclusively for business, not mixed with personal activities.
You’ll need meticulous record-keeping with receipts for everything from microphones to acoustic panels.
What Insurance Coverage Protects Expensive Studio Equipment From Theft or Damage?
You’ll want Entertainment Equipment Floater or Music Equipment Insurance policies to protect your studio gear from theft, fire, vandalism, and weather damage.
These insurance policies typically cover owned, rented, or borrowed equipment through schedule-based coverage requiring detailed inventories.
I’ve found that specialized policies often extend protection to gear in transit or off-site use, though theft coverage usually requires proof of forcible entry for claims processing.
On a final note
You’ve got the roadmap, now it’s time to start building. Whether you’re setting up your first bedroom studio with a USB mic and free software, or you’re ready to invest in professional monitors and acoustic panels, remember that great music comes from practice, not just gear. Start small, learn your tools inside and out, and upgrade strategically as your skills and needs grow. Your home studio journey begins today.