Ribbon Microphones: What They Are and When to Use Them
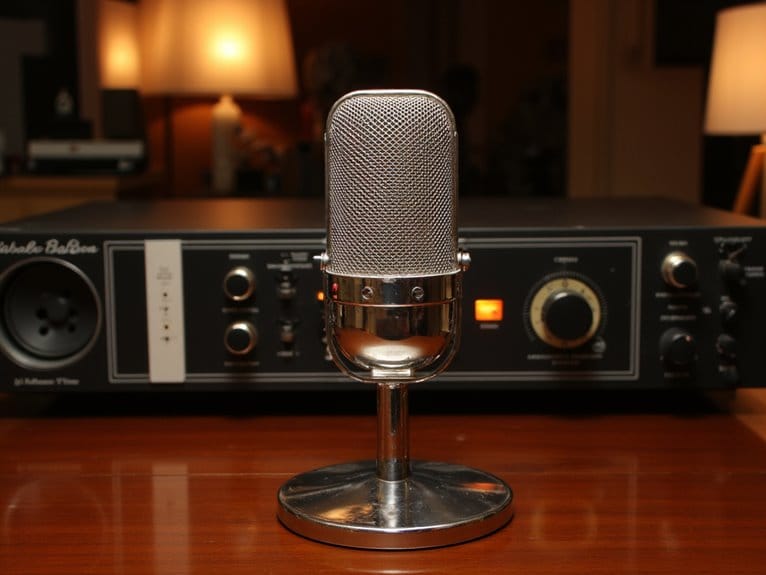
You’ll find that ribbon microphones operate through electromagnetic induction, using an ultra-thin aluminum ribbon suspended between permanent magnets that vibrates with sound waves to produce their signature warm tone. They’re perfect for recording vocals, brass instruments, and guitar amps because their natural high-frequency roll-off starting around 14 kHz smooths harsh transients while enhancing low-end response. Their figure-8 polar pattern captures sound from front and back, making them ideal for studio recordings where you want natural room ambiance, broadcast applications for interviewing guests, and situations requiring that smooth, musical character that’s defined professional recordings since the 1930s—though you’ll need quality preamps providing 65-81 dB of clean gain. Understanding their unique characteristics will help you maximize their potential in your specific applications.
We are supported by our audience. When you purchase through links on our site, we may earn an affiliate commission, at no extra cost for you. Learn more.
Notable Insights
- Ribbon microphones use a thin aluminum ribbon vibrating between magnets to capture sound through electromagnetic induction with figure-8 pickup patterns.
- They produce warm, smooth sound with natural high-frequency roll-off around 14 kHz, reducing harshness while enhancing musical recordings.
- Ideal for recording vocals, brass instruments, guitar amps, and drum overheads where smooth tone and ambient capture are desired.
- Modern ribbon mics are durable and can handle high sound pressure levels up to 165 dB, contrary to fragility myths.
- Require 65-81 dB of clean preamp gain and careful handling, but excel at natural room sound capture without extensive post-processing.
How Ribbon Microphones Work: The Science Behind the Sound
When you strip away all the complex engineering and marketing jargon, ribbon microphones operate on a surprisingly elegant principle that’s been capturing audio with remarkable fidelity for nearly a century.
At their core, ribbon microphone technology relies on electromagnetic induction, where an ultra-thin aluminum ribbon, weighing just 0.001 to 0.002 grams, vibrates between permanent magnets when sound waves hit it.
Unlike conventional mics that respond to pressure changes, this corrugated ribbon reacts to air particle velocity, creating a voltage that directly mirrors your sound’s waveform.
The acoustic energy conversion happens instantly as the ribbon moves through the magnetic field, producing an electrical signal that preserves the natural characteristics of your source with remarkable accuracy and smoothness. This design naturally creates a figure-of-8 polar pattern that captures sound equally from the front and back while effectively rejecting audio from the sides.
However, the ribbon motor’s low voltage output requires a specialized transformer assembly to boost the signal by 28 to 40 times before it reaches your preamp through the XLR connection.
The Anatomy of a Ribbon Microphone: Key Components Explained
When you’re looking at a ribbon microphone, you’re fundamentally examining three critical systems working in perfect harmony: the delicate ribbon element that captures sound waves through electromagnetic induction, the precisely engineered magnetic assembly that creates the necessary field for signal generation, and the protective housing with its integrated transformer that amplifies the ribbon’s inherently weak output.
I’ve found that understanding these components helps explain why ribbon mics produce their characteristic warm, smooth tone that so many engineers and artists prize. These microphones typically exhibit a bi-directional polar pattern that captures sound from both the front and back while rejecting sound from the sides.
Each element, from the ultrathin aluminum ribbon suspended between powerful magnets to the step-up transformer housed within the sturdy metal chassis, contributes to the microphone’s unique sonic signature and operational requirements. The ribbon’s velocity-based signal generation differs fundamentally from displacement-based systems, creating the distinctive response characteristics that define ribbon microphone performance.
Ribbon Element Construction
| Component | Material | Critical Factor |
|---|---|---|
| Ribbon | Aluminum/Duraluminum | Thickness precision |
| Structure | Corrugated pattern | Spring elasticity |
| Support | Conductive clips | Electrical connection |
| Tension | Precise calibration | Sensitivity balance |
| Assembly | Magnetic alignment | Output fidelity |
Corrugation techniques transform flat foil into functional transducers, with traditional hand-corrugation requiring skilled craftsmanship, while modern mechanical processes guarantee consistency across production runs. The electromagnetic induction process occurs when the corrugated aluminum ribbon vibrates within the magnetic field, directly generating the electrical signal that characterizes ribbon microphone operation. Modern ribbon microphones utilize stronger materials in their construction, making them significantly more durable than their vintage predecessors from the RCA era.
Magnetic Field Assembly
The magnetic engine that drives every ribbon microphone’s performance lies in its precisely engineered magnetic field assembly, where powerful permanent magnets and carefully shaped pole plates work together to create an intensely focused magnetic gap. This assembly requires microscopic precision, typically maintaining gaps of just 0.1mm on each side of the ribbon element.
Here’s what makes this magnetic system so essential:
- Neodymium or alnico magnets provide the raw magnetic power needed for maximum signal conversion.
- Magnetic alignment between pole plates guarantees uniform flux distribution across the entire ribbon surface.
- Flux stability remains constant despite temperature changes and mechanical stress over years of use.
- Gap dimensions directly influence your microphone’s sensitivity, frequency response, and overall sonic character.
This magnetic foundation determines everything from output voltage to noise floor performance. The assembly of permanent magnets and pole plates requires exceptional craftsmanship to achieve the strong magnetic field necessary for optimal ribbon microphone operation.
Housing and Transformer
Beyond the magnetic assembly‘s intricate engineering lies another critical partnership that determines whether your ribbon microphone delivers pristine audio or falls short of professional expectations: the housing and transformer combination.
The housing design protects your delicate ribbon element while shaping acoustic characteristics, typically constructed from sturdy metals like brass or aluminum that shield against electromagnetic interference and physical impacts.
Meanwhile, the transformer steps up the ribbon’s incredibly low voltage output to usable levels, with transformer efficiency directly affecting your microphone’s tonal character and signal clarity.
This partnership requires microscopic precision during assembly, where custom-wound transformers sit strategically positioned near ribbon lead wires to minimize signal loss while the housing’s grill pattern influences directional response patterns. The output transformer also provides crucial DC voltage protection that prevents phantom power from damaging the sensitive ribbon element.
Professional builders often incorporate steel mesh components within the housing structure to provide additional protection while maintaining optimal acoustic transparency.
Understanding Polar Patterns: Figure-8 vs. Cardioid Ribbon Mics
Most ribbon microphones I’ve encountered throughout my years of recording naturally exhibit a figure-8 polar pattern, though you’ll occasionally find cardioid models that challenge this conventional design approach.
The figure 8 benefits include exceptional side rejection at 90-degree angles, making them perfect for stereo recording techniques where you need precise directional control.
Here’s what you should know about each pattern:
- Figure-8 ribbons pick up sound equally from front and back while rejecting sides completely
- Cardioid advantages include stronger isolation from background noise and reduced feedback potential
- Figure-8 models excel at capturing room ambience and natural acoustic environments
- Cardioid ribbons work better in loud environments where you need predictable source isolation
The figure-8 pattern’s rear sensitivity makes it particularly valuable when you want to capture reflected sound from the room along with the direct source signal.
Capturing Instruments: Brass, Strings, and Acoustic Guitars

When you’re ready to move beyond vocal recording, ribbon microphones showcase their versatility across brass sections, string instruments, and acoustic guitars with remarkable consistency.
I’ve found that these mics excel at taming the aggressive honk of trumpets and trombones while simultaneously adding cinematic depth to violin sections, thanks to their natural frequency response and figure-of-8 pickup pattern.
You’ll discover that the same proximity effect and room ambience capture that works so well for vocals translates beautifully to instruments, whether you’re recording a solo acoustic guitar or positioning ribbons as orchestral outriggers.
Brass Section Recording
Something magical happens when you position a ribbon microphone in front of a brass section—the natural warmth and extended low-end response that these mics are famous for suddenly makes perfect sense.
I’ve discovered that proper cable management and strategic mic placement can transform your brass recordings from harsh and fatiguing to cinematic and polished.
Here’s how to maximize your brass section recordings:
- Distance matters: Place ribbons 4-6 feet from trumpets, slightly off-axis at 30-40 degrees to avoid harsh air sounds.
- Low brass positioning: Move closer and more on-axis for trombones while managing high SPL headroom.
- Outrigger technique: Position paired ribbons 6-8 feet apart behind the conductor for natural ambience.
- Room integration: Capture reflections to enhance realism and dimensional presence in your mix.
String Instrument Warmth
That same sonic magic ribbon microphones bring to brass sections becomes even more pronounced with string instruments, where the natural warmth and smooth high-frequency roll-off can transform potentially harsh violin sections into something genuinely musical.
You’ll find that ribbons excel at taming the shrillness that often plagues bowed strings, particularly in ensemble settings where multiple violins can create ear-piercing upper harmonics.
The figure-8 pattern proves invaluable for string dynamics, capturing both direct sound and room ambience while rejecting side noise.
I’ve discovered that positioning ribbons about two feet above the bridge yields ideal results, though your recording techniques should account for the microphone’s lower output requiring quality preamps and the delicate ribbon element’s sensitivity to air blasts.
Acoustic Guitar Techniques
Acoustic guitars present unique challenges that ribbon microphones handle with remarkable finesse, transforming potentially brittle string harmonics into warm, musical tones that sit beautifully in any mix.
Through careful positioning and understanding of their bi-directional characteristics, you’ll discover capture techniques that reveal acoustic nuances often lost with other microphone types.
Here are four essential positioning strategies I’ve found most effective:
- Sweet spot targeting – Position the mic where the neck meets the body for ideal balance between resonance and string clarity.
- Close proximity placement – Use 10-15 cm distance to maximize signal strength while controlling room interference.
- Dynamic positioning – Move the microphone slowly around the instrument during test recordings to identify tonal preferences.
- Room consideration – Account for the figure-eight pattern’s ambient pickup when choosing your recording environment.
Guitar Amplifier Recording: Harnessing the Ribbon Advantage

When I first started recording electric guitars decades ago, I’d reach for the same dynamic microphones everyone else was using.
However, it wasn’t until I discovered ribbon mics that I truly understood what I’d been missing in my guitar amplifier recordings.
These microphones excel at capturing guitar tone with remarkable warmth, tempering harsh frequencies while adding substantial low-end weight that modern studio techniques often struggle to achieve artificially.
Their figure-eight polar pattern offers superior side rejection compared to traditional microphone selections, giving you precise control over room ambiance and speaker placement interactions.
Whether you’re tracking in controlled studio environments or capturing live sound performances, ribbon mics provide exceptional recording clarity without requiring phantom power, ensuring seamless gear compatibility across various plugin choices and recording setups.
Drum Recording Applications: Overheads and Room Capture

While guitar amplifiers showcase ribbon microphones’ warmth and character beautifully, I’ve discovered that drums present an entirely different canvas where these mics truly demonstrate their versatility and natural sonic qualities.
When you’re setting up drum overheads, ribbon mics excel at taming cymbal harshness while preserving essential detail, creating a smoother, more musical top end than condensers typically provide.
Their bi-directional pickup pattern naturally captures room ambiance, adding depth and spaciousness that transforms your recordings.
Here’s what makes ribbons exceptional for drum applications:
- Blumlein stereo pairs create realistic imaging with excellent ambient detail
- Spaced configurations deliver wide stereo spread positioning
- Natural room capture without artificial brightness or harshness
- Gentle high-frequency response that complements cymbal frequencies perfectly
Frequently Asked Questions
Can Ribbon Microphones Be Used Outdoors for Field Recording Applications?
You can use ribbon microphones for field recording, though their outdoor durability remains questionable compared to dynamic alternatives.
While I’ve tested ribbons in controlled outdoor settings with decent results, their fragile ribbon element makes them risky for harsh conditions, wind exposure, and temperature fluctuations that field recording often demands.
This requires extensive protection gear that somewhat defeats their portability advantage.
How Do Ribbon Microphones Compare in Price to Condenser and Dynamic Mics?
When conducting ribbon pricing comparison analysis, you’ll find ribbons typically start around $200-1,000, while dynamics range $50-500 and condensers span $50-10,000.
Your microphone budget analysis reveals ribbons lack affordable entry options unlike dynamics and condensers.
I’ve noticed ribbon manufacturing costs stay high due to precision assembly, fragile elements, and specialized transformers, making them pricier investments for specific studio applications rather than general-purpose recording.
Do Ribbon Microphones Work Well With USB Audio Interfaces and Home Studios?
You’ll find ribbon microphones work excellently with USB interfaces, though ribbon sensitivity requires careful attention to gain staging and audio compatibility considerations.
I’ve discovered that interfaces offering 50+ dB of clean preamp gain, like the TASCAM US-16×08’s 56 dB, handle ribbons beautifully without external boosters.
You’ll want to disable phantom power completely, verify your interface provides adequate gain without noise floor issues, and consider impedance matching for peak performance in your home studio setup.
Can You Use Multiple Ribbon Microphones Simultaneously Without Phase Issues?
You can definitely use multiple ribbon mics simultaneously, though I’ve learned that phase alignment becomes your biggest challenge.
Careful microphone placement is essential—keep similar distances from your source and align those delicate diaphragms properly.
I always test polarity switches and use my DAW’s visual waveforms to check alignment.
With proper spacing and some post-production tweaking, you’ll avoid those frustrating cancellation issues.
Are There Any Specific Acoustic Treatment Requirements When Using Ribbon Microphones?
You’ll need strategic acoustic absorption placement since ribbon mics capture sound from both front and back with their figure-8 pattern.
I’ve found that controlling room reflections behind the microphone prevents unwanted coloration and comb filtering effects that can muddy your recordings.
Position broadband absorbers at a moderate distance behind the mic, use bass traps in corners, and treat reflective surfaces to maintain the ribbon’s natural smoothness.
On a final note
You’ve now got the knowledge to make informed decisions about ribbon microphones, from understanding their delicate construction to maximizing their unique sonic characteristics. Whether you’re capturing intimate vocals, smoothing harsh instruments, or adding vintage warmth to your recordings, these mics offer something special when handled properly. Remember, they’re not just tools—they’re investments in your sound that’ll reward careful usage with decades of professional-quality recordings.

