How to Set up a Mixer for Recording
To set up your mixer for recording, start by connecting microphones via XLR inputs and instruments through quarter-inch jacks or DI boxes for proper impedance matching. Set input gain levels to hit the yellow zone on your meters, avoiding red clipping while maintaining -18 dB to -12 dB for ideal headroom. Configure EQ settings from neutral positions, then route your mixer’s main output to your audio interface using balanced cables for clean signal transmission and professional results that’ll elevate your production quality.
We are supported by our audience. When you purchase through links on our site, we may earn an affiliate commission, at no extra cost for you. Learn more.
Notable Insights
- Connect microphones via XLR inputs and instruments through DI boxes or direct line inputs for proper impedance matching.
- Set input gain levels to peak in the yellow zone, maintaining -18 dB to -12 dB range to prevent clipping.
- Start with neutral EQ settings, then boost high frequencies for vocal clarity and cut low frequencies to reduce muddiness.
- Route mixer output to audio interface using balanced XLR or TRS cables to minimize noise and interference.
- Configure recording software for 24-bit/48 kHz quality, assign mixer channels to separate tracks for individual control.
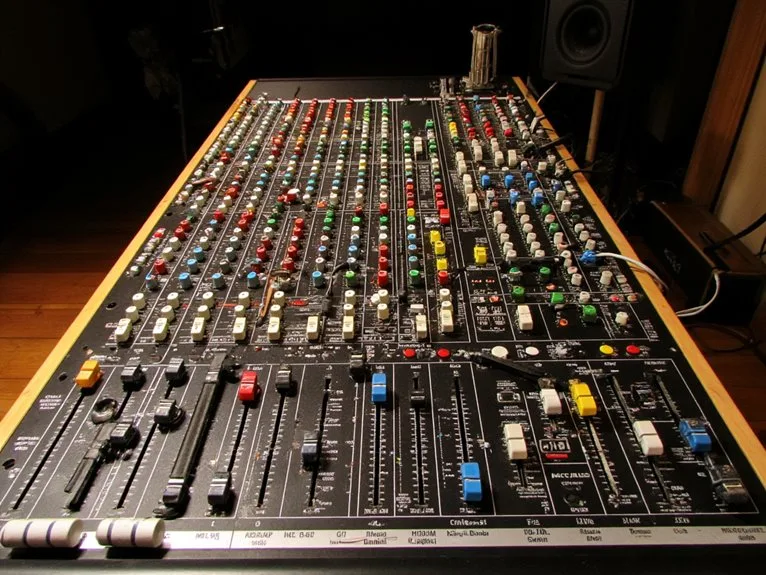
Understanding Your Mixer’s Control Panel and Components
The first step in mastering your mixer involves familiarizing yourself with its control panel, which I’ll admit can look intimidating at first glance, but it’s fundamentally a collection of repeating sections that follow logical patterns once you understand the basic layout.
Understanding mixer basics starts with recognizing that each vertical strip represents one input channel, containing identical controls like gain knobs, EQ sections, auxiliary sends, and channel faders that work together to process individual audio sources.
Channel organization becomes intuitive once you realize the signal flow moves from top to bottom, starting with input connections, through processing controls in the middle section, and ending with output faders that send your polished signal to the master mix section. Signal enters through the back of the mixer and passes through various controls, with XLR inputs for microphones typically indicated by black circle connectors. Mixers combine these input signals to create a unified output mix that can be sent to recording devices or speakers.
Connecting Microphones and Instruments to Input Channels
Now that you understand your mixer’s layout, you’ll need to connect your microphones and instruments properly to achieve clean, professional recordings.
Most microphones connect through XLR inputs and may require phantom power, while instruments typically use quarter-inch connections or require DI boxes to match impedance levels correctly. For acoustic electric guitars and similar sources, engage the high Z button on the relevant channel to accommodate high impedance signals.
After making your connections, adjust the gain knob to match your incoming signal levels to the mixer’s operating level, ensuring all sources have similar voltage for easier mixing. Getting these connections right from the start saves you from troubleshooting mysterious noise, distortion, or signal loss issues later in your recording session.
Professional audio interfaces offer multiple input channels and advanced routing capabilities, allowing you to connect numerous microphones and instruments simultaneously for complex recording setups. Many modern interfaces feature zero-latency monitoring to ensure real-time audio feedback without delays during recording sessions.
Microphone Input Setup
Whether you’re connecting your first microphone or setting up a complex multi-instrument recording session, understanding how to properly route audio signals into your mixer’s input channels forms the foundation of any successful recording setup.
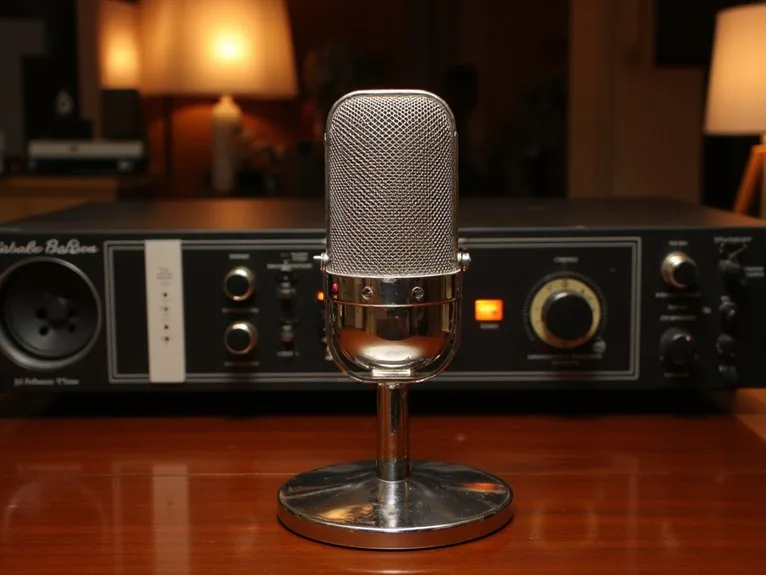
Different microphone types require specific input impedance matching for ideal signal transfer, which you’ll achieve through your mixer’s XLR inputs that provide balanced connections. Connect your microphone using male XLR connectors, then adjust the gain knob while monitoring peak LEDs to prevent distortion.
Dynamic microphones work exceptionally well for louder sound sources, while condenser microphones will need phantom power activation from your mixer to function properly. For unbalanced instruments like guitars or keyboards, use DI boxes to convert their signals for cleaner transmission over longer cable runs. When working with budget-friendly interfaces that lack line inputs, you can still achieve professional results by connecting through instrument inputs using TS quarter inch cables.
| Component | Function | Best Practice |
|---|---|---|
| XLR Input | Balanced microphone connection | Use quality cables |
| Gain Control | Signal level optimization | Adjust gradually |
| Peak LED | Overload monitoring | Watch during recording |
| Level Fader | Volume adjustment | Set after gain |
| EQ Section | Frequency shaping | Minor adjustments initially |
Instrument Connection Methods
Beyond microphones, instruments represent the other half of your recording equation, and connecting them properly requires understanding the distinct signal characteristics that keyboards, guitars, and electronic devices bring to your mixer’s input channels.
Each instrument connection demands careful attention to signal impedance matching, particularly when dealing with high-impedance guitar signals that require DI boxes to convert them into balanced, low-impedance signals your mixer can handle effectively.
Keyboards and electronic instruments typically output line-level signals, allowing direct connection to designated line inputs without additional processing. However, electric guitars and basses need that essential DI box intermediary to prevent tone degradation and noise issues.
I’ve learned that proper gain staging during instrument connection prevents clipping while maintaining signal strength, ensuring your recordings capture every nuance without unwanted distortion. When connecting instruments to your mixer, use ¼” cables for each corresponding input channel to ensure proper signal transmission and optimal recording quality.
For devices like phones or tablets, RCA cables provide an effective connection method using the red and white color-coded inputs for stereo sound capture.
Setting Proper Gain Levels and Input Sensitivity
Once you’ve connected your microphones and instruments, you’ll need to master the critical art of gain staging, which determines whether your recordings sound professional or suffer from unwanted distortion and noise floor issues.
Understanding how input gain structure works across your entire signal chain will help you achieve that sweet spot where your levels peak consistently in the yellow zone on your mixer’s meters, avoiding the dreaded red clipping that can ruin an otherwise perfect take.
I’ve learned through countless sessions that properly setting your input sensitivity from the source all the way through your mixer’s preamps creates the foundation for clean, punchy recordings that translate well across different playback systems. Remember that microphones produce signals at mic level, which is significantly lower than the line level your mixer expects, making proper gain amplification essential for optimal signal processing.
Many professional mixers feature Auto Gain modes that can help beginners find optimal levels automatically, though experienced engineers often prefer manual control for precise gain staging.
Quality studio-quality preamps play a significant role in achieving reliable sound across various performance environments and recording scenarios.
Start by zeroing your mixer and turning down all knobs and faders before beginning the gain staging process.
Understanding Input Gain Structure
When you’re setting up your mixer for recording, input gain structure forms the foundation that’ll make or break your entire audio chain, and I’ve learned this lesson the hard way after years of wondering why my mixes sounded muddy or harsh.
Proper gain staging controls signal levels from microphones through your entire system, balancing everything to avoid distortion while maintaining excellent signal clarity.
You’ll want to start with channel faders down, then gradually increase input trim until your meters peak just below clipping, leaving headroom for dynamic spikes.
This systematic approach affects every downstream process—EQ, compression, amplification—because each stage expects specific input levels to function effectively, and getting this right upfront saves countless hours troubleshooting later problems.
Preventing Signal Clipping Issues
Although proper gain structure gets your signal levels in the right ballpark, preventing clipping requires a more nuanced approach that I’ve had to master through trial and error, especially when dealing with unpredictable sources like energetic vocalists or dynamic instruments.
Effective signal monitoring becomes essential, requiring you to watch those meters like a hawk while maintaining headroom around -6 dB to -3 dB for unexpected peaks.
Here’s my three-step clipping prevention strategy:
- Set conservative limiter thresholds as your safety net against unexpected volume spikes
- Use dynamic compression to tame wild transients before they reach dangerous levels
- Monitor continuously through quality headphones, listening for pops or distortion artifacts
I’ve learned that adjusting gain trim during performance should be your last resort—use faders instead for real-time level control.
Optimizing Recording Levels
Getting your recording levels dialed in perfectly requires understanding that ideal gain sits in that sweet spot between -18 dB and -12 dB for most sources, though I’ve discovered through countless sessions that this range isn’t a one-size-fits-all solution.
Your vocals and guitars typically thrive around -15 dB, while drums demand slightly lower levels around -18 dB to accommodate their transient peaks. Effective gain monitoring becomes essential here—you’ll want to watch those channel meters like a hawk, ensuring peaks approach but never exceed 0 dB.
I always start with gain knobs low, then gradually increase while monitoring the loudest passages of performance. This methodical approach maximizes your signal-to-noise ratio, delivering exceptional audio clarity without the dreaded clipping that’ll ruin an otherwise perfect take.
Configuring EQ Settings for Each Channel
Since each channel on your mixer represents a different instrument or vocal source, I’ve found that configuring EQ settings properly can make the difference between a muddy, indistinct recording and one that sparkles with clarity.
Proper EQ configuration transforms muddy, indistinct recordings into clear, sparkling mixes that showcase each instrument and vocal source distinctly.
These EQ techniques start with setting all dials to neutral position, giving you a clean foundation for frequencies adjustments that enhance rather than overwhelm your sound.
Here’s my approach to channel-specific EQ configuration:
- Start neutral at zero – All EQ bands should begin at the center position before making any adjustments based on your specific instrument needs.
- Target specific frequencies – Boost high frequencies for vocal clarity, adjust midrange for instrument body, and manage low frequencies to eliminate muddiness.
- Listen and adjust incrementally – Make small changes while monitoring how each adjustment affects your overall mix balance and sound quality.
Professional mixing boards typically feature three-band equalizers that allow precise control over low, mid, and high frequencies, providing essential tools for shaping each channel’s sonic character in your mix.
Routing Audio Signals Through the Mixer
Now that you’ve dialed in your EQ settings, you’ll need to understand how audio signals travel through your mixer’s various pathways. This includes managing your master output connections, setting up auxiliary sends for effects processing, and controlling the overall signal flow from input to final destination.
I’ve found that proper routing is what separates amateur recordings from professional ones, since it determines whether your carefully crafted sounds actually reach their intended destinations without unwanted coloration or loss.
You’ll be working with three main routing concepts: connecting your master outputs to recording devices or monitors, configuring aux sends to add reverb and other effects, and managing the signal path to guarantee clean, organized audio flow throughout your entire setup. When setting up your routing configuration, ensure your mixer has dual monitoring outputs so you can simultaneously send audio to both your recording interface and studio monitors without signal degradation.
Master Output Connections
Three primary connection types will determine how effectively your mixer routes audio signals to your recording equipment, and understanding these pathways can make the difference between an amateur-sounding recording and a professional-quality mix.
When I’m configuring master outputs, I focus on three essential output connection techniques that’ll transform your recording workflow:
- XLR connections – These balanced outputs provide superior noise rejection and signal integrity, particularly vital when running longer cable distances to your audio interface or recording equipment.
- 1/4″ TRS jacks – These versatile outputs handle both balanced and unbalanced signals, offering flexibility for various cable compatibility considerations depending on your specific recording setup.
- Direct output routing – Individual channel outputs bypass the main mix, allowing multitrack recording where each instrument gets its own dedicated track in your DAW.
Auxiliary Send Setup
While master outputs handle your main mix signal effectively, auxiliary sends release a completely different dimension of mixer functionality that’ll revolutionize how you route audio signals throughout your recording setup.
These dedicated outputs provide independent signal paths from each channel, allowing you to create custom monitor mixes for performers or send signals to external effects processors without affecting your main recording mix.
Understanding aux send types becomes essential, as pre-fader sends maintain consistent signal regardless of channel fader position, while post-fader sends follow your channel level adjustments.
Start by setting aux send levels with master knobs at unity position, then adjust individual channel aux sends to craft your desired mix, targeting around 0 dB for ideal signal strength without distortion.
Signal Flow Management
Building on auxiliary sends’ flexibility, mastering signal flow management transforms your mixer from a simple volume controller into a sophisticated audio routing hub that’ll handle complex recording scenarios with precision and control.
Understanding signal routing requires grasping how audio travels through your mixer’s internal pathways, where each input channel feeds into processing stages before reaching your desired outputs.
I’ve found that visualizing this flow prevents the confusion that derails many recording sessions, especially when you’re juggling multiple instruments simultaneously.
Effective bus management involves three critical components:
- Input assignment – directing microphones and instruments to specific channel strips
- Processing allocation – routing signals through EQ, compression, and effects stages
- Output distribution – sending processed audio to recording devices, monitors, or headphone feeds
This systematic approach guarantees clean signal paths while maintaining flexibility for creative routing decisions.
Setting Up Monitor Mixes and Auxiliary Sends
Creating effective monitor mixes through auxiliary sends represents one of the most critical aspects of recording setup that I’ve found many engineers initially struggle with.
Yet once you understand the signal routing fundamentals, you’ll discover it’s surprisingly straightforward. Start by selecting available Aux sends on each channel strip, gradually increasing levels to send audio to your monitor mix output.
I recommend using pre-fader sends for recording scenarios since they maintain consistency independent of your main fader adjustments. Proper auxiliary send management involves clearly labeling each output, using balanced cables for connections, and muting unused sends to prevent feedback.
Focus on monitor mix enhancement by applying EQ to reduce problematic frequencies and setting appropriate gain staging for ideal signal-to-noise ratios.
Connecting the Mixer to Your Audio Interface
Once you’ve established your monitor mixes, the next logical step involves creating a solid connection between your mixer’s output and your audio interface, which I’ve learned requires careful attention to cable selection, signal routing, and proper gain staging.
Understanding mixer output types becomes essential here, as you’ll typically encounter XLR, 1/4-inch TRS, or RCA connections. I recommend focusing on the main stereo outputs, which carry your mixed signals to the interface’s line inputs.
Here’s my approach to cable selection tips:
- Choose balanced cables (XLR or TRS) to minimize noise interference over longer runs.
- Measure distances carefully to avoid stretching connections between your mixer and interface.
- Invest in quality cables with proper shielding to maintain signal integrity and reduce unwanted interference.
Connect your mixer’s left and right main outputs directly to inputs 1 and 2 on your audio interface for best recording results. Many modern rack mount digital mixers feature USB interfaces that can streamline this connection process by providing direct digital transfer to your DAW software.
Configuring Recording Software Settings
After establishing that solid connection between your mixer and audio interface, I’ve found that proper software configuration becomes the critical bridge that transforms your hardware setup into a functional recording system.
You’ll need to select recording software like Ableton Live or Logic Pro that supports multi-track capabilities, then configure your audio interface settings within the software to receive mixer signals properly.
Audio format considerations matter greatly—I recommend 24-bit depth with 48 kHz sample rates for professional results.
Software latency solutions include adjusting buffer sizes carefully, balancing low latency with system performance, and enabling real-time monitoring features. Many professional interfaces offer zero-latency monitoring which significantly improves recording efficiency and eliminates the delay between input and playback.
Don’t forget to assign each mixer channel to separate tracks, allowing individual control over levels, panning, and effects processing during your recording sessions.
For professional recordings, ensure your setup supports studio-quality recordings up to 24-bit/192kHz to meet the highest audio fidelity standards.
Testing Signal Flow and Eliminating Feedback
With your software properly configured and ready to receive audio, the real test begins when you start passing actual signals through your entire recording chain, from microphone to mixer to interface to software.
I’ve learned that systematic testing prevents countless headaches during actual recording sessions, and proper signal isolation becomes essential for identifying problems quickly.
Here’s my proven approach for extensive signal flow verification:
- Test each input individually using PFL mode to isolate signals and check for clean audio without interference or unwanted noise.
- Gradually raise monitor levels while speaking into microphones to identify feedback frequencies before they become problematic squealing disasters.
- Verify recording levels in your software while adjusting gain staging to secure ideal signal quality without distortion.
Effective feedback prevention requires strategic microphone placement, conservative monitor volumes, and targeted EQ cuts at problematic frequencies.
Essential features like zero-latency monitoring through dedicated headphone outputs help maintain performance quality during recording sessions by providing real-time audio feedback without delays.
Frequently Asked Questions
Can I Use Multiple Microphones to Record the Same Instrument Simultaneously?
You can absolutely use multiple microphones for recording the same instrument simultaneously, and I’ve found that dual microphone setup techniques offer exceptional creative possibilities.
Stereo recording techniques, like XY or spaced pair configurations, capture spatial depth and richness that single mics simply can’t match.
You’ll need proper phase alignment and strategic placement to avoid interference, but the enhanced dimensionality makes it worthwhile for serious recordings.
What’s the Difference Between Balanced and Unbalanced Cables for Mixer Connections?
The primary difference between these cable types lies in signal quality and noise resistance.
Unbalanced cables, typically using TS connectors, carry signals through a single wire, making them more susceptible to interference and limiting their effective range.
Balanced cables utilize XLR or TRS connectors with dual signal wires of opposite polarity, creating differential transmission that cancels noise and maintains superior signal integrity over longer distances.
How Do I Prevent Electromagnetic Interference From Affecting My Recordings?
You’ll want to implement several EMI solutions, starting with proper cable shielding using high-quality shielded cables, which I’ve found makes a significant difference in my own studio setups.
Keep your audio cables separated from power cables by at least six inches, run them at 90-degree angles when they must cross, and make certain everything’s properly grounded to eliminate those annoying ground loops that’ll ruin your recordings.
Should I Record Each Channel Separately or Mix Everything Down Live?
Your recording techniques choice depends on your mixing strategies and project goals.
I’d recommend recording each channel separately if you’re working on complex productions, since you’ll get maximum flexibility during post-production editing and can isolate individual elements perfectly.
However, if you’re capturing live performances or want that cohesive, real-time energy, mixing everything down live works beautifully and saves considerable time in post-production work.
What Backup Equipment Should I Have Ready During Important Recording Sessions?
You’ll need backup power like an uninterruptible power supply (UPS) to prevent sudden shutdowns during critical takes.
I’d recommend redundant storage systems including external drives plus cloud backup running simultaneously.
Keep spare cables, memory cards, and a secondary audio interface ready, because I’ve learned that equipment failures always happen at the worst possible moments during important sessions.
On a final note
You’ve now got the foundation to transform your mixer into a recording powerhouse, though I’ll admit the cable management behind mine still looks like digital spaghetti most days. Start with conservative gain settings, test your signal flow methodically, and don’t rush the setup process. Your future self will thank you when you’re capturing clean, professional-sounding recordings instead of troubleshooting mysterious hums and feedback loops during those vital creative moments.