Mixer EQ Controls and How to Use Them
You’ll find EQ controls positioned strategically on your mixer’s channel strips, typically featuring three to four bands covering high, mid, and low frequencies with dedicated gain knobs for boosting or cutting specific ranges. Each channel strip’s EQ section sits between the input gain stage and auxiliary sends, allowing you to shape individual instrument tones before they reach effects or compression. The master EQ section affects your entire mix output, so use it sparingly for gentle corrections rather than dramatic adjustments, since cutting problematic frequencies generally produces better results than boosting desired ones. Understanding these fundamental placement principles and control functions will reveal advanced techniques that transform amateur mixes into professional-sounding productions.
We are supported by our audience. When you purchase through links on our site, we may earn an affiliate commission, at no extra cost for you. Learn more.
Notable Insights
- Channel strip EQ controls are positioned between gain stages and aux sends to shape individual track tones before compression or effects processing.
- Use sweep control functions to boost a narrow Q band and adjust frequency to identify problem frequencies like muddy low-mid buildup.
- Apply subtractive EQ by cutting competing frequencies instead of boosting others to prevent frequency masking and maintain headroom.
- Master EQ sections control the entire mix output with broad impact, requiring gentle corrections after optimizing individual channel strips.
- Manage low-end frequencies (20Hz-300Hz) by high-pass filtering rumble and carving unique frequency spaces to prevent bass instrument overlap.
Understanding Different Types of EQ Systems
When you’re diving into the world of audio mixing, understanding the different types of EQ systems available can feel overwhelming at first, but I’ve found that breaking them down into their core characteristics makes the selection process much more manageable.
Parametric EQs offer the most precision through gain, frequency, and bandwidth controls, making them ideal for surgical adjustments, while graphic EQs provide quick visual feedback with fixed bands that work well for live applications.
Dynamic EQs automatically adjust based on signal levels, and semi-parametric versions offer a middle ground with fixed bandwidth options. High-end equalizers like the Dangerous Music BAX EQ feature stepped knobs that enhance usability and consistency for professional mastering applications.
Most modern DAWs include built-in EQ plugins that provide sufficient functionality for basic equalization tasks and are perfect starting points for beginners developing their mixing skills.
Understanding these EQ system types, their features, applications, and best practices while avoiding common mistakes will greatly improve your mixing results and help you choose the right tool for each specific audio challenge.
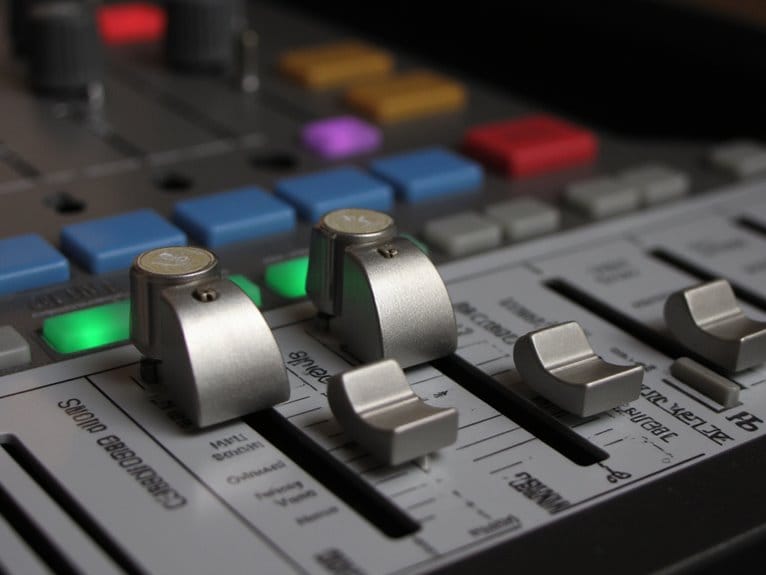
Location and Layout of EQ Controls on Mixers
When you’re working with a mixer, you’ll find EQ controls strategically positioned in three primary locations that directly impact your workflow and sound quality.
Your channel strip EQ sits right at your fingertips within each individual channel, typically positioned in the upper or middle section above the fader, giving you immediate access to shape each input source without reaching across the console or interrupting your mixing flow. These controls should be treated as problem solvers rather than tone controls, addressing specific issues in your audio signal.
Beyond these individual channel controls, you’ll also encounter master EQ sections that affect your overall mix output, plus various integration points where external EQ units can be inserted into your signal chain, creating a detailed equalization system that spans from input to final output. Modern mixing surfaces often feature an EQ Mixer mode that allows you to edit one equalizer parameter across all channel strips simultaneously, streamlining your workflow when making consistent adjustments across multiple channels.
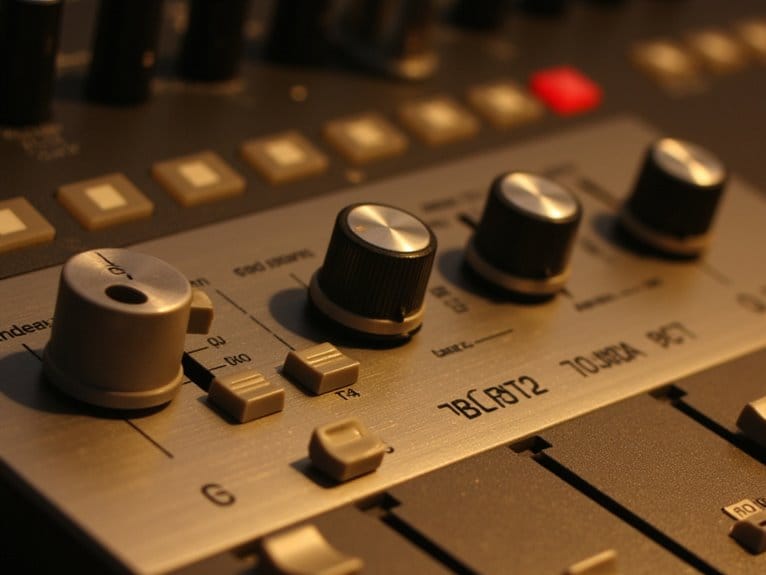
Channel Strip EQ Placement
On most mixing consoles, you’ll find the EQ controls strategically positioned in their own dedicated section of each channel strip, typically sitting between the gain stage at the top and the aux sends below. This placement in the EQ signal chain allows you to shape tone before compression or effects processing, which proves essential for EQ musicality across different genres. When you’re doing EQ troubleshooting, having controls grouped together streamlines your workflow considerably.
| EQ Type | Primary Use | Frequency Range |
|---|---|---|
| High-Pass Filter | Remove low-end rumble | 20-200 Hz |
| Parametric EQ | Precise frequency control | Full spectrum |
| Shelving EQ | Broad tonal shaping | High/Low ranges |
| Peaking EQ | Targeted boosts/cuts | Mid frequencies |
Through EQ experimentation and EQ learning, you’ll discover that proper EQ enhancements require understanding signal flow placement, making EQ automation more effective when you know exactly where adjustments occur in your mix chain. The EQ section typically features three bands covering high, mid, and low frequencies, with each band offering dedicated gain controls for precise frequency adjustments. Higher-end mixers provide parametric equalizers that offer greater precision and control over frequency adjustments compared to basic bass and treble controls found on standard mixing consoles.
Master EQ Section
Unlike the individual channel strip EQs that shape specific input signals, the Master EQ section commands a position of ultimate authority within your mixer’s signal chain, typically nestled in the Master Section where it can influence your entire mix with surgical precision.
You’ll find these controls clustered together as dedicated knobs or sliders, distinctly separated from channel EQs to emphasize their broad impact scope.
Master EQ usage requires careful consideration since adjustments affect all mixed signals simultaneously, making subtlety your best friend to avoid drastic alterations.
The typical layout features multiple frequency bands with gain adjustment controls, shelving filters, and often high-pass filtering capabilities. The EQ section includes a four-band EQ with parametric midrange and high/low frequency shelving bands, capable of switching between two modes with different curve characteristics.
Smart Master EQ settings involve gentle broad-stroke corrections after optimizing individual channels, serving as your final tonal decision before output. When making adjustments, cutting frequencies generally proves more effective than boosting for achieving better sound quality.
External EQ Integration
Sometimes you’ll find that even the most thorough Master EQ section can’t deliver the specific tonal sculpting you’re after, which brings us to the domain of external EQ integration where dedicated outboard processors expand your sonic palette beyond the mixer’s built-in capabilities.
I’ve discovered that external eq benefits become apparent when you need surgical precision or unique sonic characteristics that your mixer simply can’t provide.
When choosing eq units for integration, you’ll want to contemplate these key connection methods:
- Insert Points – Direct channel-specific processing through dedicated insert jacks
- Send and Return – Flexible routing for individual channels or submixes
- Master Section Integration – Whole-mix processing via master insert connections
- AUX Send Processing – Monitor mix enhancement through auxiliary routing
Insert connections are located at the top of channel strips and require a specific insert cable setup involving TRS and TS connectors to integrate external hardware like EQs and compressors.
External EQ units may be necessary for features not available on mixing consoles, primarily available in two types: graphic and parametric EQ.
Proper cable management and level matching maintain maximum signal integrity throughout your expanded EQ chain.
Essential EQ Control Functions and Parameters
When you’re working with mixer EQ controls, understanding the core parameters becomes essential for achieving professional-sounding results. I’ve found that mastering these fundamental functions can dramatically improve your mixing workflow.
Your Q control manages bandwidth dynamics, allowing precise resonance targeting with narrow settings or broader tone sculpting with lower values. This directly impacts mix coherence and clarity enhancement.
Gain adjustments, typically ranging ±12 to ±18 dB, require restraint since subtle 1-3 dB changes often preserve musicality while maintaining phase integrity.
Filter type selection enables focused sound manipulation through bell curves, high-pass cleaning, and shelving adjustments.
Filter slope control determines shift steepness, while bypass and visual feedback provide real-time frequency balancing tools that enhance your EQ creativity without compromising overall sonic quality.
Frequency Control and Range Selection
When you’re working with mixer EQ controls, mastering frequency bands becomes your foundation for achieving professional-quality sound, since each band targets specific portions of the audible spectrum from deep bass frequencies around 20 Hz up to the sparkling highs at 20 kHz.
I’ve found that understanding sweep control functions allows you to pinpoint exactly which frequencies need attention, whether you’re hunting down that muddy low-mid buildup around 300 Hz or enhancing vocal presence in the 2-4 kHz range.
Your range selection techniques will determine whether you’re making broad, musical adjustments with wide Q settings or performing surgical corrections with narrow bandwidth controls, and honestly, getting this balance right separates amateur mixing from professional results.
Understanding Frequency Bands
The foundation of effective mixing lies in understanding how the audio spectrum divides into distinct frequency bands, each carrying specific sonic characteristics that’ll make or break your mix’s clarity and balance.
These frequency ranges, spanning from 20 Hz to 20,000 Hz, determine how your equalization techniques affect different instruments and vocals, ultimately shaping your mix’s tonal balance.
Here’s how the primary frequency bands break down:
- Bass (20-250 Hz) – Foundation and warmth, housing kick drums and bass guitars
- Low Mids (250-500 Hz) – Instrument fullness and body, requiring careful control to avoid muddiness
- Midrange (500 Hz-2 kHz) – Vocal and instrument presence, directly impacting how forward elements sound
- High Mids (2-4 kHz) – Attack and clarity, where human hearing sensitivity peaks
Each band requires different approaches to maintain sonic clarity without frequency masking.
Sweep Control Functions
Every parametric EQ‘s most powerful feature isn’t the flashy presets or the colorful frequency display—it’s the humble sweep control that lets you hunt down problem frequencies with surgical precision.
You’ll use this frequency knob to gradually move through the audible spectrum, listening for resonances or sweet spots that need attention. Effective sweep techniques involve temporarily boosting a narrow Q band while slowly adjusting the frequency control, then cutting or enhancing once you’ve identified the target area.
Range selection features let you focus on specific frequency segments rather than scanning the entire spectrum, making your workflow more efficient.
These tonal adjustments serve as diagnostic tools first, creative enhancements second.
Range Selection Techniques
Range selection becomes your strategic weapon for carving out sonic territories in a crowded mix, where each instrument needs its own frequency real estate to breathe and shine.
I’ve learned that effective range allocation prevents frequency masking, where competing elements muddy your mix’s clarity and reduce dynamic range.
Here’s my approach to strategic range selection:
- Assign distinct frequency pockets to each instrument, avoiding overlap between competing elements
- Boost target frequencies on primary instruments while cutting those same ranges on supporting tracks
- Use narrow Q settings for surgical cuts and wide Q for musical tonal shaping
- Monitor cumulative effects across all tracks to prevent frequency buildup
Smart range selection guarantees each element occupies its own sonic space, maintaining separation while preserving the natural character of your sources.
Gain Adjustment Techniques for Boosting and Cutting
When you’re working with mixer EQ controls, mastering gain adjustment techniques becomes the foundation for everything else you’ll do in your mix. I’ve found that understanding the delicate balance between boosting and cutting frequencies can make or break your final sound.
Gain staging essentials start with proper signal levels throughout your entire chain, ensuring each component receives ideal input without overloading downstream processors. Unity gain principles dictate that you maintain consistent levels when switching EQ in and out, preventing jarring volume jumps that’ll fool your ears into thinking changes sound better simply because they’re louder.
I typically monitor signal peaks carefully, keeping them well below 0 dB while positioning faders strategically after setting initial gain levels, which creates headroom for creative frequency adjustments.
Q Control and Bandwidth Manipulation
After you’ve mastered gain staging fundamentals, Q control becomes your precision instrument for sculpting frequencies with surgical accuracy.
I’ll admit that understanding its bandwidth manipulation capabilities took me longer to grasp than I’d like to admit.
These Q Control Techniques will transform your mixing precision:
Mastering Q control techniques separates amateur mixers from professionals who achieve surgical frequency precision in their productions.
- Frequency Targeting – Higher Q values create narrow bandwidth adjustments for sound isolation of specific problem frequencies.
- Resonance Management – Lower Q settings provide broader frequency coverage for gentle tonal shaping.
- Clarity Enhancement – Medium Q values balance precision with musicality for natural-sounding corrections.
- Bandwidth Optimization – Adjust Q while monitoring the entire mix to maintain frequency balance.
Start with broader Q settings before narrowing your focus, because overly tight bandwidth adjustments can create unnatural artifacts that’ll make your mix sound processed.
Parametric Vs Graphic EQ Applications
Understanding the fundamental differences between parametric and graphic EQs will dramatically impact your mixing decisions, and I’ve learned through countless studio sessions that choosing the wrong type can either elevate your sound or create unnecessary complications in your workflow.
The parametric advantages become evident when you’re crafting complex EQ curves, adjusting Q settings for surgical precision, and manipulating overlapping frequency bands to achieve artistic vision. Meanwhile, graphic limitations surface during detailed sound shaping, where fixed frequency points restrict your creative flexibility.
| Aspect | Parametric EQ | Graphic EQ |
|---|---|---|
| Primary Use | Studio mixing, sound design | Live sound, feedback control |
| Control Level | Full frequency/Q adjustment | Fixed frequency points |
| Learning Curve | Steeper, more complex | Intuitive, visual interface |
You’ll find graphic EQs excel in live environments where quick visual adjustments matter most.
Creating Space for Instruments in Your Mix
Creating space for instruments in your mix isn’t about turning everything up louder—it’s about strategically carving out frequency territories where each element can breathe without stepping on its neighbors.
You’ll discover that successful instrument placement relies heavily on purposeful EQ cutting, which removes competing frequencies rather than boosting everything into a muddy mess that sounds impressive until you realize it doesn’t.
Through careful frequency carving, strategic cuts in overlapping ranges, and thoughtful spatial positioning techniques, you can transform a cluttered mix into a three-dimensional soundscape where every instrument has its own clearly defined place.
Carving Frequency Space
When you’re mixing multiple instruments together, I’ve found that one of the biggest challenges isn’t getting each element to sound good individually, but rather making them all coexist harmoniously within the same sonic space.
Carving frequency space requires strategic EQ decisions that prevent frequency masking, where competing instruments occupy overlapping ranges and create muddiness.
Here’s my approach to effective frequency carving:
- Identify Problem Frequencies – Use spectrum analysis to spot where instruments clash.
- Apply Subtractive EQ – Cut competing frequencies rather than boosting desired ones.
- Utilize Dynamic Processing – Implement EQ automation for changing arrangements throughout your song.
- Create Complementary Curves – Shape instruments to occupy distinct frequency ranges.
I’ll often boost a guitar’s presence around 3kHz while simultaneously cutting that same range from competing keyboards, ensuring each element maintains its clarity without sacrificing the overall mix balance.
Strategic EQ Cutting
While frequency carving establishes the foundation for mix separation, strategic EQ cutting takes this concept deeper by deliberately removing specific frequencies that muddy your mix, even when those frequencies might sound perfectly fine in isolation.
This frequency cleanup approach prevents frequency masking between instruments, where competing elements fight for the same sonic space and reduce your mix clarity.
I’ve found that narrow Q cuts work best for EQ precision, targeting problematic resonances without affecting adjacent frequencies.
When you cut unwanted frequencies from one instrument, you’re fundamentally creating dynamic range for others to breathe, improving overall tonal balance.
This technique enhances instrument separation while maintaining harmonic enhancement across your entire mix, allowing each element to occupy its own distinct pocket in the frequency spectrum.
Instrument Placement Techniques
How do you transform a cluttered mix into a three-dimensional soundscape where every instrument has its own distinct location? Through strategic instrument placement techniques that combine panning techniques with EQ clarity, you’ll create professional-sounding mixes where every element breathes naturally within the stereo field.
Effective placement strategies start with these core principles:
- Mono mixing first to establish proper frequency adjustment and instrument balance
- LCR positioning for vocals, kick, bass, and snare in the center
- Strategic panning of guitars, effects, and percussion to the sides
- Stereo enhancement using widening effects like chorus and reverb sparingly
I’ve learned that carving out unique frequency spaces prevents masking while thoughtful panning creates immersive depth, ensuring your mix translates beautifully across all playback systems.
Enhancing Vocal Clarity With Mid-Range Adjustments
Although many engineers tend to overthink vocal EQ, I’ve found that strategic mid-range adjustments between 200 Hz and 2000 Hz often provide the most dramatic improvements to vocal clarity and presence in a mix.
When dealing with muddy vocals, I start with precision cutting around 200-300 Hz to remove unwanted low-mid buildup. Then I address the vocal range’s unique voice characteristics through targeted frequency boosts.
My go-to EQ techniques involve boosting around 1-2 kHz for vocal warmth while enhancing the presence region between 3-6 kHz for clarity boosting. These mid range tips help achieve better mix clarity without sacrificing the natural character that makes each voice distinctive, allowing vocals to cut through dense instrumentation effectively.
Low-End Management for Bass Response
Three fundamental principles govern effective low-end management: weight distribution, frequency clarity, and rhythmic definition, and I’ve learned that mastering these concepts transforms muddy, sluggish mixes into tight, powerful productions that translate well across different playback systems.
Your bass frequency considerations should prioritize the 20Hz to 300Hz spectrum, where most fundamental bass energy resides.
I’ve found that proper low end balance requires strategic EQ decisions rather than random frequency adjustments.
Here’s my proven workflow for bass management:
- Start with gentle high-pass filtering below 20Hz to eliminate inaudible rumble
- Use broad shelving EQ to establish overall weight before applying surgical cuts
- Carve frequency space by removing overlapping bass frequencies from non-bass instruments
- Monitor on appropriate speakers with at least 8-inch woofers for accurate bass perception
High-Frequency Shaping for Brightness and Presence
While bass frequencies provide the foundation of your mix, high-frequency shaping between 6kHz and 20kHz determines whether your tracks sound polished and present or dull and lifeless, and I’ve discovered that strategic brightness enhancement can make the difference between amateur recordings and professional-sounding productions.
| Frequency Range | Purpose | Technique |
|---|---|---|
| 2-4 kHz | Sibilance control, harshness reduction | Gentle cuts, de-essing |
| 6-10 kHz | Dynamic presence, clarity improvement | High shelf EQ, subtle adjustments |
| 10-15 kHz | Harmonic richness, sparkle | Additive EQ, tape saturation |
| 15-20 kHz | Airiness, stereo imaging | Harmonic exciters, width enhancement |
| Above 5 kHz | Taming aggressive instruments | High shelf cuts, balanced reduction |
Achieving proper high frequency balance requires understanding that subtle adjustments often produce better results than dramatic boosts, preventing listener fatigue while maintaining the professional polish your mixes deserve.
Frequently Asked Questions
Should I Use EQ During Recording or Only During Mixing and Mastering?
You’ll gain the most EQ benefits by using minimal adjustments during recording, focusing primarily on fixing obvious problems like harsh frequencies or low-end rumble.
I recommend saving detailed EQ work for mixing since recording techniques should prioritize capturing clean, natural sounds.
Software plugins offer superior precision compared to hardware mixer EQ, giving you flexibility to make reversible adjustments without permanently altering your original recordings.
What’s the Difference Between Analog and Digital EQ Processing Sound Quality?
You’ll notice that analog warmth comes from harmonic distortions and subtle saturation that analog circuits naturally introduce, creating that coveted “musical” character I’ve experienced in countless studio sessions.
Digital precision, however, offers surgical accuracy without coloration, which I find invaluable for corrective work.
While analog EQ adds pleasing imperfections and phase shifts, digital EQ delivers transparent, linear processing that’s clinically perfect.
Can I Save and Recall EQ Presets on My Mixer for Different Songs?
Yes, you’ll find that most digital mixers support extensive preset management, allowing you to save custom EQ settings for each channel and recall them instantly between songs.
These EQ techniques enable consistent sound quality across performances, while advanced preset management systems let you store entire scenes with all channel parameters, making changes seamless during live shows or recording sessions.
On a final note
You’ve now got the essential knowledge to tackle mixer EQ with confidence, though I’ll admit it takes practice to develop that instinctive feel for what each frequency range contributes to your overall sound. Start with subtle adjustments, trust your ears over visual cues, and don’t be afraid to experiment across different venues and musical styles—you’ll discover that mastering these controls transforms your mixing capabilities considerably.