How to Choose the Right Mixer for Your Setup
When choosing your mixer, you’ll need to match your channel count to your actual inputs—typically 4-8 channels for small setups, 12-16 for medium events, and 24+ for large productions. Decide between analog’s warm sound character or digital’s built-in effects and precise control, then consider whether you need portable convenience or stationary power. Set a realistic budget from ₹5,000 for basic functionality to ₹50,000+ for professional features. Understanding these fundamentals will guide you toward the perfect mixer for your specific audio requirements.
We are supported by our audience. When you purchase through links on our site, we may earn an affiliate commission, at no extra cost for you. Learn more.
Notable Insights
- Determine your required channel count based on application: 4-8 for small gatherings, 12-16 for medium events, 24+ for large concerts.
- Choose between analog mixers for warm, natural sound and digital mixers for built-in effects and precise control capabilities.
- Ensure adequate connectivity with XLR inputs, USB ports, and 48V phantom power support for professional microphone compatibility.
- Consider portability needs: compact portable mixers for mobile use versus robust stationary mixers for permanent installations.
- Set a realistic budget that covers essential features without overspending on unused capabilities for your specific application.
Understanding Your Audio Mixing Needs
The foundation of any successful mixing project lies in clearly defining what you’re trying to accomplish, and I’ve learned that skipping this essential step often leads to frustration and subpar results down the road.
You’ll need to determine your specific genre requirements, whether you’re mixing rock, jazz, podcasts, or electronic music, because each demands different mixer functionalities and approaches.
Consider your primary environment—live performance, studio recording, or broadcast—since these contexts greatly impact the features you’ll actually use.
Your mixing environment fundamentally shapes which features matter most, making context the crucial first consideration before any equipment decisions.
I’ve found that honestly evaluating your input count, from microphones to instruments, prevents costly oversights later. Understanding the frequency spectrum of your typical sources helps ensure your mixer can handle everything from bass instruments operating at 20 Hz to 250 Hz up to high-frequency elements reaching 20 kHz.
Additionally, appraising your desired control precision helps identify whether basic channel strips suffice or if you need advanced routing capabilities, ultimately ensuring the audio quality matches your creative vision. Evaluate whether you need XLR inputs for professional microphones and instruments, as this connectivity type provides superior signal quality and phantom power for condenser microphones. Remember that maintaining proper headroom levels between -3dB and -6dB during mixing preserves dynamics and prevents distortion in your final output.
The choice between digital and analog mixers also significantly impacts your workflow, as digital options offer greater flexibility with advanced features while analog models provide simpler, more straightforward operation.
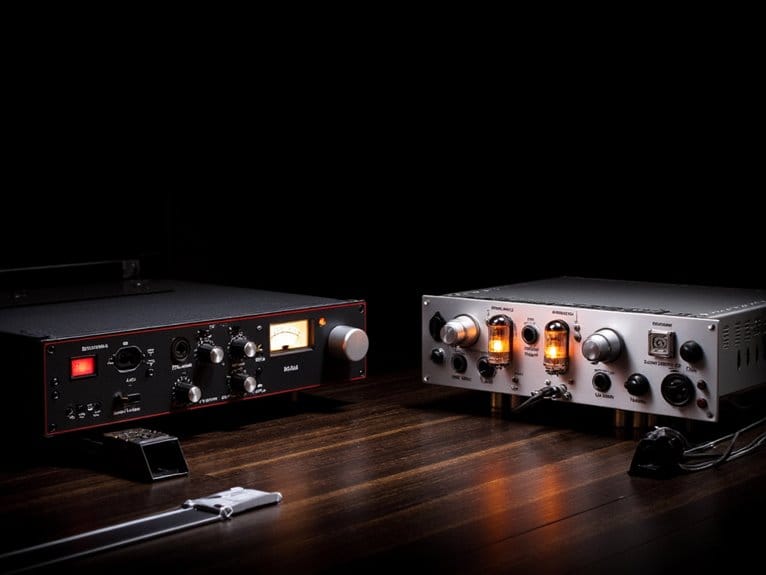
Analog Vs Digital Mixer Technology
Once you’ve identified your mixing requirements, selecting between analog and digital technology becomes your next major decision, and I’ll be honest—this choice has stumped more engineers than I care to count over the years.
Your signal fidelity and mixer performance will depend heavily on understanding how analog sound differs from digital processing, particularly when considering interface usability and maintenance needs.
Here’s what separates these technologies:
- Analog mixers capture authentic sound character but require more upkeep
- Digital processing offers built-in effects and superior noise resistance
- Cost analysis favors analog for basic setups, digital for feature-rich applications
- Interface usability differs dramatically between tactile controls and software-based options
- Maintenance needs vary greatly, with digital requiring less long-term care
This feature comparison ultimately boils down to your specific performance requirements and budget constraints. Digital mixers excel with function consolidation, allowing multiple functions to be assigned to single controls for more compact designs.
Digital mixers also provide saved settings capabilities that can be recalled for different event configurations, eliminating the need to manually adjust each parameter. Users transitioning from analog to digital may face a learning curve when adapting to software-based interfaces and menu navigation systems.
Determining the Required Number of Channels
| Event Size | Typical Channel Count |
|---|---|
| Small Gatherings | 4-8 channels |
| Medium Events | 12-16 channels |
| Large Concerts | 24+ channels |
| Professional Studios | 32+ channels |
| Home Recording | 8-12 channels |
Consider output channel considerations for speakers and recording devices, while channel quality assessments help balance cost versus performance. Smart mixing capability evaluations guarantee you’re not overwhelmed by unnecessary complexity, yet have room for expansion when your setup inevitably grows. Understanding your mixer layout thoroughly will enhance effective utilization and ensure optimal functionality during live performances and recording sessions. Each channel strip includes specific controls for input management, requiring careful evaluation of how many individual controls you’ll need for your particular audio sources. Professional mixers like the Behringer X32 Rack offer 40 input channels with programmable preamps, making them suitable for complex live sound applications that require extensive mixing capabilities.
Portability Vs Stationary Considerations
When you’re choosing between portable and stationary mixers, I’ve learned that this decision fundamentally shapes your entire audio setup, affecting everything from your daily workflow to long-term equipment investments.
Portable benefits include compact designs with lightweight materials that make transportation effortless, while all-in-one powered solutions eliminate separate amplifiers.
Stationary advantages center on robust build quality and extensive routing options that deliver professional-grade performance in fixed installations. Digital mixers offer seamless DAW integration for stationary setups, allowing you to save and recall complex routing configurations.
Consider these key factors when making your decision:
- Transport frequency – How often you’ll move your equipment
- Venue size – Small spaces favor portability, large venues need stationary power
- Setup complexity – Portable units offer quick deployment, stationary allows customization
- Durability needs – Frequent transport requires protective cases and metal chassis
- Power requirements – Stationary mixers handle higher output demands effectively
For live performances, portable mixers provide road-worthy ruggedness designed to withstand the demanding conditions of frequent transport and venue changes. Professional-grade mixers should deliver Class A preamps for enhanced recording precision regardless of whether you choose portable or stationary configurations.
Setting a Realistic Budget Range
After years of helping musicians and audio engineers navigate the mixer marketplace, I’ve discovered that establishing a realistic budget range serves as your financial compass. This prevents both underspending on features you’ll desperately need later and overspending on capabilities that’ll gather dust in your studio.
Entry-level mixers under ₹15,000 offer essential functionality for beginners, while mid-range options between ₹15,000-₹50,000 provide expanded channels and professional features. High-end mixers exceeding ₹50,000 deliver studio-grade components and advanced connectivity. Most modern devices ensure Mac and PC compatibility across different price ranges, eliminating potential workflow disruptions.
Your cost analysis should factor in connectors, effects processing, and DAW compatibility, as these elements greatly impact total investment. Consider the Behringer XENYX X1204USB at approximately $200 for home studios, though your budget considerations must align with your specific usage requirements and growth projections. Budget audio mixers provide professional features at a low cost, making them ideal for podcasters, streamers, and musicians seeking quality without breaking the bank. Quality preamp designs often justify higher initial costs since they establish your sound foundation and are crucial for audio clarity. The evolution toward digital mixers reflects current industry preferences as they integrate seamlessly with modern software workflows.
Essential Connectivity Options and Ports
When you’re evaluating mixers, you’ll need to contemplate three critical connectivity aspects that directly impact your setup’s functionality, recording capabilities, and overall versatility.
The XLR input configuration determines how many microphones you can connect simultaneously, while USB connection types affect your ability to interface with computers, mobile devices, and digital audio workstations for recording or streaming applications.
Your choice of output ports, including main outs, monitor sends, and auxiliary returns, shapes how you’ll connect to speakers, headphones, effects processors, and external recording equipment.
For professional applications, ensure your mixer includes 48V phantom power to support condenser microphones and other equipment that requires this power standard. Additionally, look for mixers that support 24-bit/192kHz recording resolution to achieve professional-grade audio quality in your recordings.
XLR Input Requirements
Although I’ve spent countless hours testing mixers across various price points, I can confidently say that XLR input requirements represent the foundation of any serious audio setup, demanding careful consideration of your specific connectivity needs.
When evaluating XLR signal quality, you’ll want balanced connections that provide superior noise rejection, particularly for professional microphone applications. Phantom power considerations become vital when you’re using condenser microphones, requiring +48V power delivery through those same XLR connectors.
Impedance matching guarantees ideal signal transfer, with most quality mixers featuring input impedance exceeding 10 kΩ.
Essential XLR specifications to evaluate include:
- Input sensitivity range from −60 to +10dBu for versatile source compatibility
- Maximum input levels around +30dBu for headroom protection
- Adjustable gain ranging −5 to +60dB in precise 1dB increments
- Individual phantom power switching for selective microphone powering
- High-quality shielding against electromagnetic interference
These technical requirements directly impact your mixer’s professional capabilities.
USB Connection Types
While XLR connections handle your microphone inputs, USB connectivity transforms your mixer into a digital audio powerhouse, bridging the gap between analog mixing and computer-based recording with remarkable versatility. USB C advantages include reversible connectors and faster data transfer, though you’ll likely need adapters for older computers. USB Type B usage dominates professional mixers, providing reliable multi-channel streaming to your DAW. USB audio playbook enables direct recording and file streaming at professional resolutions up to 24-bit/192kHz.
| Connection Type | Primary Function | Speed | Common Issues |
|---|---|---|---|
| USB-C | Power + Data | High-speed | Adapter requirements |
| USB Type-B | Audio streaming | 480 Mbps | Cable bulk |
| USB Type-A | File playbook | Standard | Limited channels |
| Ethernet | MIDI control | Variable | Setup complexity |
USB compatibility challenges arise when mixing modern and legacy equipment, while USB streaming benefits include plug-and-play simplicity and professional-grade audio quality.
Output Port Options
Beyond USB’s digital capabilities, your mixer’s output ports determine how effectively you’ll distribute audio signals to speakers, recording equipment, and monitor systems throughout your entire setup. Understanding output versatility helps match your mixing requirements with real-world connectivity demands.
Main stereo outputs connect to PA systems using XLR, TRS, or RCA connector types, with professional +4 dBu output levels ensuring proper sound reinforcement. Auxiliary outputs create independent mixes for stage monitoring, effects processing, or recording flexibility without affecting your main mix.
Subgroup routing bundles multiple channels together, allowing collective processing of drums or instruments before final output.
Essential output port considerations:
- Monitor configurations for performer feedback systems
- Recording flexibility through dedicated REC OUT ports
- Professional output levels (+4 dBu vs -10 dBV consumer standards)
- Multiple auxiliary outputs for complex routing needs
- Subgroup capabilities for advanced mixing control
Built-in Effects and Processing Capabilities
When you’re evaluating mixers with built-in effects and processing capabilities, I’ve found that understanding the vital effect types—reverb, delay, modulation, compression, and EQ—becomes essential for determining whether a particular model will meet your specific audio production needs.
The processing quality varies greatly between manufacturers, with high-end options like Lexicon-equipped Soundcraft boards delivering studio-grade results, while budget-friendly Behringer Xenyx models provide serviceable effects that work well for live performances and home recording setups.
You’ll want to take into account how these built-in processors integrate with your workflow, since the difference between basic digital effects and premium algorithms can profoundly impact your final sound quality, especially when you’re working with vocals or acoustic instruments that benefit from sophisticated spatial processing.
Essential Effect Types
The heart of any modern mixer lies in its built-in effects and processing capabilities, which can transform your raw audio signals into polished, professional-sounding productions without requiring a rack full of expensive external gear.
Understanding effects terminology becomes essential when you’re maneuvering through reverb algorithms, compression ratios, and EQ curves that’ll shape your final sound.
The creative applications are honestly endless – I’ve watched producers turn mediocre recordings into sonic masterpieces using nothing but their mixer’s onboard processing.
Here are the important effects you’ll want prioritized in your setup:
- Reverb and delay for spatial depth and ambient texturing
- EQ and compression for tonal shaping and dynamic control
- Modulation effects like chorus, flanger, and phaser for movement
- Pitch correction for vocal tuning and creative manipulation
- Noise gates for eliminating unwanted background interference
Processing Quality Considerations
Although you’ve identified the effects you need, the processing quality of those built-in capabilities will ultimately determine whether your mixer elevates or undermines your audio productions.
Digital mixers excel at complex algorithms and precise control, though they introduce processing latency ranging from 1-10 milliseconds during analog-to-digital conversion. While this latency proves manageable for most applications, it becomes noticeable with in-ear monitors where timing precision matters most.
| Aspect | Digital | Analog |
|---|---|---|
| Latency | 1-10ms processing delay | Near-zero latency |
| Sound Character | Clean, precise fidelity | Classic analog warmth |
| Reliability | Software-dependent stability | Hardware-based consistency |
| Upgradeability | Firmware updates expand features | Fixed processing capabilities |
Analog warmth remains unmatched for certain musical styles, while digital reliability depends heavily on converter quality and DSP resources. Your choice affects both immediate sound fidelity and long-term system flexibility.
Sound Quality and Frequency Response Analysis
Beyond having an intuitive layout that lets you work efficiently, your mixer’s fundamental audio performance characteristics determine whether your final output sounds professional or amateurish.
When conducting sound quality assessment, I focus on frequency response characteristics that span the complete 20 Hz to 20 kHz audible range, ensuring your mixer accurately reproduces everything from deep bass fundamentals to crisp high-frequency details.
You’ll want to examine the signal-to-noise ratio specifications, aiming for higher values that minimize background hiss, while total harmonic distortion should remain below 0.1% for transparent audio reproduction.
Look for mixers offering flat amplitude response with deviations under ±3dB across the frequency spectrum, as larger variations can color your sound undesirably and compromise mix translation across different playback systems.
Professional-grade mixers should feature a dynamic range of at least 102 dB to ensure adequate headroom and noise floor separation for demanding recording applications.
Frequently Asked Questions
Can I Use My Mixer With Streaming Software Like OBS or Streamlabs?
Yes, you can definitely use your mixer with streaming software, though mixer compatibility depends on your specific streaming setup.
USB mixers connect directly to your computer and integrate seamlessly with OBS or Streamlabs, while analog mixers require an audio interface.
I’ve found that configuring your mixer as the primary audio device in streaming software settings provides excellent control over multiple audio sources during live broadcasts.
How Do I Prevent Feedback When Using Microphones With My Mixer?
To prevent feedback loops, you’ll need strategic microphone placement—keep mics close to sound sources and away from speakers.
I’ve found that using directional microphones, like cardioids, considerably reduces ambient pickup.
Set conservative gain levels on your mixer, mute unused channels, and “ring out” your room by gradually increasing gain until feedback occurs, then notch those frequencies with EQ.
What’s the Difference Between Balanced and Unbalanced Connections on Mixers?
Balanced connections use XLR connectors with three wires that cancel electrical noise through differential signaling, making them perfect for professional microphones and long cable runs.
Unbalanced connections utilize TS or RCA connectors with two wires; they’re simpler and cheaper but susceptible to interference.
I’d recommend balanced connections for microphones and critical signals, while unbalanced works fine for instruments and shorter distances in your studio setup.
Do I Need a Separate Audio Interface if I Have a Mixer?
You don’t necessarily need a separate audio interface if your mixer includes USB connectivity and built-in analog-to-digital conversion capabilities.
Many modern mixers feature integrated USB interfaces that handle audio routing directly to your computer for recording.
However, if you’re primarily focused on studio recording with minimal live mixing needs, a dedicated audio interface might offer better preamp quality and lower latency for your specific workflow requirements.
On a final note
You’ve got all the tools now to make a smart mixer choice that’ll serve your audio needs perfectly. Remember, there’s no universally “best” mixer—only what works for your specific situation, budget, and goals. Take your time comparing features, read those user reviews I mentioned, and don’t rush the decision. Your future self will thank you when you’re mixing with confidence on equipment that fits like a glove.