How to Set up and Configure Your Audio Interface
You’ll need to connect your audio interface to your computer first, then install the manufacturer’s drivers while running as administrator for proper permissions. Next, configure your DAW by selecting the interface as your primary I/O device, choosing ASIO drivers for peak performance, and adjusting buffer sizes to minimize latency. Connect microphones using XLR cables and instruments via 1/4″ inputs, monitoring gain levels carefully to prevent distortion. The following sections reveal advanced troubleshooting techniques and maintenance strategies.
We are supported by our audience. When you purchase through links on our site, we may earn an affiliate commission, at no extra cost for you. Learn more.
Notable Insights
- Install the correct drivers for your audio interface model and operating system, checking for updates regularly for optimal stability.
- Connect your computer to the audio interface first, then add input sources using quality XLR and TRS cables.
- Set the audio interface as your primary I/O device in your DAW and select ASIO drivers for better performance.
- Adjust buffer size for low latency recording and ensure sample rates are aligned between your interface and DAW.
- Test all inputs and outputs while gradually monitoring gain levels to prevent signal distortion and ensure proper functionality.
Planning Your Audio Interface Setup
Before you can start recording professional-quality audio, you’ll need to carefully plan your interface setup by evaluating your specific studio requirements, budget constraints, and technical needs.
I’ve found that identifying your interface needs begins with counting microphone inputs, determining whether you’ll require MIDI I/O capabilities, and analyzing digital output requirements for your workflow.
Budget considerations should encompass not just the initial purchase price, but future expansion possibilities and additional hardware investments.
Smart budgeting means looking beyond the sticker price to factor in future upgrades and essential gear additions.
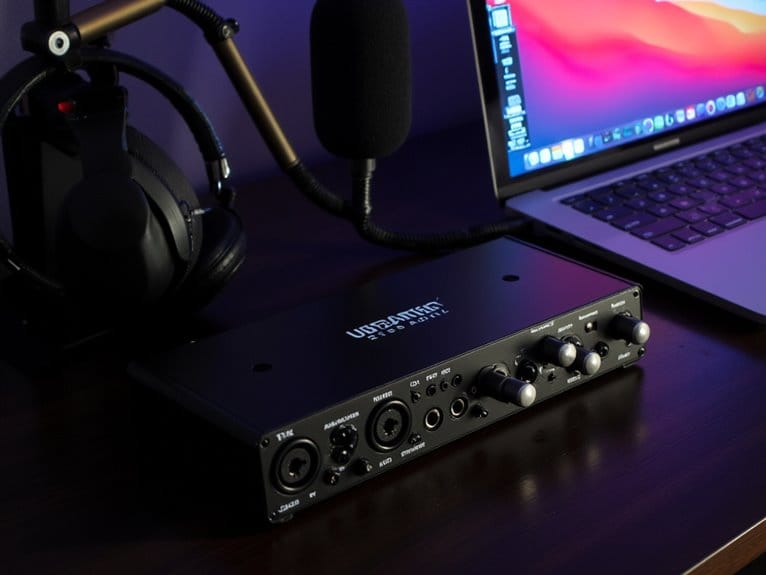
You’ll want to examine connectivity options carefully, ensuring your chosen interface supports USB, Thunderbolt, or whatever connection type your computer requires. The interface acts as the essential bridge between your audio sources and computer, converting analog signals to digital for processing. Additionally, confirm that your interface includes phantom power if you plan to use condenser microphones in your recording setup.
Consider whether S/PDIF, ADAT, or other digital interfaces are necessary for integrating external gear into your setup. Prioritize interfaces with 24-bit/192kHz resolution to ensure your recordings capture maximum detail and dynamic range for professional-quality results. Look for interfaces that provide zero-latency monitoring to prevent delay issues during real-time recording sessions.
Making Physical Connections
Once you’ve selected the perfect audio interface for your studio needs, the actual process of making physical connections becomes your gateway to professional recording quality.
Understanding different connection types guarantees you’ll route signals properly, whether you’re connecting microphones through XLR inputs, instruments via combo jacks, or monitors through balanced TRS outputs.
Cable organization matters more than you’d think—trust me, I’ve spent countless hours untangling studio spaghetti.
Here’s my systematic approach:
- Route computer connections first, positioning USB or Thunderbolt cables away from audio paths to minimize interference.
- Connect input sources next, using high-quality XLR cables for microphones and TRS cables for instruments.
- Establish monitoring outputs last, guaranteeing your studio monitors and headphones receive clean, balanced signals.
Proper cable management prevents signal degradation while maintaining professional workspace aesthetics. The quality of these cables can affect audio performance, making it essential to invest in reliable accessories for optimal sound quality. Before making any microphone connections, ensure your preamp gain is set to zero to prevent potential damage to your equipment. If your interface doesn’t appear in your computer’s audio options, you’ll need to search online and install the necessary drivers to ensure proper recognition. Many interfaces feature visual Gain Halos that help you monitor input levels and prevent unwanted clipping during the setup process.
Installing Drivers and Software Updates
Now that you’ve connected your audio interface physically, you’ll need to install the proper drivers to make certain your computer can communicate effectively with the device.
This involves downloading manufacturer-specific software that matches your interface model and operating system. The driver download process requires careful attention to compatibility details, as using generic drivers instead of the manufacturer’s optimized versions can result in reduced performance, latency issues, or complete functionality loss.
Additionally, establishing a routine for software update management will keep your audio interface running smoothly, since manufacturers regularly release updates that fix bugs, improve stability, and maintain compatibility with evolving DAW software and operating system changes. Regularly updating drivers and software ensures optimal stability and prevents connection problems that can arise from outdated versions. After downloading the driver file, you’ll need to right-click on it and select Run As Administrator to ensure proper installation permissions.
Software Update Management
After you’ve successfully downloaded your drivers, the real work begins with managing ongoing software updates, which I’ve learned through experience can make or break your audio production workflow. Your update frequency should follow a disciplined schedule—I recommend checking monthly to avoid compatibility issues with new operating systems or DAW versions.
| Update Type | Recommended Frequency | Priority Level |
|---|---|---|
| Firmware | Every 3-4 months | High |
| Drivers | Monthly check | Critical |
| Control Software | As needed | Medium |
Subscribe to manufacturer newsletters and join community forums where fellow producers share their experiences with recent updates. Always read release notes before installing, as they’ll reveal potential compatibility issues and new features that could enhance your setup’s performance and stability. Most modern audio interfaces will show update notifications directly in their control applications when firmware updates become available. Regular updates help prevent audio dropouts and glitches during production, maintaining a smooth workflow during creative sessions.
Configuring Your Computer’s Audio Settings
Once you’ve physically connected your audio interface, the next essential step involves configuring your computer’s audio settings to recognize and properly utilize your new hardware.
Right-click the speaker icon in your system tray, then select “Open sound settings” to begin the configuration process, where you’ll need to verify that your interface appears as an available device.
Essential configuration steps include:
- Setting your interface as the default output device through the sound settings window
- Adjusting input levels using the volume mixer to prevent distortion during recording
- Testing both input and output functionality by playing audio and monitoring microphone response
These audio troubleshooting tips guarantee proper output device selection, while checking mute status and driver updates resolves common connectivity issues that might arise during initial setup.
For optimal recording quality, ensure your interface supports 24-bit/192kHz recording capabilities to achieve studio-quality audio output from your podcast setup.
Mac users can benefit from automatic driver installation, while Windows users might need to download driver updates manually to ensure optimal performance with your specific audio interface.
Setting Up Your Digital Audio Workstation
With your computer’s audio settings properly configured, you’ll find that launching your Digital Audio Workstation becomes the next logical step in creating a functional recording environment, though I’ve learned through countless studio sessions that even experienced producers sometimes overlook the specific driver configurations that can make or break your workflow.
| Configuration Step | Key Setting |
|---|---|
| Audio Device Selection | Choose your audio interface as primary I/O |
| Driver Configuration | Select ASIO driver for peak performance |
| Sample Rate Matching | Align DAW and interface sample rates |
| Buffer Size Adjustment | Set low latency for real-time recording |
| Input/Output Routing | Enable all available interface channels |
When working with dynamic microphones like the Shure SM7B, ensure your interface delivers at least 60dB of gain to capture optimal signal levels without requiring additional inline preamps. Effective DAW performance enhancement strategies involve selecting your interface as the primary audio device, then implementing proper audio routing techniques to guarantee signals flow correctly from inputs to tracks while maintaining minimal latency. Professional interfaces with 24-bit recording capability ensure your audio maintains studio-quality resolution throughout the entire signal chain.
Connecting Microphones and Instruments
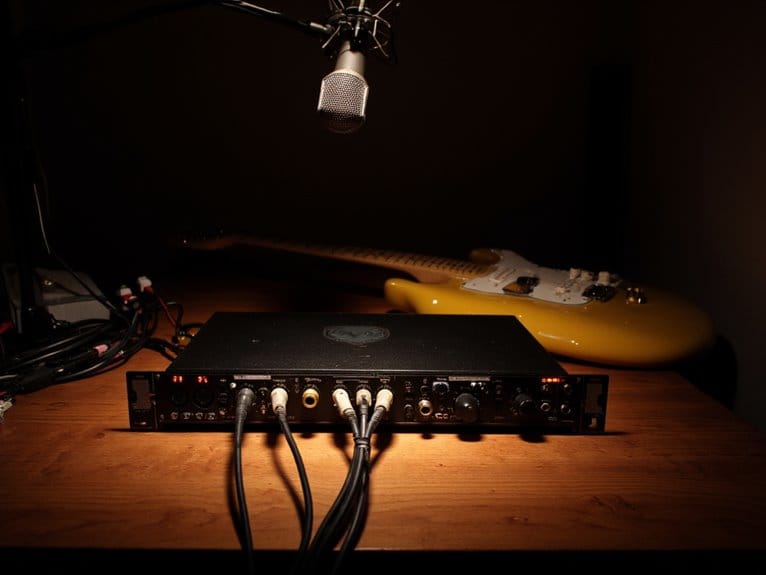
Now that you’ve got your DAW configured and ready to record, it’s time to connect your microphones and instruments to your audio interface, which requires understanding the specific input types, cable requirements, and connection methods for each device.
I’ll walk you through the proper microphone connection setup first, covering XLR cables, phantom power requirements, and input selection, followed by instrument input configuration that addresses different cable types, impedance matching, and signal levels.
Getting these connections right from the start will save you countless hours of troubleshooting later, and trust me, I’ve learned this lesson the hard way after dealing with mysterious hums, distorted signals, and failed recording sessions.
Professional interfaces like RME models offer comprehensive connectivity options and TotalMix FX software for unlimited routing and real-time monitoring capabilities. When connecting condenser microphones, keep in mind that XLR microphones require phantom power to operate, which is essential for powering the microphone’s internal circuitry and achieving optimal signal quality.
Microphone Connection Setup
Before diving into the technical specifications, I’ll say that connecting your microphone to an audio interface isn’t as intimidating as it might seem, though there are definitely some key details you’ll want to get right from the start.
Different microphone types require specific considerations, particularly when it comes to phantom power requirements for condenser mics versus the simpler plug-and-play nature of dynamic microphones.
Here’s your essential connection sequence:
- Connect your XLR cable from microphone to interface input, ensuring secure connections at both ends.
- Activate phantom power if you’re using condenser microphones, typically via a dedicated button near the input.
- Adjust gain levels gradually while monitoring input signals to prevent distortion and optimize recording quality.
Always turn off phantom power before connecting or disconnecting microphones to avoid potential damage to your equipment.
Instrument Input Configuration
Three different types of instrument connections will fundamentally determine how your audio interface handles everything from electric guitars to synthesizers, and I’ve found that understanding these distinctions upfront saves countless hours of troubleshooting later.
| Connection Type | Cable Required | Typical Use |
|---|---|---|
| Guitar/Bass | 1/4″ TS | Electric instruments |
| Keyboard | 1/4″ TRS | Line-level sources |
| MIDI | 5-pin DIN | Digital communication |
| Synthesizer | 1/4″ TRS/TS | Analog audio output |
| Direct Box | XLR | Impedance matching |
Your instrument level adjustment starts with matching output levels to your interface’s expected input range, while input gain optimization prevents that dreaded clipping distortion that’ll ruin otherwise perfect takes. I’ve learned that setting gains conservatively, around 75% maximum, leaves headroom for dynamic peaks without sacrificing signal clarity.
Resolving Common Setup Problems
Even when you’ve followed all the setup steps correctly, audio interfaces can still throw you curveballs that’ll have you scratching your head and wondering if you missed something obvious.
The most frequent culprits I’ve encountered involve cable issues and audio latency, which can transform your recording session into a frustrating troubleshooting marathon.
When problems arise, I systematically check these three areas:
- Signal path integrity – examining every connection from your microphone or instrument through the interface to your DAW.
- Driver functionality – verifying that your system properly recognizes the interface and maintains stable communication.
- Power delivery consistency – ensuring adequate power reaches all components without fluctuations that cause intermittent failures.
Methodical troubleshooting saves time and prevents the common mistake of changing multiple variables simultaneously, which often obscures the actual problem source.
Frequently Asked Questions
Can I Use Multiple Audio Interfaces Simultaneously on One Computer?
Yes, you can use multiple audio interfaces simultaneously, though multiple interface compatibility depends on your specific hardware and software setup.
I’ve found that audio interface limitations often require ASIO4ALL drivers to aggregate different devices, which may introduce latency issues.
You’ll need to verify your computer handles the processing demands, configure your DAW properly, and test thoroughly since some combinations don’t work smoothly together.
Does Using an Audio Interface Improve Sound Quality for Streaming?
Yes, you’ll definitely experience improved audio fidelity when streaming with a dedicated interface, as the superior preamps and high-quality A/D converters capture cleaner signals than built-in sound cards.
The streaming enhancement comes from reduced latency, higher bit depths, and better sample rates that deliver richer sound.
I’ve found the professional-grade components eliminate noise and distortion that typically plague internal audio hardware.
Will My Audio Interface Work With Gaming Consoles Like Playstation?
Your audio interface compatibility with gaming console connections depends on specific models and PlayStation’s USB audio support.
While many interfaces physically connect via USB ports, I’ve found that consoles often limit functionality to microphone input only, with game audio remaining through HDMI output.
Popular models like the Behringer UM2 work reliably with PS4/PS5, though you’ll need to manually configure audio settings for proper recognition.
Can I Connect My Audio Interface to a Tablet or Smartphone?
Yes, you can connect your audio interface to mobile devices, though tablet compatibility varies considerably between Android and iOS systems.
Smartphone integration works best with class-compliant interfaces that don’t require drivers. You’ll need appropriate USB adapters, and iOS devices generally offer more stable support than Android.
Check your specific device’s power requirements, as some interfaces need external power when connected to tablets or smartphones.
Do I Need Phantom Power for All Microphone Types?
No, you don’t need phantom power for all microphone types, and I’ve learned this distinction matters greatly for your setup.
Dynamic microphones operate through electromagnetic induction, requiring no external power, while condenser microphones absolutely need that +48V phantom power to energize their internal amplifiers and polarize their capsules.
Turn phantom power off when connecting dynamics to prevent potential damage.
On a final note
You’ve now got the knowledge to confidently set up your audio interface, from initial connections through driver installation and DAW configuration. I’ve seen countless musicians struggle with these same steps, but you’re armed with practical solutions for common problems and maintenance tips that’ll keep your system running smoothly. Your interface should now deliver the professional audio quality you’re seeking, whether you’re recording vocals, instruments, or producing complete tracks.

