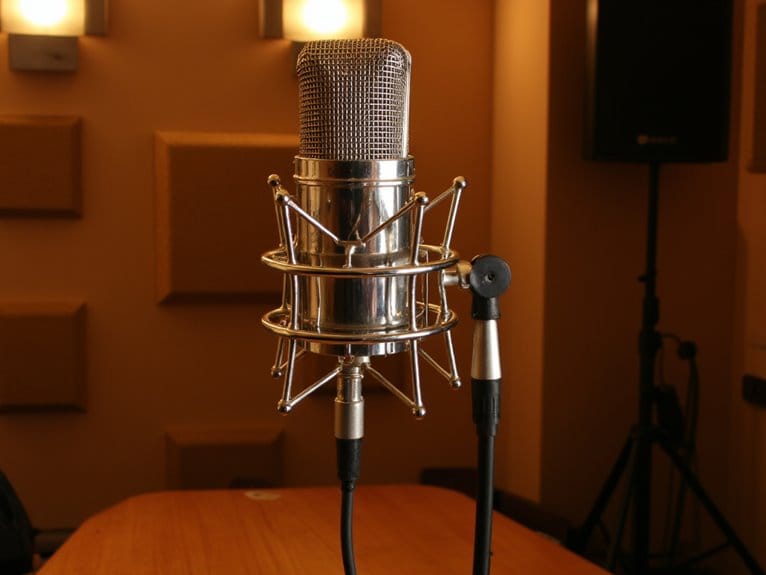
Using Ribbon Microphones Effectively
You’ll achieve professional-quality recordings when you master ribbon microphones’ unique electromagnetic design, which captures sound through a delicate aluminum ribbon that responds to air particle velocity rather than pressure, delivering the warm, natural tone that made classic recordings from the 1950s and 60s legendary. Position your ribbon mic 4-6 inches from sources, utilize its figure-eight polar pattern strategically to isolate unwanted noise, and always disable phantom power to protect the sensitive ribbon element. The proximity effect adds desirable bass warmth, while the smooth high-frequency response eliminates harsh sibilance that plagues condenser recordings, though you’ll need quality preamps for clean gain since these mics require significant amplification through step-up transformers. Understanding these fundamentals opens doors to advanced techniques that transform ordinary recordings into studio-quality productions.
We are supported by our audience. When you purchase through links on our site, we may earn an affiliate commission, at no extra cost for you. Learn more.
Notable Insights
- Disable phantom power before connecting passive ribbon microphones to prevent damage and use high-quality preamps for clean amplification.
- Position sources 4-6 inches away with proper axis alignment, utilizing the figure-eight polar pattern’s null points for noise isolation.
- Use shock mounts, windscreens, and 45-degree angling to protect the delicate ribbon element from air blasts and vibrations.
- Leverage proximity effect by placing microphones closer to thin-sounding instruments to add desirable bass warmth and richness.
- Apply Blumlein pair techniques for studio-quality stereo imaging while capturing natural room sound and spatial dimension.
Understanding Ribbon Microphone Technology and Characteristics
Precision engineering – that’s what sets ribbon microphones apart from their dynamic and condenser counterparts, and I’ve found that understanding their elegant simplicity helps you appreciate why they’ve remained virtually unchanged for nearly a century.
At their core, these microphones use electromagnetic induction to convert sound waves into electrical signals, employing an incredibly thin conductive ribbon suspended between magnetic poles. The ribbon materials, typically aluminum or specialized alloys ranging from 0.6 to 4 microns thick, vibrate with air particle velocity rather than pressure changes.
This velocity-based operation creates their characteristic warm, natural sound with exceptional transient response. While their output requires amplification through step-up transformers, their inherently low resonant frequency delivers remarkably flat response across the entire audible spectrum.
Optimal Placement Techniques and Polar Pattern Utilization
Understanding how ribbon microphones work is only half the battle – positioning them correctly reveals their true potential, and I’ve learned that their distinctive figure-eight polar pattern requires a fundamentally different approach than you’d use with cardioid or omnidirectional mics.
Your placement strategies should capitalize on that bidirectional pickup pattern, which captures sound equally from front and rear while rejecting the sides completely. I’ve found that proper axis alignment typically means positioning your source 4-6 inches away, either on-axis for full presence or slightly off-axis to tame harshness.
- Feel the rush of perfectly isolated vocals when you position null points toward noisy sources
- Experience the warmth that proximity effect adds to thin-sounding instruments
- Discover room ambiance magic through controlled rear pickup
- Achieve studio-quality stereo imaging with creative Blumlein pair techniques
While ribbon mics excel in controlled environments, their sensitivity to air movement means you’ll need quality windscreens when working in challenging conditions, similar to how directional microphones struggle with wind noise during outdoor recording sessions. For optimal results, maintain proper positioning away from walls or reflective surfaces, as central positioning maximizes voice capture quality and prevents unwanted acoustic reflections.
Proper Handling, Protection, and Equipment Requirements
Three critical mistakes I’ve witnessed in studios can instantly destroy a ribbon microphone’s delicate element, and after replacing my fair share of damaged ribbons over the years, I’ve developed a systematic approach to handling these temperamental yet rewarding instruments.
First, always disable phantom power before connecting passive ribbons-this simple maintenance tip prevents catastrophic damage. Use high-quality preamps like AEA’s RPQ3 to provide clean gain without introducing noise, since ribbons typically output lower levels than condensers.
Phantom power kills passive ribbons instantly-always disable it first, then use quality preamps to boost their naturally low output levels.
Employ shock mounts and windscreens religiously, positioning mics at 45-degree angles to minimize air blast exposure.
The “hand test” reveals dangerous wind patterns near kick drums. Common mistakes include forgetting pop filters and placing mics directly in front of horn openings, which I’ve seen destroy ribbons instantly.
Recording Applications and Sound Quality Considerations
Once you’ve mastered the handling fundamentals, ribbon microphones reveal their true magic through distinctive sonic characteristics that I’ve come to appreciate across countless recording sessions, particularly their ability to capture instruments with a warmth and musical quality that’s become increasingly rare in our digital age.
The figure-eight polar pattern excels at vocal recording, delivering that sultry midrange presence while rejecting unwanted side noise.
You’ll notice how ribbons handle proximity effect beautifully, adding bass warmth when positioned closer to sources. Their ambient capture capabilities shine through natural room sound integration, making them perfect for drum overheads and acoustic instruments.
- Rich, vintage tone that instantly transports listeners to classic recording eras
- Smooth high frequencies that eliminate harsh sibilance and listener fatigue
- Natural spatial dimension that creates immersive, three-dimensional soundscapes
- Forgiving character that makes amateur recordings sound professionally polished
On a final note
You’ve now got the essential knowledge to harness ribbon microphones’ unique character, though I’ll admit mastering their delicate nature takes patience and practice. Remember that proper phantom power protection, careful positioning at least six inches away, and understanding their figure-8 pickup pattern will serve you well. These vintage-voiced tools reward thoughtful technique with warmth and smoothness that modern condensers simply can’t replicate in your recordings. When set up correctly, ribbon microphones can excel in capturing the nuances of vocals and instruments alike, making them a good studio microphone choice for achieving that rich, vintage sound. Additionally, their excellent off-axis rejection helps to minimize unwanted noise, ensuring that your recordings maintain clarity and depth. By incorporating ribbon mics into your setup, you can elevate the overall quality of your productions and create a more inviting listening experience.