Recording Acoustic String Instruments
You’ll achieve professional-quality recordings by positioning large diaphragm condenser microphones 6-12 inches from the body-neck junction, where your instrument’s full tonal spectrum naturally converges without the boominess that plagues soundhole placement. I’ve found that cardioid polar patterns effectively reject unwanted noise while capturing those nuanced harmonic details that separate lifeless recordings from vibrant ones. The key lies in balancing direct sound with ambient resonance, and there’s considerably more depth to explore.
We are supported by our audience. When you purchase through links on our site, we may earn an affiliate commission, at no extra cost for you. Learn more.
Notable Insights
- Use large diaphragm condenser microphones with cardioid polar patterns for optimal sensitivity and noise rejection.
- Position microphones 6-12 inches away at the body-neck junction, angled slightly off-axis to avoid harshness.
- Employ stereo techniques like XY, ORTF, or spaced pairs to create spatial depth and width.
- Apply the 3:1 rule with multiple microphones to prevent phase cancellation and maintain clarity.
- Balance room acoustics and use compression carefully to preserve natural dynamics while controlling output variations.
Microphone Selection and Placement Strategies
When I’m setting up to record acoustic string instruments, I’ve learned that microphone selection serves as the foundation that’ll either capture those delicate harmonics and subtle overtones, or leave you with a flat, lifeless recording that doesn’t do justice to the instrument’s natural beauty.
Key microphone characteristics include sensitivity for capturing nuanced details, broad frequency response for full tonal range, and cardioid polar patterns that reject unwanted noise while focusing on your instrument. Large diaphragm condensers are particularly effective for acoustic instruments because they provide the warmth and wide frequency capture needed to faithfully reproduce the instrument’s full sonic character.
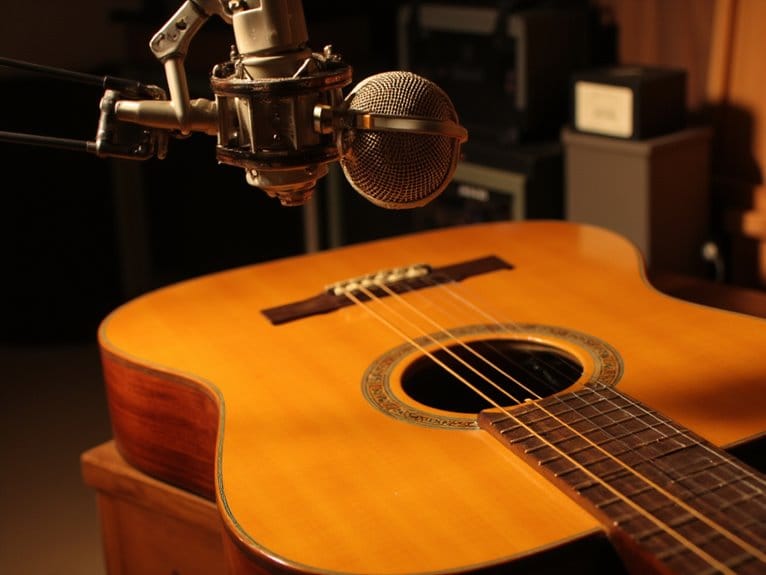
My placement techniques typically involve positioning mics 6-12 inches away to balance direct sound with natural ambience, angling slightly off-axis to minimize harsh string attacks, and avoiding the temptation to mic too close to soundholes, which often creates unwanted boominess that’ll muddy your recording. For optimal tonal balance, I recommend placing the microphone at the body-neck junction where you’ll capture both the percussive attack of the strings and the resonant warmth of the body. A frequency response range of 30 Hz to 16 kHz effectively captures both the low-end warmth and high-frequency detail essential for professional acoustic recordings.
For challenging recording environments with less-than-ideal acoustics, dynamic microphones can provide excellent results since they handle high sound pressure levels and perform reliably in untreated rooms where condensers might pick up unwanted reflections.
Stereo Recording Techniques and Configuration
While single microphone setups can capture beautiful acoustic recordings, I’ve found that stereo techniques reveal a completely different dimension of spatial depth and realism that’ll transform your string instrument recordings from good to genuinely enchanting.
| Technique | Stereo Width | Room Ambience |
|---|---|---|
| XY | Narrow-Medium | Minimal |
| ORTF | Medium-Wide | Moderate |
| Mid-Side | Adjustable | Variable |
| Spaced Pair | Very Wide | Maximum |
Each configuration offers distinct advantages, though mic phase issues become increasingly problematic as spacing increases. XY provides the safest mono compatibility with its coincident capsules, while ORTF strikes an excellent balance between width and reliability. Mid-Side excels when you need stereo width adjustments during mixing, and spaced pairs create dramatic spatial separation at the cost of potential phase complications when summed to mono. Using matched pair microphones ensures consistent frequency response across both channels, eliminating tonal imbalances that could compromise your stereo image. For optimal results, position your microphones at close distances of 6 to 12 inches from the instrument to capture detailed harmonic content while minimizing unwanted room reflections.
Overcoming Common Recording Challenges
Even after you’ve mastered proper mic placement and stereo techniques, recording acoustic instruments presents a minefield of challenges that can turn your carefully planned session into a frustrating battle against physics and acoustics.
Bleed management becomes your primary concern when multiple instruments share space, requiring strategic placement of directional cardioid mics facing opposite directions, or sometimes isolation booths that unfortunately restrict natural resonance.
I’ve learned that room acoustics dramatically affect tonal quality, demanding careful balance between capturing natural ambience and controlling unwanted reflections through damping materials.
Dynamic control proves equally critical, as string instruments deliver wide ranges from delicate fingerpicking to aggressive strumming that can clip your preamps. When using multiple microphones, maintain the 3:1 rule to prevent phase cancellation issues that can muddy your recordings.
Apply compression judiciously to preserve natural dynamics while preventing distortion. Figure-eight microphones provide exceptional sound isolation capabilities when recording multiple sources simultaneously.
On a final note
You’ve now got the essential toolkit for capturing those delicate string harmonics and resonant body tones that make acoustic recordings truly shine. While I’ll admit microphone placement can feel like solving a puzzle at first, you’ll develop that intuitive sense for sweet spots with practice. Remember, your room acoustics matter just as much as your gear choice, so don’t overlook that vital environmental factor when chasing that perfect sound.