Recording Drums: Techniques and Best Practices
You’ll achieve professional drum recordings by placing kick mics inside near the beater head for maximum attack, positioning snare mics 2-4 inches above the rim where sticks strike, and using overhead techniques like spaced pair for wide imaging or XY for phase coherence. Proper drum tuning matters more than expensive microphones, while strategic room treatment with partial absorption enhances natural sound without over-deadening. Minimalist approaches using 2-4 mics can capture authentic character, and experimentation with positioning yields the unique sonic signatures that define your recordings.
We are supported by our audience. When you purchase through links on our site, we may earn an affiliate commission, at no extra cost for you. Learn more.
Notable Insights
- Position kick drum mics inside near the beater head and snare mics 2-4 inches above the rim for optimal attack and punch.
- Use overhead microphones as sonic glue to provide spatial dimension and natural balance across the entire drum kit.
- Choose between spaced pair, XY, or ORTF overhead techniques based on genre requirements and desired stereo imaging width.
- Prioritize proper drum tuning and head selection over microphone choice, as tuning significantly impacts overall sound quality.
- Apply partial acoustic treatment with thick panels and bass traps while maintaining some natural room ambience for authentic recordings.
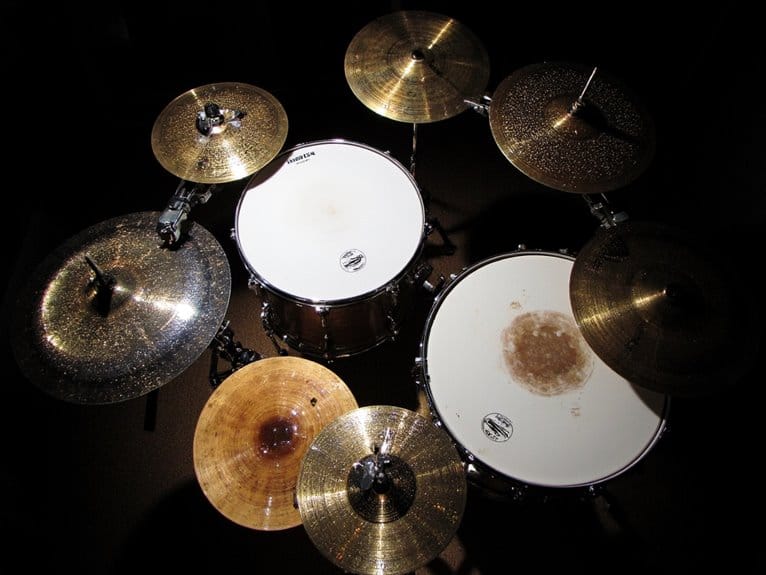
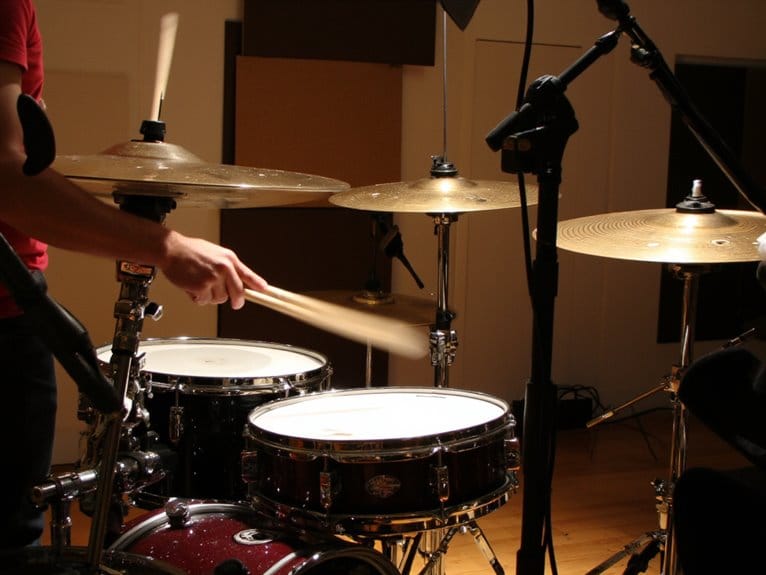
Essential Microphone Placement Strategies for Drum Kits
When you’re setting up microphones for drum recording, the placement decisions you make will fundamentally shape the character, punch, and overall sonic quality of your final mix.
For your kick drum, I’ve found that placing the mic inside near the beater head delivers that essential attack, though you’ll want to add some padding to control resonance.
Your snare drum benefits from positioning the mic above the top head, aimed directly at those stick marks where the drummer hits most frequently. The recommended distance from the snare drum is 2-4 inches from the rim, which captures punch while minimizing bleed from other instruments.
Tom toms require individual attention, with mics pointed at the center of each head to capture natural attack characteristics. When selecting tom microphones, ensure they can handle at least 145 dB SPL to accurately represent aggressive drumming without distortion.
Position your floor tom mic about one to two feet above the rim, angled strategically toward the snare to maintain kit balance, while your hi hat needs a small diaphragm condenser placed near the edge for best stick definition. The frequency response characteristics of your chosen microphones will directly influence how much processing you’ll need during mixing.
The Glynn Johns method offers a minimalist approach that achieves monumental sound using just overhead microphones positioned at equal distances from the snare drum to maintain proper phase alignment.
Overhead and Close Miking Techniques for Professional Results
Building upon those individual mic placements, you’ll discover that overhead microphones serve as the sonic glue that binds your entire drum recording together, creating the spatial dimension and natural kit balance that close mics alone can’t achieve. Choose between spaced pair for wide stereo imaging, XY technique for focused mono compatibility, ORTF method for natural balance, or Glyn Johns for unique character. Proper mic selection matters-condensers outperform dynamic microphones for overhead applications due to superior frequency response. When using the Recorderman technique, position both cardioid microphones equidistant from the kick drum to ensure proper phase alignment and sound capture. Closer mic placement enhances the brightness of metal and cymbal sounds, while increased distance improves overall drum skin tonality and natural room acoustics.
| Technique | Stereo Width | Phase Coherence | Best For | Emotional Impact |
|---|---|---|---|---|
| Spaced Pair | Very Wide | Moderate | Rock/Pop | Excitement |
| XY Technique | Narrow | Excellent | Jazz/Classical | Intimacy |
| ORTF Method | Natural | Good | All Genres | Realism |
| Glyn Johns | Unique | Good | Vintage Sounds | Nostalgia |
| Diagonal Pair | Balanced | Good | Modern Production | Power |
Maintaining phase alignment between overheads and close mics prevents comb filtering, ensuring your recordings sound cohesive rather than thin.
Minimalist Approaches to Drum Recording
Although it might seem counterintuitive in our modern world of endless tracks and inputs, I’ve found that some of the most compelling drum sounds emerge from minimalist recording approaches that use just two to four microphones total.
The key to successful minimalist miking lies in strategic placement, where small positional adjustments dramatically affect your drum balance and overall image quality.
Strategic microphone placement transforms drum recording-tiny positional shifts create dramatic changes in balance and spatial imaging quality.
I’ll often employ the Glyn Johns technique, using three mics positioned equidistant from the snare, which creates remarkable phase coherence while capturing the full kit’s natural dynamics.
Your room acoustics become absolutely critical here, since you’re relying more heavily on natural ambience rather than close-mic correction options, making proper drum volume management and tuning essential for achieving professional results. These minimalist setups also allow for quicker setups and reduce the time spent on complex mic leveling procedures.
This approach avoids the sterile overproduction that can strip away the authentic character and soul from your drum recordings.
Drum Tuning and Equipment Selection for Optimal Sound
Why does proper drum tuning remain the most overlooked aspect of achieving professional recordings, especially when it’s perhaps more important than your microphone selection?
I’ve witnessed countless sessions where engineers obsess over preamp choices while ignoring fundamentally out-of-tune drums, and honestly, it’s painful to watch.
Your drumhead selection directly impacts how microphones capture transients and frequency response, making material choice essential before you even think about placement.
Coated heads offer warmer tones perfect for vintage sounds, while clear heads provide brightness that cuts through dense mixes.
Tension balancing requires methodical diagonal tightening patterns, starting with quarter-turns after finger-tightening each rod.
I always tap near lugs to check pitch consistency, then fine-tune by striking the drumhead center while muting the opposite side for clarity. Strategic dampening techniques using moon gels or foam strips eliminate unwanted overtones that muddy your recordings.
Consider your genre when selecting tuning approaches, as metal music tuning requires tight, focused sounds with higher snare tuning for volume and kick drums tuned to enhance attack.
Room Acoustics and Mixing Considerations
Once you’ve dialed in your drum tuning and selected ideal heads, the room itself becomes your most powerful tool for shaping the character of your recording.
I’ll admit I spent years underestimating just how dramatically acoustic treatment can transform mediocre drum sounds into professional-quality captures.
Effective reverberation control requires strategic placement of thick acoustic panels on walls and ceilings where reflections are most prominent, while bass traps in corners eliminate low-frequency buildup that muddies your mix.
Sound isolation demands multiple approaches: adding mass to walls, sealing gaps with soundproofing materials, and using sound-dampening curtains to contain drum noise.
Position your kit carefully within the room’s sweet spot, place room mics about six feet away at knee height, and remember that partial absorption beats total deadening every time. Small dead rooms may be more suitable for certain recording styles like Motown, providing the tight, controlled sound characteristic of that era. Experimenting with drum kit orientation can help you discover the optimal positioning that maximizes your room’s natural acoustics and minimizes problematic reflections.
On a final note
You’ve now got the essential tools to capture professional drum sounds, whether you’re working with a single overhead mic or a full multi-mic setup. Remember, there’s no single “correct” approach-experiment with different placement techniques, trust your ears, and don’t be afraid to break conventional rules. Your room’s acoustics, the drummer’s style, and your musical goals will ultimately guide your decisions toward achieving that perfect drum sound.