Ten Steps for Choosing the Right Cymbals
You’ll choose the right cymbals by first identifying your musical genre—jazz demands thin, warm cymbals while rock requires heavy, cutting ones. Next, understand the three essentials: hi-hats (13-14″), crashes (16-18″), and rides (20-22″). Consider thickness and weight since heavier cymbals offer more volume and sustain, while thinner ones provide faster response and darker tones. Test sound characteristics, response time, and dynamics across different strike locations. Research brand profiles like Zildjian’s warmth or Sabian’s innovation, factor your budget against long-term value, and always conduct hands-on testing. The thorough breakdown ahead reveals exactly how each element transforms your setup.
We are supported by our audience. When you purchase through links on our site, we may earn an affiliate commission, at no extra cost for you. Learn more.
Notable Insights
- Identify your musical genre and playing style to determine whether you need warm, subtle cymbals for jazz or heavy, cutting cymbals for rock.
- Select essential cymbal types and sizes: 14″ hi-hats for timekeeping, 16-18″ crashes for accents, and 20-22″ rides for rhythm maintenance.
- Consider thickness and weight based on volume needs—thicker cymbals project louder while thin cymbals offer faster response and darker tones.
- Test cymbals by striking at different intensities and locations to evaluate attack clarity, projection, dynamic range, and harmonic compatibility.
- Research brand sound profiles and align your budget with skill level while considering long-term durability and resale value.
Identify Your Musical Style and Genre Requirements
Why do some cymbals sound absolutely perfect in one musical context yet completely out of place in another? The answer lies in understanding how genre influences shape cymbal selection, and honestly, I’ve learned this lesson through some embarrassing mismatches over the years.
Jazz preferences lean toward thin, warm cymbals that provide complex wash and subtle articulation, while rock features demand heavy, cutting cymbals with aggressive attack. Your rhythmic styles and performance settings directly impact what works—acoustic dimensions matter when you’re playing intimate jazz clubs versus arena rock shows.
Sound clarity requirements vary dramatically between genres, so consider musical versatility versus specialized applications. The finish significantly affects response characteristics, with brilliant finishes offering brighter projection for rock while traditional finishes provide warmer tones for jazz contexts. Harmonic content plays a crucial role in how cymbals complement your chosen musical style and overall sound aesthetic. Understanding these stylistic nuances prevents costly mistakes and guarantees your cymbals complement rather than compete with your music. Cymbals are key to developing your drummer’s voice and establishing the musical personality that defines your unique playing style. When selecting jazz ride cymbals, B20 construction provides the complex overtones and rich harmonics essential for authentic jazz expression.
Understand the Three Essential Cymbal Types
Once you’ve identified your musical style preferences, the foundation of any drum kit’s cymbal setup revolves around three fundamental types that each serve distinct musical purposes.
Understanding these core categories helps you navigate the vast array of cymbal materials and sound mixing possibilities available today.
Mastering cymbal fundamentals opens doors to countless sonic textures and creative mixing opportunities for drummers.
Essential Cymbal Types:
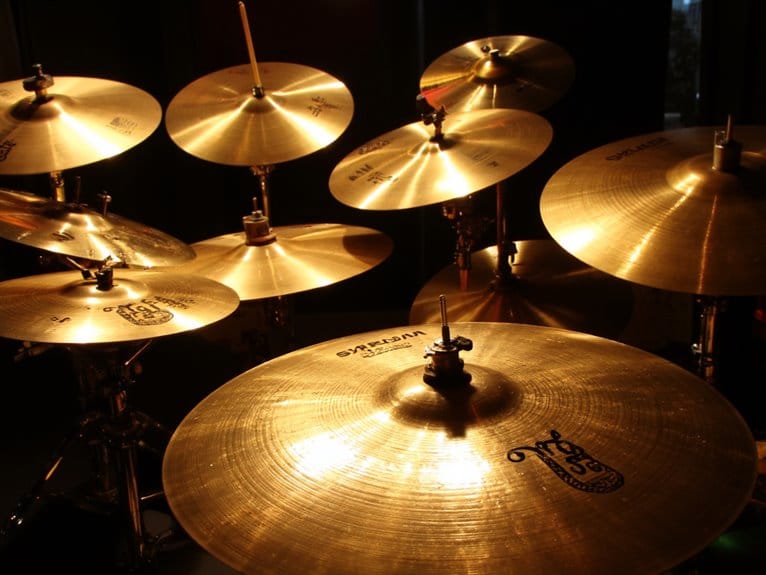
- Ride cymbals (20-22 inches) maintain steady rhythmic patterns with clear, sustained tones that cut through dense arrangements.
- Hi-hat cymbals (13-14 inches) provide versatile timekeeping foundation, from tight “chick” sounds to open, washy textures controlled by foot pedal tension.
- Crash cymbals (16-18 inches) deliver explosive accents for musical shifts and dynamic punctuation.
- Sound characteristics vary greatly based on thickness, size, and construction materials, affecting everything from stick articulation to sustain decay.
Each type contributes uniquely to your overall sound palette. Multifunctional cymbals combine both ride and crash characteristics, offering a lively sound that maintains audible ride figures while providing crash capabilities. Additionally, specialty cymbals like splash cymbals offer quick short bursts of sound for creative accents and fills.
Determine the Right Sizes for Your Setup
Selecting the proper cymbal sizes for your drum kit requires balancing sound characteristics with practical considerations like your playing style, musical genre, and physical setup constraints. I’ve found that starting with standard dimensions—14″ hi-hats, 16″ crash, and 20″ ride—provides an excellent foundation before customizing for specific needs.
| Cymbal Type | Small Size Benefits | Large Size Benefits |
|---|---|---|
| Hi-Hat | Faster response, crisp articulation | Fuller sound, increased volume |
| Crash | Quick attack, shorter sustain | Louder projection, longer wash |
| Ride | Defined stick response, controlled volume | Enhanced ping clarity, powerful bell |
Your cymbal placement directly affects ergonomics and sound balance, so consider how different sizes integrate within your kit’s layout while maintaining comfortable reach and natural playing positions for peak performance across various musical contexts. When ready to expand beyond basics, adding a 12″ splash cymbal can provide defined accents that complement your existing crash cymbals perfectly. For optimal sound production, remember that crashing should typically occur near the cymbal’s edge to achieve the characteristic sustaining wash sound that cuts through the mix effectively.
Consider Thickness and Weight for Sound and Durability
While size determines your cymbal’s fundamental character, thickness and weight shape the nuances that’ll define your sound signature and influence how long your investment lasts.
Understanding cymbal weight and thickness impact helps you match your gear to your playing style, musical genre, and budget constraints.
Matching cymbal specs to your playing style and musical needs ensures optimal performance and value from your drum kit investment.
Here’s what thickness and weight control in your setup:
- Volume and projection – Thicker cymbals produce louder volume and brighter, higher-pitched sounds with longer sustain.
- Durability factors – Heavier, thicker cymbals resist cracking better, making them suitable for aggressive playing styles.
- Response characteristics – Thin cymbals offer faster response with darker tones and quicker decay for intricate playing.
- Sound complexity – Thickness determines your frequency range, with thicker cymbals providing clearer attack versus thinner cymbals’ washy textures.
Most manufacturers label cymbal weight using standard categories like extra thin, thin, medium, heavy, and extra heavy to help drummers identify tonal characteristics. Weight is defined as thickness proportional to the cymbal’s size, creating a standardized system for comparing cymbals across different diameters.
Evaluate Sound Characteristics and Tonal Qualities
How do you determine which cymbal will deliver the exact tonal character your music demands?
Start by understanding tone layering, where cymbals produce sound across three distinct frequency bands: undertones for gong-like depth, midrange for the cymbal’s voice, and overtones for shimmer.
Test different playing areas since striking the edge yields crash-like fullness while bell strikes produce cutting, high-pitched accents.
Frequency balance determines whether you’ll get a focused, tight sound from narrower ranges or a looser, bigger character from wider spans.
I’ve found that soft mallet rolls reveal a cymbal’s complete tonal spectrum without stick attack interference, helping you assess complexity.
Rich midrange frequencies create darker, complex tones perfect for jazz, while cleaner cymbals lacking dense midrange offer clarity for articulate playing styles. Cymbals can generate frequencies extending up to 60 kHz, which significantly exceed the range captured in typical CD recordings. Consider the harmonic compatibility between your existing cymbals and any new additions to ensure they work together musically.
Test Projection and Volume Capabilities
Beyond identifying your cymbal’s tonal sweet spots, you’ll need to evaluate how effectively that sound travels through different performance environments, since volume and projection capabilities directly impact whether your cymbals will cut through a mix or get buried beneath other instruments.
Proper cymbal projection testing requires strategic assessment across multiple variables, and I’ve learned that controlled evaluation prevents costly mistakes when selecting cymbals for specific venues.
- Test with your actual playing dynamics – Strike cymbals using your normal force and stick technique, since manufacturer demonstrations rarely reflect real-world playing intensity.
- Evaluate edge versus bow response – Compare volume output across different striking zones to guarantee consistent projection throughout the cymbal’s surface.
- Assess distance projection – Listen from audience perspective to determine if volume control remains effective without harsh frequencies.
- Consider environmental factors – Test in full drum kit settings rather than isolated displays.
Assess Response Time and Playing Dynamics
Once you’ve determined your cymbals can project effectively, the next critical evaluation involves testing how quickly they respond to your playing touch and how well they translate the subtle dynamics that separate mediocre performances from truly expressive ones.
Focus on attack clarity by striking different zones with varying intensities, noting whether the cymbal delivers immediate, crisp onset or feels sluggish and delayed. Test the full dynamic range from pianissimo whispers to fortissimo crashes, paying attention to how cleanly each volume level translates.
Evaluate decay control by experimenting with different strike locations and mallet choices, observing how quickly you can stop sustain when needed and whether the cymbal maintains tonal character across all playing intensities and techniques.
Research Brand Reputations and Sound Profiles
After you’ve confirmed your cymbals respond well to your touch and deliver the dynamic range you need, the next step involves understanding which manufacturers consistently produce the sounds that’ll complement your musical style.
Each brand’s reputation stems from decades of brand evolution, with distinct sound signatures emerging from their unique manufacturing approaches and cymbal innovations.
Here are the four dominant cymbal manufacturers you should research:
- Zildjian – Nearly 400 years of craftsmanship delivering warm, rich tones across A, K, and S series
- Sabian – Modern innovation since 1981, featuring bright, cutting-edge designs for contemporary styles
- Paiste – Swiss precision manufacturing creating clear, projecting sounds favored in studio settings
- Meinl – German engineering combining traditional techniques with modern approaches for distinctive tonal colors
Factor in Budget and Long-Term Value
Three critical financial considerations will determine whether your cymbal investment pays off over the years: your immediate budget constraints, the long-term durability of your chosen cymbals, and their potential resale value down the road.
Budget considerations should align with your playing level, as beginner sets ($300-$600) offer adequate practice quality, while intermediate options ($600-$1,200) provide improved craftsmanship for serious hobbyists.
Professional cymbals exceeding $1,200 represent long term investments that resist cracking, retain tonal character under heavy use, and maintain higher resale values through established brand recognition.
B20 bronze alloys and hand-hammered construction, though initially expensive, often prove more cost-effective by minimizing replacement needs, while budget models may require earlier upgrades due to quicker degradation.
Conduct Hands-On Testing Before Purchase
While online reviews and specifications provide valuable initial guidance, nothing replaces the critical experience of physically handling and playing cymbals before making your purchase.
As I’ve learned through countless hours spent in music stores testing instruments that looked perfect on paper but failed to deliver the sound or feel I actually needed.
Effective hands on evaluation requires systematic testing across multiple dimensions, ensuring proper cymbal compatibility with your existing setup and playing style.
- Visual inspection – Check edges for chips, examine surfaces for cracks, and inspect mounting holes for keyholing or distortion.
- Play testing – Strike different areas using your typical sticks, testing various dynamics and techniques including crashes and ride patterns.
- Sound assessment – Listen for consistent tone, conflicting harmonics, and dead spots while having someone else play from distance.
- Structural evaluation – Perform finger taps to detect unusual vibrations and assess weight, thickness, and overall balance.
On a final note
You’re now equipped with the essential knowledge needed to make an informed cymbal selection that’ll serve your musical goals effectively. I’ve found that drummers who follow these systematic steps, rather than making impulsive purchases based solely on brand recognition or flashy marketing, consistently end up with cymbals that enhance their playing experience and complement their unique style. Trust your ears, stick to your budget, and you’ll find the perfect match.

