Recording Bass Guitar: Amplifier Vs Direct Input Methods
You’ll encounter two primary methods when recording bass guitar: direct input (DI) provides a clean, uncolored signal starting around $200-300, while amplifier recording delivers harmonic richness and warmth but costs $400-800 initially. DI recording offers faster setup times and consistent signal levels, though it may require careful EQ work to achieve fullness. Amplifier recording captures natural harmonics and speaker interaction, creating pleasing even-order harmonics that add character to your sound. The best approach often involves combining both methods for maximum versatility and tonal options.
We are supported by our audience. When you purchase through links on our site, we may earn an affiliate commission, at no extra cost for you. Learn more.
Notable Insights
- DI recording provides clean, uncolored signals with minimal setup costs ($200-$300) but requires careful post-processing for warmth.
- Amplifier recording delivers natural harmonic richness and warmth through speaker interaction, though setup costs range $400-$800.
- Microphone placement on amplifiers dramatically affects tonal variation, with dynamic and condenser mics offering different sonic characteristics.
- Blending DI and amplifier signals creates versatile mixing options and tonal palettes unattainable by either method alone.
- Modern bass preamps offer dual-signal capabilities, enabling simultaneous recording of clean and processed channels for enhanced versatility.
Understanding Direct Input Bass Recording Setup
How exactly do you capture that pristine bass sound that cuts through a mix without the complications of microphones and amplifiers?
I’ve found that direct input recording offers the cleanest path from your bass to your DAW, requiring minimal gear while maintaining exceptional signal integrity. You’ll connect your bass to a quality DI box using a standard ¼” cable, then route the XLR output directly to your audio interface’s mic preamp.
Different DI box types, from passive to active models, each offer distinct sonic characteristics and impedance matching capabilities. This setup eliminates background hum common with direct ¼” connections while providing the clean gain your interface needs for professional recordings. Most affordable audio interfaces under $200 offer professional-grade preamps that deliver excellent results for direct bass recording. The balanced output from DI boxes also minimizes noise and hum in studio settings, ensuring cleaner recordings. Modern interfaces feature zero-latency monitoring capabilities that provide real-time feedback during recording sessions. Keep in mind that reamping is required to achieve your desired bass tone after the initial recording session.
Benefits of the DI Recording Method
When you’re weighing the merits of different bass recording approaches, direct input delivers a collection of advantages that I’ve found consistently outperform traditional miking methods in most studio scenarios. The signal clarity you’ll achieve eliminates microphone bleed, room acoustics, and cable interference that typically muddy your bass tracks. This recording flexibility proves invaluable during post-production, since you’re capturing an uncolored signal that accepts equalization, compression, and reamping through different amplifiers without performance constraints. For musicians seeking portable alternatives, battery powered amps now offer output ranges from 3W to 100W with features like Bluetooth connectivity and built-in effects for both practice and small venue applications. DI recording also provides the advantage of line outputs that maintain consistent signal levels and impedance matching for professional recording interfaces. Additionally, incorporating a compression pedal for bass into your setup can further enhance the dynamic range and sustain of your recordings. This effect not only smooths out the inconsistencies in your playing but also ensures that your bass sits well in the mix without overpowering other elements.
| Advantage Category | Primary Benefit | Studio Impact |
|---|---|---|
| Signal Purity | Eliminates bleed/room noise | Cleaner final mix |
| Post-Production | Reamping capabilities | Unlimited tonal options |
| Technical Control | Prevents signal overload | Professional consistency |
| Workflow Efficiency | Simplified setup | Faster session turnaround |
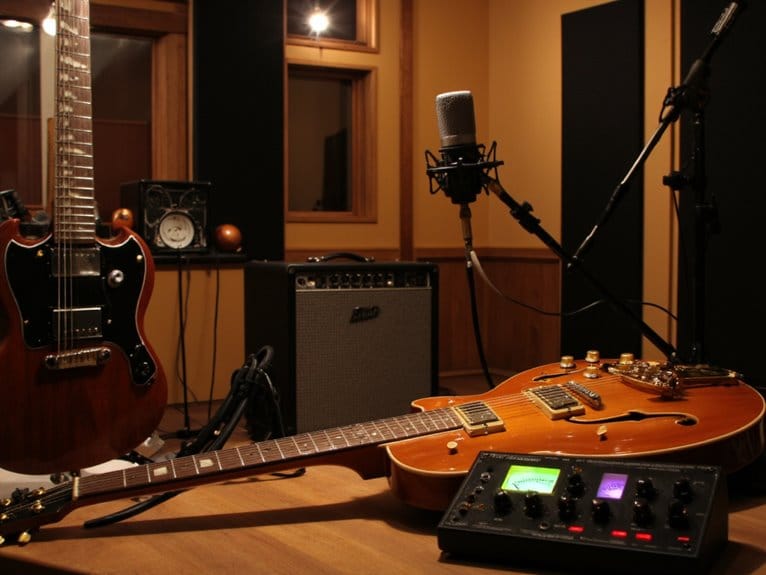
Amplifier Recording Techniques and Advantages of
The microphone’s transformative power becomes immediately apparent once you position it in front of a bass amplifier, where the marriage of speaker movement, cabinet resonance, and room acoustics creates sonic possibilities that direct input simply can’t replicate.
Your mic placement decisions dramatically affect tonal variation, with positioning between the speaker’s center and edge offering distinct frequency response characteristics.
I’ve found that multiple microphones capture different sonic perspectives simultaneously, allowing sophisticated signal blending during mixing.
Professional recording techniques often combine dynamic and condenser mics to harness both punch and detail.
Speaker characteristics interact with your chosen microphone’s polar pattern, while ambient cues add spatial dimension that transforms sterile DI signals into living, breathing bass tones with harmonic complexity.
Dynamic microphones excel in capturing the high sound pressure levels that bass amplifiers produce, making them particularly suitable for close-mic techniques where cardioid patterns help minimize unwanted room reflections and focus on the speaker’s direct output.
When monitoring your recorded bass signals through headphones, proper impedance matching between your headphones and audio interface ensures optimal sound quality and prevents signal degradation during the recording process.
Tone Quality Differences Between Methods
When you’re weighing DI versus amplifier recording methods, you’ll notice that each approach produces distinctly different tonal characteristics that can make or break your bass sound in the mix.
The DI signal delivers a clean, uncolored foundation with exceptional clarity and consistent dynamics, while amplifier recordings contribute harmonic richness, natural compression, and that elusive warmth that comes from speaker cabinets and tube saturation.
I’ve found that blending both methods often yields the most versatile results, giving you the pristine definition of DI alongside the musical character of amplified tone, which creates more options during mixing than either method alone. The choice of pickup configuration can significantly impact how well your bass translates through either recording method, with P/J setups offering the most flexibility across different recording scenarios.
For home recording setups where noise is a concern, electronic instruments with MIDI connectivity can seamlessly integrate with your digital audio workstation, providing the same flexibility as traditional recording methods while maintaining apartment-friendly volume levels.
DI Signal Characteristics
Although I’ve recorded countless bass tracks over the years, I’m still struck by how dramatically different a DI signal sounds compared to a mic’d amplifier. Understanding these tonal differences can make or break your bass recording.
DI signals deliver a flatter frequency response that lacks the natural speaker resonances and harmonic coloration you’d get from an amp, often resulting in too much midrange presence and insufficient low-end thump. This clinical tone can sound bland in busy mixes without proper DI signal processing and tonal shaping through EQ and compression.
While DI captures your bass pickups’ pure character, it misses the organic warmth and dynamic interaction that amplifiers provide, requiring careful post-processing to achieve that fuller, more musical sound. To capture the purest bass signal possible, consider using a high-quality microphone with studio-grade audio capabilities that can preserve the full frequency spectrum of your instrument.
Amplifier Harmonic Content
Beyond these inherent DI limitations lies an even more fundamental difference that shapes how your bass cuts through a mix: the harmonic content that amplifiers naturally generate.
When you mic an amp, you’re capturing those pleasing even-order harmonics that tube circuits produce, creating harmonic warmth that DI signals simply can’t replicate. This tonal complexity emerges from intermodulation distortion and amplitude modulation, particularly in the 2-4 kHz range where your bass gains its characteristic bite and presence.
While DI maintains clinical accuracy with fuller low-mids, amplifiers compress your dynamic range naturally, enhancing sustain and that coveted growl. Just as directional microphones require proper positioning typically within 3-6 feet for optimal quality, achieving the best amplified bass tone depends on strategic microphone placement relative to your speaker cabinet.
The acoustic shaping from speaker cabinets adds another layer of harmonic coloration, making your bass feel more alive and three-dimensional in recordings. Similarly, professional drummers often use dual-zone capabilities to blend acoustic elements with electronic processing, achieving enhanced harmonic complexity in their recordings.
Blending Both Methods
Rather than forcing yourself to choose between the clinical precision of direct input and the organic warmth of amplified recording, blending both methods opens a tonal palette that neither approach can achieve alone.
You’ll capture the DI’s pristine clarity alongside the amp’s harmonic complexity, creating a fuller frequency spectrum that cuts through dense mixes while maintaining low-end solidity.
These blending techniques require careful attention to phase alignment, since combining signals can cause cancellation issues if you’re not monitoring properly.
I’ve found that adjusting signal balance during mixing—whether through blend knobs, DAW faders, or automation—gives you dynamic control over emphasizing punchy clarity or vintage growl, depending on what each song section demands for ideal bass presence.
For monitoring your blend during recording, powered studio monitors with balanced frequency response help you accurately judge how the combined signals translate across different playback systems.
Modern bass processors include amp simulators and cabinet IR modeling that can bridge the gap between these methods, offering the convenience of direct recording while providing realistic amplified tones and cabinet responses.
Budget and Equipment Considerations
When you’re weighing the financial impact of your bass recording approach, the initial setup costs between DI and amp recording can vary dramatically, with DI requiring minimal gear investment while amp recording demands multiple components including microphones, stands, and quality amplifiers.
I’ve found that while entry-level amp setups might seem comparable to DI costs initially, the long-term investment value shifts greatly when you factor in accessories, room treatment, and the inevitable gear upgrades that amp recording tends to demand.
Your budget planning should consider not just the upfront expenses, but also the ongoing costs of maintaining, upgrading, and expanding each recording method’s equipment ecosystem. When selecting recording equipment, it’s worth noting that active electronics systems typically provide enhanced output and tonal clarity, which can significantly impact your recording quality regardless of whether you choose DI or amp methods.
Additionally, if you plan to transport your bass between recording sessions, investing in a quality gig bag with adequate padding can protect your instrument investment and prevent costly repairs from damage during travel.
Initial Setup Costs
Two distinct recording approaches present dramatically different financial commitments when you’re setting up your first bass recording system.
Your initial investment for amplifier-based recording typically ranges from $400-$800, encompassing mid-range amps ($200-$400), microphones, stands, cables, and potential room treatment, creating significant setup complexity that can overwhelm beginners.
Conversely, DI recording requires substantially less upfront capital, starting around $200-$300 for a quality audio interface with built-in instrument inputs, effectively eliminating amplifier, microphone, and acoustic treatment expenses. Quality audio interfaces like the PreSonus AudioBox 96 or Behringer UMC204HD offer 24-bit recording capabilities under $200, making professional bass recording highly accessible.
While budget amps under $200 exist, they often sacrifice tone quality that defeats recording purposes, whereas DI setups provide consistent, clean signals regardless of price point.
The simplified DI approach reduces both financial barriers and technical complexity, making professional bass recording accessible without major capital investment.
Consider that low watt tube amps starting around $135 can provide authentic tube warmth for bass recording while maintaining budget-friendly pricing and reduced volume requirements for home studio environments.
Long-term Investment Value
Beyond the initial sticker shock, I’ve learned that your recording method choice fundamentally shapes your financial trajectory over years of music production, with maintenance costs, upgrade paths, and resale potential creating vastly different economic outcomes.
Amplifiers demand regular tube replacements, speaker repairs, and servicing that accumulates significant long term costs, while DI setups typically require minimal maintenance due to fewer mechanical components.
However, depreciation rates tell a complex story—boutique amps often retain or increase value through collector demand, whereas DI gear depreciates faster but offers easier resale liquidity.
You’ll find that DI systems provide cost-effective sonic evolution through plugin upgrades, while amplifier improvements require expensive hardware replacements that can strain budgets over time.
Combining DI and Amplifier Signals for Enhanced Results
Although I’ve experimented with countless bass recording techniques over the years, combining DI and amplifier signals remains one of the most effective methods for capturing both the clean, percussive attack that cuts through dense mixes and the rich harmonic saturation that only comes from pushing air through speakers.
This signal blending approach requires careful attention to phase coherence, as misaligned tracks create hollow, weak sounds that’ll ruin your mix. I typically use frequency splitting with steep filters, taking low frequencies below 180 Hz from the DI for clarity while utilizing the amp’s tonal warmth above that point.
Through strategic EQ adjustments and dynamic processing, these recording techniques deliver fuller results than either method alone, though equipment considerations and sound experimentation remain essential for ideal mixing strategies. The choice of bass guitar significantly impacts your recording quality, as instruments with dual single-coil pickups provide the versatility needed to capture both bright articulation and warm fundamental tones. Modern bass preamps with DI capabilities offer multiple output options that enable simultaneous recording to both clean and processed channels, streamlining this dual-signal approach.
Frequently Asked Questions
What Bass Guitar Pickup Types Work Best With DI Recording Methods?
Active pickups work best for DI recording since they’re designed for direct connection with stronger, cleaner signals. You’ll find passive pickups need DI boxes for impedance matching and signal boosting to achieve superior recording results.
Should I Record Bass in Mono or Stereo When Using DI?
You should record bass DI in mono by default since it provides mono benefits like simplified workflow and solid low-end anchoring. Only use stereo if you’re capturing stereo effects from amp modelers or processors.
On a final note
You’ll find both DI and amplifier methods offer distinct advantages for recording bass guitar, and your choice depends on your specific needs, budget constraints, and desired tonal characteristics. While direct input provides clean, consistent results with minimal equipment investment, amplifier recording delivers natural warmth and character that many producers prefer. I’ve found the most versatile approach combines both signals, giving you maximum flexibility during mixing and post-production phases.